Looking for a fresh and flavorful dish that’s perfect for any occasion? Look no further than Caprese Pasta Salad! This delightful blend of pasta, juicy tomatoes, creamy mozzarella, and vibrant basil brings a taste of Italy right to your table. In this article, I’ll guide you through the simple ingredients and steps to create your own version. Get ready to impress your friends and family with a dish that’s as easy to make as it is delicious!
Ingredients
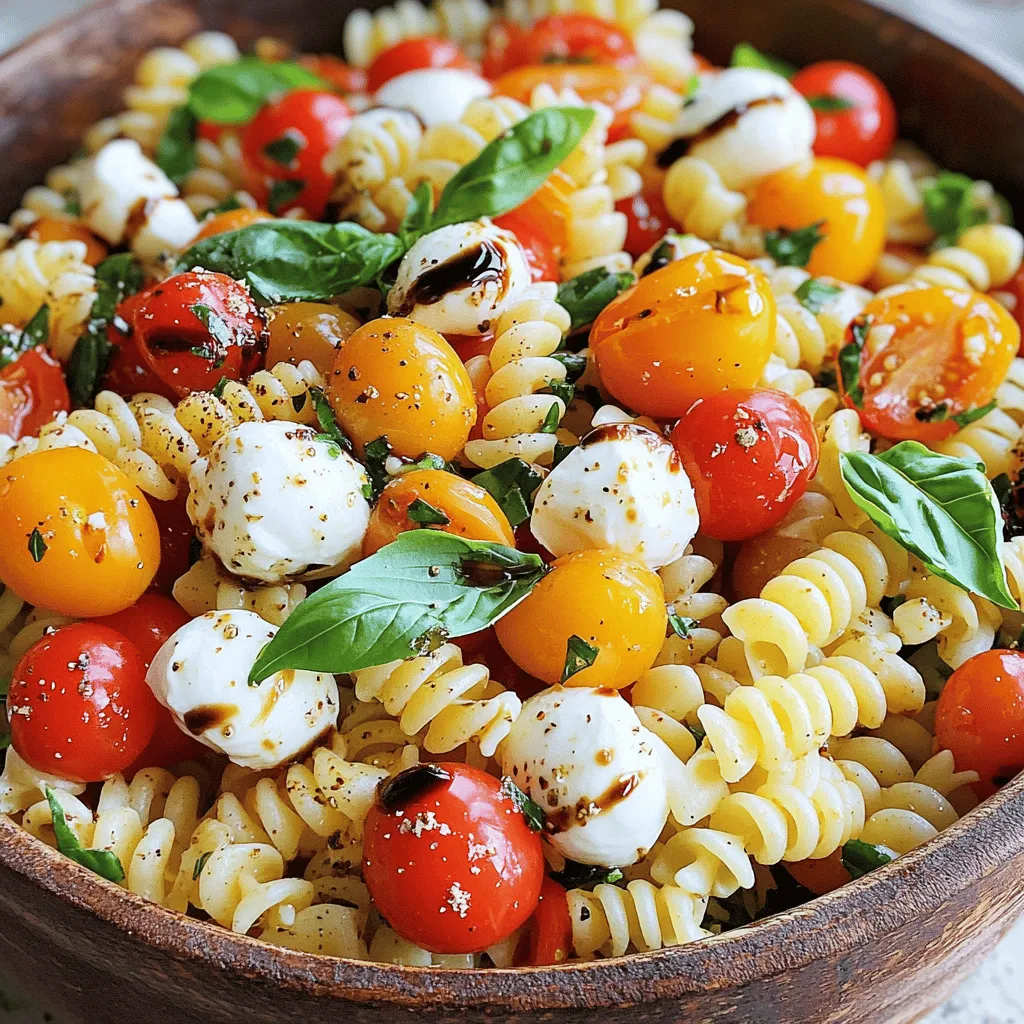
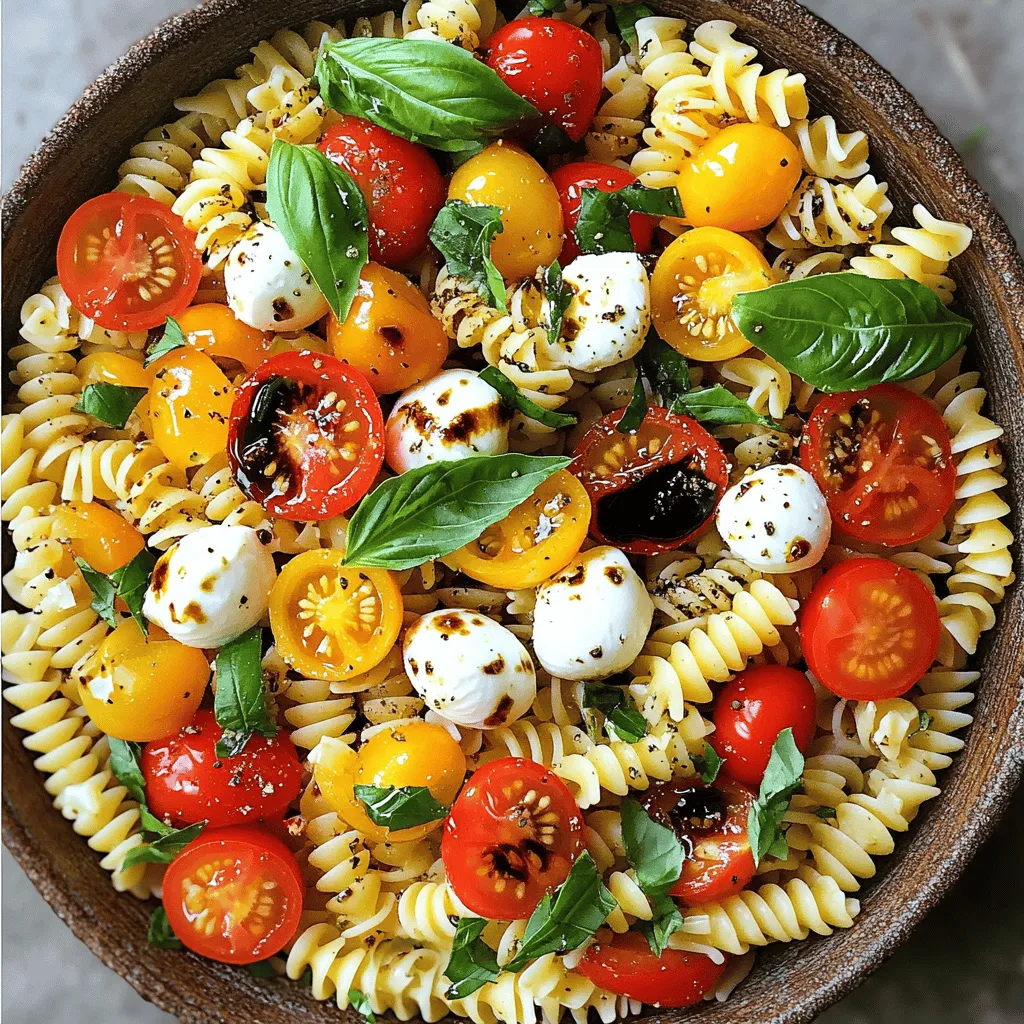
List of Ingredients
– 8 ounces pasta (fusilli or penne recommended)
– 1 cup cherry tomatoes, halved
– 1 cup fresh mozzarella balls (bocconcini), halved
– 1 cup fresh basil leaves, roughly torn
– 2 tablespoons extra-virgin olive oil
– 1 tablespoon balsamic glaze
– 1 teaspoon Italian seasoning
– Salt and pepper to taste
Quality Ingredient Tips
Choosing the right pasta
I recommend using fusilli or penne for this dish. These shapes hold the dressing well. They also grab the bits of cheese and tomato nicely.
Selecting fresh mozzarella
Always look for fresh mozzarella balls, called bocconcini. They are soft and creamy. The flavor is rich and pairs well with the other ingredients. Check your store’s cheese section for the freshest ones.
Importance of fresh basil
Fresh basil adds a bright taste to your salad. Use whole leaves, roughly torn, for the best flavor. Dried basil won’t give the same result. Fresh basil makes this dish pop!
Step-by-Step Instructions
Cooking the Pasta
To start, you need to bring a large pot of salted water to a rolling boil. This means the water should bubble up vigorously. Once boiling, add the pasta. I recommend using fusilli or penne for the best texture. Cook the pasta according to the package instructions, usually around 8-10 minutes, for that perfect al dente bite. Al dente means the pasta is firm to the bite, not mushy. After the time is up, drain the pasta in a colander. Rinse it under cold water to stop the cooking process. Set the pasta aside to cool completely.
Preparing the Salad
Now it’s time to prepare the salad. In a large mixing bowl, combine the cooled pasta, halved cherry tomatoes, and halved mozzarella balls. You can also add roughly torn basil leaves into the mix. The fresh basil adds a lovely aroma. Be gentle while mixing. Use a spatula or a large spoon. This helps keep the ingredients intact. You want everything to blend nicely without squishing the tomatoes or mozzarella.
Dressing and Serving
Next, let’s dress the salad. Drizzle the extra-virgin olive oil and balsamic glaze over the pasta mixture. These two ingredients bring a rich flavor. Sprinkle in the Italian seasoning, and season with salt and pepper to taste. Toss everything together gently. Aim for an even coating of the dressing. For the best flavor, let the salad sit at room temperature for about 15 minutes. This marination time allows the flavors to meld beautifully.
When ready to serve, transfer the salad to a nice serving bowl. You can also portion it into individual cups for a fun presentation. Enjoy your fresh and flavorful Caprese Pasta Salad!
Tips & Tricks
Enhancing Flavor
To boost flavor, adjust the Italian seasoning. Add more or less based on your taste. For a kick, try adding red pepper flakes. Marinate the salad for at least 15 minutes. This lets the flavors mix well. A longer marination time can deepen the taste.
Presentation Tips
Serve Caprese pasta salad in a clear bowl. This shows off the bright colors. For a fun twist, use individual cups. Top each serving with a fresh basil leaf. This adds a splash of green. You can also drizzle extra balsamic glaze for a fancy look.
Equipment Recommendations
Use a large mixing bowl for easy stirring. A spatula works best for mixing without breaking the pasta. A colander is essential for draining the pasta. Invest in a good set of measuring spoons for accurate seasoning. These tools help make cooking easier and more fun.
Variations
Adding Protein
You can make your Caprese Pasta Salad heartier by adding protein. Here are some tasty options:
– Grilled chicken: Slice it thin and mix it in for great flavor.
– Shrimp: Cooked shrimp adds a nice touch. Just toss it in!
– Chickpeas: For a vegetarian option, add canned chickpeas for protein and texture.
Adding protein not only boosts nutrition but also keeps you full for longer.
Extra Vegetables
Don’t hesitate to mix in more vegetables. They add crunch and flavor. Here are some suggestions:
– Bell peppers: Diced bell peppers bring color and sweetness.
– Cucumbers: Thinly sliced cucumbers add a refreshing crunch.
– Olives: Sliced olives can give a briny taste that complements the salad.
Adding extra vegetables makes the salad even more colorful and nutritious.
Dietary Modifications
You can easily adapt Caprese Pasta Salad to fit different diets. Here’s how:
– Vegan: Swap fresh mozzarella for vegan cheese or avocado.
– Gluten-free: Use gluten-free pasta to enjoy without worry.
These modifications help everyone enjoy this fresh and flavorful dish.
Storage Info
How to Store Leftovers
To store leftover Caprese Pasta Salad, use an airtight container. Glass containers work well, keeping the salad fresh. Make sure to press out any air before sealing. Store the container in the refrigerator. This keeps the flavors bright and tasty.
Shelf Life
Leftover Caprese Pasta Salad lasts about 3 days in the fridge. After that, it may begin to spoil. Check for changes in color or texture. If it smells off or looks slimy, it’s time to toss it.
Reheating Suggestions
You can enjoy leftover Caprese Pasta Salad cold. It’s refreshing right from the fridge. If you prefer it warm, heat it gently in a skillet. Add a splash of olive oil to revive the flavors. Avoid cooking it too long, as this can wilt the fresh basil. Enjoy your meal!
FAQs
Can I make Caprese Pasta Salad ahead of time?
Yes, you can make Caprese Pasta Salad ahead of time. This dish tastes even better after sitting. Here are some tips for meal prep:
– Prepare the pasta and let it cool.
– Mix the salad ingredients, but wait to add the dressing.
– Store it in the fridge in an airtight container.
– Add the dressing just before serving to keep it fresh.
What is the best pasta to use?
The best pasta types for this salad are fusilli or penne. These shapes hold the dressing and ingredients well. Here are some recommendations:
– Fusilli has twists that catch flavors.
– Penne has holes that hold the dressing, too.
– You can also try farfalle for a fun look.
Can this dish be served warm?
You can serve this dish warm, but it shines when cold. If you prefer it warm, follow these serving suggestions:
– Serve right after mixing if you enjoy warmth.
– Mix in grilled chicken or shrimp for a heartier meal.
– If you serve it warm, try to use fresh basil to keep the flavors bright.
How do I customize the dressing?
Customizing the dressing is simple and fun. Here are some ingredient swaps for your personal taste:
– Use lemon juice instead of balsamic glaze for a zesty kick.
– Add garlic for a bolder flavor.
– Swap olive oil for avocado oil for a different taste.
– Feel free to adjust salt and pepper to your liking.Enjoy making your Caprese Pasta Salad!
This blog post covered the tasty Caprese Pasta Salad, from ingredients to variations. I shared tips for picking fresh items and making cooking easy. Remember to marinate for best flavor and try different ingredients to suit your taste. You can enjoy this salad warm or cold, making it versatile for any meal. Lastly, storing and reheating leftovers can keep your dish fresh and delicious. Enjoy your cooking journey and create your own perfect Caprese Pasta Salad!


