Buffalo Chicken Dip Creamy and Cheesy Delight

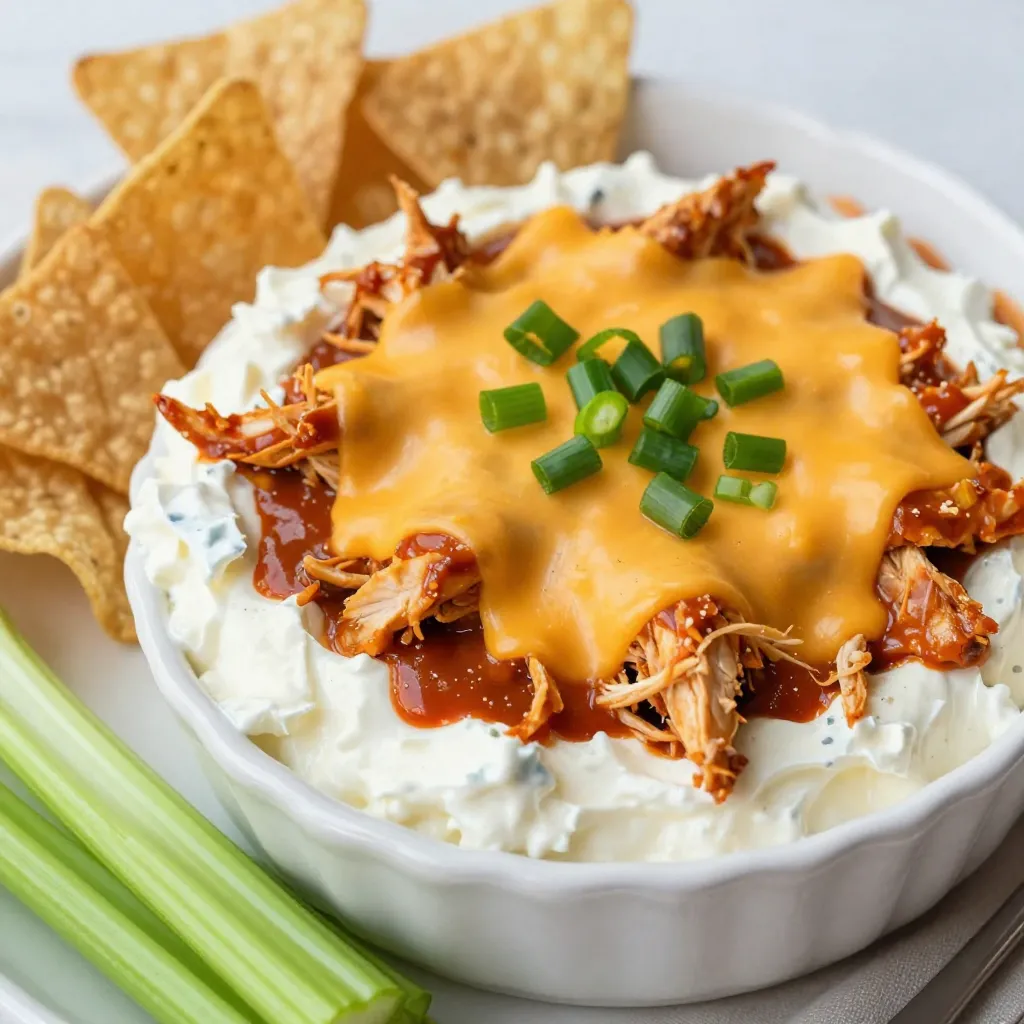
Are you ready to dive into a creamy and cheesy delight that will steal the show at your next gathering? Buffalo Chicken Dip is the perfect appetizer that combines shredded chicken, gooey cheese, and a kick of heat. Whether you’re serving it with tortilla chips or celery sticks, this crowd-pleaser will have everyone coming back for more. Let’s explore the simple ingredients and steps you need to create this flavorful dip!
Why I Love This Recipe
- Flavor Explosion: This dip combines the tangy heat of buffalo sauce with creamy cheeses, creating a mouthwatering experience that’s hard to resist.
- Easy to Make: With simple ingredients and straightforward steps, this recipe comes together quickly, making it perfect for busy days or last-minute gatherings.
- Versatile Serving Options: Serve it with tortilla chips for a classic touch or celery sticks for a healthier alternative, catering to all preferences.
- Crowd-Pleaser: Whether it’s a party, game day, or a family gathering, this dip is sure to be a hit, leaving everyone coming back for more!
Ingredients
Key Ingredients
– 2 cups shredded cooked chicken
– 1 package (8 oz) cream cheese, softened
– 1 cup buffalo sauce
– 1 cup shredded cheddar cheese
– 1 cup shredded mozzarella cheese
– ½ cup ranch dressing
– ¼ cup chopped green onions for garnish
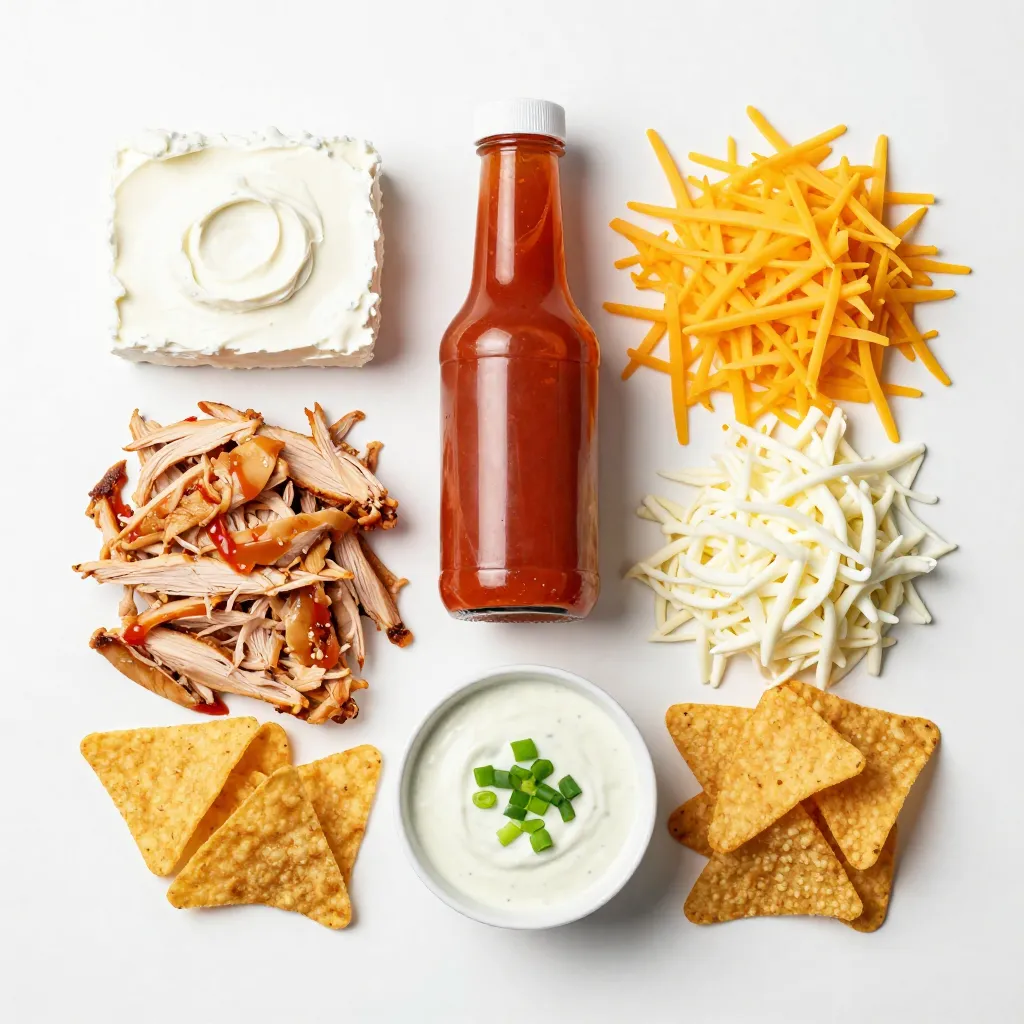
Buffalo Chicken Dip comes together with these simple ingredients. The star is the shredded cooked chicken. You can use rotisserie chicken for ease. Cream cheese adds the rich, creamy base. Buffalo sauce gives it that needed kick.
Cheddar and mozzarella cheese melt beautifully and add depth. Ranch dressing balances the heat. Finally, green onions add a fresh touch on top. You can adjust the buffalo sauce based on your spice level.
Serving Suggestions
– Tortilla chips
– Celery sticks
For serving, you have great options. Tortilla chips are crunchy and perfect for dipping. Celery sticks add a fresh crunch. Both pair well with the creamy dip. Buffalo Chicken Dip is best served warm. It is a crowd-pleaser at parties or game days. Everyone loves to scoop and enjoy!

Step-by-Step Instructions
Prepping the Oven
Preheat your oven to 350°F (175°C). This step gets your oven ready for baking. A hot oven helps the dip cook evenly and quickly.
Mixing the Ingredients
In a large mixing bowl, blend the softened cream cheese and buffalo sauce. Use a hand mixer or spatula to mix until the texture is smooth and creamy. Next, add the shredded chicken and ranch dressing. Stir in shredded cheddar cheese and half of the mozzarella cheese. Mix until everything is well combined and creamy.
Assembling the Dip
Carefully transfer the creamy mixture into a greased baking dish, about 9×9 inches. Spread it out evenly in the dish. To make it even cheesier, sprinkle the remaining mozzarella cheese on top. This will create a delicious, gooey layer when baked.
Baking the Dip
Place the baking dish in your preheated oven. Bake for 20 to 25 minutes. You’ll know the dip is ready when it is hot and bubbly at the edges. The cheese on top should melt to a golden perfection.
Tips & Tricks
Ensuring Creamy Texture
To get that perfect creamy texture, mix the cream cheese and buffalo sauce well. I like to use a hand mixer for this. It makes the job easier and faster. You want to blend until it is smooth and fluffy. After that, add the chicken and ranch dressing. Mix gently but thoroughly. This helps keep it creamy and delicious.
Adjusting Spice Levels
Buffalo sauce can vary in heat. To adjust the spice level, start with less sauce. You can always add more later. Taste the dip after you mix in the chicken and ranch. If you want more heat, stir in a bit more buffalo sauce. This way, everyone can enjoy the dip, no matter their spice tolerance.
Perfect Serving Temperature
Serving the dip warm makes it best. After baking, let it cool for just a few minutes. This helps prevent burns. Use a spoon to scoop out the dip easily. I love to serve it with crispy tortilla chips or fresh celery sticks. This adds a nice crunch to every bite!
Pro Tips
- Adjust the Heat: Feel free to modify the amount of buffalo sauce according to your spice preference; a little goes a long way!
- Mixing Method: For a super creamy texture, use a hand mixer to blend the cream cheese and buffalo sauce until completely smooth.
- Cheese Variety: Experiment with different cheeses like pepper jack or gouda for a unique flavor twist in your dip.
- Make Ahead: You can prepare the dip a day in advance; just cover it tightly and refrigerate, then bake it when you’re ready to serve.
Variations
Ingredient Substitutes
You can switch up the chicken in your dip. A rotisserie chicken works great. It saves time and adds flavor. If you want a lighter dip, try low-fat cream cheese. For a dairy-free option, use cashew cream or a non-dairy cream cheese.
Flavor Additions
Want to spice things up? Add jalapeños for a kick. You can also mix in garlic powder or smoked paprika. These spices add depth and make the dip unique. Experiment to find your perfect blend.
Different Serving Ideas
Buffalo chicken dip pairs well with many snacks. Try serving it with crispy tortilla chips. Celery sticks add a fresh crunch. You can also use sliced cucumbers or pita bread. These sides make your dip even more fun to eat!
Storage Info
Leftovers
To store your Buffalo Chicken Dip, let it cool down first. Then, place it in an airtight container. You can keep it in the fridge for up to four days. If you want to enjoy it later, make sure to cover it well to prevent it from drying out.
Reheating Tips
When it’s time to enjoy your leftovers, reheating is key. The best way is to use an oven. Preheat it to 350°F (175°C) and place your dip in an oven-safe dish. Heat for about 15-20 minutes until it’s hot and bubbly. This method helps keep the creamy texture. You can also use a microwave, but be careful not to dry it out. Heat in short bursts, stirring in between.
Freezing the Dip
If you plan to freeze the dip, do it before baking. Place the mixed dip in a freezer-safe container. You can freeze it for up to three months. When ready to eat, thaw it in the fridge overnight. After thawing, bake it at 350°F (175°C) for 25-30 minutes. This method keeps the flavors fresh. Enjoy your creamy and cheesy delight anytime!
FAQs
Can I make Buffalo Chicken Dip ahead of time?
Yes, you can make Buffalo Chicken Dip ahead of time. To prepare in advance, follow these steps:
– Mix all the ingredients and place them in a baking dish.
– Cover the dish tightly with plastic wrap or foil.
– Store it in the fridge for up to 24 hours before baking.
This way, you save time on the day of your gathering. Just remember to remove the cover before baking.
How long can Buffalo Chicken Dip be stored?
Buffalo Chicken Dip can be stored safely in the fridge for 3 to 4 days.
– Keep it in an airtight container to maintain freshness.
– If you want to keep it longer, consider freezing it.
Frozen dip can last for about 2 months. Just thaw it in the fridge before reheating.
What can I substitute for ranch dressing?
If you want to swap ranch dressing, here are some great options:
– Blue cheese dressing adds a bold flavor.
– Greek yogurt gives a creamy texture with less fat.
– Thousand Island dressing offers a sweet twist.
Each substitute changes the dip’s taste, so choose what you like best!
This recipe for Buffalo Chicken Dip is a fun and tasty way to enjoy a crowd favorite. You learned about key ingredients like shredded chicken, cream cheese, and buffalo sauce. We discussed how to mix, bake, and serve this dish perfectly. Remember, you can adjust the spice or swap ingredients to suit your taste. For leftovers, storing and reheating tips will keep your dip fresh. Dive into this flavorful treat, share with friends, and enjoy the easy steps every time you make i

Spicy Cheesy Buffalo Chicken Dip
Ingredients
- 2 cups shredded cooked chicken
- 8 oz cream cheese, softened to room temperature
- 1 cup buffalo sauce
- 1 cup shredded cheddar cheese
- 1 cup shredded mozzarella cheese
- 0.5 cup ranch dressing
- 0.25 cup chopped green onions (for garnish)
- 1 serving tortilla chips or celery sticks (for serving alongside)
Instructions
- Preheat your oven to 350°F (175°C) to ensure it’s hot and ready for baking.
- In a large mixing bowl, combine the softened cream cheese and buffalo sauce. Use a hand mixer or spatula to blend until the mixture is perfectly smooth and creamy.
- Gradually stir in the shredded chicken, ranch dressing, and an enticing combination of shredded cheddar cheese along with half of the mozzarella cheese. Continue mixing until all the ingredients are well-integrated and creamy.
- Carefully transfer the luscious mixture into a greased baking dish (approximately 9x9 inches) and spread it out evenly to ensure even cooking.
- To elevate the cheesy goodness, sprinkle the remaining mozzarella cheese generously over the top of the dip.
- Place the baking dish in the preheated oven and bake for 20-25 minutes. You'll know it’s ready when the dip is hot, bubbling at the edges, and all the cheese on top is melted to perfection.
- Once done, remove the dip from the oven and allow it to rest for a few minutes to avoid burns. For a fresh touch, garnish with the vibrant chopped green onions on top.
- Serve warm, pairing it with crispy tortilla chips or refreshing celery sticks, allowing everyone to indulge in delicious dips!


![- 2 ripe peaches, diced - 2 ripe avocados, diced - 1 cup fresh arugula or a mix of your favorite greens - Fresh mint leaves, for garnish - 1/2 cup tangy feta cheese, crumbled - 1/4 cup pecans, coarsely chopped - 2 tablespoons creamy honey - 2 tablespoons freshly squeezed lemon juice - Salt and freshly cracked pepper, to taste To make this Peach and Avocado Salad, you need fresh, quality ingredients. Ripe peaches bring a sweet taste. Ripe avocados add creamy texture. Fresh arugula or mixed greens offer a nice crunch. Don't forget the fresh mint leaves for a pop of color and flavor. For additional flavor, add tangy feta cheese. It enhances the salad's taste. Pecans add a lovely crunch and nuttiness. Honey gives a hint of sweetness. Fresh lemon juice adds a zesty touch. Finally, season with salt and pepper to balance everything. This mix of flavors and textures creates a fresh and flavorful delight. For the complete recipe, you can check the [Full Recipe]. - First, dice the peaches and avocados. Aim for small, even pieces. This helps them blend well in the salad. - Next, layer the diced peaches and avocados in a large salad bowl. This forms a colorful base for the dish. - Now, gently fold in your choice of greens, like arugula or mixed greens. This adds a nice crunch and freshness. - Sprinkle the crumbled feta cheese and chopped pecans on top. They give a lovely salty flavor and texture contrast. - In a small bowl, whisk together the honey and fresh lemon juice. This dressing is simple but very tasty. - Drizzle the dressing over the salad. Toss gently to combine without smashing the avocado. - Finally, taste and season with salt and freshly cracked pepper. Adjust to make the flavors pop. You can find the complete instructions in the [Full Recipe]. To make the best peach and avocado salad, cut your fruits into similar sizes. This helps create a nice balance. When you toss the salad, do it gently. You want to mix it well but avoid mashing the ripe avocado. This keeps the salad light and fresh. Taste is key. Adjust the seasoning to fit your palate. You can also add a touch of honey for sweetness or fresh mint leaves for a burst of flavor. These small tweaks can take your salad to the next level. Serving matters. You can place the salad in individual bowls for a nice touch. Another idea is to arrange everything on a platter. A colorful display makes the salad look even more inviting. A drizzle of honey or a sprinkle of mint can add a lovely finish. For the full recipe, check out the detailed steps provided. {{image_4}} You can switch up the cheese and nuts in this salad for new flavors. Instead of feta, try goat cheese or blue cheese. Both add a rich taste that pairs well with peaches. For nuts, swap pecans for walnuts or almonds. Each nut gives its unique crunch and flavor. You can also change the greens. If you want a different taste, use spinach or kale. Both greens add a nice twist. Spinach brings a soft texture, while kale adds a bit of bite. Each option makes the salad fresh and fun to eat. The dressing plays a big role in this salad. If you want to try something different, use balsamic vinegar or olive oil instead of honey and lemon juice. Balsamic adds a sweet and tangy flavor, while olive oil brings a smooth, rich taste. You can also experiment with flavored vinegars. Try raspberry or apple cider vinegar for a new twist. These flavors will enhance the sweetness of the peaches. To make this salad a complete meal, add grilled chicken or shrimp. Both proteins add heartiness and pair well with the fruits. Grilled chicken offers a mild flavor, while shrimp brings a sweet touch. You can also mix in extra fruits like berries. Strawberries or blueberries add a burst of color and flavor. They make the salad even more vibrant and exciting. For the full recipe, check out the Peachy Avocado Delight 🥭🥗 section. To store leftovers, place the salad in an airtight container. This helps keep the salad fresh. Make sure to seal it well. Keep it in the refrigerator. It will stay good for about one day. The avocado may brown a bit, but it remains tasty. To help maintain freshness, you can add a squeeze of lemon. This slows down browning and keeps flavors bright. You cannot freeze this salad. Freezing will change the texture of the peaches and avocados. They may become mushy when thawed. Enjoy the salad fresh for the best taste and experience. You can enjoy leftovers cold straight from the fridge. The cool salad is refreshing on warm days. If you prefer it warm, gently reheat it. Use a pan over low heat. Heat just until warm, but avoid cooking it. This keeps the flavors intact and the ingredients from getting mushy. Enjoy every bite of your Peach and Avocado Salad! For the full recipe, check out the detailed instructions above. Yes, you can make this salad ahead of time. To keep it fresh, follow these steps: - Prep ingredients separately: Dice your peaches and avocados. Store them in separate containers. - Mix greens and toppings: Combine arugula, feta, and pecans in another bowl. - Make the dressing: Whisk together honey and lemon juice. Store in a small jar. When ready to serve, mix everything together for a fresh taste. This method helps prevent browning. This salad is both tasty and healthy. Here’s a quick look at its nutrition: - Calories: About 250 per serving - Protein: 5 grams - Fat: 18 grams - Carbohydrates: 22 grams - Fiber: 6 grams It offers a good mix of healthy fats from avocados and protein from feta. You can easily make this salad vegan. Here are some swaps: - Cheese: Replace feta with vegan cheese or omit it. - Honey: Use maple syrup or agave nectar instead of honey. These changes keep the salad creamy and sweet without dairy. This salad pairs well with many dishes. Here are a few ideas: - Grilled chicken or fish: Adds protein and complements the fruit. - Quinoa or rice: Serve as a side dish for a fuller meal. - Bruschetta: Offers a crunchy contrast to the salad's softness. These options create a balanced and satisfying meal. For the full recipe, check out Peachy Avocado Delight. This blog post detailed how to make a refreshing Peach and Avocado Salad. You learned about the best fresh ingredients, like ripe peaches and avocados, and useful tips for preparation and mixing. I shared ways to enhance flavor and present your salad beautifully, along with easy swaps and storage tips. In conclusion, this salad brightens any meal. Experiment with ingredients and enjoy fresh flavors. Make it your own!](https://goldendishy.com/wp-content/uploads/2025/06/36e1ff7f-d317-490a-9c34-18da7fd6bdcc-768x768.webp)
![- 2 cups cooked chicken breast, shredded - 1 ripe avocado, mashed until smooth - 1/4 cup smooth Greek yogurt - 1 tablespoon freshly squeezed lemon juice - 1/4 cup red onion, finely chopped - 1/2 cup cherry tomatoes, halved - 1/4 cup celery, finely diced - 1/4 teaspoon garlic powder - Salt and freshly ground black pepper to taste - Fresh cilantro or parsley, chopped, for garnish The ingredients in creamy avocado chicken salad make it tasty and healthy. The chicken provides protein, while avocado adds healthy fats. Greek yogurt makes it creamy without extra calories. Fresh veggies like tomatoes and celery give a nice crunch. Using fresh ingredients is key. This brings out the best flavors. You can adjust the amounts based on what you like. For example, add more tomatoes if you love them. Don’t forget the seasoning! Salt and pepper enhance the taste. Fresh herbs like cilantro or parsley top it off perfectly. They add color and flavor. I recommend checking the full recipe for detailed steps. Enjoy making this delicious dish! - Combine mashed avocado, Greek yogurt, and lemon juice in a bowl. - Mix until smooth using a fork or whisk. To make the creamy dressing, start with a ripe avocado. Mash it in a bowl until it is smooth. Next, add 1/4 cup of Greek yogurt. This adds creaminess and protein. Then, squeeze in 1 tablespoon of lemon juice. This will brighten the flavor. Mix these three ingredients well with a fork or whisk. You want a creamy and smooth texture. This creamy dressing is the base of your salad and full of healthy fats. - Add shredded chicken to the avocado mixture. - Stir thoroughly to coat the chicken evenly. Now it’s time to add in the chicken. Use 2 cups of cooked chicken breast, shredded. You can use leftover chicken or rotisserie chicken for ease. Add the chicken to the creamy dressing. Stir well so every piece of chicken is coated. This adds protein and makes the salad filling. The creamy dressing brings all the flavors together. - Gently fold in red onion, cherry tomatoes, and celery. - Season with garlic powder, salt, and black pepper to taste. Next, let’s add some crunch and color. Gently fold in 1/4 cup of finely chopped red onion, 1/2 cup of halved cherry tomatoes, and 1/4 cup of diced celery. These veggies add freshness and texture. Now, season your salad. Add a pinch of garlic powder, salt, and freshly ground black pepper. Taste it and adjust the seasoning as needed. Mix gently so you don’t break the veggies. Now, your creamy avocado chicken salad is ready to serve! Check out the Full Recipe for more details. - Look for avocados that yield slightly to pressure. - Check the color; ripe avocados usually have a darker skin. Selecting the perfect avocado is key for your creamy avocado chicken salad. When you gently press the avocado, it should give a bit. This tells you it is ripe and ready to use. A darker skin tone often means ripeness, but don't rely on color alone. Always feel for that slight softness! - Use rotisserie chicken for convenience. - Ensure chicken is fully cooked; internal temperature should reach 165°F (75°C). Cooking the chicken can take time, but using rotisserie chicken saves you effort. It offers great flavor and saves cooking time. If you cook your own chicken, make sure to check the internal temperature. It needs to reach 165°F (75°C) to be safe to eat. - Serve in individual bowls, atop lettuce leaves, or in a wrap. - Consider a lemon wedge on the side for added flavor. Serving your salad can be fun! You can use individual bowls or place it on crisp lettuce leaves. If you want a wrap, that works too. A lemon wedge on the side brightens the meal and adds a zesty kick. For the full experience, try the [Full Recipe]. Enjoy your tasty and healthy choice! {{image_4}} You can make your creamy avocado chicken salad even better by adding fruits. Diced apples or grapes bring a nice sweetness. They also add a nice crunch. If you want a tropical twist, try adding mango. Its juicy flavor blends well with creamy avocado. Not in the mood for chicken? You can easily swap it out. Canned tuna or chickpeas work well for a vegetarian option. Both of these options add protein and flavor. If you love seafood, consider using grilled shrimp. It adds a fresh, light taste to the salad. Want to spice things up? Adding spices can really boost the flavor. Try cumin or smoked paprika for a warm kick. If you like heat, toss in some jalapeños. These will give your salad a spicy edge that keeps it exciting. Feel free to get creative with your mix-ins! Each variation gives you a new twist on this delicious dish. Check out the Full Recipe for more ideas. Store your creamy avocado chicken salad in an airtight container in the refrigerator. It will stay fresh for up to 2 days. I suggest enjoying it right after you make it. However, if you keep the ingredients separate, it can last a little longer. This way, you keep the textures nice. Do not freeze the salad. Avocado gets mushy when frozen. If you want to prepare ahead, consider freezing the chicken on its own. This will keep it fresh and ready for your salad. Prep your ingredients ahead of time. Store them separately to mix later. This salad is a great option for busy weeks. You can have a tasty meal ready in minutes! For the full recipe, check out the detailed instructions above. Typically lasts for about 2 days when stored properly. I recommend using an airtight container. This helps keep your salad fresh and tasty. After two days, the avocado may brown and lose its creamy texture. Yes, but it’s best to combine the ingredients just before serving to maintain freshness. If you prepare it early, store the salad components separately. This way, the avocado stays bright and creamy. Great with whole-grain bread, crackers, or a side of fruit. I love serving it on toast for a hearty lunch. Pairing it with fresh fruit offers a nice, sweet contrast. You can also use it as a filling in wraps for a tasty twist. For the full recipe, check out the detailed steps above. This creamy avocado chicken salad is easy to make and full of flavor. We covered the main ingredients, steps, and tips to perfect it. You learned how to mix chicken with creamy dressing and fresh veggies. Remember to store leftovers properly for the best taste. Enjoy this salad as a quick meal or snack. Feel free to customize with your favorite ingredients. With these simple tips, you can create a dish that is both healthy and delicious.](https://goldendishy.com/wp-content/uploads/2025/06/50306de2-9119-4a0c-8cb7-3da0c4c0a2a4-768x768.webp)

. 1. Heat olive oil in a large skillet over medium heat. 2. Add finely chopped red onion to the skillet. 3. Sauté the onion for 2-3 minutes until it becomes soft. 4. Now, add diced red and green bell peppers to the skillet. 5. Cook for 3-4 minutes until the peppers soften. 6. Stir in corn kernels and black beans. 7. Season with ground cumin, smoked paprika, garlic powder, salt, and pepper. 8. Mix well and cook for 5 more minutes until hot. 1. Heat another skillet over medium heat. 2. Place a tortilla in the skillet and sprinkle ¼ cup of cheese on it. 3. Layer ½ cup of the veggie mixture over the cheese. 4. Top with another ¼ cup of cheese for extra flavor. 5. Fold the tortilla in half, covering the filling. 6. Cook for 3-4 minutes until golden brown on one side. 7. Flip the quesadilla gently using a spatula. 8. Cook for another 3-4 minutes until crispy and cheese melts. - Keep the heat at medium for a crispy texture. - Use a spatula to flip the quesadilla easily. - Check for doneness by ensuring both sides are golden brown. These simple steps make it easy to create loaded veggie quesadillas at home. For the full recipe, refer to the recipe section above. Enjoy the process! Choosing the right cheese is key. I love a mix of cheddar and mozzarella. This mix melts well and adds great flavor. You want the cheese to stretch and pull when you take a bite. Balancing spices and seasonings is also important. Start with the basics like salt and pepper. Then, add spices like cumin and smoked paprika. Adjust them to fit your taste. A little heat can come from red pepper flakes if you like it spicy. Day-to-day storage tips help keep your quesadillas fresh. Place leftovers in an airtight container. Keep them in the fridge for up to three days. You can also wrap them tightly in foil or plastic wrap. Reheating suggestions for best flavor include using the oven or skillet. For the oven, preheat to 350°F. Heat the quesadillas for about 10 minutes. In a skillet, cook them over medium heat. This method keeps them crispy and delicious. Plating ideas can make your meal pop. Arrange the quesadillas in a fan shape on a colorful plate. This makes them look fun and inviting. Adding colorful garnishes like fresh cilantro adds a nice touch. You can also sprinkle some diced tomatoes or avocado on top. These small changes make your meal look gourmet. Enjoy your loaded veggie quesadillas! For the full recipe, check out the Loaded Veggie Quesadillas 🥑 section. {{image_4}} You can make loaded veggie quesadillas even more fun. Here are some easy ideas. Want some extra protein? You can add grilled chicken or tofu. Just cook them first, then slice and add to your quesadilla mix. If you like seafood, try shrimp. Cook them quickly and toss them in for a tasty twist. Spices can change the game. Try different spices like chili powder or oregano. They add depth and warmth. You can also add sauces or marinades. A dash of hot sauce or a sprinkle of lime juice can elevate your quesadillas. Need gluten-free options? Use gluten-free tortillas. They work great and taste just as good. If you're vegan, swap out the cheese for a plant-based version. There are many tasty dairy-free cheeses out there that melt well. You can find the full recipe for loaded veggie quesadillas to get started on these variations. To keep your uncooked quesadillas fresh, wrap them tightly in plastic wrap. This keeps out moisture and air. You can also place them in an airtight container. If you want to freeze them, stack the quesadillas with parchment paper in between. This prevents them from sticking together. Uncooked quesadillas can stay in the freezer for up to three months. After cooking, let the quesadillas cool completely. Then, wrap them in foil or place them in a container. Store them in the fridge for up to four days. I find they taste best within the first two days. If you notice any odd smell or mold, it’s best to toss them. To reheat, use an oven or a skillet. For the oven, preheat to 350°F (175°C). Place the quesadilla on a baking sheet and heat for about 10 minutes. If using a skillet, add a little oil and heat over medium heat for about 3-4 minutes on each side. Leftover quesadillas can also become a fun breakfast. Chop them up and add them to scrambled eggs for a tasty twist. For more ideas, check out the Full Recipe. Making loaded veggie quesadillas is quick and easy. It takes about 10 minutes to prep. Cooking them takes around 15 minutes. In total, you can make them in about 25 minutes. This makes them a great choice for busy days or quick meals. Yes, you can prep loaded veggie quesadillas in advance. To do this, cook the veggie mixture and let it cool. Then, assemble the quesadillas but do not cook them. Store them in an airtight container in the fridge for up to two days. You can also freeze them for a month. When ready to eat, just cook them straight from the fridge or freezer. This makes meal prepping super easy! You can mix and match many veggies in quesadillas. Some great options include: - Spinach or kale for a green boost - Mushrooms for a savory taste - Zucchini or squash for extra texture - Jalapeños for a spicy kick - Tomatoes for freshness Feel free to get creative! Each veggie adds its own flavor and texture. You can make quesadillas that fit your taste perfectly. For more ideas, check out the Full Recipe. These loaded veggie quesadillas are fun and easy to make. We explored essential ingredients like black beans, bell peppers, and corn. I’ve shared tips for perfect texture, storing leftovers, and creative garnishes. Remember, you can customize them with protein or spices to suit your taste. In the end, these quesadillas are more than just food; they bring flavor and joy. Enjoy making them your own!](https://goldendishy.com/wp-content/uploads/2025/06/a7c52493-2108-4a2f-8f90-ee80e7df7b2a-768x768.webp)