Brown Sugar Glazed Carrots Tasty and Easy Side Dish

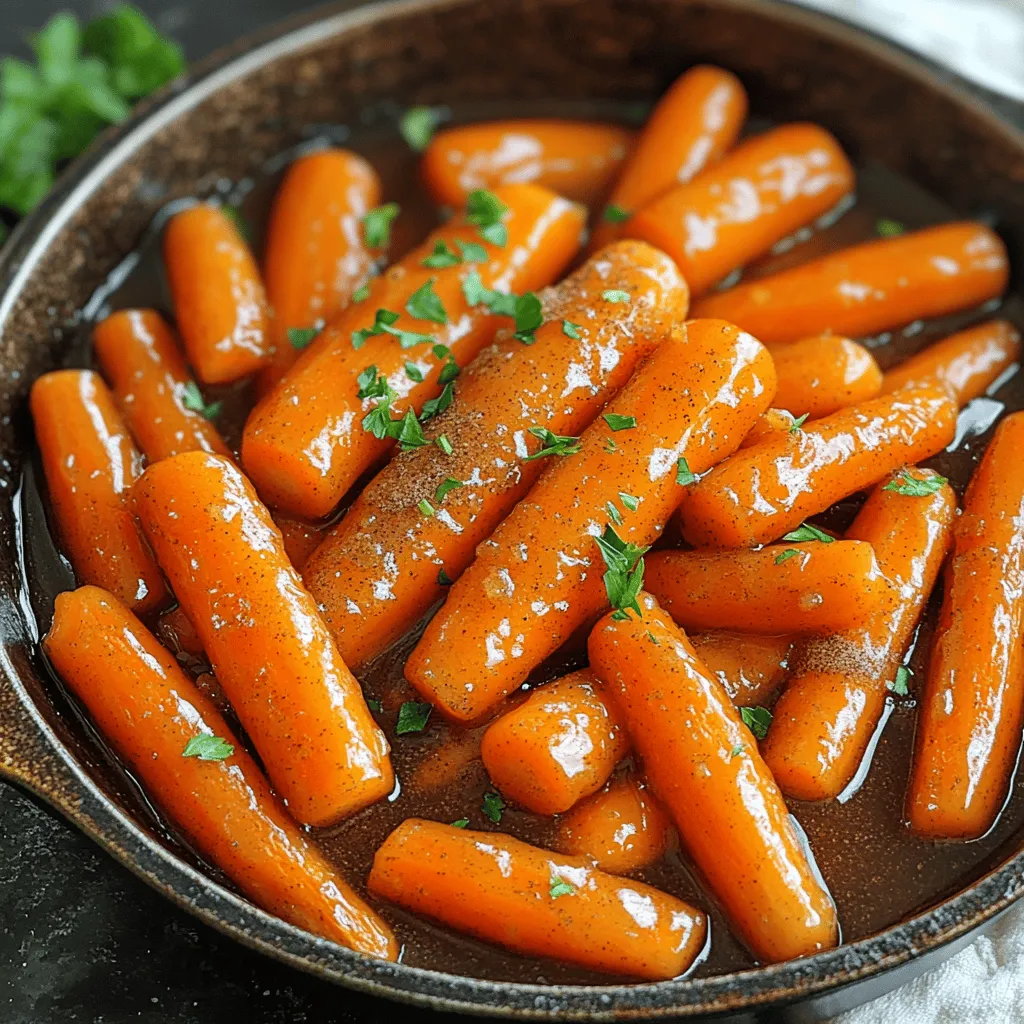
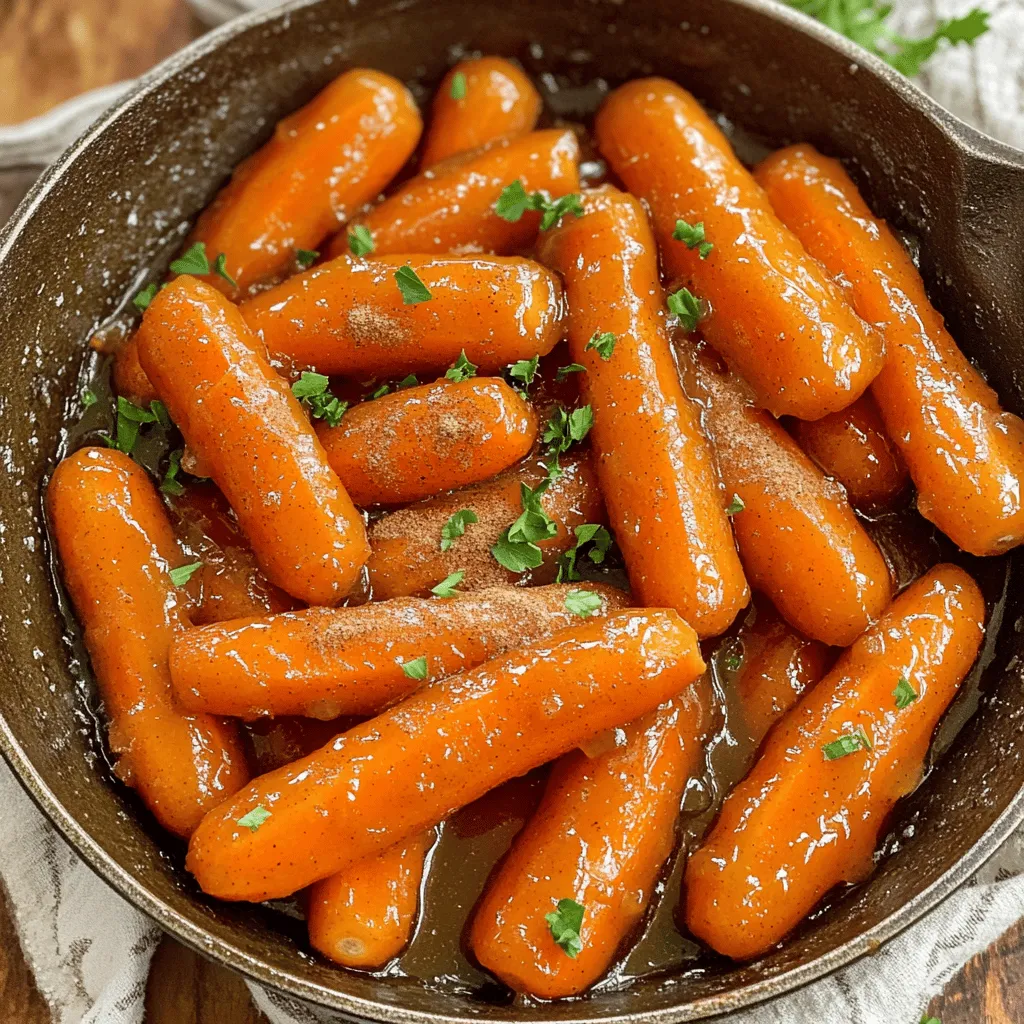
Looking for a side dish that’s both tasty and simple? Brown sugar glazed carrots might just be your new favorite! With just a few easy steps, you’ll create a sweet, buttery glaze that makes carrots shine at any meal. Whether you’re cooking for family or guests, these glazed carrots will impress. Ready to bring flavor to your plate? Let’s dive into the sweet world of brown sugar glazed carrots!
Ingredients
Main Ingredients
– 1 pound baby carrots (or regular carrots, peeled and cut)
– 3 tablespoons unsalted butter
– 1/4 cup packed brown sugar
Spices and Seasoning
– 1/2 teaspoon ground cinnamon
– 1/4 teaspoon ground nutmeg
– Salt and freshly ground black pepper
Liquids
– 1/4 cup vegetable broth or water
– Fresh parsley for garnish
When I make brown sugar glazed carrots, I start with the main ingredients. Baby carrots work best, but regular carrots are fine too. Just peel and cut them into sticks. The butter adds richness, while brown sugar gives sweetness.
Next, I include spices. The cinnamon adds warmth, and nutmeg brings a hint of earthiness. Salt and black pepper help balance the flavors.
For liquids, I use vegetable broth or water. This helps cook the carrots and create a glaze. Fresh parsley at the end brightens the dish with color and flavor.
Gather these ingredients, and you’re ready to make a tasty side dish that everyone will love!
Step-by-Step Instructions
Preparation
Melting the butter
Start by placing a large skillet over medium heat. Add 3 tablespoons of unsalted butter to the pan. Wait until the butter melts and bubbles. This butter will give the carrots a rich flavor.
Preparing the carrots
You can use baby carrots or regular carrots. If you use regular carrots, peel them and cut them into sticks. Aim for uniform sizes. This helps them cook evenly.
Cooking Process
Combining butter with carrots
Once the butter is melted, add the carrots to the skillet. Toss them gently to coat each piece with butter. This step is key for flavor.
Adding brown sugar and spices
Sprinkle 1/4 cup of packed brown sugar, 1/2 teaspoon of ground cinnamon, and 1/4 teaspoon of ground nutmeg over the carrots. Stir well to mix the sugar and spices evenly. This will create a sweet, warm coating.
Simmering and Glazing
Pouring in vegetable broth
Next, carefully pour in 1/4 cup of vegetable broth. You can also use water if you prefer. Stir briefly to combine everything.
Covering and simmering
Cover the skillet with a lid and let the carrots simmer for about 10 to 12 minutes. Stir occasionally. This will help the carrots become tender.
Thickening the glaze
After the carrots are soft, remove the lid. Increase the heat to medium-high. Cook for another 3 to 5 minutes. This will help the glaze thicken and become glossy. You want it to be sweet and sticky.
Tips & Tricks
Perfecting the Glaze
How to check for doneness
To check if your carrots are done, pierce them with a fork. They should be tender but still firm. If they feel soft and mushy, you’ve cooked them too long. Aim for a nice balance of softness that keeps some crunch.
Tips for caramelization
For perfect caramelization, keep an eye on the heat. After simmering, raise the heat to medium-high. This helps the glaze thicken, turning it from a sauce to a sticky coating. Stir often to prevent burning and to make sure each carrot gets that sweet glaze.
Enhancing Flavor
Adjusting seasoning
Taste your carrots before serving. If they need more flavor, add a pinch of salt or a dash of pepper. You can also add a bit more brown sugar for extra sweetness or cinnamon for warmth. Adjust to your taste!
Using fresh herbs for garnish
Fresh herbs can brighten your dish. Chopped parsley adds color and freshness. Just sprinkle some on top before serving. You can also try thyme or chives for different flavors. Fresh herbs can take your carrots to another level.
Cooking Alternatives
Stovetop vs. oven baking
You can make these glazed carrots on the stovetop or in the oven. The stovetop lets you control the cooking better and is quicker. If you prefer roasting, toss your carrots in the glaze and roast them at 400°F for about 20-25 minutes. Just make sure to stir them halfway through.
Using other types of carrots
While baby carrots are easy, you can use any carrots you like. Regular carrots, cut into sticks, work great too. You can even try rainbow carrots for a fun twist. Just remember to keep the pieces uniform for even cooking.

Variations
Different Sweeteners
You can switch up the sweeteners in this recipe. Honey adds a nice floral note. Maple syrup gives a rich, earthy flavor. Both work well in place of brown sugar. For those watching sugar intake, consider using a stevia blend. It can provide sweetness without the extra calories.
Additional Ingredients
You can easily add dried fruit for a burst of flavor. Raisins or cranberries bring sweetness and chewiness. They pair well with the glaze. Nuts can also enhance texture. Walnuts or pecans add crunch and depth. Just chop them before mixing in.
Dietary Modifications
If you want a vegan option, use plant-based butter. This keeps the dish creamy without dairy. For gluten-free needs, check your vegetable broth. Most broths are gluten-free, but it’s good to verify. These changes make the dish suitable for various diets.
Storage Info
Refrigeration
To store leftover carrots, place them in an airtight container. This keeps them fresh and tasty. Make sure the container is sealed well to prevent moisture loss. Stored this way, your glazed carrots will last for about 3 to 5 days in the fridge. Always check for any signs of spoilage before eating.
Reheating Methods
The best ways to reheat glazed carrots are in a skillet or microwave. If using a skillet, add a splash of water or broth to the pan. Heat over medium-low. Stir often to keep them moist. For the microwave, place the carrots in a bowl with a damp paper towel. Heat in short bursts, stirring in between, until warm. This helps avoid drying out the carrots.
Freezing Instructions
You can freeze cooked glazed carrots to enjoy later. Let them cool completely before placing them in a freezer-safe bag. Remove as much air as possible. They can last up to 3 months in the freezer. When you’re ready to eat, thaw them overnight in the fridge. Reheat them using a skillet or microwave for the best taste.
FAQs
Can I use regular carrots instead of baby carrots?
Yes, you can use regular carrots. Just peel and cut them into uniform sticks. This helps them cook evenly. Regular carrots have great flavor and will work well in this recipe.
How do I make the glaze thicker?
To thicken the glaze, cook the carrots uncovered for a few extra minutes. This allows the liquid to reduce and become syrupy. You can also add a bit more brown sugar for extra sweetness.
What can I serve with brown sugar glazed carrots?
These carrots pair well with many dishes. Serve them alongside roasted chicken, grilled steak, or baked fish. They also complement rice or quinoa nicely, adding a sweet touch to your meal.
Can I prepare these carrots in advance?
Yes, you can prepare the carrots ahead of time. Cook them and let them cool, then store in the fridge. Reheat them in a skillet before serving. This makes meal prep easier and saves time on busy days.
In this article, we covered making brown sugar glazed carrots. We discussed the key ingredients, from sweet carrots to rich spices. I provided step-by-step instructions, tips for perfecting your glaze, and tasty variations. Remember, you can adjust flavors to suit your taste. These carrots add joy to any meal. Enjoy making this dish, knowing it will impress everyone at the table. With simple storage tips, you can savor them later too. Enjoy your cooking journey!


![- 4 large bell peppers (any vibrant color) - 1 cup quinoa, thoroughly rinsed and drained - 2 cups vegetable broth - 1 can (15 oz) black beans, well rinsed and drained - 1 cup corn (fresh, frozen, or canned, drained) - 1 cup cherry tomatoes, halved - 1 teaspoon ground cumin - 1 teaspoon smoked paprika - 1 teaspoon garlic powder - Salt and freshly cracked black pepper to taste - 1 tablespoon extra virgin olive oil - ½ cup shredded cheddar cheese (optional but recommended) - Fresh cilantro or parsley, finely chopped for garnish - Additional vegetables (e.g., zucchini, mushrooms) - Spices and herbs (e.g., oregano, chili powder) When making stuffed bell pepper boats, you have many options. I love using colorful bell peppers. They add a fun look to your dish. Choose ones that are firm and bright. For the filling, I use quinoa. It’s not only healthy but also tasty. Rinse it well before cooking. The vegetable broth adds flavor and makes it rich. Black beans are another great choice. They are filling and packed with protein. Rinse them well too, to get rid of extra salt. Corn brings sweetness to the dish. You can use fresh, frozen, or canned corn. Cherry tomatoes add a nice juicy burst. Spices like cumin and paprika give depth. Garlic powder adds that warm flavor we all love. Don’t forget to season with salt and pepper to make it pop. Finally, I drizzle olive oil on the filling. It helps everything blend together. If you love cheese, add some cheddar on top for creaminess. Feel free to customize your stuffed peppers with optional add-ins. You can mix in other veggies like zucchini or mushrooms. Extra spices can make a big impact too. This recipe is flexible. You can adjust it to fit your taste. Explore and have fun with your stuffed bell pepper boats! For the complete guide, check out the Full Recipe I have shared. - Preheat the oven to 375°F (190°C). - Prepare the bell peppers by cutting off their tops. Carefully remove the seeds and membranes. Make sure they sit upright in a baking dish. - Combine 1 cup of quinoa and 2 cups of vegetable broth in a saucepan. - Bring this mix to a boil, then reduce the heat to low. Cover the pot and let it simmer. Cook for about 15 minutes or until the quinoa is fluffy and the broth has absorbed. - In a large mixing bowl, combine the cooked quinoa with one can of black beans, one cup of corn, and spices. - Add 1 teaspoon of ground cumin, 1 teaspoon of smoked paprika, and 1 teaspoon of garlic powder. Season with salt and black pepper. - Drizzle 1 tablespoon of olive oil over the mixture. Stir until everything is well blended. - Carefully spoon the filling into each prepared bell pepper. Press it down gently to pack it in. - If you like, top each stuffed pepper with ½ cup of shredded cheddar cheese for added flavor. - Pour a little water into the bottom of the baking dish. Cover the dish with aluminum foil. This helps keep the peppers moist. - Bake the stuffed peppers in the preheated oven for 25-30 minutes. Check for doneness; they should be fork-tender. Enjoy your delicious Stuffed Bell Pepper Boats with vibrant colors and flavors! For the full recipe, please refer back to the recipe section. To start, cutting bell peppers right matters. Slice off the tops using a sharp knife. Be careful not to cut too deep. Next, remove the seeds and white membranes inside. A small spoon works great for this. Rinse the peppers under cold water to clean them. For even cooking, place your stuffed peppers tightly in the baking dish. This helps them cook at the same rate. Mixing flavors is key, too. Use spices like cumin and smoked paprika to boost taste. You can taste the filling before you stuff the peppers. Adjust the salt and pepper as needed. Serving your stuffed bell pepper boats can be fun. Use a colorful platter to catch the eye. Arrange the peppers upright, showing off their filling. You can add a wedge of lime on the side for a fresh touch. A sprinkle of chopped cilantro or parsley adds color and flavor. You can prepare stuffed peppers ahead of time. Stuff them and cover with foil. Store them in the fridge for up to a day. This makes meal prep easy for busy nights. For sides, consider a fresh salad or crusty bread. You can also pair them with rice or quinoa for a filling meal. These peppers are great for family dinners or potlucks. For the full recipe, check out Stuffed Bell Pepper Boats. {{image_4}} You can easily make this dish vegetarian. Substituting quinoa with rice or couscous works well. Rice gives a nice texture, while couscous cooks faster. Both options taste great in these stuffed bell pepper boats. Adding different vegetables also boosts flavor and nutrition. Try diced zucchini, mushrooms, or spinach. These veggies add color and crunch. You can mix and match to fit your taste. Want to add meat? Ground turkey or beef makes a hearty filling. Just cook the meat before adding it to the quinoa mixture. This step ensures the meat is safe to eat. When adding meat, adjust the spices. You might want to use more cumin or paprika. This adjustment gives the dish a richer taste. Cheese can take your stuffed peppers to the next level. Mozzarella or feta are great choices. Mozzarella melts beautifully, while feta adds a tangy twist. For even more flavor, add layers of salsa or sauce. It keeps the filling moist and adds a kick. You can also drizzle some sauce on top before baking. This extra step makes the dish even more delicious. Check out the [Full Recipe] for all the details! To keep your stuffed bell pepper boats fresh, store them in an airtight container. This helps lock in moisture and flavor. You can keep them in the fridge for about 3 to 4 days. If you want to save them for later, allow them to cool completely before storing. You can freeze stuffed peppers both before and after baking. If you freeze them before cooking, wrap them tightly in plastic wrap and then in aluminum foil. This keeps out air and prevents freezer burn. If you choose to freeze them after baking, let them cool first. Then, place them in a freezer-safe container. They will stay good for up to 3 months. To reheat your stuffed peppers, the oven works best. Preheat it to 350°F (175°C). Place the peppers in a baking dish and cover with foil. Bake for about 20 to 25 minutes until heated through. You can also use a microwave if you're in a hurry. Just place one pepper on a plate and heat for 2 to 3 minutes. This method may make them a bit softer, but they'll still taste great! To make stuffed bell peppers in advance, prepare the filling first. Cook the quinoa and mix it with your beans, corn, and spices. Once mixed, stuff each bell pepper with the filling. You can store them in the fridge for up to two days before baking. Cover them tightly to keep them fresh. When ready to bake, just pop them into the oven. This saves you time and effort on busy nights. Yes, you can use other types of peppers! Try using poblano, Anaheim, or even jalapeño peppers. Each type adds a unique flavor and spice level. Poblano peppers are mild and have a rich taste. They also hold a good amount of filling. If you like a bit of heat, jalapeños are a great choice. Just remember to adjust the cooking time if your peppers are smaller. Stuffed bell pepper boats pair well with many side dishes. Some great options include a fresh green salad, roasted vegetables, or rice. You can also serve them with a side of guacamole or salsa for added flavor. If you want something warm, consider serving bread or cornbread. These sides complement the flavors and make for a complete meal. To adjust the spice level, you can add or reduce spices. For less heat, skip the cumin and paprika. If you want more flavor, add some chili powder or crushed red pepper. You can also mix in diced jalapeños or hot sauce. Start with a little and taste as you go. This way, you can find the perfect balance for your taste. Yes, this dish can be gluten-free! The main ingredients, like quinoa and beans, are naturally gluten-free. Just be sure to check that your vegetable broth is gluten-free as well. If you add other ingredients, like sauces or spices, check their labels. This way, you can enjoy a safe and tasty meal. Stuffed bell peppers are simple and fun to make. We covered the key ingredients and steps to prepare them. You learned how to customize flavors and presentation. Remember, you can use different spices, grains, or veggies. These peppers can please everyone, regardless of diet. Enjoy your meal prep and share these tasty, healthy treats with friends and family. Happy cooking!](https://goldendishy.com/wp-content/uploads/2025/07/06b7afd9-4005-4ab6-8aaa-ba374b5d3167-768x768.webp)
