Get ready to treat your taste buds with my Brown Sugar Garlic Chicken! This dish is a mouthwatering mix of sweet and savory, perfect for any meal. I’ll walk you through simple steps, fresh ingredients, and clever tips to make it shine. No need to be a pro in the kitchen; you’ll impress everyone from the first bite. Let’s dive into this finger-licking delight that’s easy to cook and hard to resist!
Why I Love This Recipe
- Sweet and Savory Combination: The caramelized brown sugar adds a delicious sweetness that perfectly balances the savory garlic and soy sauce, creating a mouthwatering flavor profile.
- Easy to Prepare: This recipe requires minimal effort, making it perfect for busy weeknights or when you want to impress guests without spending hours in the kitchen.
- Versatile Serving Options: Serve it over rice, with vegetables, or in a wrap; this chicken adapts to your meal preferences and is always a crowd-pleaser.
- Stunning Presentation: Garnishing with green onions and sesame seeds not only enhances the flavor but also adds a visually appealing touch to your dish.
Ingredients
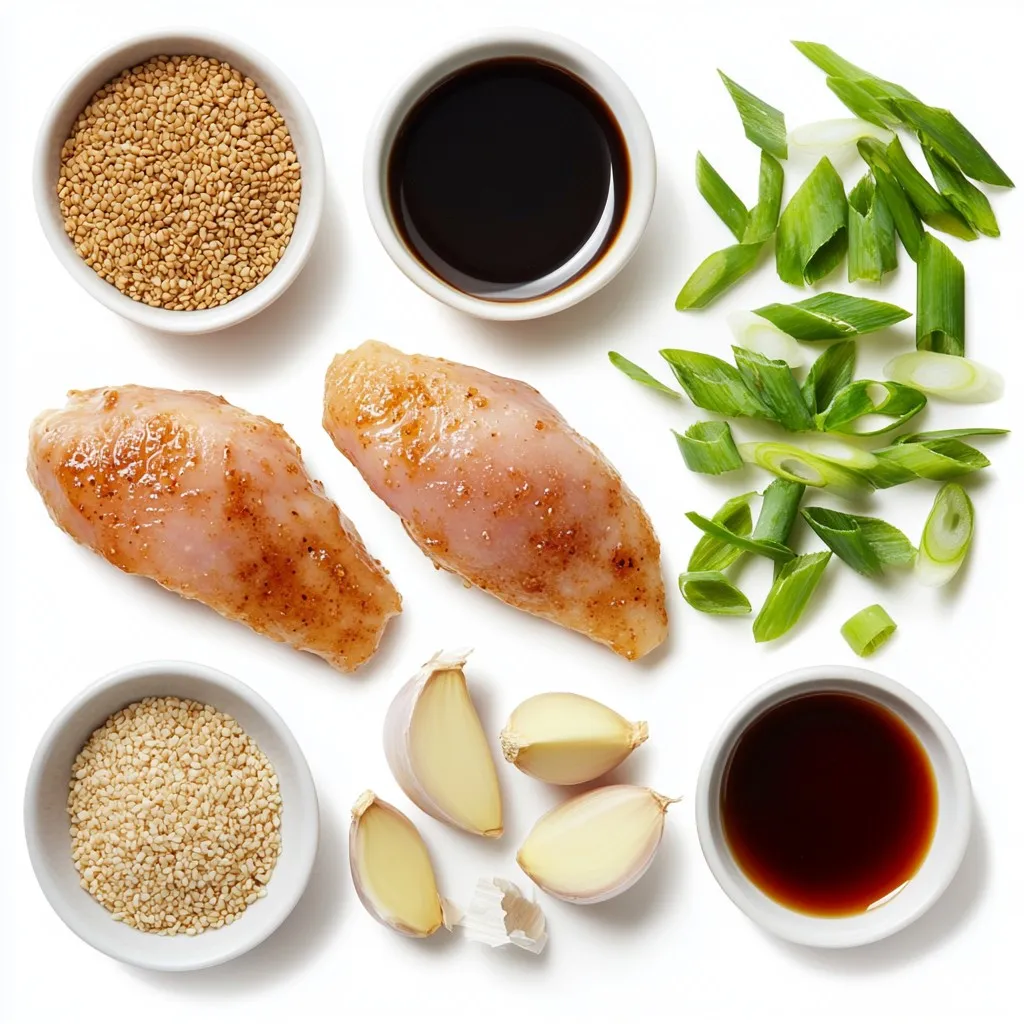
List of Ingredients for Brown Sugar Garlic Chicken
– 4 boneless, skinless chicken breasts
– 1/4 cup brown sugar
– 4 cloves garlic, finely minced
– 1/4 cup low-sodium soy sauce
– 2 tablespoons olive oil
– 1 tablespoon freshly grated ginger
– 1 teaspoon sesame oil
– Salt and freshly cracked black pepper, to taste
– 2 tablespoons chopped green onions, for garnish
– 1 tablespoon sesame seeds, for garnish
Importance of Fresh Ingredients
Using fresh ingredients makes a big difference in flavor. Fresh garlic brings a strong aroma. Fresh ginger adds warmth and depth. The quality of chicken affects the dish’s overall taste. When you use fresh ingredients, you get better flavors and textures. Always choose the best quality you can find. This choice helps elevate your cooking.
Suggested Substitutions for Ingredients
If you don’t have brown sugar, you can use honey or maple syrup. For garlic, garlic powder works in a pinch, but fresh is best. If you want less sodium, choose a low-sodium soy sauce or coconut aminos. You can swap chicken breasts for thighs for a juicier bite. For a vegan option, use tofu or tempeh and adjust cook times. These swaps keep the dish delicious while meeting your needs.
Step-by-Step Instructions
Preparing the Marinade
To make the marinade, grab a medium bowl. Add 1/4 cup of brown sugar. Next, finely mince 4 cloves of garlic and toss them in. Pour in 1/4 cup of low-sodium soy sauce. Add 2 tablespoons of olive oil and 1 tablespoon of freshly grated ginger. Lastly, drizzle in 1 teaspoon of sesame oil. Whisk everything together until smooth. This mix is key for flavor.
Marinating the Chicken
Take 4 boneless, skinless chicken breasts. Season them with salt and cracked black pepper. Place them in a large zip-lock bag or a shallow dish. Pour your marinade over the chicken. Make sure each piece gets coated well. Seal the bag or cover the dish. For best results, refrigerate for at least 30 minutes. If you have time, marinate for up to 4 hours. This step makes the chicken super tasty.
Cooking the Chicken: Searing and Baking
When you’re ready to cook, preheat your oven to 375°F (190°C). Heat a large oven-safe skillet over medium-high heat. Take the chicken out of the marinade. Keep the marinade for later. Sear the chicken breasts for 2-3 minutes on each side. Look for a nice golden-brown crust. Once seared, pour the reserved marinade over the chicken. This adds even more flavor.
Next, transfer the skillet to your preheated oven. Bake for 20-25 minutes. Check that the chicken reaches 165°F (74°C) inside. Halfway through, baste the chicken with the sauce. This keeps it juicy and packed with flavor. When done, take the skillet out. Let the chicken rest for 5 minutes before slicing. This helps the juices stay in.
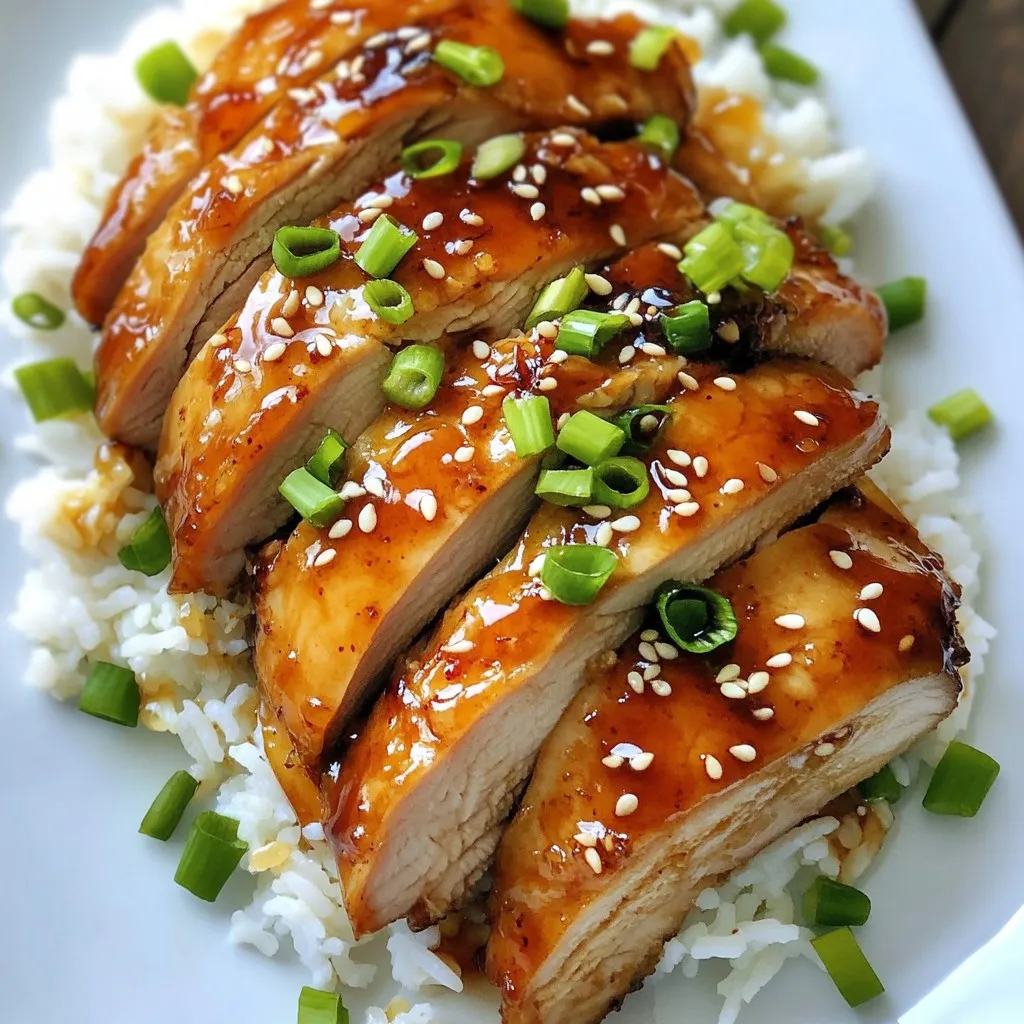
For serving, drizzle any remaining sauce from the skillet over the sliced chicken. You can garnish with chopped green onions and sesame seeds for a nice touch. Enjoy your finger-licking brown sugar garlic chicken!
Tips & Tricks
How to Achieve Perfectly Cooked Chicken
To cook chicken just right, start with even-sized pieces. This helps them cook at the same rate. Season the chicken well with salt and pepper. Searing it in a hot skillet gives a nice crust. Cook each side for 2-3 minutes until golden brown. Using an oven-safe skillet makes it easy to move from the stove to the oven. Bake the chicken at 375°F (190°C) until the center reaches 165°F (74°C). Letting the chicken rest for 5 minutes keeps it juicy and tender.
Enhancing Flavor with Additional Ingredients
You can boost the flavor with a few extra items. Adding red pepper flakes gives a spicy kick. A splash of lime juice adds brightness. You can also mix in some honey for extra sweetness. Fresh herbs like cilantro or basil add a fresh twist. Feel free to experiment! Just remember to balance the flavors so they blend well.
Serving Suggestions for Presentation
Presentation matters when serving your dish. Slice the chicken into even pieces for a nice look. Lay it over fluffy jasmine rice or colorful steamed veggies. Drizzle the leftover sauce on top for extra flavor. Garnish with chopped green onions and sesame seeds to make it pop. This not only looks great but also adds taste. A well-presented dish makes every meal feel special.
Pro Tips
- Marinade Timing: For the best flavor, allow the chicken to marinate for at least 2 hours, or overnight if possible. This will enhance the depth of flavor in your dish.
- Perfect Searing: Ensure your skillet is hot enough before adding the chicken to achieve that beautiful golden-brown crust. A properly heated pan will help lock in the juices.
- Basting Technique: Basting the chicken halfway through baking helps to keep it moist and infuses it with more of that delicious caramelized sauce.
- Resting Period: Always let the chicken rest for a few minutes after cooking. This allows the juices to redistribute, ensuring each bite is tender and juicy.
Variations
Adding Vegetables to the Dish
You can easily add veggies to the brown sugar garlic chicken. Carrots, bell peppers, and broccoli are great choices. They add color and crunch. Chop them into bite-sized pieces. Toss the veggies into the marinade with the chicken. This way, they soak up all that tasty flavor. You can also roast them alongside the chicken. This makes a complete meal all in one pan!
Alternative Proteins for the Recipe
If you want to switch things up, try other proteins. Pork chops or salmon work well with this marinade. They both absorb flavors nicely. For pork, use thick chops to keep them juicy. For salmon, cook it for less time. The marinade will give it a great taste. Just follow the same steps for cooking, but adjust the time as needed.
Vegetarian/GF-Friendly Options
For a vegetarian or gluten-free option, use tofu or tempeh. Both absorb marinades well and are full of protein. Cube the tofu and press it to remove excess water. Marinate it just like you would the chicken. Bake it at 375°F until golden. For gluten-free, make sure to use gluten-free soy sauce. This way, you can enjoy the sweet and savory flavors without worry.
Storage Info
Best Practices for Storing Leftovers
To keep your brown sugar garlic chicken fresh, follow these steps:
– Let the chicken cool down to room temperature.
– Place it in an airtight container.
– Store in the fridge for up to 3 days.
– If you have extra sauce, keep that in a separate container.
This method helps maintain flavor and texture. Avoid leaving it out for too long. Food safety is key!
Reheating Instructions for Optimal Flavor
When reheating, you want to keep the chicken juicy and tasty. Here’s how:
– Preheat your oven to 350°F (175°C).
– Place the chicken in an oven-safe dish.
– Add a splash of water or extra sauce to keep it moist.
– Cover with foil to prevent drying out.
– Heat for about 15-20 minutes until warmed through.
You can also reheat in a microwave. Use a microwave-safe plate, cover, and heat in short bursts. This keeps the chicken from getting tough.
Freezing Tips for Future Meals
Freezing is a great way to save your brown sugar garlic chicken for later. Here’s how to do it right:
– Allow the chicken to cool completely.
– Cut it into portions for easy use later.
– Wrap each piece tightly in plastic wrap.
– Place wrapped chicken in a freezer bag and remove as much air as possible.
– Label with the date and freeze for up to 3 months.
When you’re ready to eat, thaw in the fridge overnight. Reheat using the methods mentioned for the best flavor.
FAQs
What Can I Serve with Brown Sugar Garlic Chicken?
You can serve this chicken with many tasty sides. Here are some great options:
– Fluffy jasmine rice: It soaks up the sauce well.
– Steamed vegetables: Broccoli and carrots add color and crunch.
– Mixed greens salad: A fresh salad balances the sweet chicken.
– Noodles: Simple stir-fried noodles make a hearty meal.
– Mashed potatoes: Creamy potatoes pair nicely with savory flavors.
Feel free to mix and match these sides based on your taste!
How Long Can I Keep Leftovers?
You can keep leftovers for about three to four days. Store the chicken in an airtight container in the fridge. If you want to keep it longer, freeze the chicken for up to three months. Just remember to thaw it in the fridge before reheating.
Can I Use Chicken Thighs Instead of Breasts?
Yes, you can use chicken thighs! They stay moist and juicy during cooking. Just adjust the cooking time. Thighs may take a few more minutes to cook through. Ensure that the internal temperature reaches 165°F (74°C). Enjoy the rich flavor they bring to the dish!
This blog showed you how to make brown sugar garlic chicken. You learned about fresh ingredients, cooking methods, and tips for flavor. I shared ideas for variations, storage, and answers to common questions.
Cooking is fun and rewarding. Try this recipe and make it your own. Enjoy the tasty meals you creat


