If you love cookies, you need to try my Brown Butter Chocolate Chip Cookies. The rich, nutty flavor of brown butter takes these tasty treats to a new level. With a perfect blend of chewy and crunchy, they make a delightful snack for any occasion. Join me as we dive into this simple recipe that guarantees to impress your friends and family. Let’s bake some magic together, one cookie at a time!
Why I Love This Recipe
- Rich Flavor: The brown butter adds a deep, nutty taste that elevates the classic chocolate chip cookie to new heights.
- Perfect Texture: These cookies strike the ideal balance between chewy and crispy, making every bite delightful.
- Customizable: Feel free to add nuts or swap in different types of chocolate to suit your preferences!
- Make Ahead: The dough can be chilled overnight, allowing you to bake fresh cookies whenever you crave them.
Ingredients
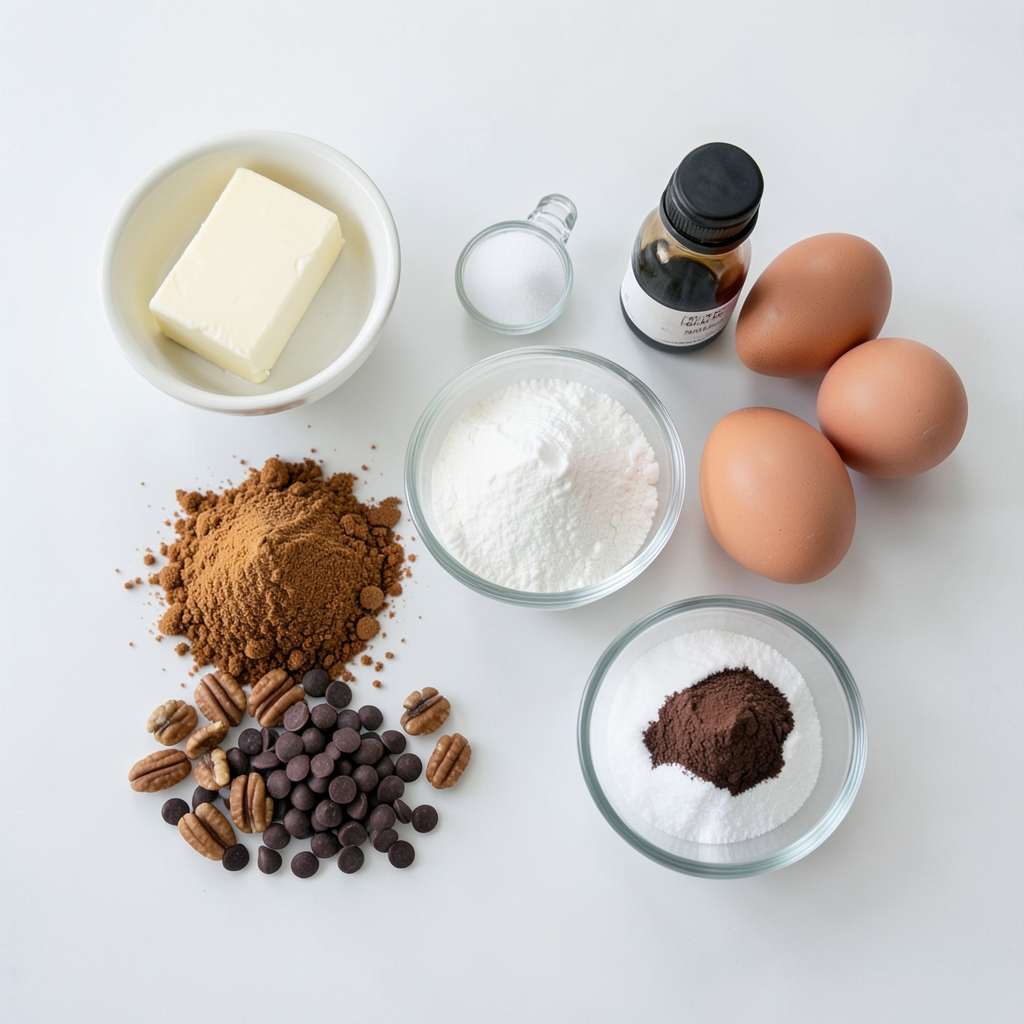
List of Ingredients
- 1 cup unsalted butter
- 1 1/4 cups packed brown sugar
- 1/2 cup granulated sugar
- 2 large eggs
- 1 teaspoon pure vanilla extract
- 2 1/2 cups all-purpose flour
- 1 teaspoon baking soda
- 1/2 teaspoon fine sea salt
- 1 cup semi-sweet chocolate chips
- 1/2 cup chopped pecans (optional)
Gathering the right ingredients makes the best cookies. Start with unsalted butter. This gives you control over the salt level. You need 1 cup of it. Next, brown sugar adds moisture and a rich flavor. You’ll want 1 1/4 cups.
Granulated sugar gives sweetness and helps with texture. Use 1/2 cup. For richness, add 2 large eggs. They help bind everything. A teaspoon of pure vanilla extract adds a lovely aroma and taste.
Now, let’s talk about the flour. You need 2 1/2 cups of all-purpose flour for the base. This creates the cookie structure.
Baking soda is next. It’s the leavening agent that helps cookies rise. Use 1 teaspoon. Lastly, add 1/2 teaspoon of fine sea salt. This enhances the flavors.
Chocolate chips bring the magic. Use 1 cup of semi-sweet chocolate chips. If you like nuts, add 1/2 cup of chopped pecans. They add crunch and flavor.
With these ingredients, you are ready to make some amazing brown butter chocolate chip cookies!
Step-by-Step Instructions
Step 1: Brown the Butter
To brown the butter, melt it in a medium saucepan over medium heat. Stir frequently to prevent burning. The butter will start to bubble and then foam. After 5-7 minutes, it will turn golden brown and smell nutty. Watch carefully; if it burns, you must start over. Once browned, remove it from heat and let it cool for 10 minutes.
Step 2: Mix the Sugars
In a large mixing bowl, combine the cooled brown butter with packed brown sugar and granulated sugar. Mix well using a hand mixer or a whisk. Aim for a creamy texture, which takes around 2-3 minutes. This step adds sweetness and helps create a nice base for your cookies.
Step 3: Incorporate Eggs and Vanilla
Add the eggs one at a time to the sugar mixture. Mix well after each addition. Next, pour in the pure vanilla extract. Blend until everything is fully combined and slightly frothy. This adds moisture and flavor to your dough.
Step 4: Prepare Dry Ingredients
In another bowl, whisk together the all-purpose flour, baking soda, and fine sea salt. Whisking ensures that the baking soda and salt are evenly mixed. Gradually add this dry mixture to the wet ingredients, stirring gently. Be careful not to overmix; you want a soft dough.
Step 5: Fold in Chocolate and Nuts
Using a spatula, gently fold in the semi-sweet chocolate chips and chopped pecans if you choose to use them. Folding helps keep the dough light and airy. Ensure the chocolate and nuts are evenly distributed throughout the dough.
Step 6: Chill the Cookie Dough
Cover the mixing bowl with plastic wrap or a lid. Refrigerate the dough for at least 30 minutes. Chilling the dough is vital. It helps the flavors deepen and makes the dough easier to scoop.
Step 7: Preheat the Oven
While the dough chills, preheat your oven to 350°F (175°C). Preheating is essential for even baking. It ensures your cookies rise properly and have a nice texture.
Step 8: Scoop the Cookies
Line two baking sheets with parchment paper. Use a cookie scoop or tablespoon to drop rounded balls of dough onto the sheets. Leave about 2 inches of space between each ball. This space allows the cookies to spread as they bake.
Step 9: Bake the Cookies
Place the trays in the oven and bake for 10-12 minutes. Look for golden-brown edges and soft centers. This gives you a chewy cookie. If they look too soft, they may need a minute or two more.
Step 10: Cool Down
Remove the cookies from the oven and let them sit on the baking sheet for 5 minutes. This cooling time helps them firm up. After that, transfer the cookies to a wire rack to cool completely. Enjoy the warm, gooey goodness!
Tips & Tricks
Achieving Perfect Flavor
Using brown butter is key. It adds a rich, nutty taste. When you heat the butter, watch it closely. Stir it often to prevent burning. The color should turn golden brown. You’ll know it’s ready when it smells amazing. This step transforms a simple cookie into a gourmet treat.
Texture Tips
For chewy cookies, do not overbake them. Take them out when they are golden on the edges but soft in the middle. If you prefer crunchy cookies, bake them a bit longer. You can also use more flour for a thicker texture. Experiment with the bake time to find your perfect cookie.
Presentation Ideas
Serving your cookies well adds to the fun. Stack them on a pretty plate for a nice look. Dust them lightly with powdered sugar for extra flair. You can also place them in a cute cookie jar. This makes a lovely gift or a sweet treat at home. Enjoy showing off your delicious cookies!
Pro Tips
- Brown Butter Technique: Ensure you stir the butter continuously while browning to prevent it from burning. The goal is a nutty aroma and a rich golden color.
- Chilling the Dough: Chilling the cookie dough not only enhances the flavors but also helps in achieving the perfect chewy texture. For best results, chill overnight.
- Cookie Spacing: Make sure to leave enough space between each cookie on the baking sheet. This allows them to spread evenly while baking, preventing them from merging into one another.
- Perfect Baking Time: Keep an eye on the cookies towards the end of the baking time. They should be golden at the edges and slightly soft in the center for a chewy finish.
Variations
Nut-Free Option
You can easily make these cookies nut-free. Just skip the chopped pecans in the recipe. The cookies will still taste great and have a nice texture without them. If you want a bit of crunch, try adding oats or crushed pretzels instead. These will give your cookies a fun twist.
Different Chocolate Types
The type of chocolate you use can change the cookie’s taste. If you love dark chocolate, swap the semi-sweet chips for dark chocolate chips. This will give your cookies a richer flavor. If you prefer sweeter treats, try using white chocolate chips. You can even mix different types for a fun blend!
Gluten-Free Alternative
For a gluten-free cookie, you can use gluten-free flour. Look for a blend that works well for baking. You can also try almond flour or coconut flour. Keep in mind that these flours may change the cookie's texture. If you use almond flour, add an extra egg to help bind the dough. Enjoy your delicious cookies without the gluten!
Storage Info
How to Store Cookies
To keep your cookies fresh, use an airtight container. I recommend glass or plastic containers. Layer parchment paper between cookies to avoid sticking. Store at room temperature for best results. If you want to keep them longer, you can refrigerate them.
Freezing Cookies
Freezing cookie dough is easy and great for future treats. First, scoop dough into balls and place them on a baking sheet. Freeze the balls for about an hour. Once frozen, transfer them to a zip-top bag. Label the bag with the date. You can freeze the dough for up to three months.
Shelf Life
Stored properly, these cookies last about a week at room temperature. If you refrigerate them, they can last up to two weeks. When frozen, they maintain quality for three months. Just remember to thaw them at room temperature before baking or eating. Enjoy your delicious cookies!
FAQs
Can I use salted butter instead of unsalted?
You can use salted butter, but it changes the taste. Unsalted butter lets you control the salt. Using salted butter may make cookies too salty. If you use salted, skip the added salt in the recipe.
What if I forget to chill the dough?
Not chilling the dough affects texture. Chilling helps cookies spread less. If you skip this step, cookies may turn out flat. They may also lose that chewy center we love. Always try to chill for a better result.
How do I know when cookies are done baking?
Look for golden-brown edges. The center should be soft but not raw. Bake cookies for 10-12 minutes. If they seem too puffy, they need more time. Trust your eyes for the best results.
Can I add more chocolate chips?
Yes, you can add more chocolate chips! Extra chips make cookies even more delicious. Just keep the total amount balanced with the dough. This way, cookies still bake well without being too heavy.
You’ve learned how to make amazing cookies step by step. From browning butter to choosing the right chocolate, each part matters. Storing and freezing tips help keep them fresh. Remember, you can switch ingredients to match your taste. Try different types of chocolate or make them nut-free. These small changes can bring big flavors. Baking can be fun and rewarding. Enjoy sharing your cookies with friends and family!