Blueberry Oatmeal Crumble Bars Easy and Delicious Treat

If you’re looking for a simple treat that’s both easy to make and full of flavor, you’ve found it! These Blueberry Oatmeal Crumble Bars are your next go-to recipe. With wholesome ingredients like rolled oats and fresh blueberries, each bite offers a perfect balance of sweetness and nutrition. Let’s dive into how you can whip up these yummy bars that everyone will love!
Ingredients
List of Key Ingredients
– Rolled oats
– Whole wheat flour
– Brown sugar
– Unsalted butter
The key ingredients make these blueberry oatmeal crumble bars rich and tasty. Rolled oats give a chewy texture. Whole wheat flour adds a nutty taste. Brown sugar brings sweetness and depth. Unsalted butter keeps the crust soft and flavorful.
Optional Ingredients
– Honey or maple syrup
– Fresh lemon juice
You can add honey or maple syrup for extra sweetness. A splash of fresh lemon juice brightens the blueberry flavor. Both are great if you want to tweak the taste a bit.
Substitutions
– Frozen blueberries instead of fresh
– Alternative flours for gluten-free options
If you don’t have fresh blueberries, use frozen ones. Just thaw them first. For gluten-free options, try almond flour or oat flour. These swaps keep the bars delicious while meeting different dietary needs.
Step-by-Step Instructions
Preparing the Baking Pan
First, preheat your oven to 350°F (175°C). This step is key for even baking. Next, take an 8×8-inch baking pan and line it with parchment paper. Leave some paper hanging over the sides. This makes it easy to lift the bars out later.
Making the Crust
In a large mixing bowl, combine the following ingredients:
– 2 cups rolled oats
– 1 cup whole wheat flour
– 1/2 cup packed brown sugar
– 1/2 cup unsalted butter, melted
– 1/2 teaspoon baking soda
– 1/2 teaspoon salt
– 1 teaspoon pure vanilla extract
Mix these ingredients well until you get a crumbly texture. The mixture should hold together but still look loose.
Assembling the Bars
Take about two-thirds of the oat mixture and press it firmly into the bottom of your lined baking pan. This will be your crust.
In a separate bowl, mix together 2 cups of fresh blueberries, 1 tablespoon of fresh lemon juice, and 1 tablespoon of cornstarch. If you want extra sweetness, add 1 tablespoon of honey or maple syrup. Gently fold the blueberries until they are covered.
Spread the blueberry mixture evenly over the crust in your baking pan. Make sure to cover the entire surface. Then, crumble the remaining oat mixture over the blueberries. This will be your topping.
Bake the bars in your preheated oven for 30-35 minutes. They are done when the top is golden brown and the blueberries bubble. After baking, let them cool in the pan for about 10 minutes. Then, lift them out using the parchment paper.
Place the bars on a wire rack to cool completely. Once cool, cut them into squares or rectangles for serving.
Tips & Tricks
Baking Tips
To get that perfect golden brown crust, start by pressing the oat mixture firmly into the pan. This helps it hold together well. Bake the bars until the top is golden and the blueberries bubble. Look for a nice color change; this means they are ready. If you see the blueberries bubbling, you know they are cooked through.
Cooling and Cutting
After baking, let the bars cool for at least 10 minutes in the pan. This helps them set. For best results, transfer them to a wire rack to cool completely. When cutting, use a sharp knife for clean edges. You can cut them into squares or rectangles.
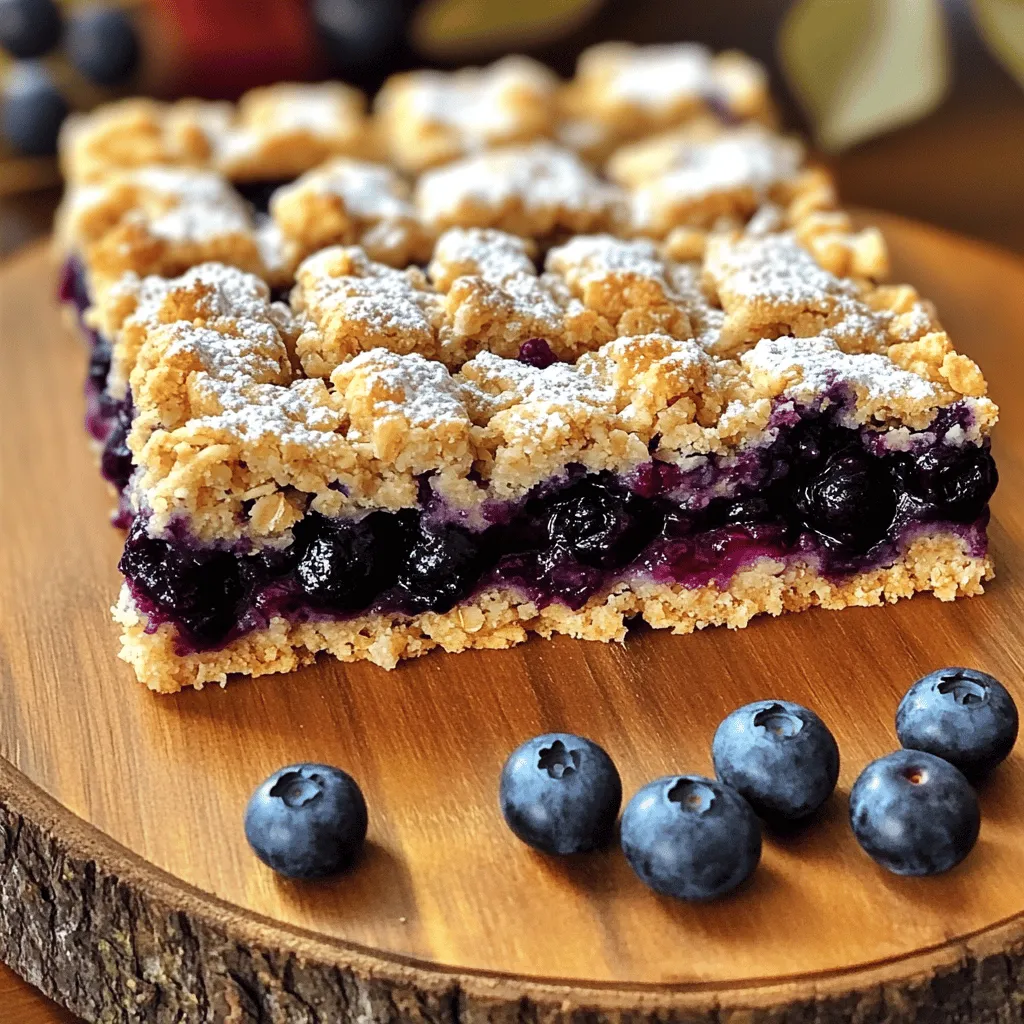
Presentation Suggestions
To serve, arrange the bars on a nice platter. Dust them lightly with powdered sugar for a sweet touch. Add some fresh blueberries around the bars for color. For a special treat, serve with a scoop of vanilla ice cream. This makes the bars even more enjoyable.

Variations
Flavor Variations
You can change up the taste of your blueberry oatmeal crumble bars with some fun add-ins. Adding nuts like walnuts or almonds gives a nice crunch. You can also add seeds, like sunflower seeds, for extra texture. Spices can really elevate your bars too. Try adding a sprinkle of cinnamon or nutmeg for warmth. These small changes can make a big difference in flavor.
Dietary Variations
If you want a vegan version, use plant-based butter instead of regular butter. This small swap keeps the bars tasty while meeting dietary needs. For those who need gluten-free options, use gluten-free oats and flour. This ensures everyone can enjoy these delicious treats without worry.
Seasonal Fruit Alternatives
While blueberries are the star, you can switch them out for other fruits. Strawberries, raspberries, or peaches work well too. Each fruit brings its own unique taste. You can even mix different fruits for a fun twist. This flexibility lets you enjoy these bars all year round.
Storage Info
Room Temperature Storage
You can keep your blueberry oatmeal crumble bars at room temperature for 2 to 3 days. Make sure to store them in an airtight container. This way, they stay fresh and tasty.
Refrigeration
For longer freshness, store the bars in the fridge. Use a container that seals tightly. They can last up to a week when stored this way. Just remember to let them sit out for a bit before you enjoy them. This helps bring back their soft texture.
Freezing Instructions
To freeze these bars, cut them into squares first. Wrap each square in plastic wrap, then place them in a freezer-safe bag. You can freeze them for up to 3 months. When you’re ready to eat, take them out and let them thaw in the fridge overnight. For a quick warm-up, pop them in the microwave for a few seconds. Enjoy your treat any time!
FAQs
How do I know when the blueberry crumble bars are done?
You can tell the blueberry crumble bars are done by looking for a few signs. First, the top should be a nice golden brown. Second, you should see the blueberries bubbling around the edges. Both of these signs show that the bars are ready. If you want to check for doneness, you can also insert a toothpick into the center. If it comes out clean, your bars are good to go!
Can I make these bars ahead of time?
Yes, you can make these bars ahead of time! They are great for meal prep. To do this, bake the bars and let them cool completely. Then, wrap them tightly in plastic wrap or store them in an airtight container. They will stay fresh for about four days in the fridge. If you want to keep them longer, you can freeze them. Just thaw them in the fridge before serving.
What can I substitute for oats?
If you need to substitute oats, there are a few options. You can use quinoa flakes for a similar texture. Another choice is to use ground almonds, which give a nice nutty flavor. If you want something gluten-free, try using gluten-free oat flour. These substitutes will change the taste a bit, but they will still make tasty bars!
This post covered all you need to know about making blueberry crumble bars. You learned about key ingredients like oats and whole wheat flour. We also discussed optional ingredients and useful substitutions.
You now have step-by-step instructions for making the bars. Plus, there are tips for baking, cooling, and presentation. Finally, we explored ways to store and vary the recipe.
Enjoy trying these tips and make the bars your own! Happy baking!


![- 1 cup all-purpose flour - 1 cup whole wheat flour - 1 tablespoon pumpkin pie spice - ½ cup granulated sugar - 1 can (15 oz) pumpkin puree - 2 large eggs - ½ cup brewed coffee, cooled - ⅓ cup vegetable oil - Optional mix-ins: ½ cup chocolate chips or nuts - Baking soda - Baking powder - Salt - Brown sugar - Pure vanilla extract The main ingredients form the base of your muffins. The blend of all-purpose and whole wheat flour adds great texture. Pumpkin puree brings moisture and a rich flavor. You can’t forget the pumpkin pie spice; it gives that cozy fall taste. Granulated sugar adds sweetness, while brown sugar provides depth. For the additional ingredients, eggs help the muffins rise and become fluffy. Brewed coffee gives a coffee kick, enhancing the flavor without being too strong. Vegetable oil keeps them moist. If you want, add chocolate chips or nuts for extra fun. Now, let’s talk staples. Baking soda and baking powder help the muffins rise. Salt balances the sweetness. Finally, pure vanilla extract adds a warm note that ties everything together. You can find the full recipe at the end. Set your oven to 350°F (175°C). This temperature helps the muffins rise nicely. Line or grease the muffin tin to keep the muffins from sticking. I prefer using paper liners for easy cleanup. In a large mixing bowl, whisk together the flours, baking soda, baking powder, pumpkin pie spice, and salt. This step is key for even flavor and texture. Make sure there are no lumps in the mixture. In another bowl, mix the granulated sugar and brown sugar until smooth. Then, add the pumpkin puree, eggs, cooled coffee, vegetable oil, and vanilla extract. Stir until everything is well combined. The mixture should look creamy and inviting. Gradually mix the dry ingredients into the wet mixture. Use a spatula to fold gently. Avoid overmixing; a few lumps are just fine. If you want, gently fold in chocolate chips or nuts for added flavor and texture. Spoon the batter into the muffin tins. Fill each cup about two-thirds full to allow for rising. Place the muffin tin in the oven and bake for 18-22 minutes. To check for doneness, insert a toothpick into a muffin. If it comes out clean, they are ready. Let the muffins cool in the pan for about 5 minutes. After that, transfer them to a wire rack to cool completely. Enjoy them warm for a cozy treat! For an extra touch, serve with cinnamon sugar or maple syrup. You can find the full recipe [here]. To make your muffins light and fluffy, avoid overmixing the batter. Stir gently until the dry and wet ingredients just come together. A few lumps are okay! Also, use room temperature ingredients. This helps the batter mix better and rise well. For a stronger coffee taste, try substituting brewed coffee with espresso. This adds depth to the flavor. Another great tip is to sprinkle some cinnamon sugar on top of the muffins before baking. This gives them a sweet, crispy crust that enhances their cozy taste. These muffins taste best when warm. Enjoy them with a fresh cup of coffee. For added sweetness, drizzle some maple syrup on top or spread a little cream cheese frosting. These simple touches make your cozy fall treat even more delightful! {{image_4}} You can easily make these muffins gluten-free. Simply swap the all-purpose flour with a gluten-free flour mix. Make sure to check the blend. Some mixes work better in baked goods than others. Using a good quality mix helps maintain texture and taste. If you want a dairy-free version, use almond milk instead of regular milk. Almond milk adds a light flavor that pairs well with the spices. For oil, replace vegetable oil with coconut oil. Coconut oil adds a subtle sweetness and complements the pumpkin nicely. To add some crunch, you can mix in nuts like walnuts or pecans. They add a nice texture and flavor. You can also play with spices. Try adding a pinch of nutmeg or cardamom for a twist. If you love chocolate, consider adding chocolate chunks. They melt perfectly and create a rich taste. To keep your pumpkin spice latte muffins fresh, place them in an airtight container at room temperature. This method helps maintain their soft texture and rich flavor. If you have a lot of muffins, you can stack them with parchment paper between layers. This prevents them from sticking together. If you want to enjoy these muffins later, freezing is a great option. First, let the muffins cool completely. Wrap each muffin in plastic wrap, then place them in a freezer bag. Make sure to remove as much air as possible to avoid freezer burn. You can store them in the freezer for up to three months. When you're ready to eat one, take it out and let it thaw at room temperature. You can also reheat it in the microwave for about 15-20 seconds. To keep your muffins moist and tasty over time, consider these tips: - Add a slice of bread to the container. This helps keep the muffins moist. - Avoid exposing them to direct sunlight or heat sources, as this can dry them out. - If you notice any muffins getting stale, you can toast them lightly. This can bring back some of their original flavor. Storing your pumpkin spice latte muffins correctly ensures you can enjoy their warm, cozy flavors for days to come. For the full recipe, check the earlier section! Yes, you can add more pumpkin puree. However, this change will affect the muffins. Adding extra puree makes the muffins moister. It may also make them denser. If you want a lighter muffin, keep the amount as in the Full Recipe. You can try adding an extra tablespoon at first. This way, you can see how the texture changes. These muffins last about three days at room temperature. Keep them in an airtight container. They can also last about a week in the fridge. The cold helps keep them fresh longer. If you want to save them for later, freeze them. They stay good for about three months in the freezer. Just remember to wrap them well. Yes, you can make these muffins without eggs. Here are some good substitutes: - 1/4 cup unsweetened applesauce - 1/4 cup mashed banana - 1 tablespoon flaxseed meal mixed with 2.5 tablespoons water Each option helps bind the muffins. They also add moisture. Choose the one you like best for a vegan version. You can use several options instead of brewed coffee. Here are some alternatives: - Brewed tea for a lighter flavor - Milk or almond milk for a creamy texture - Pumpkin spice tea for a fall twist These options help keep the muffins moist and tasty. You can experiment with what you have at home. These Pumpkin Spice Latte Muffins mix simple ingredients in easy steps. You learned how to combine flours, spices, and pumpkin puree for a tasty treat. I shared tips for perfect muffins and ways to store them well. Remember, you can adjust flavors to your liking. Try nuts or different spices for variety. Whether you enjoy them warm or frozen, these muffins are sure to please. Happy baking!](https://goldendishy.com/wp-content/uploads/2025/06/a78bef71-23f4-423c-981c-d5caf094e886-768x768.webp)

![- 1 cup rolled oats - 1/2 cup natural peanut butter (smooth or crunchy) - 1/3 cup honey or maple syrup The main ingredients form the base of these bites. Rolled oats give them a hearty texture and fiber. Natural peanut butter adds creaminess and protein. Honey or maple syrup provides natural sweetness. - 1/2 cup ground flaxseed - 1/4 cup mini chocolate chips - 1/4 cup chia seeds These add-ins let you customize your bites. Ground flaxseed boosts nutrition and fiber. Mini chocolate chips make them fun and tasty. Chia seeds add crunch and healthy fats. - 1/2 teaspoon ground cinnamon - A pinch of salt Seasonings enhance the flavor. Ground cinnamon adds warmth and sweetness. A pinch of salt balances the flavors, making them pop. These ingredients come together to create a snack that is both simple and packed with energy. You can find the full recipe above to guide you through the steps of making these no-bake energy bites. - Measure 1 cup of rolled oats. - Mix 1/2 cup ground flaxseed and 1/4 cup chia seeds. - In a separate bowl, combine 1/2 cup natural peanut butter and 1/3 cup honey or maple syrup. Start by mixing the dry ingredients in a large bowl. This includes your oats, flaxseed, chia seeds, chocolate chips, cinnamon, and salt. Stir well to make sure everything is evenly spread. Then, in your other bowl, blend the peanut butter and honey until smooth. This makes a sticky base for your bites. Next, pour the wet mix into the dry mix. Use a spoon or your hands to combine them. You want to make sure everything is well mixed. The result should feel sticky but hold its shape when pressed. Now it's time to scoop out the mixture. Use clean hands to grab small amounts, about the size of a tablespoon. Roll these into balls and place them on a baking sheet lined with parchment paper. Once all your bites are shaped, pop the sheet in the fridge for at least 30 minutes. This helps them set, making them easier to eat. After chilling, your No-Bake Energy Bites are ready! For more details on the recipe, check the Full Recipe. You can easily swap ingredients for your No-Bake Energy Bites. If you want a vegan option, replace honey with maple syrup. It will still add sweetness and help bind the bites. For nut-free alternatives, use sun butter or soy nut butter instead of peanut butter. These options keep the texture while avoiding nuts. Getting the right texture is key. If your mixture feels too dry, add a bit more nut butter or syrup. This will help everything stick together. When rolling your bites, keep your hands slightly wet. This helps prevent sticking. Aim for even sizes to get uniform bites that chill well. To boost flavor, add spices like vanilla or nutmeg. These can add a nice kick and make them more exciting. You can also use flavored nut butters, like almond or cashew butter. This twist changes the taste while keeping the bites healthy. If you're looking for the complete instructions, check the Full Recipe. {{image_4}} You can mix flavors to make the bites even more fun. One favorite is chocolate peanut butter. Just add cocoa powder or more mini chocolate chips. This gives you a rich taste. Another great option is almond joy-inspired bites. Use almond butter, shredded coconut, and chopped almonds. This adds a tropical twist. Want to make these bites even better? Consider adding protein powder. It boosts protein without changing the taste. You can also mix in dried fruits like raisins or cranberries. These add natural sweetness and fiber. Pumpkin seeds or sunflower seeds work great too. They add crunch and healthy fats. You can create themed bites for different times of the year. In fall, try pumpkin spice bites. Just add pumpkin puree and pumpkin spice. For winter holidays, think about gingerbread energy bites. Mix in ginger, nutmeg, and a bit of molasses. These variations keep your snacks exciting and seasonal. For the full recipe, check out the No-Bake Energizing Peanut Butter Bliss Bites. To keep your energy bites fresh, store them in airtight containers. Glass or plastic containers work well. Make sure to seal them tight. This helps prevent them from drying out. For longer freshness, keep them in the fridge. They taste great cold and stay firm. You should eat your energy bites within one week. After that, they may lose flavor and texture. Signs of spoilage include a strange smell or dry spots. If they feel crumbly or hard, it’s time to toss them. You can freeze your energy bites for later. To freeze, place them in a single layer on a baking sheet. Once frozen, transfer them to a freezer bag. Make sure to remove as much air as possible. They can last up to three months in the freezer. To thaw, simply take out what you need. Leave them on the counter for about 30 minutes. You can also pop them in the fridge overnight. Now you have a quick snack ready anytime! No-Bake Energy Bites stay fresh for about one week in the fridge. Store them in an airtight container. This keeps them tasty and safe to eat. Yes, you can make No-Bake Energy Bites ahead of time! They are perfect for meal prep. Make a batch on the weekend, and enjoy them all week long. Common allergens include peanut butter and honey. Some people may be allergic to oats or chia seeds. Always check for allergies when sharing these bites with others. Absolutely! You can swap peanut butter for almond or cashew butter. Just make sure the nut butter is smooth enough to mix well. You can modify the recipe to suit your needs. Use maple syrup instead of honey for vegan bites. For nut-free options, try sunflower seed butter. Add dried fruits or seeds for extra flavor and nutrition. Check the [Full Recipe] for more ideas. In this blog post, we explored how to make tasty no-bake energy bites. We covered the main ingredients, like oats and peanut butter. You learned about optional add-ins and seasonings you can try. I shared step-by-step instructions to guide you through the process. Remember, you can customize your bites to fit your taste. Try different flavors, adjust for allergens, and store them properly. Enjoy creating these healthy snacks that fit your needs. Happy snacking!](https://goldendishy.com/wp-content/uploads/2025/06/48776490-fb92-4f64-9515-66f21e34c535-768x768.webp)


![- 1 cup strawberries, hulled and sliced - 1 cup blueberries - 1 ripe mango, peeled and diced - 1 cup pineapple, diced - 1 banana, sliced The fruit selection is key. I enjoy using a mix of colors and flavors. Strawberries bring sweetness, while blueberries add a nice pop of tartness. The mango gives a tropical vibe, and pineapple adds a refreshing taste. The banana adds creaminess and helps balance the flavors. - 1/4 cup honey - 2 tablespoons freshly squeezed lime juice - Zest of 1 lime The dressing pulls everything together. I use honey for natural sweetness. Fresh lime juice brightens the dish, making it taste fresh. The lime zest adds an extra layer of flavor that's hard to resist. - Fresh mint leaves, for garnish Mint leaves add a beautiful touch. They not only look good but also give a nice hint of freshness. If you want to impress guests, sprinkle some mint on top before serving. Make sure to check out the Full Recipe for a detailed guide on how to combine these ingredients into a delicious Honey Lime Fruit Salad. To start, gather your fruits. Grab one cup of hulled and sliced strawberries, one cup of blueberries, one ripe mango peeled and diced, one cup of diced pineapple, and one sliced banana. In a large mixing bowl, combine all these fruits. Gently mix them to spread the flavors evenly. This step helps each fruit shine in the salad. Next, we make the dressing. In a separate bowl, add a quarter cup of honey, two tablespoons of freshly squeezed lime juice, and the zest of one lime. I like to whisk these together until the mixture is smooth. This dressing adds a sweet and zesty kick to the salad. Now, it's time to bring it all together. Drizzle the honey-lime dressing over your prepared fruits. Toss everything gently with a spatula or large spoon. Make sure each piece of fruit gets coated in the dressing. Let the salad sit for about ten minutes at room temperature. This resting time lets the flavors blend beautifully. Enjoy your fresh and colorful Honey Lime Fruit Salad! You can find the Full Recipe for details on preparation. To make a great Honey Lime Fruit Salad, choose ripe, seasonal fruits. Fresh fruits provide the best taste and texture. Look for strawberries with bright red color. Blueberries should be plump and firm. Pick mangoes that give slightly when you press them. Pineapples should smell sweet at the base. Bananas need to be ripe but not brown. When you select these fruits, you ensure a delightful salad. Let your salad rest for at least 10 minutes before serving. This short wait helps the flavors blend. The honey lime dressing seeps into the fruits. This makes each bite burst with flavor. The longer the salad sits, the better it tastes. You can prepare this ahead of time for easy serving. Presentation matters when serving this salad. You can use individual bowls for a personal touch. A large platter works well for gatherings. Arrange the fruits in a colorful pattern. Add lime wedges on the side for extra zest. A few fresh mint leaves on top make it look appealing. Your guests will love the bright colors and fresh taste. For the full recipe, check the instructions above. {{image_4}} You can easily change this fruit salad to suit your taste. Adding fruits like kiwi or grapes can make it even better. Kiwi adds a bright green color and a tangy taste. Grapes are sweet, crunchy, and add variety. Just chop them up and toss them in. Mix and match to create your dream fruit salad! For a fun tropical vibe, try adding shredded coconut or a splash of coconut juice. Shredded coconut gives a chewy texture and a hint of sweetness. Coconut juice can make the dressing even more refreshing. This twist takes your fruit salad to a whole new level. You’ll feel like you’re on a sunny beach with every bite! If you want a vegan option, use agave syrup instead of honey. Agave syrup is a great sweetener that works well in this recipe. It blends nicely with lime juice and keeps the salad tasty. This swap still gives you that sweet flavor without using honey. Enjoy your fruit salad without any worries! For the full recipe, check out the [Full Recipe]. Keep the salad in an airtight container in the fridge. This helps keep it fresh. Avoid letting the salad sit out for too long. If you plan to serve it later, store it right away. Consume within 1-2 days for best freshness. The fruits will start to lose their crispness after that. If you notice any browning, it’s time to toss it out. Always check for changes in smell or texture. Freezing fruit salad can change its texture. If you want to freeze it, use firm fruits like pineapple and mango. Avoid bananas, as they turn mushy. To freeze, place the salad in a freezer-safe container. When ready to eat, let it thaw in the fridge. You can also add fresh honey-lime dressing after defrosting for extra flavor. Yes, you can use frozen fruits in this salad. Frozen fruits can be a great option when fresh fruits are out of season. They are often picked at their peak and frozen right away, keeping their nutrients intact. However, frozen fruits can release more water as they thaw. This might make the salad a bit watery. To avoid this, let the frozen fruits thaw and drain excess liquid before mixing them in. Fresh fruits offer a crunchier texture and vibrant look, so choose based on your preference. No, this salad is not vegan due to honey. Honey comes from bees, making it an animal product. If you want a vegan option, you can easily replace honey with agave syrup or maple syrup. Both alternatives provide sweetness and work well with lime. The taste will differ slightly, but the salad will still be delicious. Just make sure to use the same amount of the substitute for the best flavor balance. This fruit salad is packed with vitamins and minerals. Here are some key benefits of its ingredients: - Strawberries: High in vitamin C and antioxidants, good for your skin. - Blueberries: Great for brain health, rich in fiber, and low in calories. - Mango: Full of vitamins A and C, supports eye health and boosts immunity. - Pineapple: Contains bromelain, which helps digestion and reduces inflammation. - Banana: A good source of potassium, great for heart health. Overall, this salad provides a mix of nutrients that can boost energy and support overall health. It’s a tasty way to enjoy fruits every day. For the full recipe, check out the details above. This blog post shared how to make a delicious Honey Lime Fruit Salad. I covered the best ingredients, including fresh fruits and a zesty dressing. You learned how to prepare everything step-by-step and found tips for picking juicy fruits. I also shared fun ways to adapt the salad to your taste. Finally, remember to store it properly to keep it fresh. Enjoy this vibrant mix and feel good about your healthy choice!](https://goldendishy.com/wp-content/uploads/2025/07/db0dca5e-aa0e-4365-a3c2-c9e5564148e0-768x768.webp)