Are you ready to bake the perfect treat? These Blueberry Lemon Scones are fluffy and packed with flavor. With fresh or frozen blueberries and a zesty lemon twist, they are perfect for breakfast or a snack. In this post, I’ll guide you through every step, from measuring your ingredients to baking them to golden perfection. Let’s dive in and create something delicious!
Why I Love This Recipe
- Fresh and Zesty Flavor: The combination of blueberries and lemon creates a delightful, refreshing taste that brightens any morning.
- Easy to Make: This recipe is straightforward and requires minimal effort, making it perfect for both novice and experienced bakers.
- Perfect for Any Occasion: These scones are versatile enough to serve at brunch, as a snack, or for a cozy afternoon tea.
- Customizable: Feel free to experiment with different fruits or add-ins to suit your taste preferences and make them your own!
Ingredients
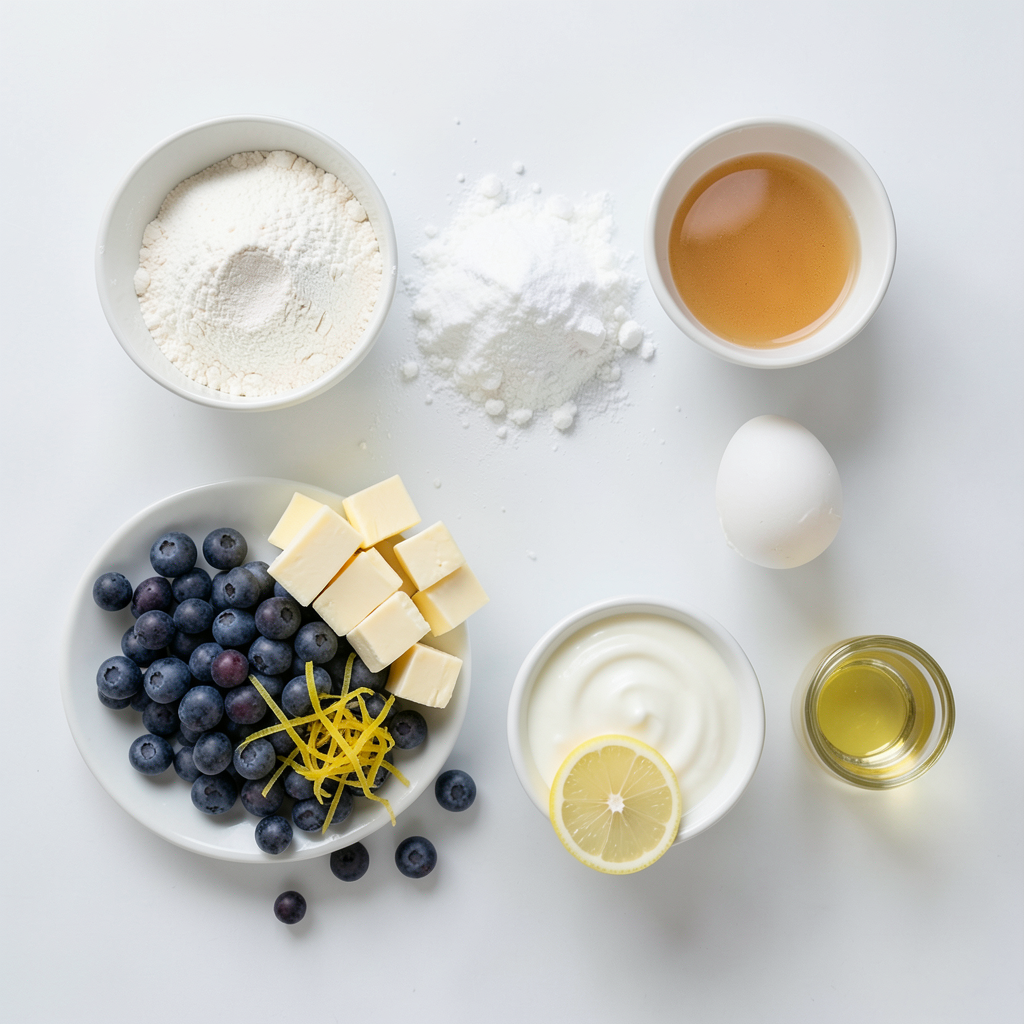
Required Ingredients
- 2 cups all-purpose flour
- 1/4 cup granulated sugar
- 1 tablespoon baking powder
- 1/2 teaspoon salt
- 1/2 cup cold unsalted butter, cut into small cubes
- 1/2 cup fresh or frozen blueberries
- Zest of 1 lemon
- 1/2 cup heavy cream
- 1 large egg
- 1 teaspoon pure vanilla extract
- 1 tablespoon fresh lemon juice
Measurement Details
When measuring your ingredients, use cups and tablespoons. Here are some tips for accuracy:
- Flour: Spoon flour into the measuring cup. Do not pack it down.
- Sugar: Granulated sugar should be leveled off with a straight edge.
- Baking Powder and Salt: Use a measuring spoon and level it off for precise amounts.
- Butter: Use a scale for an exact measurement, or cut it according to the markings on the wrapper.
- Cream and Liquids: Use a liquid measuring cup for accuracy.
These simple steps ensure your scones turn out fluffy and delicious every time.
Step-by-Step Instructions
Prepping and Mixing Dry Ingredients
Preheat your oven to 400°F (200°C). Line a baking sheet with parchment paper. This will stop the scones from sticking. In a big bowl, mix 2 cups of flour, 1/4 cup of sugar, 1 tablespoon of baking powder, and 1/2 teaspoon of salt. Whisk these dry items well until they are blended evenly.
Preparing the Dough
Cut 1/2 cup of cold unsalted butter into small cubes. Add this butter to your flour mix. Use your fingers or a pastry cutter to break the butter into the flour. You want it to look like small pebbles. Next, gently fold in 1/2 cup of fresh blueberries and the zest of 1 lemon. Be careful not to crush the blueberries while mixing.
Mixing Wet Ingredients and Combining
In a separate bowl, whisk together 1/2 cup of heavy cream, 1 large egg, 1 teaspoon of vanilla extract, and 1 tablespoon of fresh lemon juice. Make sure this mix is smooth. Pour these wet ingredients into your dry mixture. Stir slowly with a spatula until just combined. Don’t overmix; this keeps the scones light and fluffy.
Shaping and Baking
Turn the dough onto a floured surface. Knead it gently a few times until it forms a ball. Shape the dough into a circle about 1 inch thick. Use a sharp knife or bench scraper to cut the dough into 8 wedges. Place each wedge on your prepared baking sheet, leaving space between them. Bake for 15 to 18 minutes. The scones should be golden on top. To check, insert a toothpick in the center; it should come out clean.
Tips & Tricks
Achieving the Perfect Texture
To get light and fluffy scones, don’t overmix the dough. Overmixing can make them tough. Mix just until the ingredients come together. This keeps the scones soft.
Using cold butter is key. Cold butter creates steam while baking. This steam helps make the scones rise. Cut the butter into small cubes and keep it chilled until use. This will help you achieve that desired texture.
Enhancing Flavor
You can add more flavors to your scones. Try adding a pinch of cinnamon or nutmeg for warmth. A handful of chopped nuts adds a nice crunch. You can also swap blueberries for other fruits like raspberries or cranberries.
Adjust the sweetness by adding more or less sugar. If you like a sweeter scone, add an extra tablespoon of sugar. For less sweetness, reduce it slightly. Always taste your dough before baking to get it just right.
Baking Tips
Set your oven to 400°F (200°C) for the best results. This high heat helps the scones rise quickly. Bake them for 15 to 18 minutes. Keep an eye on them during the last few minutes.
To check if they’re done, insert a toothpick into the center. If it comes out clean, they are ready. The tops should be golden brown and look puffed. Enjoy the aroma as they bake!
Pro Tips
- Use Cold Ingredients: Ensure your butter and cream are cold to achieve a flaky texture. This helps create steam in the oven, which makes the scones rise beautifully.
- Don’t Overmix: Mix the dough just until combined. Overmixing can lead to tough scones instead of the desired light and crumbly texture.
- Experiment with Flavors: Feel free to add other ingredients like chopped nuts, chocolate chips, or different berries to customize your scones to your taste.
- Store Properly: Keep leftover scones in an airtight container at room temperature for up to 2 days or freeze them for longer storage. Reheat in the oven for best results.
Variations
Substitutions
If you want to change things up, you can use gluten-free flour. Options like almond flour or a pre-made gluten-free blend work well. Just remember, gluten-free flour can absorb more liquid. You may need to adjust the amount of cream or add an egg for moisture.
For dairy-free options, use coconut cream instead of heavy cream. You can swap out the butter for a vegan alternative, like coconut oil or vegan butter. These changes keep your scones tasty and suitable for different diets.
Flavor Variations
Feel free to experiment with different fruits! Raspberries add a tart bite, while cranberries bring a sweet-tart flavor. You could even mix in some chopped strawberries for a summertime treat. The key is to keep the fruit fresh or frozen for the best texture.
Zest from other citrus fruits can also add a fun twist. Try orange or lime zest for a different flavor profile. Each fruit will bring a new taste, making your scones unique every time you bake.
Serving Suggestions
These scones pair perfectly with tea or coffee. The bright lemon flavor complements the rich notes of your drink. Serve them warm for a cozy experience that everyone will love.
For spreads, consider clotted cream, butter, or a fruit jam. A light drizzle of honey or maple syrup can enhance the sweetness, too. Get creative and enjoy these tasty scones with your favorite toppings!
Storage Info
Storing Leftover Scones
To keep your blueberry lemon scones fresh, place them in an airtight container. This helps prevent them from drying out. Make sure to let them cool completely before storing. If you do not have an airtight container, a zip-top bag works well too. Just remove as much air as you can before sealing. Store them at room temperature for up to three days. If you want them to last longer, consider refrigerating them.
Freezing Scones
You can freeze scones, both uncooked and baked. To freeze uncooked scones, place the cut wedges on a baking sheet. Freeze them for about an hour until firm, then transfer them to a zip-top bag. They can stay frozen for up to three months. When you're ready to bake, there's no need to thaw them. Just add a few extra minutes to the baking time.
For baked scones, let them cool completely before freezing. Wrap each scone in plastic wrap, then place them in a zip-top bag. To reheat, simply thaw them in the fridge overnight. Warm them in the oven at 350°F for about 10 minutes. This brings back their fresh-baked taste and texture.
FAQs
Can I use frozen blueberries for this recipe?
Yes, you can use frozen blueberries. They work well in this recipe. When using frozen berries, do not thaw them first. Add them straight to the dough. This helps keep the scones light and fluffy. If you mash the berries, they can turn the dough purple. For best results, fold them in gently to keep them whole.
How do I know when the scones are done baking?
The scones are done when they are golden brown on top. You can also poke one with a toothpick. If it comes out clean, the scones are ready. Look for a light, fluffy texture. They should feel firm to the touch. If they seem soft or doughy, they need more time.
Can I make these scones ahead of time?
Yes, you can prepare these scones ahead of time. You can make the dough and shape it into wedges. Then, cover the scones and place them in the fridge. They can sit in the fridge for up to 24 hours. When you are ready to bake, just pop them in the oven. If you want to freeze them, wrap them tightly. Bake from frozen, adding a few extra minutes to the time.
You learned about the key ingredients and their roles in making delicious scones. You now know how to mix dry and wet ingredients for the best dough. I shared tips for texture, flavor, and baking success. You also discovered how to store and adapt these scones.
With this knowledge, you can create tasty treats for any occasion. Enjoy baking and experimenting with flavors! Your scones can become a favorite for friends and family.