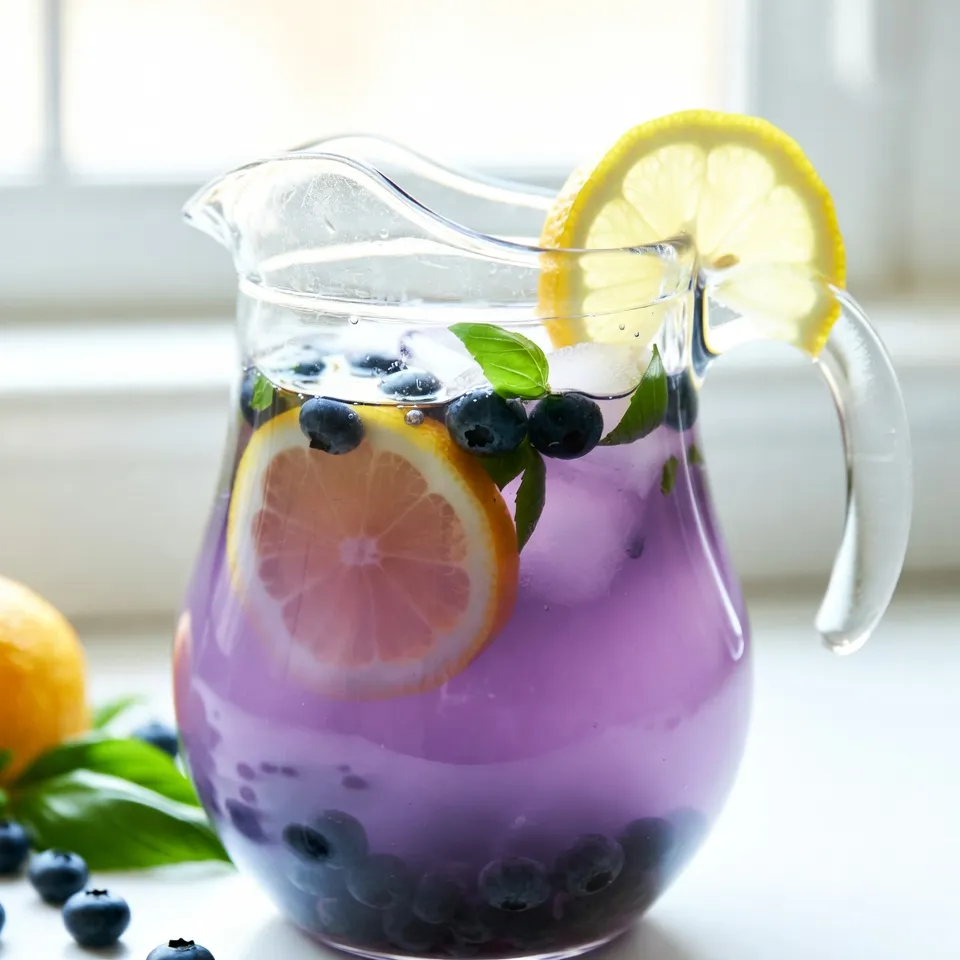
Looking for a drink that screams summer? Try my Blueberry Basil Lemonade! This refreshing blend packs a tasty punch with fresh blueberries, aromatic basil, and zesty lemon. It’s easy to make and perfect for hot days, BBQs, or relaxing on the patio. Join me as we explore simple steps to create this delightful drink. Your taste buds will thank you! Ready to sip your way to summer bliss? Let’s dive in!
Why I Love This Recipe
- Refreshing Flavor Combination: The blend of sweet blueberries, aromatic basil, and zesty lemon creates a unique and refreshing taste that’s perfect for hot days.
- Simple to Make: This recipe uses easy-to-follow steps that make it accessible for cooks of all skill levels, allowing anyone to enjoy a homemade beverage.
- Perfect for Gatherings: Whether it’s a picnic, barbecue, or family gathering, this lemonade is a crowd-pleaser and adds a touch of sophistication to any occasion.
- Customizable Sweetness: You can easily adjust the sweetness of this lemonade to suit your personal taste, making it a versatile drink for everyone.
Ingredients
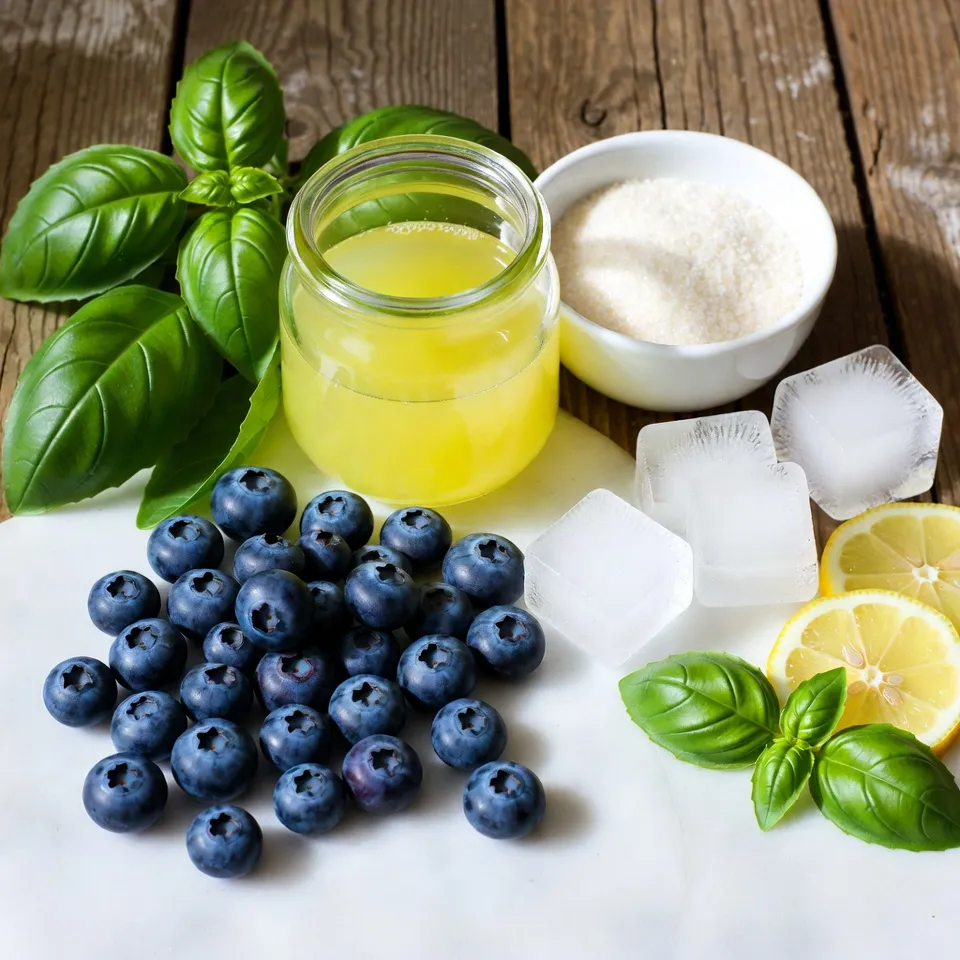
Fresh Ingredients
– 1 cup fresh blueberries
– 1 cup fresh basil leaves
– 1 cup freshly squeezed lemon juice (about 4-5 lemons)
Fresh ingredients are key to great taste. Fresh blueberries give a sweet and tart flavor. They also add a pretty color. Fresh basil leaves bring an herby note that pairs well with the lemon. Use only ripe, juicy lemons for the best juice. They should feel heavy and firm.
Pantry Staples
– 1 cup granulated sugar
– 4 cups water, divided
– Ice cubes
Granulated sugar sweetens the drink. You can adjust the amount to fit your taste. Water helps mix all the flavors and makes the lemonade light and refreshing. Ice cubes are a must for that cool, crisp sip on hot days.
Garnishing
– Lemon slices
– Basil sprigs
Garnishing adds a fun touch. Lemon slices give a pop of color and extra flavor. Basil sprigs look great and smell amazing. Together, they make your drink look fancy and inviting.
Step-by-Step Instructions
Berry Preparation
1. Start by taking 1 cup of fresh blueberries. Place them in a medium saucepan.
2. Add 1 cup of water and 1 cup of granulated sugar to the pan.
3. Put the saucepan over medium heat. Stir the mix gently.
4. Bring it to a gentle simmer. This should take about 5-7 minutes.
5. Keep stirring until the sugar dissolves and the blueberries burst.
6. Once done, take the pan off the heat and let it cool for a few minutes.
7. Next, strain the blueberry mix using a fine mesh sieve.
8. Press the solids with a spoon. This helps to extract more juice.
9. Discard the solid bits and keep your vibrant blueberry syrup aside.
Basil Preparation
1. Take 1 cup of fresh basil leaves.
2. Add these leaves to a blender with 1 cup of water.
3. Blend on high until the basil is finely chopped. It should look smooth.
4. Strain the basil mix through a fine mesh sieve.
5. Discard any solids left in the sieve. You want just the liquid.
Combining Ingredients
1. In a large pitcher, combine the freshly squeezed juice from about 4-5 lemons.
2. Add the blueberry syrup and the basil liquid to the pitcher.
3. Pour in the remaining 3 cups of water.
4. Stir everything well to mix the flavors.
5. Taste the lemonade. If it needs more sweetness, add more sugar.
6. If it is too sweet, add more water to dilute it.
7. Cover the pitcher and place it in the fridge for at least 1 hour. This helps the flavors blend and chill.
8. To serve, fill glasses with ice cubes.
9. Pour the blueberry basil lemonade over the ice.
10. Garnish each glass with a lemon slice and a sprig of fresh basil. Enjoy your refreshing drink!
Tips & Tricks
How to Perfect Your Lemonade
To make a great blueberry basil lemonade, sweetness is key. Start with one cup of sugar, but taste it. You might want to add more or less. If it’s too sweet, add more water.
Cooling the drink is also important. After mixing, chill it in the fridge for at least an hour. This helps the flavors blend. Serve it cold over ice for a refreshing sip.
Presentation Tips
Serving your lemonade can be fun! Use clear glasses to show off the bright color. Fill each glass with ice before pouring in the lemonade.
For garnishing, add lemon slices on the rim. A sprig of fresh basil on top makes it look fancy. You can also float some blueberries in the glass for extra flair. These little touches make your drink pop!
Pro Tips
- Choose Ripe Blueberries: For the best flavor, select ripe blueberries that are plump and juicy. They will provide a natural sweetness and vibrant color to your lemonade.
- Fresh Basil is Key: Use fresh basil leaves rather than dried for a more aromatic and flavorful infusion. The fresh leaves will enhance the overall taste of the lemonade.
- Adjust Sweetness to Taste: Depending on the tartness of your lemons and the sweetness of the blueberries, you may want to adjust the sugar. Start with less and add more as needed to achieve your desired sweetness.
- Chill Before Serving: Letting the lemonade chill for at least an hour allows the flavors to meld beautifully. Serve it over ice for a refreshing drink on a hot day!
Variations
Flavor Combinations
You can make this drink even better by adding mint or other herbs. Mint brings a fresh twist. It pairs well with blueberries and basil. Simply add a handful of mint leaves when simmering the blueberries. You can also try other herbs like thyme or rosemary for unique flavors.
Alternative fruits are another option. You can mix in strawberries, raspberries, or even peaches. Just blend them with the blueberries for a fruity punch. Each fruit adds its own taste and color, making your drink more exciting.
Sweetness Alternatives
If you want a healthier drink, consider using natural sweeteners. Honey or agave syrup can replace granulated sugar. They add sweetness without the refined sugar. Just remember to adjust the amount, as they might be sweeter.
For sugar-free options, try using stevia or monk fruit sweetener. These alternatives work well without adding calories. Make sure to taste as you go. This way, you can find the perfect balance for your lemonade.
Storage Info
Refrigeration
For the best taste, chill your blueberry basil lemonade in the fridge. Use a pitcher with a lid to keep it fresh. The lemonade will stay good in the fridge for about 3 to 5 days. Always stir before serving, as some ingredients may settle.
Freezing Options
You can freeze blueberry basil lemonade for later use. Pour the lemonade into ice cube trays or freezer-safe containers. Leave some space at the top, as the liquid will expand when frozen. To serve, let it thaw in the fridge overnight or at room temperature for a few hours. If using ice cubes, blend them into a slushy drink for a fun twist.
FAQs
Common Questions
Can I use frozen blueberries?
Yes, you can use frozen blueberries for this lemonade. They work well and save time. Just remember to thaw them slightly before cooking. This helps release their juices better.
How do I adjust the recipe for less sugar?
To reduce sugar, use less granulated sugar or try a natural sweetener. Start with half a cup and taste it. You can always add more if needed.
Health Benefits
Nutritional advantages of ingredients
Blueberries are rich in vitamins and antioxidants. They help with heart health and may improve brain function. Basil adds vitamins A and K, which are great for your skin. Lemons are packed with vitamin C, boosting your immune system.
Hydrating properties of lemonade
Lemonade is refreshing and hydrating. The combination of water, lemon juice, and fruits helps keep you cool in summer. Staying hydrated is vital for overall health and energy.
Serving Suggestions
Pairing with snacks or meals
Blueberry basil lemonade pairs well with light snacks. Serve it with fresh fruit, cheese, or salads. It also complements grilled chicken or fish for a summer meal.
Use in cocktails or mocktails
You can turn this lemonade into a fun cocktail. Add vodka or gin for a refreshing drink. For a mocktail, mix in sparkling water for bubbles without alcohol. Enjoy the flavors!
This blog post shared how to make a tasty blueberry basil lemonade. We explored fresh and pantry ingredients, detailed step-by-step instructions, and offered tips for perfect results. Plus, I provided variations and storage options for your drink.
In the end, this refreshing beverage boosts flavor, creativity, and health. Enjoy it on sunny days, or pair it with your favorite meals. You can impress guests and savor each sip. Try it toda