Looking for a delicious and easy plant-based meal? Baked Teriyaki Tofu is just that! You can enjoy a crispy, savory dish bursting with flavor. In this simple recipe, I’ll walk you through each step, from prepping the tofu to making a tasty teriyaki sauce. Plus, you’ll find tips for a perfect bake, plus variations to suit every diet. Let’s dive in and bring this tasty dish to your table!
Ingredients
Main Ingredients for Baked Teriyaki Tofu
For this tasty dish, you need the following main ingredients:
– 1 block (15 oz) firm tofu, pressed and cut into 1-inch cubes
– ½ cup soy sauce (or tamari for a gluten-free option)
– ¼ cup pure maple syrup
– 2 tablespoons rice vinegar
– 2 tablespoons sesame oil
– 3 cloves garlic, finely minced
– 1 tablespoon freshly grated ginger
– 2 tablespoons cornstarch
– 1 tablespoon sesame seeds (for garnish)
– 3 green onions, thinly sliced (for garnish)
These ingredients create a savory sauce that brings the tofu to life. Firm tofu works best because it absorbs flavors well and holds its shape during baking. The soy sauce adds saltiness, while maple syrup gives a hint of sweetness. Garlic and ginger provide warmth and depth to the dish.
Optional Ingredients to Enhance Flavor
You can add a few optional ingredients to boost the flavor even more:
– 1 tablespoon sriracha or chili paste for heat
– 1 tablespoon mirin for extra sweetness
– 1 teaspoon sesame oil for richer flavor
These options allow you to customize the dish to your taste. If you like a little heat, sriracha will spice things up. Mirin adds a sweet and tangy note that pairs well with the other flavors.
Substitutes for Dietary Needs
If you have dietary restrictions, here are some great substitutes:
– Use tempeh instead of tofu for more protein and a firmer texture
– Coconut aminos can replace soy sauce for a soy-free option
– Use agave syrup instead of maple syrup for a different sweetness
These substitutes keep the dish delicious while catering to different diets. Tempeh offers a nutty flavor and is packed with protein. Coconut aminos give a similar taste without soy. Agave syrup is a simple way to adjust sweetness levels.
Step-by-Step Instructions
Prepping the Tofu
First, you need to prepare the tofu. Start with one block of firm tofu. Press it between two plates to remove excess water. This step is key for better texture. After pressing, cut the tofu into 1-inch cubes. This size helps it cook evenly.
Making the Teriyaki Sauce
Next, let’s make the teriyaki sauce. In a medium bowl, mix together the following ingredients:
– ½ cup soy sauce (or tamari)
– ¼ cup pure maple syrup
– 2 tablespoons rice vinegar
– 2 tablespoons sesame oil
– 3 cloves garlic, finely minced
– 1 tablespoon freshly grated ginger
Whisk these ingredients until smooth. This sauce adds rich flavor to the tofu.
Baking and Finishing Touches
Now, it’s time to bake the tofu. Preheat your oven to 400°F (200°C). Line a baking sheet with parchment paper. This prevents sticking. Place the cubed tofu in a bowl and sprinkle with 2 tablespoons of cornstarch. Gently toss until each piece is coated. Spread the tofu on the baking sheet in a single layer. Drizzle half of the teriyaki sauce over the tofu.
Bake for 25-30 minutes. Halfway through, turn the tofu cubes for even cooking. After baking, pour the remaining teriyaki sauce over the tofu. Toss gently to coat. Return the tofu to the oven for another 5-10 minutes. This step caramelizes the sauce, making it sticky and flavorful.
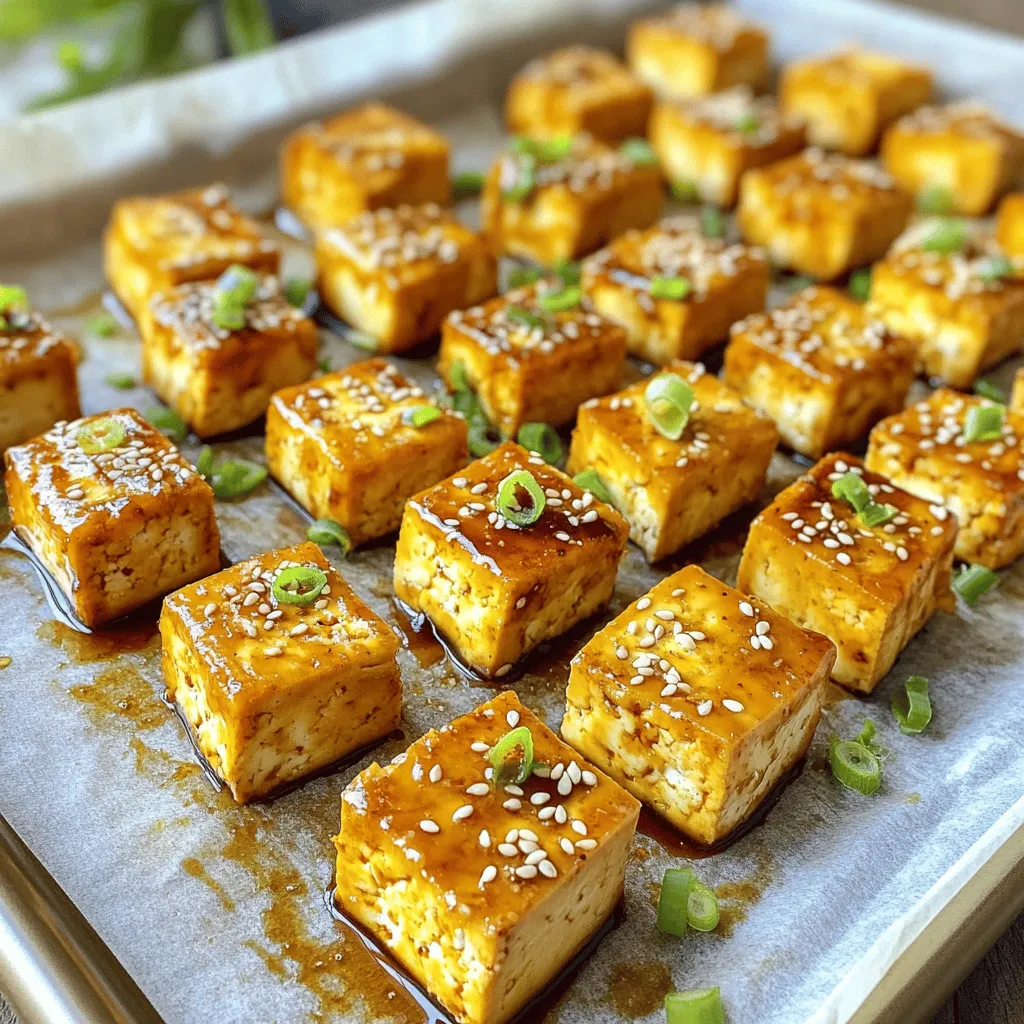
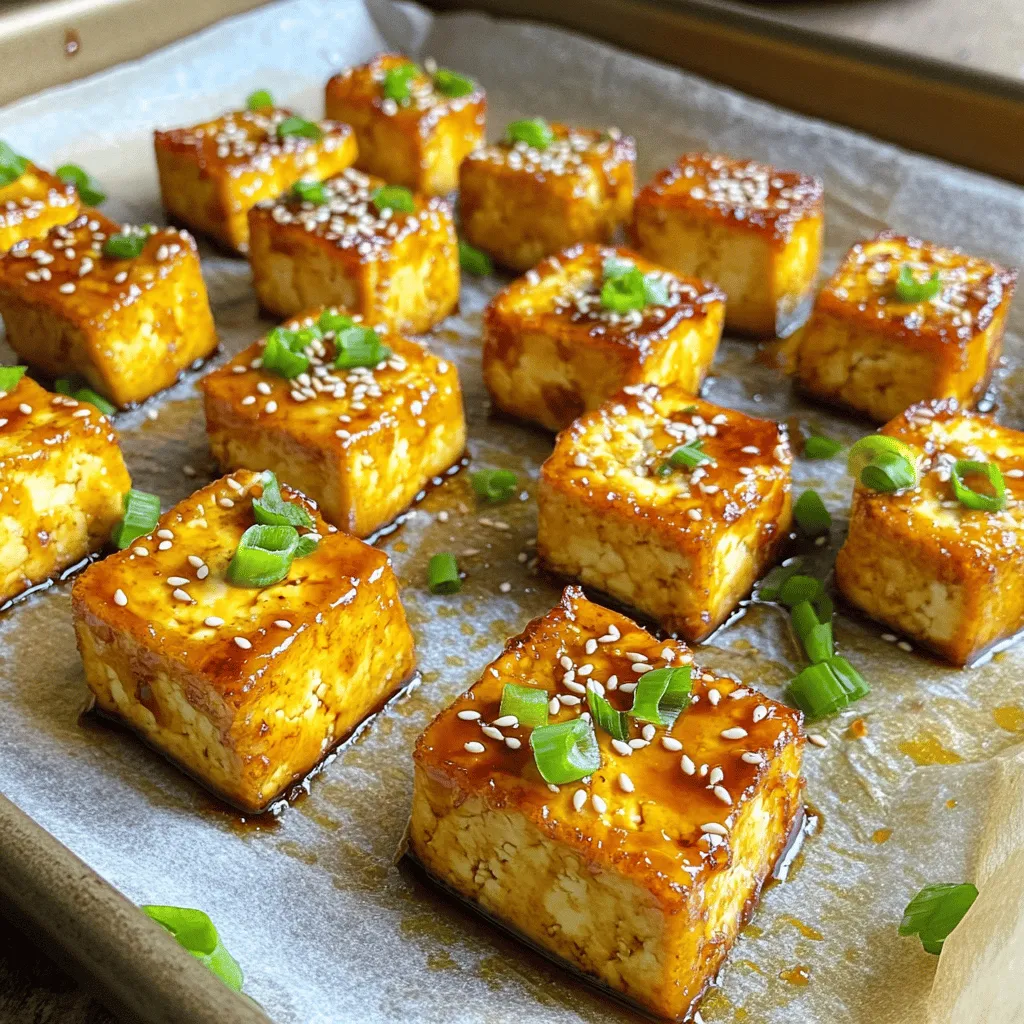
Once baked, remove the tofu from the oven. Finish by sprinkling sesame seeds and sliced green onions on top. This adds color and crunch. Enjoy your tasty baked teriyaki tofu!
Tips & Tricks
Achieving the Perfect Crispiness
To get crispy tofu, press it well. Remove as much moisture as you can. After cutting it, coat each cube in cornstarch. This step is key for that crunch. Bake at 400°F for 25-30 minutes. Flip the tofu halfway through for even cooking. The golden brown color means it is ready.
Best Practices for Flavor Enhancement
Use fresh garlic and ginger for the best taste. These ingredients boost the teriyaki sauce’s flavor. Let your tofu soak in the sauce for a bit. This helps it absorb all those yummy flavors. Drizzle some sauce just before the end of baking. It adds a sticky glaze that is hard to resist.
Common Mistakes to Avoid
Don’t skip pressing the tofu. It will turn out soggy if you do. Avoid using too much sauce too soon. This can make your tofu mushy instead of crispy. Make sure to coat each piece evenly with cornstarch. If you don’t, some cubes may not get crispy.
Variations
Adding Vegetables to the Recipe
You can make your baked teriyaki tofu even more colorful and tasty by adding vegetables. Carrots, bell peppers, and broccoli work well. Just chop them into bite-sized pieces. Toss them with the tofu before baking. This step adds nutrients and makes the dish pop with color.
Protein Alternatives for Different Diets
If you want to switch up the protein, try using tempeh or seitan instead of tofu. Both options absorb flavors well and have great textures. Tempeh is nutty and has a firm bite. Seitan mimics meat and is very chewy. These choices keep the meal exciting and cater to different tastes.
Gluten-Free and Vegan Modifications
To keep this dish gluten-free, use tamari instead of soy sauce. Tamari is a great choice and tastes the same. For a nut-free option, skip the sesame oil and use olive oil instead. This way, you can enjoy the dish while sticking to your dietary needs.
Storage Info
How to Properly Store Leftovers
To keep your baked teriyaki tofu fresh, store it in an airtight container. Let the tofu cool down first. It can last in the fridge for up to four days. If you notice any moisture, use a paper towel to absorb it before sealing the container. This helps keep the tofu from getting soggy.
Reheating Tips for Best Results
When you are ready to enjoy leftovers, the best way to reheat the tofu is in the oven. Preheat your oven to 350°F (175°C). Spread the tofu on a baking sheet and cover it with foil. Heat for about 10-15 minutes. This method helps restore some crispiness. You can also microwave it for quicker results. Just remember to cover it with a damp paper towel to keep it moist.
Freezing Baked Teriyaki Tofu
Yes, you can freeze baked teriyaki tofu! Start by letting it cool completely. Place the tofu in a freezer bag, removing as much air as possible. It can stay frozen for up to three months. When you’re ready to eat, thaw it in the fridge overnight. Then, reheat as mentioned above. Enjoy your flavorful tofu anytime!
FAQs
How do I know when the tofu is done baking?
Tofu is done when it turns golden brown and crispy. You should bake it for 25 to 30 minutes. Halfway through, turn the tofu cubes for even cooking. It should feel firm to the touch and have a nice texture. Once you see a beautiful caramel color, it’s ready to enjoy!
Can I use other sauces instead of teriyaki?
Yes, you can! Try soy sauce with honey or maple syrup. A sweet chili sauce works well too. For a spicy kick, use sriracha mixed with soy. Each sauce will give a new flavor twist to your baked tofu. Feel free to explore and find what you love!
What can I serve with baked teriyaki tofu?
Baked teriyaki tofu pairs well with steamed rice or quinoa. You can also serve it with stir-fried vegetables for a colorful plate. A fresh salad adds crunch and balance. For a complete meal, add some pickled veggies on the side. This dish is versatile and fits many sides!
In this guide, we explored how to make baked teriyaki tofu. We discussed key ingredients, step-by-step prep, and tips for crispiness. You learned about tasty variations and storage tips.
Always remember, cooking is fun and easy. With the right ingredients and methods, you can make delicious meals. Enjoy your kitchen journey with baked teriyaki tofu. Happy cooking!


