Looking for a delicious and healthy snack? You’re in the right place! Baked sweet potato fries are crispy, flavorful, and easy to make. In this article, I’ll show you exactly how to prepare these tasty treats from scratch. You’ll learn about the best ingredients, step-by-step instructions, and helpful tips for that perfect crunch. Let’s get started on your journey to the ultimate sweet potato fries!
Ingredients
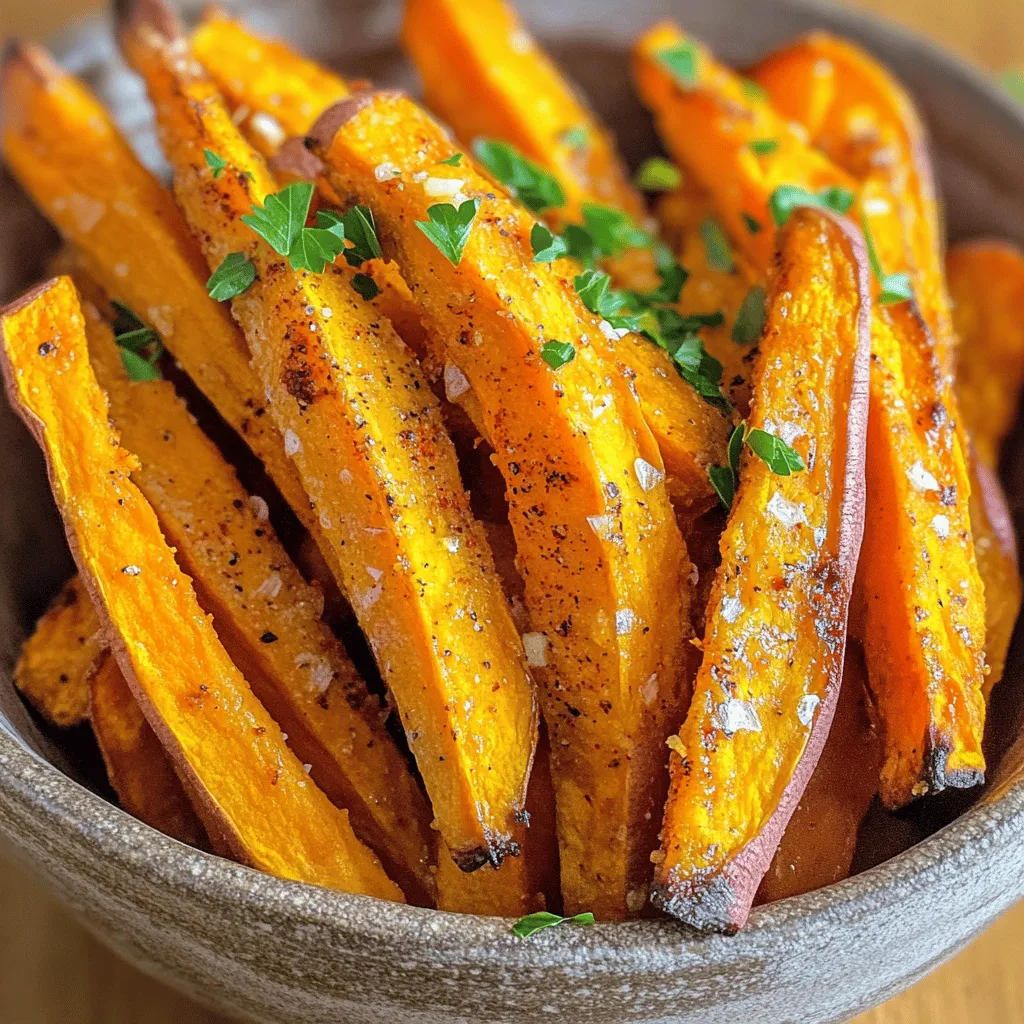
To make crispy baked sweet potato fries, gather these simple ingredients.
– 2 large sweet potatoes, peeled and cut into thin, even fries
– 2 tablespoons extra-virgin olive oil
– 1 teaspoon smoked paprika
– 1 teaspoon garlic powder
– ½ teaspoon cayenne pepper (optional, for a spicy kick)
– Sea salt and freshly ground black pepper to taste
– Fresh parsley, finely chopped (for garnish)
Sweet Potatoes and Their Preparation
Sweet potatoes are the star of this dish. They offer a natural sweetness and a vibrant color. Start by peeling them. Then, cut them into thin, even fries. This ensures they cook evenly and get crispy.
Seasonings and Oils Used
Extra-virgin olive oil helps the fries crisp up nicely. The oil also carries the flavors from the spices. Smoked paprika adds a unique taste, while garlic powder gives depth. If you like heat, add cayenne pepper for a kick. Salt and black pepper enhance all the flavors.
Optional Garnishes and Dips
For a fresh touch, garnish with finely chopped parsley. You can also serve these fries with a dip. Classic ketchup works well, but a tangy aioli can elevate the flavor even more. Enjoy experimenting with your favorite dips!
Step-by-Step Instructions
Preparation Steps
1. Preheat your oven to 425°F (220°C). A hot oven helps the fries get crispy.
2. In a large bowl, add 2 large sweet potatoes, peeled and cut into thin fries.
3. Drizzle 2 tablespoons of extra-virgin olive oil over the fries. Toss them gently to coat.
4. In a small bowl, mix together 1 teaspoon smoked paprika, 1 teaspoon garlic powder, and ½ teaspoon cayenne pepper (if you want heat). Add sea salt and black pepper to taste. Stir well to blend the spices.
5. Sprinkle the spice mix over the sweet potatoes. Toss again until all the fries are coated.
Baking Instructions
1. Line a baking sheet with parchment paper. This helps the fries not stick.
2. Spread the fries in a single layer on the sheet. Make sure they have space to cook evenly.
3. Bake for 20-25 minutes. Halfway through, flip the fries with a spatula. This helps them brown on both sides.
4. Watch closely in the last few minutes. You want them golden brown and crispy.
5. When done, remove the fries. Garnish with fresh parsley for color.
Enjoy your crispy baked sweet potato fries hot, with your favorite dip!
Tips & Tricks
Achieving Crispiness
To get perfect crispy sweet potato fries, cutting matters. Make sure the fries are thin and even. This helps them cook uniformly. If the fries are too thick, they may turn out soft.
Using parchment paper is a game-changer. It keeps the fries from sticking, helps them brown better, and makes cleanup easy. Spread the fries out on the paper without crowding. Air needs to flow around them for that crunch.
Temperature and time are key too. Preheat your oven well to 425°F (220°C). Bake the fries for 20-25 minutes. Flip them halfway through to brown both sides. Check them closely in the last few minutes. You want golden brown and crispy, not burnt.
Flavor Enhancements
Now, let’s talk flavor. You can try many seasonings to spice things up. Besides smoked paprika, consider adding cumin or even cinnamon for a twist. Mixing flavors can enhance the fries’ taste.
Combining herbs and spices works wonders. Try a mix of rosemary and garlic powder, or even add fresh herbs after baking. They add depth and freshness.
Cooking techniques can also boost flavor. For example, toss the fries with garlic while baking. You could add lemon juice or zest for brightness. These simple tweaks make your fries stand out.Enjoy creating this tasty snack!

Variations
Flavor Twist Ideas
You can easily give baked sweet potato fries a fun twist. Here are some ideas:
– Spicy sweet potato fries: Add more cayenne pepper or use chili powder. This adds heat and makes them exciting.
– Sweet and savory combinations: Try adding a sprinkle of cinnamon or brown sugar. This creates a sweet balance with the savory spices.
– Different dipping sauces to pair with: Experiment with dips like chipotle mayo, ranch, or even a homemade garlic aioli. Each dip can change the whole flavor experience.
Dietary Alternatives
If you have dietary needs, there are easy options:
– Gluten-free adjustments: This recipe is naturally gluten-free. Just ensure your spices are also gluten-free.
– Vegetarian and vegan options: All ingredients are plant-based. You can enjoy this dish with no worries.
– Low-calorie alternatives: You can reduce the oil to just one tablespoon. This keeps the fries tasty while cutting calories.
By using these variations, you can create a snack that fits your taste and dietary needs.
Storage Info
Best Practices for Storage
How do you store leftovers?
After enjoying your baked sweet potato fries, let them cool first. Place them in an airtight container. This keeps them fresh and prevents sogginess. Store the container in the fridge.
How can you reheat fries for crispiness?
To reheat, use your oven. Preheat it to 400°F (200°C). Spread the fries on a baking sheet. Bake them for about 10 minutes. This helps regain their crunch. You can also use an air fryer if you have one.
What about freezing instructions for longer storage?
You can freeze sweet potato fries! First, let them cool completely. Then, spread them on a baking sheet and freeze for an hour. Once frozen, transfer them to a freezer bag. Seal it tightly and label it. They can last up to three months.
Shelf Life
How long do baked sweet potato fries last in the fridge?
Baked sweet potato fries can last about 3-5 days in the fridge. Make sure they are in an airtight container.
What are the signs of spoilage?
If the fries smell bad or look discolored, it’s time to toss them. A slimy texture is also a bad sign. Always trust your senses!
FAQs
Common Questions
What are the nutritional benefits of sweet potatoes?
Sweet potatoes are packed with vitamins and minerals. They are high in fiber, which helps digestion. They also contain beta-carotene, which supports eye health. Plus, they have antioxidants that fight free radicals in the body. This makes sweet potatoes a healthy choice for snacks.
Can I make these fries in an air fryer?
Yes, you can use an air fryer for these fries! Set the air fryer to 400°F (200°C). Cook the fries in a single layer for about 15-20 minutes. Shake the basket halfway through for even cooking. You’ll get crispy fries with less oil!
How do I prevent my fries from being soggy?
To avoid soggy fries, cut them evenly and thin. This helps them cook evenly. Also, make sure to coat them lightly in oil and spices. Spread them out on the baking sheet to allow air to circulate. Flip them halfway through baking for the best texture.
Additional Inquiries
What’s the best way to cut sweet potatoes for fries?
The best way to cut sweet potatoes is to first peel them. Then, slice them into 1/4-inch thick sticks. Try to keep the size consistent for even cooking. Use a sharp knife for clean cuts, and be careful while cutting.
Can I use other types of potatoes?
Yes, you can use other potatoes like russets or Yukon Golds. They will taste different but can still become crispy fries. Keep in mind that cooking times may vary, so check for doneness.
How to serve baked sweet potato fries?
Serve your baked sweet potato fries hot. They pair well with dips like ketchup, aioli, or ranch dressing. You can also sprinkle some fresh herbs on top for added flavor. Enjoy them as a snack or a side dish with your meal!
In this post, we explored making delicious baked sweet potato fries. We covered the ingredients, preparation steps, and baking instructions. Tips for crispiness and flavor enhancements help you elevate your fries. We also shared variations, storage practices, and answers to common questions.
Embrace your creativity in the kitchen with these recipes. Enjoy satisfying, healthy fries that everyone will love.


