Baked Parmesan Tomatoes Tasty and Simple Recipe

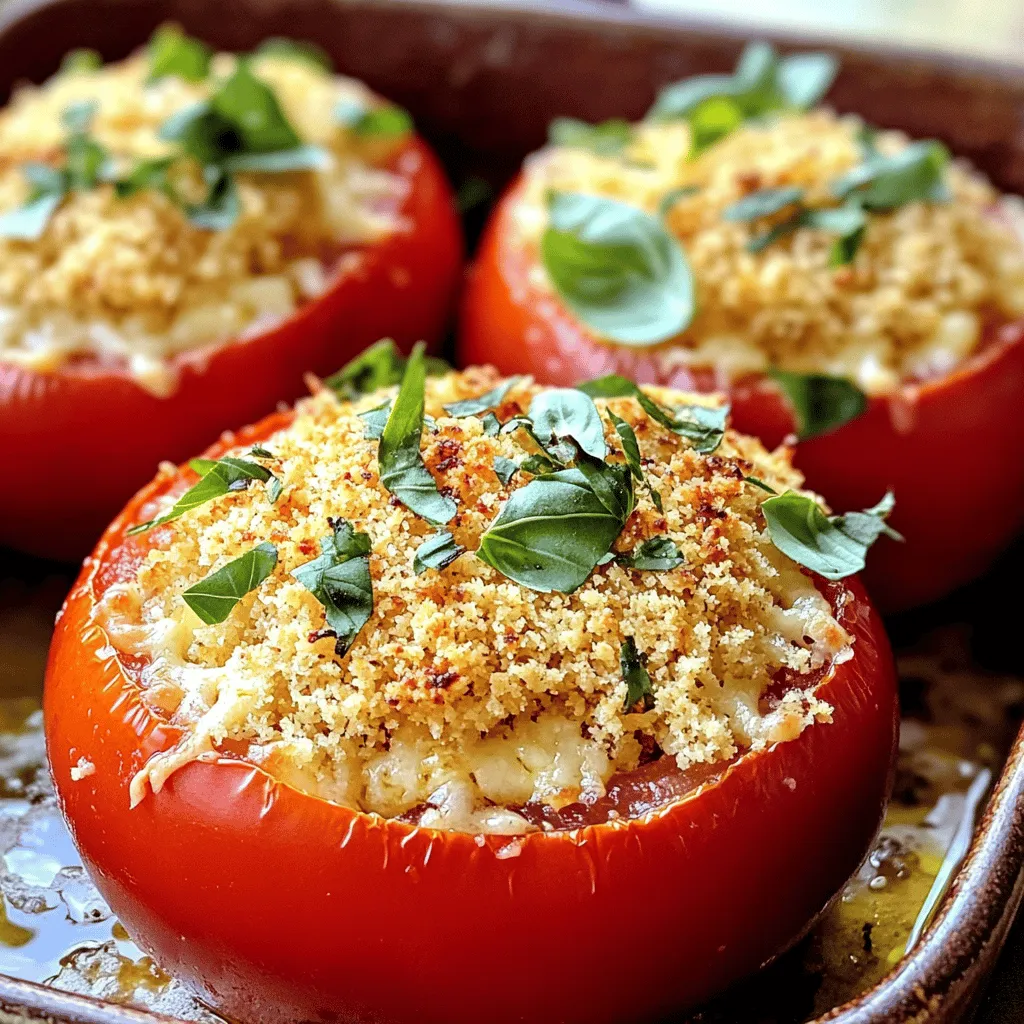
If you’re looking for a quick and tasty dish, Baked Parmesan Tomatoes are perfect for you. This simple recipe bursts with flavor and takes just minutes to prepare. You only need a few ingredients to make this cheesy delight. In this post, I’ll guide you through the easy steps to create this flavorful side or snack. Let’s dive into this delicious adventure together!
Ingredients
List of Ingredients
For Baked Parmesan Tomatoes, gather these simple ingredients:
– 4 large ripe tomatoes
– 1 cup grated Parmesan cheese
– 1/2 cup breadcrumbs (panko recommended for extra crunch)
– 3 cloves garlic, minced
– 2 tablespoons fresh basil, finely chopped (or 1 tablespoon dried basil)
– 1 teaspoon dried oregano
– 1/4 teaspoon red pepper flakes (optional, for a spicy kick)
– 2 tablespoons olive oil, plus extra for drizzling
– Salt and pepper, to taste
Suggested Tools & Equipment
You will need a few basic tools:
– A sharp knife for slicing tomatoes
– A spoon for scooping out the insides
– A mixing bowl for combining the filling
– A baking dish for the stuffed tomatoes
– An oven to bake the dish
Nutritional Information
Each serving of Baked Parmesan Tomatoes is rich in flavor and nutrients. Here’s a quick look at what you get per serving:
– Calories: Approximately 200
– Protein: 8g
– Carbohydrates: 12g
– Fat: 14g
– Fiber: 2g
These tomatoes are not only tasty but also a good source of vitamins and minerals. Enjoy this dish guilt-free!
Step-by-Step Instructions
Prepping the Tomatoes
Start by preheating your oven to 375°F (190°C). Take four large ripe tomatoes and slice off the tops. Use a spoon to scoop out the seeds and pulp. This creates a bowl shape. You can save the insides for another dish or toss them. Make sure to keep the tomato shells intact for filling later.
Mixing the Filling
In a mixing bowl, combine one cup of grated Parmesan cheese and half a cup of breadcrumbs. I like to use panko for extra crunch. Add three minced garlic cloves, two tablespoons of finely chopped fresh basil, and a teaspoon of dried oregano. If you want a bit of heat, sprinkle in a quarter teaspoon of red pepper flakes. Drizzle in two tablespoons of olive oil and season with salt and pepper. Mix everything until well combined.
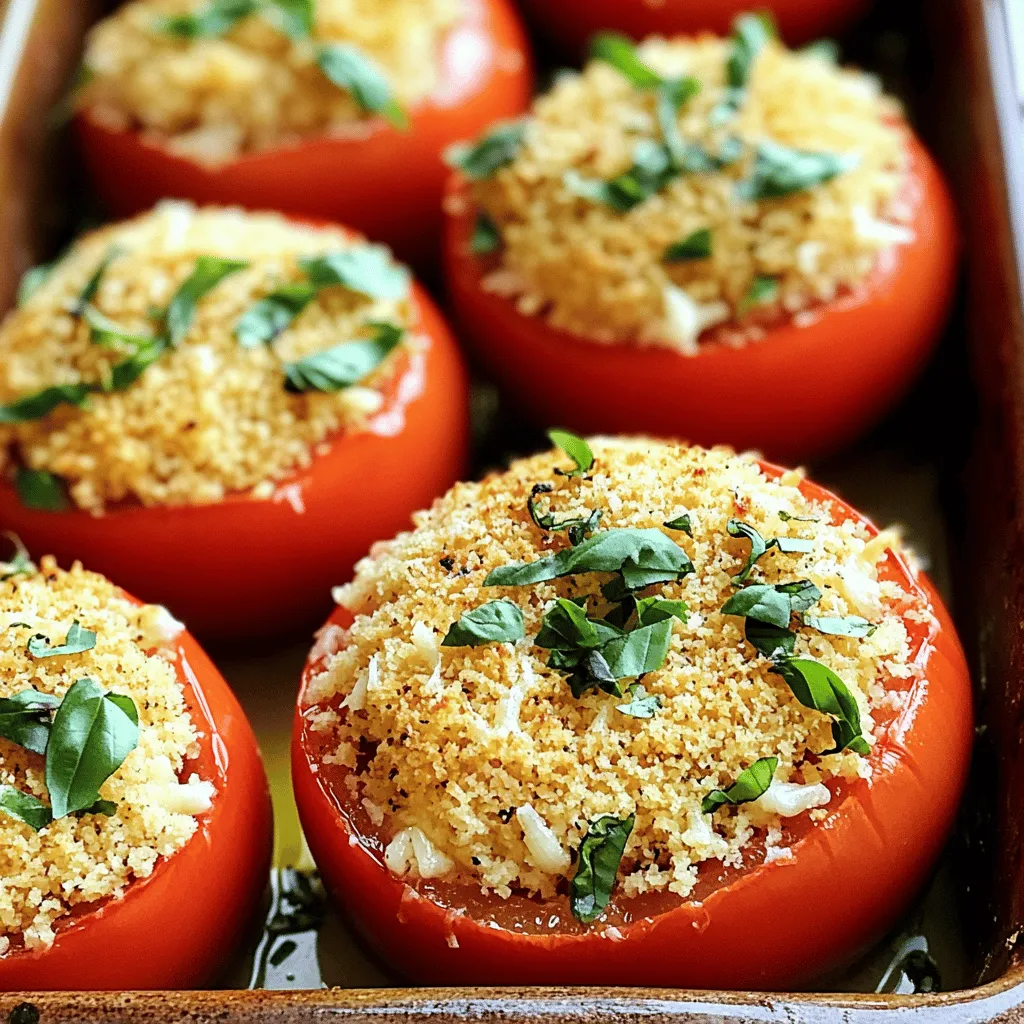
Baking the Stuffed Tomatoes
Now it’s time to stuff the tomatoes! Generously fill each hollowed tomato with the cheese mixture. Make sure to press down gently for a compact filling. Arrange the stuffed tomatoes in a baking dish, standing them upright. For extra flavor, drizzle a bit more olive oil on top. Bake the tomatoes for 25 to 30 minutes. Look for a golden brown top and tender tomatoes. Once done, let them cool slightly before serving. This enhances the flavors and makes them even more tasty.
Tips & Tricks
Best Practices for Flavor Enhancement
To make your baked Parmesan tomatoes burst with flavor, use fresh herbs. Fresh basil and oregano add brightness. You can also mix in some garlic for a fantastic aroma. If you enjoy a bit of heat, add red pepper flakes. This gives the dish a nice kick and makes it lively.
Suggestions for Achieving Crispy Tops
For the perfect crispy top, use panko breadcrumbs. They are lighter and crispier than regular breadcrumbs. Drizzle a little extra olive oil on top before baking. This step helps the tops brown evenly. You can also broil the tomatoes for the last few minutes. Just watch them closely to prevent burning.
How to Personalize Your Baked Parmesan Tomatoes
You can customize your baked Parmesan tomatoes easily. Try adding cooked sausage or bacon to the filling for extra protein. If you prefer a vegetarian option, mix in chopped spinach or zucchini. You can even switch up the cheese. Feta or mozzarella adds a different flavor profile. Be creative and make the dish your own!

Variations
Adding Different Cheeses
You can switch up the cheese in this recipe. Try mozzarella for a gooey texture. Feta adds a tangy bite that pairs well with tomatoes. Goat cheese gives a creamy and rich flavor. Mixing different cheeses can also create a more complex taste. Experiment with what you have on hand!
Seasonal Vegetable Add-ins
Feel free to add seasonal vegetables to the filling. Zucchini or bell peppers work great with the cheese. Spinach adds a pop of color and nutrition. You can also use mushrooms for an earthy flavor. Just chop them small and mix them in.
Gluten-Free Options
For a gluten-free version, skip the breadcrumbs or use gluten-free alternatives. Ground almonds or crushed rice cakes can work well. You can also add more cheese to help bind the filling. This keeps the dish tasty and avoids gluten.
Storage Info
How to Store Leftover Baked Tomatoes
To keep your baked tomatoes fresh, let them cool first. Place any leftovers in an airtight container. You can store them in the fridge for up to three days. If you’re using a glass dish, cover it tightly with plastic wrap. This helps keep the tomatoes moist and flavorful.
Reheating Instructions
Reheating baked tomatoes is easy! Preheat your oven to 350°F (175°C). Place the tomatoes on a baking sheet. Bake them for about 10-15 minutes until they warm up. This method keeps the topping crispy. You can also use a microwave, but the topping may get soft. Heat on medium for about 1-2 minutes, checking often.
Freezing Tips
Freezing baked tomatoes is a great option! First, let them cool completely. Then, wrap each tomato in plastic wrap, or place them in freezer bags. Make sure to remove as much air as possible. You can freeze them for up to three months. When ready to eat, thaw them in the fridge overnight. Reheat them in the oven for the best taste.
FAQs
Can I make Baked Parmesan Tomatoes ahead of time?
Yes, you can prepare Baked Parmesan Tomatoes ahead of time. You can hollow the tomatoes and mix the filling. Keep the stuffing in the fridge. When you’re ready, stuff the tomatoes and bake them. This method saves time and makes serving easy.
What can I serve with Baked Parmesan Tomatoes?
Baked Parmesan Tomatoes pair well with many dishes. Here are a few ideas:
– Grilled chicken or fish
– Quinoa or rice dishes
– Fresh salads
– Pasta with a light sauce
These options complement the rich, cheesy flavor of the tomatoes.
Are Baked Parmesan Tomatoes suitable for meal prep?
Yes, Baked Parmesan Tomatoes are great for meal prep. You can make a batch and store them in the fridge. They last for up to three days. Just reheat them in the oven or microwave before serving. This makes it easy to enjoy a tasty meal throughout the week.
In this article, we covered how to create delicious Baked Parmesan Tomatoes. We looked at ingredients, tools, and nutrition. Then we went through the steps to prep and bake. I also shared tips to enhance flavor and add your favorite touches. Finally, we discussed storage and answered common questions.
Making Baked Parmesan Tomatoes is simple and fun. You can impress anyone with these tasty treats! Enjoy experimenting with flavors and sharing with friends.


![To make teriyaki chicken lettuce wraps, you need a few key ingredients. These create the rich flavors and fresh textures. Here’s what you’ll need: - 1 lb (450g) boneless, skinless chicken breast, finely diced - 1 tablespoon canola oil - 1/2 cup bell pepper, finely chopped (choose red or yellow for sweetness) - 1/2 cup carrot, grated (for a touch of crunch) - 3 green onions, beautifully sliced - 2 cloves garlic, minced (for aromatic depth) - 1/4 cup low-sodium soy sauce (to control saltiness) - 2 tablespoons honey (for a hint of natural sweetness) - 1 tablespoon rice vinegar (to balance flavors) - 1 teaspoon sesame oil (for a nutty aroma) - 1 teaspoon fresh ginger, grated (adds a zesty kick) - 1 head of butter lettuce or iceberg lettuce, with leaves gently separated These ingredients come together to create a joyful, tasty meal. Garnishes can elevate your dish. While not required, they add flair and flavor. Here are some great options: - Sesame seeds (for garnish, optional but recommended) - Fresh cilantro or parsley, for garnish (optional) Adding these garnishes can make your wraps look and taste even better. Lettuce is key for wraps. It holds the filling perfectly. Here are tips to choose the best lettuce: - Look for crisp, fresh leaves. Avoid any wilting or browning. - Butter lettuce has a soft, pliable texture, perfect for wrapping. - Iceberg lettuce offers a nice crunch but can be thicker. Choose what you like best for your teriyaki chicken lettuce wraps. To start, gather your ingredients. You need: - 1 lb boneless, skinless chicken breast, finely diced - 1 tablespoon canola oil - 1/2 cup bell pepper, finely chopped - 1/2 cup carrot, grated - 3 green onions, beautifully sliced - 2 cloves garlic, minced - 1/4 cup low-sodium soy sauce - 2 tablespoons honey - 1 tablespoon rice vinegar - 1 teaspoon sesame oil - 1 teaspoon fresh ginger, grated - 1 head of butter or iceberg lettuce, leaves separated - Sesame seeds and fresh herbs for garnish Make sure your chicken is chopped small. This helps it cook evenly. Chop the bell pepper finely for sweetness and color. Grate the carrot for crunch. Slice the green onions thin. Mince the garlic and grate the ginger to release their flavors. Heat the canola oil in a large skillet over medium heat. Wait until the oil shimmers. Add the diced chicken and cook it for 5-7 minutes. Stir often until the chicken is brown and fully cooked. Then, add the minced garlic, grated ginger, and chopped bell pepper. Sauté this mixture for 2-3 minutes. The bell pepper should soften and blend with the chicken. In a small bowl, whisk together the soy sauce, honey, rice vinegar, and sesame oil. When well combined, pour this sauce into the skillet. Now, gently fold in the grated carrots and sliced green onions. Cook for another 2-3 minutes. This helps the sauce coat everything and thicken slightly. Remove the skillet from heat. Let the teriyaki chicken cool for a few minutes. This resting time allows the flavors to meld beautifully. To serve, take a lettuce leaf and place a generous spoonful of the teriyaki chicken mixture in the center. This creates your wrap. For added flavor, sprinkle sesame seeds and fresh herbs on top. Serve the wraps right away. Encourage everyone to wrap them up and enjoy the fresh, vibrant flavors. For the full details on making this dish, check out the Full Recipe. For juicy chicken, choose fresh chicken breast. Cut it into small, even pieces. This helps it cook evenly. Heat your skillet before adding oil. Use medium heat to avoid burning. Stir the chicken often. This keeps it from sticking and ensures even cooking. Add garlic and ginger early. This builds a great flavor base. Cook until the chicken is completely brown and firm. To wrap your lettuce, use large, whole leaves. Butter or iceberg lettuce works best. Place a spoonful of chicken in the center. Fold the sides in first, then roll it up. This keeps the filling secure. Make sure the wrap is tight but not too tight. You want it to hold together without falling apart. Arrange your wraps on a platter. Add extra garnishes like sesame seeds for a beautiful look. You can change the flavor of your wraps easily. Add extra veggies like cucumbers or radishes. They give a nice crunch. For a spicy kick, include sliced jalapeños or sriracha sauce. If you like nuts, add chopped peanuts or cashews. You can also switch the protein. Try ground turkey or tofu for a new taste. Mix and match to find your favorite flavor combo. For the complete recipe, check out the [Full Recipe]. {{image_4}} You can switch up the protein in your wraps. If you like beef, use ground beef or diced steak. For a lighter choice, try shrimp or fish, like salmon. If you prefer turkey, ground turkey works well too. Each protein brings its own flavor and texture. Just adjust the cooking time to ensure everything cooks through. To make these wraps vegetarian or vegan, use tofu or tempeh. Both options absorb flavors well. Press and cube the tofu before cooking to remove extra moisture. For a tasty twist, you can use cooked lentils or chickpeas. These options give a hearty bite while keeping your meal plant-based. Add fun flavors to your wraps! You can mix in crushed peanuts or cashews for crunch. Fresh herbs like basil or mint can add a fresh taste. Spice lovers may enjoy a dash of sriracha or chili flakes for heat. You can also add diced pineapple or mango for a sweet twist. These enhancements make your wraps even more exciting! For the complete recipe, check the [Full Recipe]. After enjoying your teriyaki chicken lettuce wraps, you may have leftovers. To store them, place the wraps in an airtight container. Keep the chicken mixture and lettuce leaves separate. This helps keep the lettuce crisp and fresh. Store in the fridge for up to three days. When you're ready to enjoy your leftovers, simply reheat the chicken mixture. Use a skillet over medium heat. Stir until heated through, about 5 minutes. Avoid microwaving the lettuce, as it may become soggy. Assemble the wraps just before eating for the best taste. Meal prepping makes weeknight cooking easy. You can prepare the chicken mixture ahead and store it in the fridge. Use the Full Recipe to guide your prep. To save time, chop vegetables on the weekend. This way, you have everything ready to go when you need a quick dinner. Enjoy your healthy wraps any night! To make the sauce, start with low-sodium soy sauce for a savory base. Add honey for sweetness and rice vinegar for a tangy kick. Then, mix in sesame oil for a nutty aroma. Combine these in a bowl and whisk until smooth. This sauce balances flavors, making your wraps burst with taste. Yes, you can make this dish ahead of time. Prepare the teriyaki chicken mixture and store it in an airtight container. Keep it in the fridge for up to three days. When ready to eat, reheat the mixture in a skillet over medium heat. Serve it with fresh lettuce leaves for a quick meal. Pair your lettuce wraps with some light side dishes. Here are a few great options: - Steamed jasmine rice for a filling side. - Edamame sprinkled with sea salt for a healthy snack. - A simple cucumber salad for a refreshing crunch. - Miso soup for warmth and depth. These sides complement the flavors of the wraps beautifully. For the full recipe, check out [Full Recipe]. Teriyaki chicken lettuce wraps are fun and tasty. We covered key ingredients, cooking steps, and tips to make them juicy. You learned how to customize and store your wraps for busy nights. This dish fits many diets with easy variations and great sides. Enjoy trying new flavors and sharing with friends. You now have all the tools to create delicious wraps that anyone can love. Keep experimenting and have fun in the kitchen!](https://goldendishy.com/wp-content/uploads/2025/06/72f6a023-630c-4819-9e2f-2135bf5b7418-768x768.webp)


. Prep Time: 15 minutes Total Time: 1 hour 30 minutes Servings: 6 This potato salad is great for summer meals. You can serve it at picnics, barbecues, or potlucks. I love to garnish it with extra dill and chives for a colorful touch. Enjoy! In this post, I shared how to make a classic potato salad. We covered the ingredients, tips for cooking the potatoes, and mixing the dressing. I showed you how to add flavors and enhance your dish. Remember, you can store leftovers correctly or even try tasty variations. Potato salad is easy to make and perfect for any meal. Enjoy your cooking adventure!](https://goldendishy.com/wp-content/uploads/2025/07/3d114334-7953-4aa3-9cf8-99466b57d4b6-768x768.webp)
