Avocado Egg Salad Lettuce Wraps Fresh and Tasty Meal
. You should refrigerate any leftover avocado egg salad in an airtight container. This way, it stays fresh for up to one hour before serving. However, I recommend eating it right away for the best taste. The flavors blend nicely when it’s fresh, and the texture remains creamy. Freezing avocado egg salad is not a good idea. The avocado will change texture and become mushy when thawed. To enjoy the best taste and texture, consume this dish fresh. You can prep the egg salad a day ahead of time. Store it in an airtight container in the fridge. Keep the salad separate from the lettuce leaves. This way, the lettuce stays crisp when you serve the wraps. For the full recipe, check the earlier section. No, fresh hard-boiled eggs provide better texture and flavor. Canned eggs lack the richness and depth that fresh eggs bring. When you boil eggs, the yolk stays creamy, while the whites turn firm. This contrast makes each bite delightful and satisfying. Consume within 1-2 days for best quality. As time passes, the avocado can brown, and the salad loses its fresh taste. Store it in an airtight container to keep it as fresh as possible. If you see browning, you can mix in a little lemon juice to help revive the color. Pair with fresh fruit, vegetable sticks, or a light soup. Fresh fruit adds sweetness, while crunchy vegetable sticks give texture. A light soup can balance the meal and add warmth. These sides complement the wraps and make for a well-rounded meal. In this post, we explored a simple, healthy recipe for avocado egg salad lettuce wraps. We covered the essential ingredients, step-by-step preparation, and tips for the best flavor and texture. These wraps are a great way to enjoy nutritious foods without heavy carbs. As you try this recipe, feel free to make it your own. Enjoy experimenting with different ingredients and variations. Eating healthy can be fun and tasty!](https://goldendishy.com/wp-content/uploads/2025/07/cd9e1d49-3f1d-44c5-8cf3-19f4c22fda08.webp)
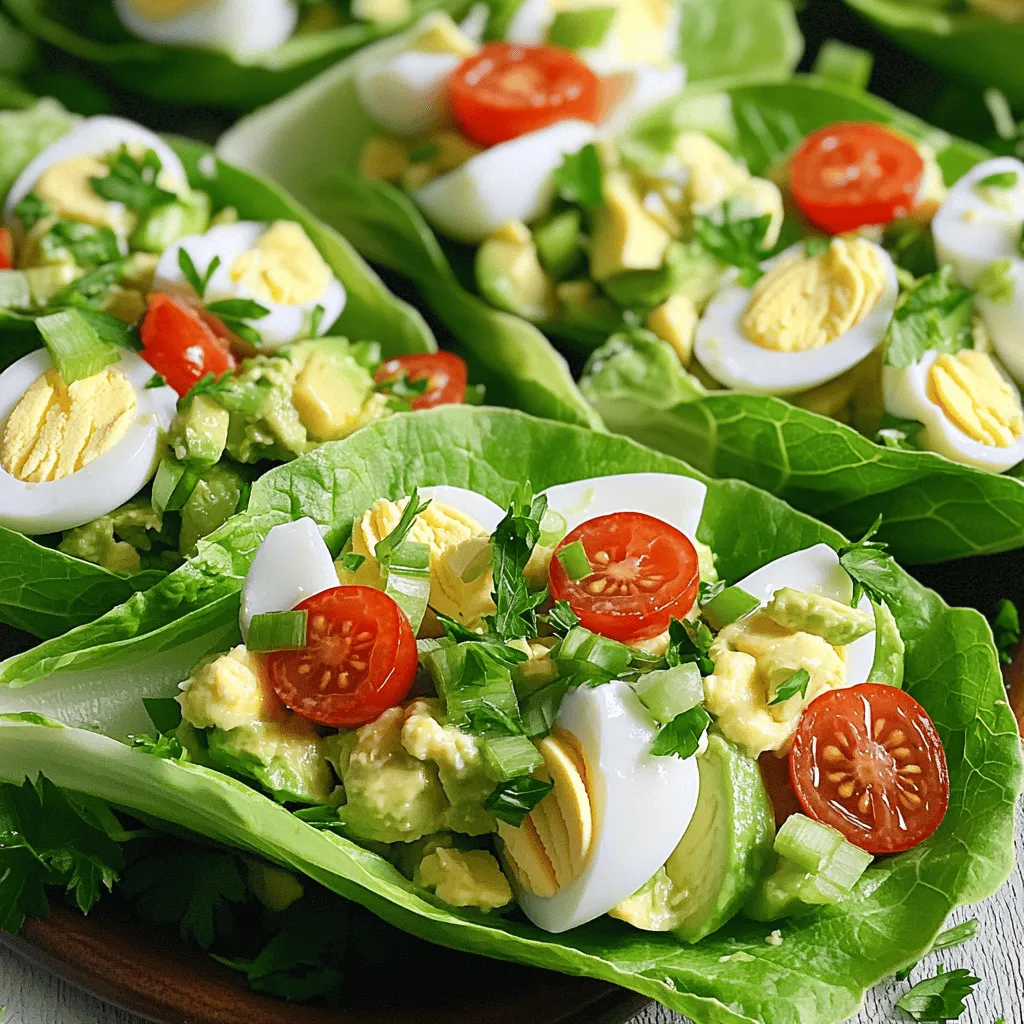
Looking for a fresh and tasty meal that’s quick to prepare? Avocado Egg Salad Lettuce Wraps are a delicious and healthy option! Packed with protein and creamy avocado, these wraps are perfect for lunch or a light dinner. In this article, I’ll walk you through the simple steps to create this flavorful dish, from selecting the right ingredients to serving tips. Let’s dive in and whip up something delightful that you’ll love!
Ingredients
Main Ingredients
– 4 large hard-boiled eggs
– 1 ripe avocado
– 1 tablespoon Greek yogurt (or sour cream)
– 1 tablespoon Dijon mustard
– 1 tablespoon fresh lemon juice
– 1 green onion, finely sliced
Seasoning and Garnishing
– 1/4 teaspoon garlic powder
– Salt and freshly ground black pepper, to taste
– Optional: Halved cherry tomatoes and freshly chopped parsley
Lettuce Wraps
– 8 large romaine or butter lettuce leaves
To make avocado egg salad lettuce wraps, gather these fresh and simple ingredients. Start with four hard-boiled eggs. They add protein and texture. Next, grab a ripe avocado. This fruit brings creaminess and flavor.
You will also need Greek yogurt or sour cream. This makes the salad rich and smooth. A tablespoon of Dijon mustard adds a zesty kick. Fresh lemon juice brightens the dish with some acidity.
The green onion gives a mild bite and color. For seasoning, use garlic powder, salt, and black pepper to taste. You can add halved cherry tomatoes and parsley for a pop of color and taste if you wish.
Finally, choose eight large romaine or butter lettuce leaves. These leaves make perfect wraps. They are crunchy and light, holding your delicious filling well.You’ll find all the steps to create this tasty meal. Enjoy the fresh flavors in every bite!
Step-by-Step Instructions
Preparation of Egg Salad
– First, chop four hard-boiled eggs into small pieces and put them in a bowl.
– Next, slice the ripe avocado in half, remove the pit, and scoop the soft flesh into the bowl with the eggs.
Mixing the Ingredients
– Now, add one tablespoon of Greek yogurt, one tablespoon of Dijon mustard, and one tablespoon of fresh lemon juice to the bowl.
– Include one finely sliced green onion, 1/4 teaspoon of garlic powder, and a pinch of salt and pepper.
– Use a fork to mash the avocado and mix everything together until you get a nice blend. Keep it slightly chunky for better texture.
Assembly of Lettuce Wraps
– Rinse eight large romaine or butter lettuce leaves under cold water and dry them well.
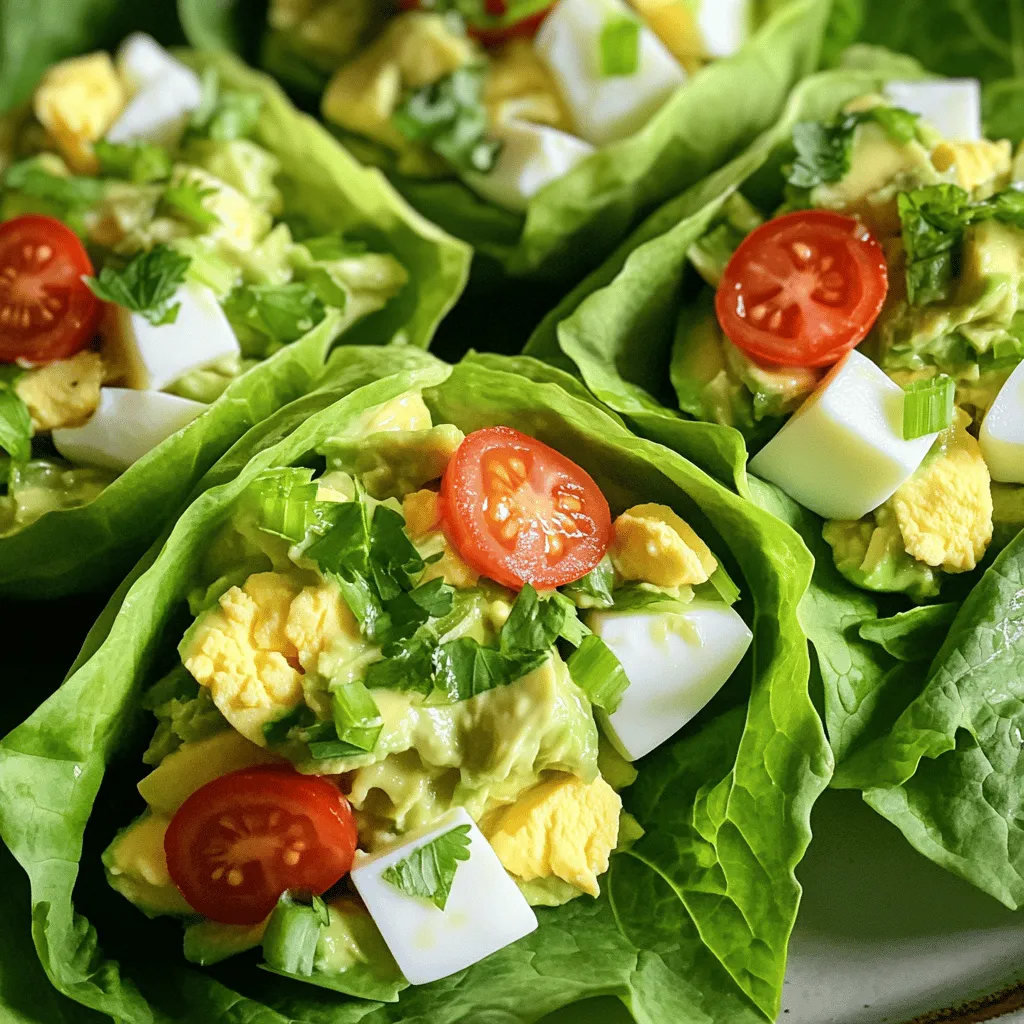
– Take one lettuce leaf and spoon a good amount of the avocado egg salad into the center. Be careful not to overfill it.
– If you’d like, add halved cherry tomatoes and parsley on top for a pretty finish.Enjoy your fresh meal!
Tips & Tricks
Achieving the Best Texture
– Keep the egg salad slightly chunky. This adds a nice bite to your wraps.
– Adjust seasoning for personal preference. Taste your mix and tweak it to suit you.
Presentation Ideas
– Arrange wraps on a platter for serving. This makes your dish look inviting and fresh.
– Garnish with cherry tomatoes and parsley for visual appeal. Their colors add a nice touch.
Time-Saving Tips
– Prepare hard-boiled eggs in advance. This cuts down on your prep time.
– Use pre-packaged avocado for quicker prep. It saves time and still tastes great.
Use these tips to make your avocado egg salad lettuce wraps shine. You will enjoy a meal that is both fresh and tasty.

Variations
Additional Ingredients
You can easily enhance your avocado egg salad with extra ingredients. Adding diced bell peppers gives a nice crunch. You can also include chopped herbs like dill or cilantro for freshness. These additions lift the flavor and make each bite exciting.
Different Types of Wraps
If you want to switch things up, try different wraps. Collard greens or spinach leaves are great substitutes for lettuce. They add unique tastes and textures. Whole grain tortillas are another option to consider. They provide a filling and hearty base for your egg salad.
Healthier Alternatives
For a lighter option, use low-fat or vegan yogurt instead of Greek yogurt. This change keeps the salad creamy while cutting some calories. You can also switch Dijon mustard for hummus. Hummus adds flavor and makes the dish even creamier.
Storage Info
How to Store Leftovers
You should refrigerate any leftover avocado egg salad in an airtight container. This way, it stays fresh for up to one hour before serving. However, I recommend eating it right away for the best taste. The flavors blend nicely when it’s fresh, and the texture remains creamy.
Freezing Instructions
Freezing avocado egg salad is not a good idea. The avocado will change texture and become mushy when thawed. To enjoy the best taste and texture, consume this dish fresh.
Preparing in Advance
You can prep the egg salad a day ahead of time. Store it in an airtight container in the fridge. Keep the salad separate from the lettuce leaves. This way, the lettuce stays crisp when you serve the wraps.
FAQs
Can I use canned eggs instead of hard-boiled?
No, fresh hard-boiled eggs provide better texture and flavor. Canned eggs lack the richness and depth that fresh eggs bring. When you boil eggs, the yolk stays creamy, while the whites turn firm. This contrast makes each bite delightful and satisfying.
How long can I store avocado egg salad?
Consume within 1-2 days for best quality. As time passes, the avocado can brown, and the salad loses its fresh taste. Store it in an airtight container to keep it as fresh as possible. If you see browning, you can mix in a little lemon juice to help revive the color.
What can I serve with avocado egg salad lettuce wraps?
Pair with fresh fruit, vegetable sticks, or a light soup. Fresh fruit adds sweetness, while crunchy vegetable sticks give texture. A light soup can balance the meal and add warmth. These sides complement the wraps and make for a well-rounded meal.
In this post, we explored a simple, healthy recipe for avocado egg salad lettuce wraps. We covered the essential ingredients, step-by-step preparation, and tips for the best flavor and texture. These wraps are a great way to enjoy nutritious foods without heavy carbs.
As you try this recipe, feel free to make it your own. Enjoy experimenting with different ingredients and variations. Eating healthy can be fun and tasty!
. You should refrigerate any leftover avocado egg salad in an airtight container. This way, it stays fresh for up to one hour before serving. However, I recommend eating it right away for the best taste. The flavors blend nicely when it’s fresh, and the texture remains creamy. Freezing avocado egg salad is not a good idea. The avocado will change texture and become mushy when thawed. To enjoy the best taste and texture, consume this dish fresh. You can prep the egg salad a day ahead of time. Store it in an airtight container in the fridge. Keep the salad separate from the lettuce leaves. This way, the lettuce stays crisp when you serve the wraps. For the full recipe, check the earlier section. No, fresh hard-boiled eggs provide better texture and flavor. Canned eggs lack the richness and depth that fresh eggs bring. When you boil eggs, the yolk stays creamy, while the whites turn firm. This contrast makes each bite delightful and satisfying. Consume within 1-2 days for best quality. As time passes, the avocado can brown, and the salad loses its fresh taste. Store it in an airtight container to keep it as fresh as possible. If you see browning, you can mix in a little lemon juice to help revive the color. Pair with fresh fruit, vegetable sticks, or a light soup. Fresh fruit adds sweetness, while crunchy vegetable sticks give texture. A light soup can balance the meal and add warmth. These sides complement the wraps and make for a well-rounded meal. In this post, we explored a simple, healthy recipe for avocado egg salad lettuce wraps. We covered the essential ingredients, step-by-step preparation, and tips for the best flavor and texture. These wraps are a great way to enjoy nutritious foods without heavy carbs. As you try this recipe, feel free to make it your own. Enjoy experimenting with different ingredients and variations. Eating healthy can be fun and tasty!](https://goldendishy.com/wp-content/uploads/2025/07/cd9e1d49-3f1d-44c5-8cf3-19f4c22fda08-300x300.webp)


![To make Zucchini Ricotta Fritters, gather these simple ingredients: - 2 medium zucchinis, grated - 1 cup ricotta cheese - 1/2 cup all-purpose flour - 2 large eggs, beaten - 1/4 cup grated Parmesan cheese - 2 green onions, finely chopped - 1/2 teaspoon garlic powder - Salt and pepper, to taste - Olive oil, for frying - Fresh basil or parsley, for garnish These ingredients work together to create crispy, tasty fritters that everyone will love. The fresh zucchini adds moisture and flavor, while the ricotta cheese gives a creamy texture. Using grated Parmesan cheese enhances the savory taste of the fritters. Make sure to squeeze out as much moisture from the zucchini as you can. This step is key to ensure your fritters do not get soggy. You can use a clean kitchen towel for this. Want to dive deeper into making these fritters? Check out the Full Recipe for all the steps! Start by grating the zucchinis. You can use a box grater or a food processor. After grating, place the zucchini in a clean kitchen towel. Gather the towel around the zucchini and twist it. This will help squeeze out the extra moisture. Removing moisture is key. It keeps the fritters from becoming soggy. In a large bowl, combine the drained zucchini, ricotta cheese, flour, and beaten eggs. Add grated Parmesan, chopped green onions, garlic powder, salt, and pepper. Use a sturdy spoon to mix everything. The batter should be slightly chunky, not too smooth. This texture helps the fritters hold their shape when cooking. Heat a non-stick skillet over medium heat and add a few tablespoons of olive oil. Let the oil heat until it shimmers. Once hot, drop spoonfuls of batter into the skillet. Gently flatten each fritter with a spoon. Cook them for about 3-4 minutes on each side. They should turn golden brown and crispy. Don't overcrowd the skillet. If needed, cook in batches. After cooking, place the fritters on a plate lined with paper towels. This will absorb any excess oil. Serve warm with chopped basil or parsley for a fresh touch. To make your fritters crispy, start by removing moisture. Zucchini has a lot of water. When you grate it, you must squeeze it in a towel. This helps the fritters stay firm. Next, heat your oil until it shimmers. A hot skillet cooks the fritters quickly and keeps them crispy. If the oil is not hot enough, they can soak up too much oil and become soggy. Herbs and spices can elevate your fritters. I love adding fresh basil or parsley for brightness. You can also try a pinch of red pepper flakes for heat. For dips, a tangy yogurt sauce pairs well. You can also serve them with a tasty marinara. These additions make each bite even better. Avoid overcrowding your skillet. Too many fritters at once can lower the heat. This can lead to uneven cooking. Instead, cook them in small batches. Keep the cooked fritters warm by placing them on a plate in a low oven. This way, they stay warm and crisp until you serve them. {{image_4}} You can change the taste of your fritters easily. Try adding different cheeses like feta or mozzarella. You can also mix in finely chopped veggies such as bell peppers or spinach. Fresh herbs like dill or thyme add a nice touch too. These small changes can create a whole new snack experience. If you need a gluten-free version, use almond flour or coconut flour instead of all-purpose flour. Both options work well and will keep your fritters light and crispy. Just be sure to adjust the amount used, as these flours can absorb moisture differently. For a vegan twist, replace the ricotta with a plant-based cheese. Flaxseed meal can work well as an egg substitute. Just mix one tablespoon of flaxseed with three tablespoons of water and let it sit for a few minutes. If you want low-carb fritters, swap the flour for grated cauliflower. This keeps the fritters tasty while cutting down on carbs. For the full recipe, check out the [Full Recipe]. To keep your zucchini ricotta fritters fresh, you should refrigerate them. Place the leftover fritters in an airtight container. This helps prevent them from drying out. Make sure to layer them with paper towels to absorb extra moisture. You can store them for up to three days in the fridge. If you want to save some for later, freezing is a great option. First, let the fritters cool completely. Then, place them in a single layer on a baking sheet. Freeze them for about one hour. This step helps them keep their shape. After they are frozen, transfer them to a freezer bag. Label the bag with the date. They can stay good for up to two months. When you’re ready to eat your frozen fritters, reheat them in the oven. Preheat the oven to 375°F (190°C). Place the fritters on a baking sheet and bake for about 15-20 minutes. This method will help them regain their crispy texture. Enjoy your tasty snack! For the full recipe, check out the detailed instructions above. Yes, you can bake them! Place the fritters on a baking sheet lined with parchment paper. Brush them lightly with olive oil. Bake at 400°F for about 20-25 minutes. Flip them halfway through to get both sides crispy. To reheat, use an oven or an air fryer. Preheat the oven to 350°F. Place the fritters on a baking sheet and bake for about 10 minutes. This will keep them crispy. You can make the batter ahead of time! Store it in the fridge for up to 24 hours. Just remember to mix it again before cooking. The moisture from the zucchini can settle. Fritters are done when they are golden brown and crispy on both sides. You can also gently press them. If they feel firm and do not sink, they are ready. Yes, they are great for meal prep! You can cook them and store in the fridge for up to 3 days. They make a tasty snack or meal addition. For more details, check the Full Recipe. Zucchini ricotta fritters are a simple and tasty snack. You can enjoy them any time of the day. Here’s how to make them: - 2 medium zucchinis, grated - 1 cup ricotta cheese - 1/2 cup all-purpose flour - 2 large eggs, beaten - 1/4 cup grated Parmesan cheese - 2 green onions, finely chopped - 1/2 teaspoon garlic powder - Salt and pepper, to taste - Olive oil, for frying - Fresh basil or parsley, for garnish To start, I recommend grating the zucchinis. Use a box grater or food processor to make it quick. After grating, take a clean kitchen towel. Place the zucchini in the middle and twist the towel. This helps squeeze out extra moisture. It’s important to do this step to keep your fritters crispy. Next, grab a large mixing bowl. Add the drained zucchini, ricotta cheese, flour, beaten eggs, Parmesan, green onions, garlic powder, and some salt and pepper. Mix everything well with a spatula. The batter should feel a bit chunky. Now, heat a non-stick skillet over medium heat. Drizzle in some olive oil to coat the bottom. Let the oil heat until it looks shiny. This ensures a nice fry for your fritters. Once the oil is hot, drop spoonfuls of the batter into the skillet. Use the back of a spoon to flatten each fritter a bit. This helps them cook evenly. Fry for about 3-4 minutes on each side. You want them golden brown and crispy. Don’t overcrowd the skillet; work in batches if needed. When done, transfer the fritters to a plate lined with paper towels. This will soak up any extra oil. Serve them warm, topped with fresh basil or parsley. These toppings add a lovely touch to your dish. For the full recipe, check out the detailed instructions above. Enjoy making these tasty treats! In this blog post, we covered how to make Zucchini Ricotta Fritters from start to finish. We shared a list of simple ingredients and provided step-by-step cooking instructions. You learned tips to ensure crispiness and explored tasty variations. Storing and reheating tips were also discussed to help keep your fritters fresh. Overall, these fritters are easy to make and delicious. They offer a healthy twist for any meal. Enjoy experimenting with different flavors and variations!](https://goldendishy.com/wp-content/uploads/2025/06/35e9f5a9-d1bf-47b3-b252-98dbfdd31548-768x768.webp)
![- 3 medium zucchinis, grated - 200g feta cheese, crumbled - 1 cup Greek yogurt Zucchini brings moisture and a light taste. Feta adds saltiness and creaminess. Greek yogurt keeps the pie rich and tangy. This trio creates a tasty base for the pie. - 1 cup all-purpose flour - 1 teaspoon baking powder - 1 teaspoon dried oregano - 1 teaspoon garlic powder - Salt and pepper to taste The flour gives the pie structure. Baking powder helps it rise and become fluffy. Oregano adds a hint of herb, while garlic powder brings depth. Salt and pepper enhance all the flavors. - 1 tablespoon olive oil (for greasing) - 1 tablespoon sesame seeds (for topping) - 1/2 cup fresh dill, chopped (optional for garnish) Olive oil keeps the pie from sticking. Sesame seeds add crunch and a nutty flavor. Fresh dill makes the dish pop with color and fragrance. You can skip the dill but it really brightens the pie. Explore the full recipe to get all the steps for this delightful dish! 1. Preheat the Oven: Set your oven to 180°C (350°F). This ensures your pie bakes evenly. 2. Grease the Pie Dish: Use 1 tablespoon of olive oil to lightly grease a round pie dish. This helps the pie not stick. 3. Drain the Zucchini: Grate 3 medium zucchinis and sprinkle them with salt. Let them sit for 10 minutes. Gather the zucchini in a clean kitchen towel and squeeze out the extra water. This step is key to avoiding a soggy pie. 1. Combine Wet Ingredients: In a separate bowl, whisk together 1 cup of Greek yogurt and 3 large eggs. Mix until smooth. 2. Add Dry Ingredients: To the wet mixture, add 200g of crumbled feta cheese, 1 cup of all-purpose flour, 1 teaspoon of baking powder, 1 teaspoon of dried oregano, and 1 teaspoon of garlic powder. Stir in the drained zucchini, then season with salt and pepper. 3. Mix Thoroughly: Use a spatula to combine everything well. You want a thick and smooth batter. 1. Transfer the Batter: Pour your zucchini mixture into the greased pie dish. Smooth the top with a spatula for an even layer. 2. Top with Sesame Seeds: Evenly sprinkle 1 tablespoon of sesame seeds across the top. This adds a nice crunch. 3. Baking Time and Temperature: Place the dish in the oven and bake for 35-40 minutes. The top should be golden brown and a toothpick inserted should come out clean. Follow these steps for a tasty Zucchini and Feta Pie! For the complete recipe, check out the [Full Recipe]. Draining Zucchini Effectively Draining zucchini is key for great texture. First, grate the zucchini and sprinkle a pinch of salt on top. Let it sit for 10 minutes. This step draws out excess moisture. Next, gather the zucchini in a clean kitchen towel. Squeeze hard to remove the water. This helps avoid a soggy pie. Avoiding Sogginess To keep your pie firm, use the drained zucchini right away. If you let it sit too long, it can release moisture again. Bake your pie soon after mixing. This keeps the crust crispy and the filling light. Seasoning Tips Zucchini can be mild, so season well. Use salt and pepper generously. Adding garlic powder brings warmth to the flavor. Dried oregano adds a nice herb taste. Feel free to experiment with spices! Optional Ingredients to Add Consider adding chopped onions for extra flavor. Fresh herbs like basil or parsley can brighten the dish. You can also mix in sun-dried tomatoes for a sweet touch. These additions can make your pie even more delicious. Pairing Suggestions Zucchini and feta pie pairs well with fresh salads. A simple green salad with lemon dressing works great. You can also serve it with a yogurt dip for a creamy contrast. Presentation Tips Cut the pie into wedges and place them on a colorful platter. Garnish with fresh dill for a pop of color. For an extra touch, add a dollop of Greek yogurt on the side. This adds creaminess and flavor. Enjoy sharing this tasty dish! {{image_4}} Alternative Cheeses You can easily swap feta cheese. Try goat cheese for a tangy twist. Ricotta adds creaminess and pairs well too. These options keep the dish flavorful and fun. Gluten-Free Options For a gluten-free version, replace all-purpose flour with almond flour or a gluten-free blend. This change maintains the pie's texture and taste, perfect for those avoiding gluten. Adding Fresh Herbs Fresh herbs can enhance your zucchini and feta pie. Basil, parsley, or chives are great choices. These herbs add brightness and depth to your dish. Just chop them finely and mix in before baking. Spices to Consider Consider adding spices for extra flavor. A pinch of cayenne pepper gives heat. Paprika adds smokiness, while cumin lends an earthy note. Experiment with these spices to find your favorite flavor combo. Hot vs. Cold This pie tastes great both hot and cold. Serve it warm right from the oven for a comforting meal. If you prefer, let it cool and serve at room temperature for a lighter option. Appetizer vs. Main Course You can serve zucchini and feta pie as an appetizer or a main dish. Cut it into small wedges for a fun starter. For a main course, pair it with a salad or roasted veggies to make a filling meal. - Refrigeration Tips: Store your zucchini and feta pie in the fridge. Let it cool completely first. Wrap it tightly in plastic wrap. This keeps it fresh for up to three days. You can also place it in an airtight container. This helps prevent moisture loss. - Best Containers to Use: Use glass or plastic containers that seal well. They help keep your pie tasting great. If you have a large piece, a pie dish with a lid is perfect. Just make sure it’s completely sealed to avoid drying out. - Oven vs. Microwave: The oven is best for reheating. Preheat it to 180°C (350°F). Place the pie on a baking sheet to catch any drips. Heat for about 10-15 minutes. This keeps the crust crispy. The microwave is quicker but can make the pie soggy. If you use the microwave, heat in short bursts, checking often. - Maintaining Texture: To keep the pie’s texture, cover it with foil in the oven. This helps it heat evenly. In the microwave, add a cup of water in the microwave. This adds moisture and helps avoid dryness. - How to Freeze Zucchini Pie: To freeze, wrap individual slices in plastic wrap. Then, place them in a freezer bag. Squeeze out the air before sealing. You can also freeze the whole pie. Just wrap it tightly in two layers of plastic wrap. - Thawing and Reheating: When ready to eat, thaw slices in the fridge overnight. For a whole pie, leave it on the counter for a few hours. Reheat using the oven to keep the crust crispy. Enjoy your tasty pie even after freezing! Yes, you can! Other veggies work well in this pie. Try adding spinach for a fresh taste. Bell peppers add a nice crunch. Grated carrots give a touch of sweetness. Just make sure the veggies are not too watery. Drain them like you do with zucchini. Definitely! Zucchini and feta pie is great for meal prep. Once cooled, slice it and store it in the fridge. Use an airtight container to keep it fresh. It lasts up to five days. This pie pairs well with a simple salad. A mixed green salad adds freshness. You can also serve it with a dollop of Greek yogurt. For drinks, try a light white wine or sparkling water. Check the top for a golden brown color. Insert a toothpick into the center. If it comes out clean, your pie is ready. If it’s still wet, bake it a few more minutes. Yes, you can! Prepare the pie and keep it in the fridge. Bake it the next day for fresh flavors. You can also freeze it before baking. Thaw overnight in the fridge before baking. For a complete guide, check the Full Recipe for all the details! Zucchini and Feta Pie is easy to make and full of flavor. We explored key ingredients, step-by-step instructions, and helpful tips for the best results. You can vary the recipe to fit your taste. Enjoy it hot or cold, as a main dish or appetizer. Proper storage keeps it fresh. With these insights, you can serve this dish with confidence. Try it out, and impress your family and friends with your skills. Happy cooking!](https://goldendishy.com/wp-content/uploads/2025/07/7ca7cda4-3dfb-4b99-98f1-545ca5d8f2b3-768x768.webp)


![To make Cranberry Orange Energy Bites, you need the right mix of flavors and textures. Here’s what you will need: - 1 cup rolled oats - 1/2 cup almond butter - 1/4 cup honey or maple syrup - 1/2 cup dried cranberries, finely chopped - Zest of 1 medium orange - 1/4 cup freshly squeezed orange juice - 1/4 cup chia seeds - 1/2 teaspoon ground cinnamon - Pinch of sea salt - Optional: 1/4 cup chopped nuts or seeds These ingredients come together to create a tasty and healthy snack. The oats provide fiber and energy. Almond butter adds protein and a creamy texture. Honey or maple syrup gives a touch of sweetness, while dried cranberries add a chewy burst of flavor. The zest and juice of the orange brighten the bites, making them refreshing. Chia seeds add crunch and healthy omega-3s. You can also mix in nuts or seeds for extra texture. They can make your bites even more filling. You can find the full recipe for the perfect energy bites in the recipe section above. - Mixing the Base Ingredients Start by taking a large bowl. Add 1 cup of rolled oats, 1/2 cup of almond butter, and 1/4 cup of honey or maple syrup. Mix with a sturdy spoon until everything blends well. This base forms the heart of your energy bites. - Adding Flavorful Components Next, stir in 1/2 cup of finely chopped dried cranberries, the zest of 1 medium orange, and 1/4 cup of freshly squeezed orange juice. Also, add 1/4 cup of chia seeds, 1/2 teaspoon of ground cinnamon, and a pinch of sea salt. Keep mixing until you see a uniform color and texture. - Achieving the Right Texture Use your hands or a spatula to mix the ingredients thoroughly. You want a sticky but manageable consistency. If it feels too dry, add a bit more orange juice. If it’s too wet, sprinkle in extra oats until it feels just right. - Rolling Into Balls After you’ve mixed everything, cover the bowl with plastic wrap or a lid. Chill the mixture in the fridge for about 30 minutes. Once chilled, take portions and roll them into 1-inch balls. You should get about 15 to 20 bites. - Optional Coating with Nuts or Seeds For added crunch and flavor, roll some of the balls in chopped nuts or seeds. This step is optional, but it gives a nice touch to each bite. - Chilling the Mixture After rolling, arrange the energy bites on a plate. You can chill them for an extra 10 to 15 minutes to firm them up even more. This makes them easier to eat. - Presentation Tips For a pretty display, stack the energy bites or place them in a rustic jar. You can sprinkle some extra orange zest on top for color and aroma. Enjoy your tasty, nutritious snack! Check the [Full Recipe] for more details. - Best Practices for Freshness: Store energy bites in an airtight container. This keeps them moist and tasty. - Duration of Shelf Life: These bites last up to 1 week in the fridge. After that, they may dry out. - Freezing Energy Bites for Later Use: You can freeze these bites. Place them in a single layer on a tray. Once frozen, store them in a bag. They can last for up to 3 months. - Preparing in Bulk: Make a double batch! This way, you always have a quick snack ready. - Overmixing or Undermixing: Mix just enough to combine all ingredients. Too much mixing can make them tough. - Adjusting Consistency: If the mixture is too dry, add more juice. If too wet, mix in more oats. Always aim for a sticky but manageable mixture. For the full recipe, check out Cranberry Orange Energy Bites. {{image_4}} You can mix things up by adding different nuts. Walnuts, almonds, or pecans give a nice crunch. Just chop them finely and fold them into the mix. You can use about 1/4 cup of your choice. Incorporating other fruits can also change the flavor. Try using dried apricots, raisins, or figs. They add sweetness and texture. Just chop them to match the size of the cranberries. If you want a vegan option, swap honey for maple syrup. This keeps the bites sweet without using animal products. Almond butter is already vegan, so you’re set there! For gluten-free substitutions, choose certified gluten-free oats. Most oats are naturally gluten-free but can get cross-contaminated. Make sure to check the label. Using different nut butters can change the taste and texture. Peanut butter or cashew butter works great. Just use the same amount as almond butter. Adjusting crunchiness with seeds is another fun option. Add chia seeds or flaxseeds for some extra bite. You can also toss in sunflower seeds for a nut-free crunch. The cranberry orange energy bites are packed with nutrients. Each ingredient brings unique health benefits. - Rolled oats offer fiber, which helps digestion and keeps you full. - Almond butter is a great source of healthy fats and protein. - Dried cranberries add antioxidants that fight free radicals. - Chia seeds are rich in omega-3s and help with heart health. - Orange juice boosts your immune system with vitamin C. These bites provide energy and nutrients to fuel your day. They are perfect for a quick boost before a workout or during a busy afternoon. How many bites should you eat for a snack? I suggest two to three bites. This gives you enough energy without overdoing it. Each bite is satisfying. Dietary recommendations may vary. Listen to your body. If you feel hungry after two bites, enjoy another! Balance is key. Each bite contains about 70 calories. This makes it easy to track your snack intake. If you want fewer calories, consider adjusting the recipe. You can reduce the honey or use less nut butter. This way, you can fit these bites into your dietary goals without losing flavor. For more details, check the full recipe. Enjoy these tasty energy bites while staying mindful of your nutrition! Cranberry orange energy bites can last up to one week in the fridge. Store them in an airtight container to keep them fresh. If you want to keep them longer, you can freeze them. They can last up to three months in the freezer. Just thaw them in the fridge before enjoying. Yes, you can substitute almond butter with other nut butters. Peanut butter, cashew butter, or sunflower seed butter work well. Each will give a unique taste. Make sure to choose one that fits your dietary needs. You can use the mixture for various snacks. Try spreading it on toast or mixing it into yogurt. You can also make energy bars by pressing the mixture into a pan and slicing it. This way, you have more options for your snack. To make them sweeter, you can add more honey or maple syrup. You can also mix in some chocolate chips or dried fruits like dates. Adjust the sweetness based on your taste. This way, you can create a snack that you love. Yes, there are many alternatives for honey or maple syrup. You can use agave nectar, brown rice syrup, or coconut nectar. Each of these will add a different sweetness. Just make sure to adjust the amount based on how sweet you want your bites to be. For the full recipe, check out the recipe section above. These Cranberry Orange Energy Bites are simple to make and taste great. You mix healthy ingredients, shape them into bites, and enjoy a tasty snack. Remember to store them properly to keep them fresh. You can also tweak ingredients for your tastes or diet. With these tips and flavor ideas, you’ll enjoy these bites any time you need a quick boost. Get creative and make this snack your own!](https://goldendishy.com/wp-content/uploads/2025/06/5774e534-56b3-4e6d-8a48-215f930e3d22-768x768.webp)