Avocado and Black Bean Tacos Deliciously Simple Recipe

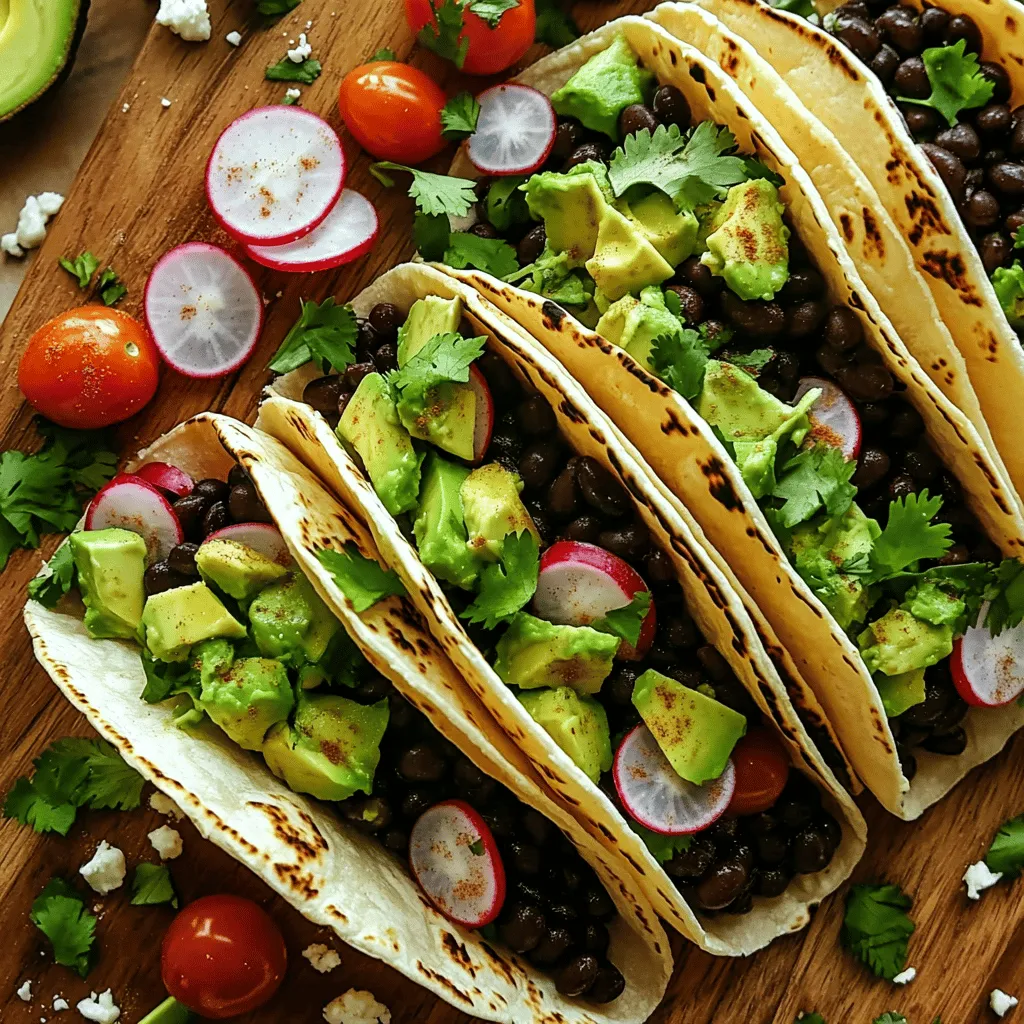
Looking for a quick and tasty meal? Avocado and black bean tacos are here to save your day! This delicious recipe combines creamy avocado, hearty black beans, and fresh veggies for a satisfying dish you’ll love. I will guide you step-by-step through easy preparations and cooking tips. Whether you’re a taco lover or trying this for the first time, you’ll find joy in every bite. Let’s dive in!
Ingredients
List of Ingredients
– 1 can black beans (15 oz), rinsed and drained
– 1 ripe avocado, diced
– 1 medium red onion, finely chopped
– 1 cup cherry tomatoes, halved
– 1 jalapeño, minced
– 1/4 cup fresh cilantro leaves, chopped
– 2 tablespoons fresh lime juice
– 1 teaspoon ground cumin
– Salt and pepper to taste
– 8 small corn tortillas
– Optional toppings: diced radishes, crumbled feta, hot sauce
When I make avocado and black bean tacos, I love how simple the ingredients are. Each one brings a unique taste and texture. Start with a can of black beans. Rinse and drain them well. This helps reduce sodium and keeps the flavor fresh. Then, grab a ripe avocado. Cut it into small cubes, which adds creaminess to each bite.
Next, chop a medium red onion finely. It adds a nice crunch and a bit of sharpness. For sweetness and color, halve a cup of cherry tomatoes. Their juiciness brightens the dish. If you want some heat, mince a jalapeño. Just remember to remove the seeds for less spice.
Fresh cilantro gives a burst of flavor, so use about a quarter cup of chopped leaves. Lime juice is crucial too; two tablespoons will add zing. A teaspoon of ground cumin gives warmth. Finally, add salt and pepper to taste.
To hold all these delicious fillings, you’ll need eight small corn tortillas. If you want to mix things up, try toppings like diced radishes for crunch, crumbled feta for creaminess, or hot sauce for a kick.
This ingredient list makes the tacos not just tasty but also fun to prepare.
Step-by-Step Instructions
Preparation of Ingredients
To start, take a large mixing bowl. Add one can of black beans that you rinsed and drained. Next, dice one ripe avocado into small pieces. Chop one medium red onion finely and add it to the bowl. Halve one cup of cherry tomatoes and add them in too. For a bit of heat, take one jalapeño. Carefully remove the seeds and mince it. Then, add this to your bowl along with 1/4 cup of chopped cilantro.
Next, it’s time to add flavor! Squeeze two tablespoons of fresh lime juice over the mixture. This brightens up the taste. Sprinkle in one teaspoon of ground cumin for warmth. Don’t forget to add salt and freshly cracked pepper to taste. Use a spatula to fold the ingredients gently. Be careful not to mash the avocado; you want those lovely pieces to stay intact.
Cooking the Tortillas
Now, let’s warm the tortillas. Heat a non-stick skillet or griddle over medium heat. Place the corn tortillas on the skillet. Warm each tortilla for about 30 seconds on each side. They should get soft and pliable, but not crispy. This step makes them perfect for holding all that tasty filling.
Assembling the Tacos
To make the tacos, lay a warm tortilla flat. Spoon a generous amount of the black bean and avocado mixture into the center. Don’t be shy; fill it just right! If you like, you can add optional toppings. Diced radishes add a nice crunch. Crumbled feta cheese brings creaminess, and a dash of hot sauce gives it a kick.
Serve the tacos right away while they are still warm. For a pretty touch, garnish each taco with a few extra cilantro leaves. This makes your dish look fresh and inviting.
Tips & Tricks
How to Choose the Best Avocado
How do I know if an avocado is ripe? Look for a dark green skin. Gently squeeze the fruit in your palm. If it feels slightly soft, it is ready to eat. If it feels hard, it needs more time. A ripe avocado will yield to gentle pressure.
Should I pick a firm or soft avocado? Firm avocados last longer. You can buy them and let them ripen at home. Soft avocados are great for immediate use. If you need one fast, choose a soft one.
Enhancing Flavor
What spices and herbs should I use? Ground cumin adds warmth and depth. Fresh cilantro gives a bright taste. You can also try chili powder for heat or smoked paprika for a smoky touch.
What toppings can I add for more flavor? Consider adding diced radishes for crunch. Crumbled feta cheese brings creaminess. Hot sauce can add a kick. Feel free to mix and match toppings to find your favorite combo.
Ensuring Perfect Tacos
How do I warm the tortillas? Heat a non-stick skillet over medium heat. Place each tortilla in the skillet for about 30 seconds. Flip and warm the other side. This makes them soft and ready to fill.
How can I avoid soggy tacos? Use a slotted spoon when adding the filling. This stops excess liquid from soaking the tortilla. Serve the tacos right after filling to keep them fresh.

Variations
Vegan Options
If you want to make your tacos vegan, you can swap out any non-vegan toppings. Instead of feta cheese, use a dairy-free cheese or leave it off entirely. You can also add more veggies like bell peppers or corn for extra flavor and texture.
Spicy Variations
To kick up the heat, add more jalapeños or try different peppers. You can use serrano or habanero for a fiery taste. Toss in some cayenne pepper or chili powder to the mixture for an extra spicy kick. Adjust the spices to find the heat level you like best.
Ingredient Swaps
Feel free to mix up the beans or veggies. Pinto beans or kidney beans can work well too. Try adding corn, zucchini, or bell peppers for variety. You can even use sweet potatoes for a unique twist. Each swap adds a new layer of flavor.
Storage Info
Storing Leftovers
To keep your taco filling fresh, place it in an airtight container. This helps maintain flavor and texture. Store it in the fridge for up to three days. Avoid adding toppings until you’re ready to eat. This keeps everything crisp and tasty.
Freezing Instructions
If you want to save some taco filling for later, freezing works great. First, let the mixture cool completely. Then, put it in a freezer-safe container or bag. Seal it tightly, removing as much air as possible. You can freeze it for up to three months. When you’re ready, just thaw it in the fridge overnight.
Reheating Tips
To reheat your filling, use the stove for the best results. Place it in a skillet over medium heat. Stir it often to warm evenly. You can also use a microwave. Just heat it in short bursts, stirring in between. Avoid overheating to keep the texture just right. Serve the filling warm in your tortillas for a delicious meal.
FAQs
Can I use canned black beans for this recipe?
Yes, canned black beans are convenient and work well. They save time and add great flavor. Just rinse and drain them before use. This step removes excess sodium and keeps your dish fresh.
How do I prevent my avocado from browning?
To keep your avocado fresh, use lime juice in the mixture. The acid helps slow down browning. You can also store leftover avocado in an airtight container with some lime juice on top. This keeps it bright and green.
What can I serve with avocado and black bean tacos?
These tacos pair well with a few simple sides. Try serving them with:
– Mexican rice
– Fresh corn salad
– Grilled vegetables
– Chips and salsa
These sides add color and balance to your meal.
How long do these tacos last in the fridge?
These tacos stay fresh for about 2 days in the fridge. Store the filling in a sealed container. Keep the tortillas separate to avoid sogginess. Reheat the filling in a pan before serving.
Is this recipe gluten-free?
Yes, this recipe is gluten-free! The main ingredients are black beans, avocado, and corn tortillas. Always check labels if you use pre-packaged items, as some may contain gluten.
Ideas for meal prep with this recipe
Meal prep is easy with these tacos. You can:
– Make the filling a day ahead and store it in the fridge.
– Chop veggies and store them in separate containers.
– Warm tortillas right before serving.
This way, you can enjoy a quick and healthy meal anytime.
In this article, we covered a tasty black bean and avocado taco recipe. You learned about the key ingredients, easy steps to prepare them, and tips for the best flavor. We also explored variations to suit your taste and how to store leftovers. Tacos are fun and flexible, making them great for any meal. With these tips, you can create delicious tacos every time. Enjoy making your new favorite dish!


![- 1 lb boneless, skinless chicken breast - Soy sauce, honey, rice vinegar, sesame oil - Fresh garlic and ginger The main stars of this dish are the chicken and the sauce. Start with 1 pound of boneless, skinless chicken breast. Cut it into 1-inch cubes for even cooking. You’ll also need soy sauce for that salty umami flavor. Honey adds sweetness, while rice vinegar gives a nice tang. Don't forget the sesame oil, which adds a rich, nutty taste. Fresh garlic and ginger bring a wonderful aroma and flavor to the mix. - Red and green bell peppers - Zucchini - Scallions and sesame seeds for garnish Adding vegetables makes your skewers colorful and tasty. Use red and green bell peppers cut into 1-inch squares. They add crunch and sweetness. Sliced zucchini rounds are great for texture and taste. For garnish, sprinkle chopped scallions and sesame seeds on top. They add a nice pop of flavor and look pretty, too. - Wooden skewers or metal skewers - Cornstarch for sauce thickening You will need skewers to hold all the goodness together. If you choose wooden skewers, soak them in water for about 30 minutes. This helps prevent burning on the grill. Metal skewers are a great option too. For the teriyaki sauce, you will use cornstarch mixed with water to make it thick and glossy. This will give your chicken a beautiful glaze. For the full recipe, check the section above on how to bring these ingredients together into a delightful dish. To start, gather your marinade ingredients. In a bowl, mix the soy sauce, honey, rice vinegar, sesame oil, minced garlic, and grated ginger. Whisk until everything blends well. Add the chicken breast cubes, making sure they are well coated. Cover the bowl with plastic wrap. Place it in the fridge for at least 30 minutes. For a stronger flavor, marinate for up to 2 hours. This step is key to juicy, flavorful chicken. If you use wooden skewers, soak them in water for at least 30 minutes. This helps stop them from burning. While the skewers soak, preheat your grill or grill pan to medium-high heat. A hot grill will give your skewers those perfect grill marks and lock in the flavors. After marinating, take the chicken out of the fridge. Start threading the marinated chicken onto the skewers. Alternate with pieces of red and green bell peppers and zucchini slices. Leave small gaps between each piece for even cooking. Now, place the skewers on the hot grill. Grill them for about 10 to 12 minutes. Turn them occasionally to ensure even cooking. The chicken should reach an internal temperature of 165°F. You’ll know they are done when they have beautiful grill marks and smell amazing. For the best flavor, marinate the chicken for at least 30 minutes. If you have time, let it soak for up to 2 hours. This longer marinating time helps the chicken absorb all the tasty flavors. To boost the flavor even more, add a splash of orange juice or sprinkle some chili flakes into the marinade. These small changes can make a big difference. To get those nice grill marks, preheat your grill to medium-high heat. Once you place the skewers on, resist the urge to move them around too much. Let them cook for about 10-12 minutes. Flip them only when they lift easily from the grill. To know if the chicken is done, use a meat thermometer. The safe internal temperature for chicken is 165°F. This ensures your skewers are juicy and safe to eat. When serving your Chicken Teriyaki Skewers, make it look nice! Arrange them on a platter, maybe on a bed of fresh lettuce. You can also serve them with a small bowl of extra teriyaki sauce for dipping. For sides, consider steamed rice or a fresh salad. The colors of the skewers and the sides will create a beautiful meal. This makes it more fun to eat and share! {{image_4}} You can switch up the protein in your skewers. Shrimp works great, too. Just remember to cook shrimp for only 4-6 minutes. Tofu is another good choice. Use firm tofu and press it first to remove extra water. Then, cut it into cubes. Tofu takes about the same time as chicken to cook. For a plant-based twist, try a marinade with soy sauce, maple syrup, and garlic. It will give you great flavor without meat. You can make vegetable-only skewers with bell peppers, zucchini, mushrooms, and cherry tomatoes. These cook quickly and taste amazing on the grill. You can make your skewers even better with spices. Adding chili flakes or smoked paprika gives a nice kick. You can also try different sauces like peanut or hoisin sauce. Mix in veggies like onions or asparagus for more color and taste. These small changes can make your Chicken Teriyaki Skewers unique and fun. For the full recipe, check out the detailed instructions above. When you have leftover chicken teriyaki skewers, store them properly. Place the skewers in an airtight container. This helps keep them fresh. Refrigerate them within two hours of cooking. It’s best to eat them within three days. Use glass or plastic containers with tight lids. These containers prevent air from getting in. You can also wrap them in aluminum foil. Just make sure they are sealed well. This keeps your skewers moist and tasty. To reheat your skewers, use an oven or a stovetop. Both methods keep the chicken juicy. If using an oven, set it to 350°F. Place the skewers on a baking sheet. Heat for about 10 minutes. For stovetop reheating, use a non-stick pan. Add a splash of water to the pan. Cover it with a lid. This helps steam the skewers and keeps them moist. Avoid reheating them in the microwave. Microwaves can make the chicken dry. Instead, always check the internal temperature. It should reach 165°F for safe eating. If you want to freeze the chicken skewers, do it right after cooking. Let them cool completely first. Wrap each skewer in plastic wrap. Then place them in a freezer bag. This helps prevent freezer burn. To thaw, move the skewers to the fridge a day before you want to eat them. This keeps them safe and tasty. If you need to thaw them faster, use the microwave on the defrost setting. But make sure to cook them right away after. For the best results, enjoy your chicken teriyaki skewers fresh. But if you follow these steps, leftovers can still taste great! For the full recipe, check it out [Full Recipe]. To check if your Chicken Teriyaki Skewers are done, use a meat thermometer. The chicken should reach an internal temperature of 165°F (75°C). This step is key for food safety. If you don't have a thermometer, make sure the juice runs clear when you cut the chicken. No pink should show. Yes, you can make the teriyaki sauce ahead of time. Mix the ingredients and store it in the fridge. This makes your meal prep easier. You can also make a larger batch and freeze it. Just thaw it before use. This way, your meal cooks faster. Chicken Teriyaki Skewers pair well with many side dishes. You might try steamed rice or quinoa for a filling option. A fresh salad adds a nice crunch. You can also serve them with grilled vegetables for a colorful plate. These sides will enhance the flavors and balance the meal. Chicken Teriyaki skewers are easy and fun to make. You learned about key ingredients like chicken, vegetables, and sauce. I shared step-by-step instructions for marinating, preparing, and grilling. You also saw tips for perfecting your dish and some tasty variations. In the end, you can enjoy these skewers any way you like. With proper storage and reheating, leftovers can be just as delicious. I hope this guide helps you create a tasty meal that you will love!](https://goldendishy.com/wp-content/uploads/2025/07/34476f9e-f69f-487d-af01-da0dcfe0a0e7-768x768.webp)

. Start by gathering all your ingredients. You will need chicken, garlic, lemon juice, and spices. If you use wooden skewers, soak them in water for at least 30 minutes. This step helps keep them from burning on the grill. In a large bowl, mix the minced garlic, lemon juice, lemon zest, olive oil, smoked paprika, cayenne pepper, ground cumin, salt, and pepper. Whisk these together until they blend well. Then add the chicken cubes. Make sure each piece is coated in the marinade. Cover the bowl and place it in the fridge. Let it marinate for at least 1 hour, or longer if you have time. This will add great flavor to the chicken. Preheat your grill to medium-high heat. If you use a grill pan, heat it over medium on the stove. Once your chicken has marinated, thread the pieces onto the skewers. Leave a small space between each piece. This helps the chicken cook evenly. Grill the skewers for about 10 to 12 minutes. Turn them often to get nice grill marks. Check that the chicken reaches an internal temperature of 165°F (75°C). After grilling, let the skewers rest for a few minutes. This keeps the juices inside. Finally, garnish with fresh parsley before serving. This adds a nice touch to your dish. For the full recipe, check the instructions above. To get the best flavor, use fresh ingredients. Fresh garlic and lemon juice give a bright taste. When mixing the marinade, let the spices blend well. They create a rich flavor. Don't rush the marinating. Allow at least one hour, or better yet, overnight. This soaking time lets the chicken absorb all those tasty flavors. Adjust the cayenne pepper based on your spice level. This way, you can make the dish mild or fiery to fit your taste. One common mistake is not soaking wooden skewers. If you skip this step, they can burn on the grill. Always soak them for at least thirty minutes. Another mistake is overcrowding the skewers. Leave some space between the chicken pieces. This helps them cook evenly. Also, don't rush the resting time after grilling. Letting them rest keeps the juices inside, making the chicken juicy. To make your skewers look great, use a large serving platter. Arrange the skewers neatly. Add fresh lemon wedges around them for color. A sprinkle of chopped parsley on top makes it more inviting. For an extra treat, serve with a yogurt dip or tzatziki. This adds creaminess and coolness to the spicy flavors. These simple steps can elevate your dish and impress your guests. For the complete guide on making these skewers, check the Full Recipe. {{image_4}} You can swap chicken for other proteins. Try shrimp for a quick cook. Beef or pork also works well. Just adjust your cooking time to avoid overcooking. Fish, like salmon, can add a rich flavor. Each protein brings its own taste. For a vegetarian version, use firm tofu. It soaks up flavors well. You can also try mushrooms for a meaty texture. Bell peppers, zucchini, and cherry tomatoes make colorful additions. For a vegan option, skip the chicken and keep the marinade. Mix things up with different marinades. Try adding soy sauce or ginger for an Asian twist. A spicy chili paste can add heat. For a Mediterranean flair, use herbs like oregano and thyme. Experiment with what you like for new tastes. For the full recipe, check out the details above. After enjoying your spicy lemon garlic chicken skewers, let any leftovers cool down. Place them in an airtight container. Store them in the fridge for up to three days. This keeps the chicken fresh and tasty for later meals. To reheat the chicken skewers, preheat your oven to 350°F (175°C). Place the skewers on a baking sheet. Heat for about 10-15 minutes or until they are warm. You can also use a microwave. Heat them on medium power for 1-2 minutes. This way, the chicken stays juicy and delicious. If you want to save the skewers for later, freezing is a great option! Wrap each skewer in plastic wrap or aluminum foil. Place them in a freezer-safe bag. They can last up to three months in the freezer. When you are ready to eat them, thaw them in the fridge overnight. Then, reheat as mentioned above for a tasty meal. For the full recipe, check out the link! You should marinate chicken for at least 1 hour. For the best taste, let it sit overnight. This longer time allows the flavors to soak in well. The garlic and lemon will really shine through. Just remember, the longer the chicken sits in the marinade, the more flavorful it becomes. Yes, you can cook these skewers in the oven. Preheat your oven to 400°F (200°C). Line a baking sheet with foil for easy cleanup. Place the skewers on the sheet and bake for about 15-20 minutes. Make sure to turn them halfway through for even cooking. Check that the chicken reaches 165°F (75°C) inside. These skewers go great with many side dishes. Here are some tasty options: - Grilled vegetables like bell peppers and zucchini - A fresh green salad with lemon vinaigrette - Rice or quinoa to soak up the juices - Garlic bread for a crunchy contrast Each of these sides will add a nice balance to the meal. To change the spice level, simply adjust the cayenne pepper. For less heat, use half a teaspoon or skip it. If you want more spice, add an extra teaspoon. You can also use spicy marinades or hot sauce for extra kick. Always taste as you go, so you can find your perfect level of heat. For the full recipe, check the earlier section. Enjoy cooking! You learned how to make Spicy Lemon Garlic Chicken Skewers. We covered the main ingredients, marinade, and garnishes. I provided step-by-step instructions for grilling. You also got tips for perfect flavor and common mistakes to avoid. There are variations, like using different proteins and marinades. Lastly, I shared storage info and answered key FAQs. Try these skewers for your next cookout. Enjoy the bold flavors and easy prep!](https://goldendishy.com/wp-content/uploads/2025/06/b1f94ef8-81fb-4621-8ae2-1513b5b656e4-768x768.webp)

