Apple Cider Pound Cake Perfect for Autumn Gatherings

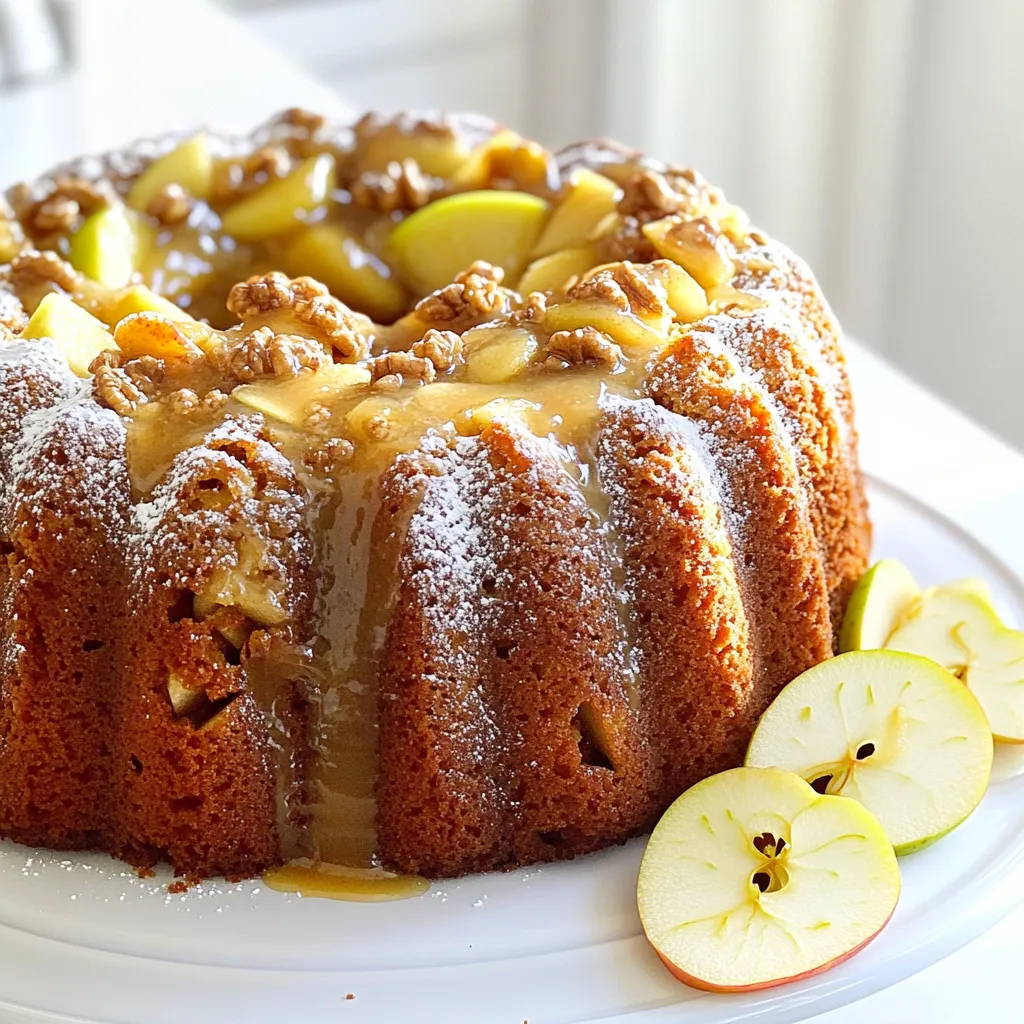
Autumn is the perfect time for warm, comforting flavors, and nothing captures that better than my Apple Cider Pound Cake! This simple yet delightful cake combines the warmth of cinnamon, nutmeg, and real apple cider, making it a must-have for fall gatherings. Whether you’re hosting a dinner or enjoying a cozy night in, this cake will impress your guests and satisfy your cravings. Let’s get baking!
Ingredients
To make the perfect Apple Cider Pound Cake, you will need the following ingredients:
– 1 cup unsalted butter, softened
– 2 cups granulated sugar
– 3 large eggs, at room temperature
– 1 teaspoon pure vanilla extract
– 3 cups all-purpose flour, sifted
– 1 teaspoon baking powder
– 1 teaspoon baking soda
– ½ teaspoon salt
– 1 cup apple cider, preferably fresh
– 1 teaspoon ground cinnamon
– ½ teaspoon ground nutmeg
– 1 cup peeled and chopped apples (Granny Smith recommended)
– ½ cup chopped walnuts (optional)
These ingredients work together to create a moist, flavorful cake. The unsalted butter adds richness, while the sugar gives sweetness. Using fresh apple cider makes a big difference in taste. The apples add texture and a slight tartness, which pairs well with warm spices like cinnamon and nutmeg. If you like a bit of crunch, incorporate the walnuts. They add a nice surprise in each bite.
Having your eggs and butter at room temperature helps everything mix smoothly. This step is key for a light and fluffy cake. Remember to sift your flour. It helps to aerate the flour, making your cake rise better. Keep these tips in mind as you gather your ingredients. You’ll set yourself up for a deliciously successful bake!
Step-by-Step Instructions
Preparation Steps
– Preheat your oven to 350°F (175°C).
– Prepare your bundt pan by greasing and flouring it well. This step helps the cake release easily.
Mixing Steps
– In a large bowl, cream the softened butter and sugar. Use an electric mixer on medium speed for about 4-5 minutes. The mix should look light and fluffy.
– Add the eggs one at a time. Beat well after each egg before adding the next. Stir in the vanilla extract until everything mixes well.
– In another bowl, combine the sifted flour, baking powder, baking soda, salt, ground cinnamon, and ground nutmeg. Whisk them together until they blend evenly.
Final Steps
– Gradually fold the dry mix into the wet mixture. Alternate with apple cider. Start and end with the flour mix. Mix gently to keep the cake tender.
– Carefully fold in the chopped apples and walnuts, if you want some extra crunch.
– Pour the batter into the prepared bundt pan. Use a spatula to smooth the top so it bakes evenly.
– Bake your cake for 55-65 minutes. Check with a toothpick in the center. It should come out clean.
– Once done, take the cake out of the oven. Let it cool in the pan for about 15 minutes. Then, invert it onto a wire rack to cool completely.
Tips & Tricks
Best Baking Practices
To ensure even baking, follow a few simple steps. First, always preheat your oven to the right temperature. This helps the cake rise correctly. Next, use a bundt pan or tube pan that is well-greased and floured. This prevents the cake from sticking.
It’s also key to use room temperature ingredients. Cold butter or eggs can make your batter lumpy. Let your butter sit out for about 30 minutes before mixing. The same goes for the eggs. This small tip can make a big difference in your cake’s texture.
Enhancements for Flavor
When it comes to flavor, using fresh apple cider is best. Fresh cider has a rich taste that makes the cake moist and flavorful. Bottled cider can work, but it might lack that fresh zing.
Choosing the right apples is also important. I recommend Granny Smith apples for their tartness. They balance the sweetness from the sugar and cider. You can also try Honeycrisp or Fuji apples for a sweeter twist.
Presentation Tips
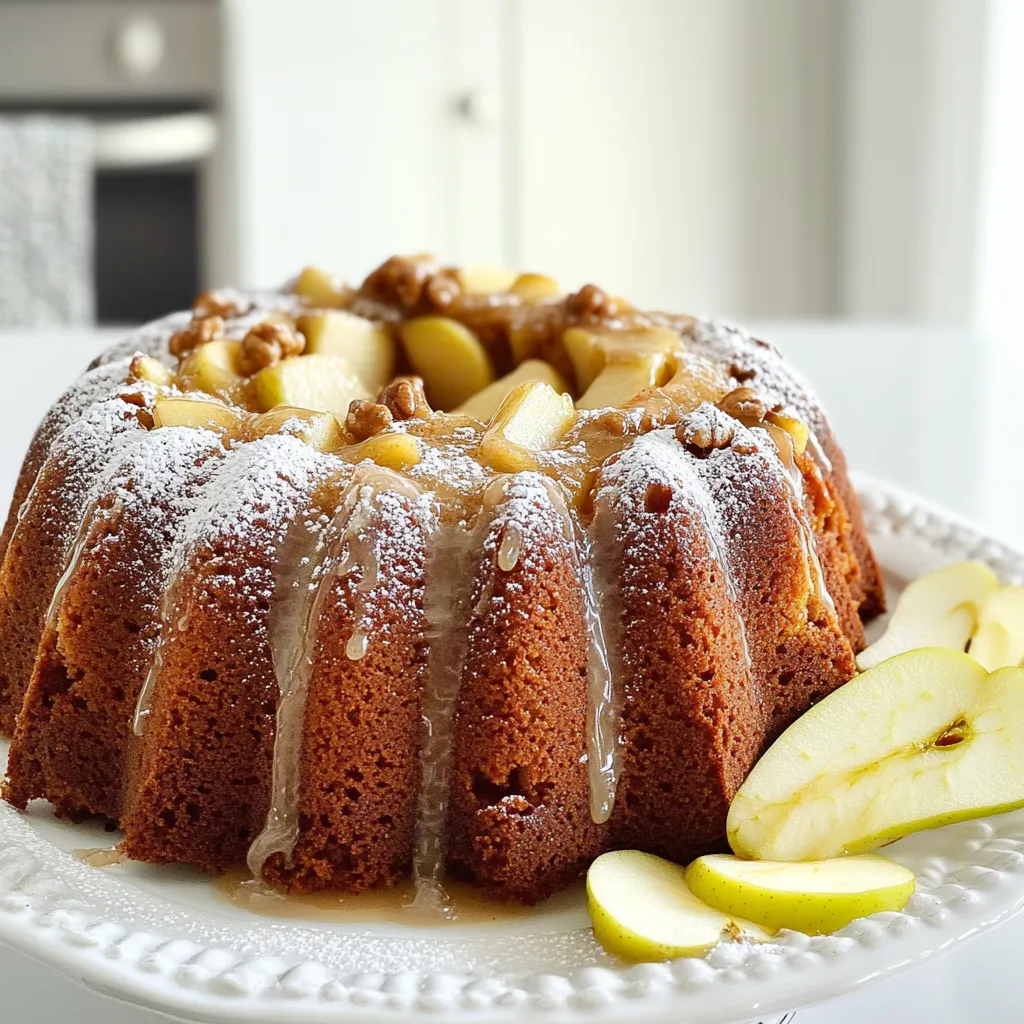
Presentation matters, especially for gatherings. Dust each slice of cake with powdered sugar before serving. This adds a lovely touch and makes it look festive.
For a glaze, mix powdered sugar with a splash of apple cider. Drizzle this over the top of the cake for added sweetness. To make it more beautiful, arrange thin apple slices beside the cake. This gives a charming autumn feel and makes it ready for your guests.

Variations
Flavor Variations
You can easily change the flavor of your apple cider pound cake. Adding spices can make it extra special. Try mixing in allspice or ginger for a warm kick. You can also add other fruits like pears or berries. Nuts, like pecans or almonds, bring great texture too. These small changes can transform your cake into something unique.
Dietary Adjustments
If you need gluten-free options, you can use gluten-free flour blends. They work well in this recipe. For those watching sugar intake, try using less sugar or natural sweeteners like honey. These swaps keep the cake tasty while fitting your diet. Always make sure to test the texture and taste, as these changes can affect the final result.
Seasonal Twists
Autumn brings cozy flavors. You can add dried cranberries for a festive touch. They give a nice tartness to the sweet cake. For winter, consider using peppermint extract or orange zest. These seasonal twists make your cake perfect for holiday gatherings. You can also create a fun glaze with cider and sugar to add extra flair.
Storage Info
Proper Storage Methods
Store your leftover pound cake at room temperature. Wrap it tightly in plastic wrap. This keeps it fresh for days. If you want to save it longer, freeze it. Slice the cake first for easier thawing. Wrap each slice in plastic wrap, then place them in a freezer bag. This method keeps the cake moist.
Shelf Life
At room temperature, your apple cider pound cake lasts about 3 to 4 days. If you keep it in the fridge, it can last up to a week. Be sure to wrap it well to prevent it from drying out.
Reheating Tips
When you want to enjoy your pound cake again, reheating is key. Use the microwave for quick warming. Heat each slice for about 10 to 15 seconds. If you prefer the oven, set it to 300°F. Wrap the cake in foil to keep it from drying. Heat for about 10 minutes. Enjoy the warm, cozy flavors all over again!
FAQs
Common Questions
Can I use cake flour instead of all-purpose flour?
Yes, you can use cake flour. The cake will be lighter. Use the same amount, but add a little more liquid if needed.
How do I substitute eggs for a vegan option?
You can use applesauce or mashed bananas as a substitute. Use 1/4 cup for each egg. This will keep the cake moist.
What can I serve with Apple Cider Pound Cake?
You can serve it with whipped cream or vanilla ice cream. A warm caramel sauce also pairs well with the cake.
Troubleshooting Issues
Why did my cake sink in the middle?
Your cake may have sunk due to overmixing or underbaking. Be sure to mix just until combined and check for doneness with a toothpick.
How can I fix a dry pound cake?
To fix a dry cake, add a simple syrup. Combine equal parts sugar and water, heat until dissolved, and brush it onto the cake.
Additional Ideas
Can I make mini versions of this pound cake?
Yes, you can make mini versions! Use a mini bundt pan or a muffin tin. Bake for about 20-25 minutes.
Best beverages to pair with Apple Cider Pound Cake
Pair the cake with warm spiced cider, chai tea, or a light dessert wine. These drinks enhance the cake’s flavor.
In this article, we explored the ingredients, steps, and tips for making a delicious Apple Cider Pound Cake. You learned how to prepare and mix the batter, bake it perfectly, and add fun variations. Proper storage and reheating tips help maintain freshness. Remember, baking is an art, and practice makes perfect. Enjoy crafting this delightful cake and share it with friends and family. Your kitchen will be filled with warmth and joy. Happy baking!


![To make Peach Cobbler French Toast, gather these items: - 4 slices of thick bread (brioche or challah is best) - 2 ripe peaches, sliced (canned peaches work too; drain them) - 2 large eggs - 1 cup milk (whole or almond milk is great) - 1 tablespoon pure vanilla extract - 1 teaspoon ground cinnamon - 1 tablespoon brown sugar - 1 tablespoon unsalted butter (for cooking) - ½ cup granola (optional, for crunch) - Whipped cream (optional, for serving) If you have dietary needs, consider these swaps: - For gluten-free, use gluten-free bread. - Vegan? Swap eggs with flaxseed meal and use plant-based milk. - For low-sugar diets, try a sugar substitute in place of brown sugar. Picking peaches is easy with these tips: - Look for peaches that are firm but slightly soft when squeezed. - Choose fruit with a sweet smell; this indicates ripeness. - Avoid peaches with bruises or dark spots, as these can affect flavor and texture. By following these tips and using the right ingredients, you’ll make a delightful Peach Cobbler French Toast that everyone will love! Check out the Full Recipe for more details. Making Peach Cobbler French Toast is a fun and simple process. I’ll walk you through each step to ensure your dish turns out perfectly. 1. Mixing the egg custard: In a medium bowl, whisk together 2 large eggs, 1 cup of milk, 1 tablespoon of pure vanilla extract, and 1 teaspoon of ground cinnamon. Mix well until it is smooth and creamy. This egg custard gives the French toast its rich flavor. 2. Soaking the bread slices: Pour the egg mixture into a shallow dish. Take 4 slices of thick bread, like brioche or challah. Place each slice in the dish, soaking for about 2-3 minutes on each side. Make sure they absorb the custard well. 3. Preparing the peach topping: While the bread soaks, slice 2 ripe peaches. If you use canned peaches, ensure they are drained. In a small saucepan, combine the sliced peaches with 1 tablespoon of brown sugar. Cook over medium heat for about 5-7 minutes, stirring often. When the peaches are soft and syrupy, take them off the heat. 4. Cooking the French toast: Heat a skillet over medium heat and add 1 tablespoon of unsalted butter. Let the butter melt completely. Place the soaked bread slices in the skillet. Cook each side for 3-4 minutes until golden brown. The butter helps give the toast a nice, crisp texture. Once cooked, arrange the French toast on plates and spoon the warm peach topping over each slice. For a delightful crunch, you can sprinkle granola on top. If you want to indulge, add a dollop of whipped cream. For detailed steps, refer to the Full Recipe. - Achieving the perfect golden crust: To get that nice, golden crust, use thick bread. Brioche or challah works best. Soak each slice well, but don't leave it too long. This ensures the center stays soft while the outside crisps up. - Temperature control for even cooking: Keep your skillet or griddle at medium heat. If it’s too hot, the bread will burn before cooking through. If it’s too cool, you won’t get the lovely crust. Adjust as needed while cooking each slice. - How to avoid soggy bread: Soak the bread just enough to absorb the flavors. If the bread is too soggy, it won’t cook well. A quick 2-3 minute soak on each side is perfect for keeping it fluffy yet not falling apart. - Pairing with syrup or whipped cream: Drizzle with maple syrup for sweetness. A dollop of whipped cream adds a creamy touch. Both make your Peach Cobbler French Toast even more delightful. - Presentation ideas for special occasions: Stack the slices on a platter. Add warm peach syrup on top. Garnish with fresh peach slices. A sprinkle of cinnamon creates an eye-catching centerpiece for brunch. - Best sides to complement Peach Cobbler French Toast: Serve with crispy bacon or sausages for a savory balance. Fresh fruit adds color and freshness, making your meal more appealing. You can also add a light salad for a refreshing touch. For the full recipe, check out [Full Recipe]. {{image_4}} You can make Peach Cobbler French Toast to fit your diet. If you need gluten-free options, choose gluten-free bread. Many brands offer tasty alternatives. For dairy-free choices, almond or oat milk works well. Both give a nice flavor. You can also swap out spices. Try nutmeg or allspice for a twist. Extracts like almond or maple add a fun taste. To make this dish even better, think about adding nuts or seeds. Chopped pecans or walnuts give a nice crunch. You can also mix in berries. Blueberries or raspberries pair well with peaches. They add color and flavor. If you want new fruit choices, try apples or mango. Both fruits bring a fresh taste and keep it exciting. With these tips, you can create your own unique version. Check out the Full Recipe for more details! To keep your Peach Cobbler French Toast fresh, follow these tips: - Refrigerate promptly: Place leftover French toast in an airtight container within two hours of cooking. - Layer wisely: If you have multiple pieces, insert parchment paper between them to prevent sticking. - Use within three days: For the best taste and texture, enjoy your leftovers within this time. When it comes to reheating, use a skillet or microwave: - Skillet method: Heat on low for about 3-4 minutes on each side. This keeps the toast crispy. - Microwave method: Heat on medium for 30-second intervals until warm. This method may soften the toast. You can freeze Peach Cobbler French Toast for later enjoyment! Here’s how: - Cool completely: Let the French toast cool to room temperature before freezing. - Wrap well: Use freezer-safe bags or wrap each slice in plastic wrap, then aluminum foil. - Label and date: Write the date on the bag for easy tracking. To thaw and reheat: - Thaw overnight: Place in the fridge for several hours or overnight. - Reheat: Use the skillet method mentioned above or microwave for 1-2 minutes until hot. Now you can enjoy this delicious treat anytime! Check out the Full Recipe for all the details. Choosing the right bread makes a big difference. I recommend using thick slices of brioche or challah. These breads soak up the egg mixture well and become nice and fluffy. Look for bread that is fresh but not too soft. You want a sturdy texture that holds up during cooking. Yes, you can prepare some parts ahead of time. You can soak the bread slices in the egg mixture and store them in the fridge for a few hours. Just be sure to cook them right before serving. You can also prepare the peach topping in advance and warm it up when you are ready to eat. If you don’t have peaches, you can try other fruits. Fresh or canned sliced pears work well. You can also use berries like blueberries or strawberries. Just keep in mind that cooking times may vary slightly. The cooked Peach Cobbler French Toast lasts about three days in the fridge. Store it in an airtight container to keep it fresh. When you reheat it, warm it in a skillet or microwave until hot. This helps keep the texture nice. For the full recipe, check the one provided above. Peach Cobbler French Toast is a delightful dish that brings joy to breakfast. We covered ingredients, preparation steps, and useful tips for cooking. I offered ideas for variations, storage, and answers to common questions. Embrace your creativity with this recipe. Try different fruits or spices for unique flavors. Enjoy the process and make it your own! Happy cooking!](https://goldendishy.com/wp-content/uploads/2025/06/19b86d0b-72ea-4091-b6de-feef30e599d4-768x768.webp)
![- 1 cup all-purpose flour - 1 cup whole wheat flour - 1 tablespoon pumpkin pie spice - ½ cup granulated sugar - 1 can (15 oz) pumpkin puree - 2 large eggs - ½ cup brewed coffee, cooled - ⅓ cup vegetable oil - Optional mix-ins: ½ cup chocolate chips or nuts - Baking soda - Baking powder - Salt - Brown sugar - Pure vanilla extract The main ingredients form the base of your muffins. The blend of all-purpose and whole wheat flour adds great texture. Pumpkin puree brings moisture and a rich flavor. You can’t forget the pumpkin pie spice; it gives that cozy fall taste. Granulated sugar adds sweetness, while brown sugar provides depth. For the additional ingredients, eggs help the muffins rise and become fluffy. Brewed coffee gives a coffee kick, enhancing the flavor without being too strong. Vegetable oil keeps them moist. If you want, add chocolate chips or nuts for extra fun. Now, let’s talk staples. Baking soda and baking powder help the muffins rise. Salt balances the sweetness. Finally, pure vanilla extract adds a warm note that ties everything together. You can find the full recipe at the end. Set your oven to 350°F (175°C). This temperature helps the muffins rise nicely. Line or grease the muffin tin to keep the muffins from sticking. I prefer using paper liners for easy cleanup. In a large mixing bowl, whisk together the flours, baking soda, baking powder, pumpkin pie spice, and salt. This step is key for even flavor and texture. Make sure there are no lumps in the mixture. In another bowl, mix the granulated sugar and brown sugar until smooth. Then, add the pumpkin puree, eggs, cooled coffee, vegetable oil, and vanilla extract. Stir until everything is well combined. The mixture should look creamy and inviting. Gradually mix the dry ingredients into the wet mixture. Use a spatula to fold gently. Avoid overmixing; a few lumps are just fine. If you want, gently fold in chocolate chips or nuts for added flavor and texture. Spoon the batter into the muffin tins. Fill each cup about two-thirds full to allow for rising. Place the muffin tin in the oven and bake for 18-22 minutes. To check for doneness, insert a toothpick into a muffin. If it comes out clean, they are ready. Let the muffins cool in the pan for about 5 minutes. After that, transfer them to a wire rack to cool completely. Enjoy them warm for a cozy treat! For an extra touch, serve with cinnamon sugar or maple syrup. You can find the full recipe [here]. To make your muffins light and fluffy, avoid overmixing the batter. Stir gently until the dry and wet ingredients just come together. A few lumps are okay! Also, use room temperature ingredients. This helps the batter mix better and rise well. For a stronger coffee taste, try substituting brewed coffee with espresso. This adds depth to the flavor. Another great tip is to sprinkle some cinnamon sugar on top of the muffins before baking. This gives them a sweet, crispy crust that enhances their cozy taste. These muffins taste best when warm. Enjoy them with a fresh cup of coffee. For added sweetness, drizzle some maple syrup on top or spread a little cream cheese frosting. These simple touches make your cozy fall treat even more delightful! {{image_4}} You can easily make these muffins gluten-free. Simply swap the all-purpose flour with a gluten-free flour mix. Make sure to check the blend. Some mixes work better in baked goods than others. Using a good quality mix helps maintain texture and taste. If you want a dairy-free version, use almond milk instead of regular milk. Almond milk adds a light flavor that pairs well with the spices. For oil, replace vegetable oil with coconut oil. Coconut oil adds a subtle sweetness and complements the pumpkin nicely. To add some crunch, you can mix in nuts like walnuts or pecans. They add a nice texture and flavor. You can also play with spices. Try adding a pinch of nutmeg or cardamom for a twist. If you love chocolate, consider adding chocolate chunks. They melt perfectly and create a rich taste. To keep your pumpkin spice latte muffins fresh, place them in an airtight container at room temperature. This method helps maintain their soft texture and rich flavor. If you have a lot of muffins, you can stack them with parchment paper between layers. This prevents them from sticking together. If you want to enjoy these muffins later, freezing is a great option. First, let the muffins cool completely. Wrap each muffin in plastic wrap, then place them in a freezer bag. Make sure to remove as much air as possible to avoid freezer burn. You can store them in the freezer for up to three months. When you're ready to eat one, take it out and let it thaw at room temperature. You can also reheat it in the microwave for about 15-20 seconds. To keep your muffins moist and tasty over time, consider these tips: - Add a slice of bread to the container. This helps keep the muffins moist. - Avoid exposing them to direct sunlight or heat sources, as this can dry them out. - If you notice any muffins getting stale, you can toast them lightly. This can bring back some of their original flavor. Storing your pumpkin spice latte muffins correctly ensures you can enjoy their warm, cozy flavors for days to come. For the full recipe, check the earlier section! Yes, you can add more pumpkin puree. However, this change will affect the muffins. Adding extra puree makes the muffins moister. It may also make them denser. If you want a lighter muffin, keep the amount as in the Full Recipe. You can try adding an extra tablespoon at first. This way, you can see how the texture changes. These muffins last about three days at room temperature. Keep them in an airtight container. They can also last about a week in the fridge. The cold helps keep them fresh longer. If you want to save them for later, freeze them. They stay good for about three months in the freezer. Just remember to wrap them well. Yes, you can make these muffins without eggs. Here are some good substitutes: - 1/4 cup unsweetened applesauce - 1/4 cup mashed banana - 1 tablespoon flaxseed meal mixed with 2.5 tablespoons water Each option helps bind the muffins. They also add moisture. Choose the one you like best for a vegan version. You can use several options instead of brewed coffee. Here are some alternatives: - Brewed tea for a lighter flavor - Milk or almond milk for a creamy texture - Pumpkin spice tea for a fall twist These options help keep the muffins moist and tasty. You can experiment with what you have at home. These Pumpkin Spice Latte Muffins mix simple ingredients in easy steps. You learned how to combine flours, spices, and pumpkin puree for a tasty treat. I shared tips for perfect muffins and ways to store them well. Remember, you can adjust flavors to your liking. Try nuts or different spices for variety. Whether you enjoy them warm or frozen, these muffins are sure to please. Happy baking!](https://goldendishy.com/wp-content/uploads/2025/06/a78bef71-23f4-423c-981c-d5caf094e886-768x768.webp)
. This blog post covered how to make delicious chocolate chip scones. You learned about the key ingredients, step-by-step instructions, and tips for success. Remember, cold butter and careful mixing are key to flaky, tasty scones. Feel free to explore different flavors and variations. They can impress your friends or brighten your morning. With good storage methods, you can enjoy them later, too. Baking scones is fun, and the results are always worth it. Enjoy your baking journey and share your creations!](https://goldendishy.com/wp-content/uploads/2025/07/8341b68f-e0af-4c5e-ad3a-191f22800308-768x768.webp)
![For the baked cinnamon apple chips, you will need: - 2 large apples (Honeycrisp or Fuji are ideal for sweetness and texture) - 1 teaspoon ground cinnamon - 1 tablespoon sugar (coconut sugar serves as a healthier alternative) - A pinch of salt - Optional: 1 teaspoon lemon juice (to prevent browning of the apple slices) You can switch out the sugar for a natural sweetener like honey or agave. For a fun twist, try adding a sprinkle of nutmeg or cardamom in place of cinnamon. If you want to skip the lemon juice, you can use vinegar. Just remember, it may change the flavor a bit. I recommend using Honeycrisp or Fuji apples. They offer a great mix of sweetness and crunch. Other good choices are Granny Smith for a tart flavor or Gala for a milder taste. Each type brings its own charm to the chips, so feel free to experiment with your favorites. First, set your oven to 225°F (110°C). This low heat helps the apples dry out slowly. While the oven warms up, line two baking sheets with parchment paper. This keeps the apple chips from sticking and makes cleanup easy. Next, wash the apples under cool water. This step is key for cleanliness. Use an apple corer or a sharp knife to remove the cores. Slice the apples into thin rounds, about 1/8 inch thick. If you want to keep them fresh, sprinkle a bit of lemon juice on the slices. This will stop browning. Now, lay the apple slices on the baking sheets. Make sure they do not overlap. Overcrowding will make it hard for them to crisp up. When the apple slices bake for about 45 minutes, flip them over. This helps them cook evenly. Use a spatula and be careful not to break them. Keep an eye on the apple chips as they bake. After 1 to 1.5 hours, they should look golden and feel crisp. If they still feel soft, let them bake a little longer. Once done, take them out and let them cool on the sheets. They will get crunchier as they cool. For the complete recipe, check out the Full Recipe section! To get your apple chips nice and crispy, slice them thin. Aim for about 1/8 inch thick. The thinner the slice, the crunchier the chip. Lay the slices flat on your baking sheet without overlapping. This helps them bake evenly. Baking at a low temperature, like 225°F, lets the moisture escape slowly. Flip them halfway through baking for even crispiness. Keep an eye on the apple chips as they bake. They can go from crisp to burnt quickly. Check them every 15 minutes towards the end of baking. Look for a light golden color and a crisp texture. If they bend, they need more time. If they snap, they're done. This way, you can catch them at just the right moment. These apple chips are great on their own, but you can make them even better. Serve them in a bright bowl for a fun touch. Pair them with dips like nut butter or yogurt for a tasty snack. You can also sprinkle some extra cinnamon on top before serving for added flavor. Enjoy them as a healthy treat any time of day! {{image_4}} You can change the spice game with nutmeg or cloves. Nutmeg gives a warm, sweet taste. Cloves add a rich, spicy flavor. Try mixing cinnamon with these spices for a fun twist. A little goes a long way, so start small. Just a pinch can transform your apple chips into something special. If you want to switch things up, use different sweeteners. Honey adds a nice floral note. Agave syrup is a great vegan choice. Coconut sugar offers a brown sugar taste. Each sweetener brings its unique flavor. Just remember to adjust the amount based on sweetness. Check the [Full Recipe] for guidance on using your chosen sweetener. Want to boost flavor? Add nuts or dried fruit. Chopped almonds or walnuts add crunch and protein. Dried cranberries or raisins can bring sweetness. Mix them into your cinnamon-sugar blend for an extra treat. You can even sprinkle them on top before baking. This way, each bite becomes a delightful surprise. To keep your baked cinnamon apple chips fresh, use an airtight container. Glass jars work well. You can also use resealable plastic bags. Just make sure to remove as much air as possible. Store them in a cool, dark place. Avoid direct sunlight or heat, which can make them soggy. When stored properly, these chips can last about one week. After that, they may lose some crunch. If you place them in the fridge, they can last longer, but the texture might change. Always check for any signs of moisture or softness before enjoying them. If your apple chips lose their crunch, don’t worry! You can easily revive them. Simply preheat your oven to 200°F (93°C). Spread the chips on a baking sheet in a single layer. Bake them for about 5 to 10 minutes. This will help bring back their crispy texture. Enjoy them fresh from the oven! Yes, you can use a dehydrator. Just slice the apples thinly. Set the dehydrator to 135°F (57°C). Dehydrate for 6 to 8 hours. Check them often. You want them crisp but not burnt. This method keeps more nutrients than baking. To stop browning, you can use lemon juice. Just sprinkle a teaspoon on the slices. This acid slows down the browning process. You can also soak the slices in a mix of water and lemon juice for a few minutes. Rinse and dry them before baking. Apple chips are a great snack! They have fiber that helps digestion. They are low in calories, making them a healthier choice. You get natural sweetness without added sugar. Plus, they contain vitamins A and C. They are good for your skin and immune system. Yes, you can freeze them! First, let them cool completely. Place them in a single layer on a baking sheet. Freeze until solid. Then, transfer to an airtight bag. They can last up to 6 months in the freezer. Just let them thaw before eating. For the full recipe, check the earlier section. In this post, we explored how to make delicious baked cinnamon apple chips. We covered ingredients, substitutions, and the best apple varieties. The step-by-step guide included tips for achieving crispiness and avoiding overbaking. You also learned variations with spices and sweeteners, along with storage information. Now you have all the tools to create your own tasty snacks. Enjoy your homemade apple chips!](https://goldendishy.com/wp-content/uploads/2025/07/917ca0c2-206f-45f2-a1a8-9893eb8662bc-768x768.webp)