Air Fryer Garlic Parmesan Shrimp Skewers Delight

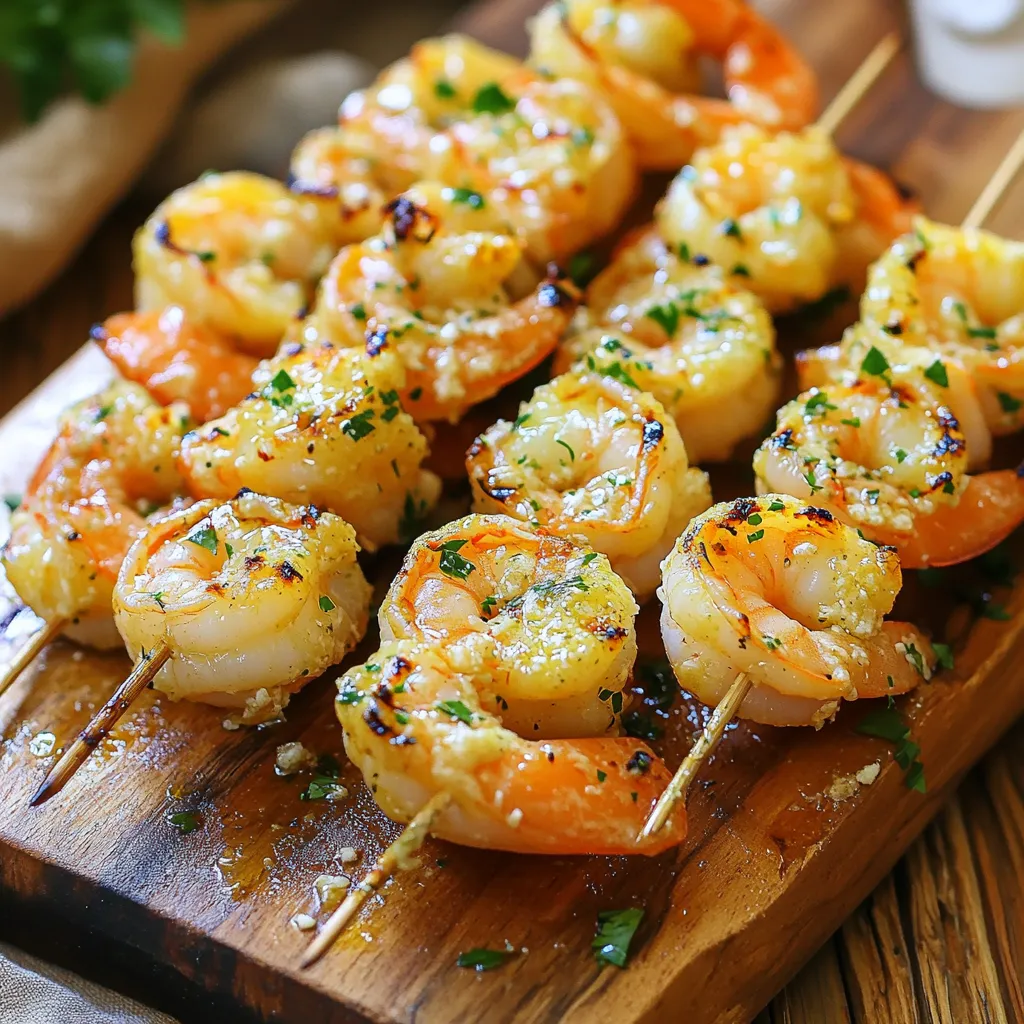
Welcome to the world of juicy Air Fryer Garlic Parmesan Shrimp Skewers! If you love quick and tasty meals, this dish is for you. In this post, I’ll share simple steps to make these flavorful skewers, tips to enhance their taste, and variations to suit your cravings. Whether you’re a busy parent or a cooking novice, I promise you’ll impress your family or guests with just a few easy ingredients. Let’s dive in!
Ingredients
List of Ingredients for Garlic Parmesan Shrimp Skewers
– 1 pound large shrimp, peeled and deveined
– 3 tablespoons extra virgin olive oil
– 4 cloves garlic, finely minced
– 3 tablespoons freshly grated Parmesan cheese
– 1 teaspoon smoked paprika
– 1 teaspoon garlic powder
– 1 teaspoon dried Italian herb blend
– Salt and freshly ground black pepper, to taste
– 1 tablespoon fresh parsley, finely chopped
– Skewers (soak wooden skewers for 30 minutes)
Importance of Fresh Ingredients
Using fresh ingredients makes a big difference in taste. Fresh shrimp offers a sweet flavor and firm texture. Fresh garlic adds a strong, bold taste that pairs well with Parmesan. When you pick fresh herbs, they bring bright flavors to your dish. Fresh ingredients not only taste better, but they also look good on your plate.
Alternative Ingredients for Dietary Preferences
You can easily swap some ingredients to fit your needs. For a low-carb option, use zucchini or bell peppers instead of shrimp. If you need a dairy-free version, try nutritional yeast. This gives a cheesy flavor without the milk. For a spicy kick, add cayenne pepper or chili flakes. Adjusting the recipe allows everyone to enjoy delicious shrimp skewers.
Step-by-Step Instructions
Preparing the Marinade
Start by gathering your ingredients. In a large mixing bowl, combine:
– 3 tablespoons extra virgin olive oil
– 4 cloves garlic, finely minced
– 3 tablespoons freshly grated Parmesan cheese
– 1 teaspoon smoked paprika
– 1 teaspoon garlic powder
– 1 teaspoon dried Italian herb blend
– Salt and freshly ground black pepper to taste
Whisk these together until you have a smooth and rich marinade. This mix adds flavor and keeps the shrimp moist.
Marinating the Shrimp
Next, add 1 pound of peeled and deveined shrimp to the bowl. Toss gently to coat each shrimp with the marinade. For the best taste, let them sit for 15 to 30 minutes. If you want to marinate them longer, place the bowl in the fridge. This step is key for flavor.
Assembling the Skewers and Preheating the Air Fryer
While the shrimp marinates, soak your wooden skewers in water for 30 minutes. This helps prevent burning. Preheat your air fryer to 400°F (200°C). This high heat gives the shrimp a nice crisp.
After soaking, thread the marinated shrimp onto the skewers. Make sure they are spaced out evenly. This helps them cook well.
Cooking Process in the Air Fryer
Place the shrimp skewers in the air fryer basket in a single layer. Avoid overlapping for even cooking. Cook them for 6 to 8 minutes. Flip them halfway through to ensure they cook evenly. The shrimp should turn opaque and curl slightly when done.
Once cooked, carefully take the skewers out of the air fryer. Garnish with freshly chopped parsley for a bright finish. Serve hot and enjoy your tasty meal!
Tips & Tricks
Achieving the Perfect Garlic Flavor
To get that strong garlic taste, use fresh garlic. Fresh garlic adds a bold flavor. Mince it finely so it spreads well. Mix the minced garlic with olive oil before adding shrimp. This helps the garlic flavor soak into the shrimp. For an extra kick, let the shrimp marinate for 30 minutes.
Ensuring Even Cooking of Shrimp
Even cooking is key for tasty shrimp. First, make sure to space your shrimp well on the skewers. If they touch, they may not cook right. Place the skewers in a single layer in the air fryer. Flip the skewers halfway through cooking to let hot air reach all sides. Cook for 6-8 minutes until the shrimp turn opaque.
Best Practices for Skewer Preparation
If using wooden skewers, soak them in water for 30 minutes. Soaking prevents burning in the air fryer. For metal skewers, you can skip this step. Always make sure the shrimp are securely threaded. This helps keep them from falling off while cooking. Aim for around 4-5 shrimp per skewer for a good bite.

Variations
Spicy Garlic Parmesan Shrimp Skewers
For a spicy kick, add red pepper flakes to your marinade. Start with a pinch and taste as you go. You can also swap in chili powder for more heat. This change enhances the dish while keeping the garlic and cheese flavors.
Lemon Herb Shrimp Skewers
To brighten your skewers, add fresh lemon juice and zest. Mix these into the marinade. The citrus flavor balances the rich garlic and Parmesan. You can also use fresh herbs like dill or cilantro for a refreshing twist. This variation adds a nice zing that pairs well with the shrimp.
Addition of Vegetables to the Skewers
You can easily add veggies for more color and nutrition. Bell peppers, zucchini, and cherry tomatoes work great. Cut them into chunks and thread them onto the skewers with the shrimp. This adds flavor and makes the meal more filling. Just make sure the veggies are cut to similar sizes for even cooking.
Storage Info
Tips for Storing Leftover Shrimp Skewers
To store leftover shrimp skewers, let them cool to room temperature. Place them in an airtight container. This helps keep them fresh. You can store them in the fridge for up to 2 days. Remember to label the container with the date. This way, you can track how long they’ve been stored.
Reheating Instructions for Leftovers
When you want to enjoy your leftover shrimp skewers, reheating is simple. Preheat your air fryer to 350°F (175°C). Place the skewers in the basket. Heat them for about 4 to 5 minutes. Check if they are warmed through. This method keeps them crispy and tasty. Avoid using the microwave, as it can make them rubbery.
Freezing Shrimp Skewers for Later Use
If you want to freeze shrimp skewers, it’s best to do this before cooking. Prepare and marinate the skewers as directed. Place them on a baking sheet lined with parchment paper. Freeze them for about 2 hours until they are solid. Then, transfer them to a freezer bag. Remove as much air as possible. They can last in the freezer for up to 3 months. When ready to cook, do not thaw. Just cook them in the air fryer for a few extra minutes. This keeps them fresh and delicious.
FAQs
Can I use frozen shrimp for this recipe?
Yes, you can use frozen shrimp. Just make sure to thaw them first. Place the shrimp in a bowl of cold water for about 15-20 minutes. This helps them thaw quickly and evenly. Once thawed, peel and devein them if needed. Frozen shrimp can work well, but fresh shrimp often taste better.
What type of air fryer works best for shrimp skewers?
Any air fryer that can reach 400°F (200°C) works well. A basket-style air fryer is great for this recipe. It allows for even cooking and good air circulation. If your air fryer has a skewers attachment, even better! Just make sure the shrimp fit comfortably without crowding.
How can I tell when shrimp are fully cooked?
Cooked shrimp turn opaque and curl slightly. This usually takes about 6-8 minutes in the air fryer. You can also cut one in half to check. If it’s pink and no longer translucent, it’s done. Be careful not to overcook them, or they can become tough.
Is it necessary to soak wooden skewers?
Yes, soaking wooden skewers is a good idea. It prevents them from burning in the air fryer. Soak them in water for at least 30 minutes before using. This step ensures your skewers hold up and adds no burnt flavor to your shrimp.
In this blog post, we explored making garlic parmesan shrimp skewers. We discussed key ingredients and their importance. Fresh ingredients enhance flavor, while alternatives cater to diets.
I shared step-by-step instructions to marinate, assemble, and cook the skewers. Tips helped achieve perfect flavor and even cooking. Variations added zest with spices, herbs, and veggies.
Finally, I covered how to store and reheat leftovers, ensuring you enjoy every bite. Now, you’re ready to impress with these tasty skewers. Enjoy cooking!


![- 2 cups Granny Smith apples, diced into bite-sized pieces - 1 cup celery, finely sliced - 1 cup red grapes, halved - 1 cup walnuts, coarsely chopped for texture - 1/2 cup plain Greek yogurt, for creaminess - 1/4 cup mayonnaise, to enhance richness - 1 tablespoon fresh lemon juice, to brighten flavors - 1 teaspoon honey, to balance tartness - Salt and freshly ground black pepper, to taste This classic Waldorf salad features fresh produce that bursts with flavor. I love using Granny Smith apples because they add a nice crunch and tartness. They pair perfectly with the sweet red grapes. Celery provides a refreshing crunch, making every bite enjoyable. You also need walnuts for a rich nutty flavor and a great texture. I like to coarsely chop them to keep some larger pieces for crunch. The creamy dressing comes from a mix of plain Greek yogurt and mayonnaise. This blend adds richness and keeps the salad light. Add fresh lemon juice to keep the apples bright and tasty. A touch of honey balances the tartness of the apples and grapes. Seasoning with salt and black pepper enhances the overall taste. This mix of ingredients creates a delightful and colorful salad that is perfect for any meal. For the full recipe, check out the detailed instructions to create this refreshing Waldorf salad. Start by dicing the Granny Smith apples into bite-sized pieces. This makes them easy to eat. To keep the apples fresh and bright, toss them in lemon juice right away. The juice helps stop browning. Next, slice the celery into thin pieces. You want them crunchy and fresh. Then, halve the red grapes. This adds a sweet and juicy burst to the salad. For the dressing, take a bowl and combine plain Greek yogurt and mayonnaise. This mix brings creaminess and smoothness to your salad. Add honey, salt, and black pepper. Whisk these together until you have a smooth, even texture. This dressing is key to making your salad flavorful. In a large bowl, fold the diced apples, sliced celery, halved grapes, and chopped walnuts together. Be gentle to keep all the pieces intact. Then, pour the creamy dressing over the salad. Carefully mix everything to coat the ingredients evenly. Taste the salad and adjust flavors if needed. Add more salt, pepper, or honey for balance. Let it chill for at least 30 minutes so the flavors blend well. Serve it on crisp lettuce leaves for a bright and tasty dish. For the full recipe, check the earlier sections. To keep your apples fresh, start by using lemon juice. After dicing Granny Smith apples, toss them in lemon juice right away. This helps prevent browning. You can also use a mix of water and lemon juice. Soak the diced apples for a few minutes. Drain and dry them before adding to your salad. This step keeps your salad looking vibrant. You can adjust the sweetness and tanginess of your Waldorf salad. If you want more sweetness, add extra honey. For a tangier taste, increase the lemon juice. You can also try different dressings. A bit of apple cider vinegar can give a nice twist. Experiment with your flavors until you find what you love. For a beautiful presentation, serve your salad on crisp lettuce leaves. Use romaine or butter lettuce for a nice touch. You can also add fresh herbs as a garnish. Chopped mint or parsley can add color. Serve the salad in a clear bowl to show off the bright colors. This makes your dish not only tasty but also eye-catching. For more details, refer to the Full Recipe. {{image_4}} You can switch up the fruits in Waldorf salad. Try using ripe pears or sweet strawberries. Each fruit gives a new flavor twist. You can also use different nuts. Pecans or almonds add a nice crunch. Each change can make the salad feel fresh and new. If you want a vegan version, swap Greek yogurt with plant-based yogurt. Use a vegan mayo for creaminess. For gluten-free diets, ensure your mayonnaise is gluten-free. You can also make a low-fat dressing. Use low-fat yogurt and reduce the mayo. These options keep the salad tasty while meeting dietary needs. Waldorf salad shines as both a side dish and a main course. Serve it alongside grilled chicken for a hearty meal. You can also pair it with other salads for a light lunch. Mixing flavors and textures makes it exciting. For a fun twist, serve it in endive leaves or on a bed of spinach. This adds a lovely presentation and taste. For the full recipe, check out the [Full Recipe]. To store leftover Waldorf salad, place it in an airtight container. Make sure to seal it tightly. This keeps the salad fresh and prevents any unwanted smells. Keep it in the fridge right after serving. If you have any extra lettuce, store it separately to keep it crisp. Waldorf salad tastes best when eaten within three days. After that, the apples may start to brown and lose their crunch. The salad will still be safe to eat for up to five days, but the texture might change. Waldorf salad is best served cold. If you need to serve it after refrigeration, just give it a gentle stir. If the salad seems a bit too thick, add a splash of lemon juice or a bit of yogurt to loosen it up. Avoid reheating, as it can change the texture and taste. Enjoy it fresh for the best flavor! Waldorf Salad dates back to the late 1800s. It first appeared at the Waldorf Astoria Hotel in New York City. Chef Oscar Tschirky created this dish for a charity ball. The original recipe included only apples, celery, and mayonnaise. Over time, people added nuts, grapes, and yogurt for extra flavor. Today, we enjoy many versions of this classic salad. Yes, you can prepare Waldorf Salad ahead of time. Make the salad and store it in the fridge. Keep it covered to keep it fresh. I recommend waiting to add nuts until serving. This keeps them crunchy. If you want to serve it later, mix all the ingredients except the dressing. Add the dressing just before serving for the best taste. You can easily swap out some ingredients in Waldorf Salad. Use different fruits like pears or strawberries if you like. If you prefer a vegan option, replace yogurt and mayo with avocado or a plant-based yogurt. For nuts, use almonds or pecans instead of walnuts. These options let you customize the salad to your taste. This blog post covered the making of a Waldorf Salad. You learned about fresh ingredients like apples, celery, and grapes. We discussed how to prepare them, make a tasty dressing, and mix everything together. I shared tips for keeping your apples crisp and customizing flavor. You can also try different fruits and nuts or adapt the recipe for dietary needs. Enjoy your Waldorf Salad, and remember to store it correctly for the best taste. Happy eating!](https://goldendishy.com/wp-content/uploads/2025/06/f7b618e5-0e03-408a-a1e5-f7591c04b926-768x768.webp)


![- 4 medium-sized beets - 4 cups mixed greens - 1/2 cup goat cheese - 1/4 cup walnuts - 1/4 cup dried cranberries or pomegranate seeds - 1/4 cup extra virgin olive oil - 2 tablespoons balsamic vinegar - 1 teaspoon honey - Salt and pepper - Fresh parsley for garnish The ingredients in this salad make it a real treat. The beets bring a sweet earthiness. They roast beautifully, turning soft and tender. Mixed greens add a fresh crunch. Goat cheese offers creamy tanginess. Walnuts give a nice crunch and healthy fats. Dried cranberries or pomegranate seeds add a pop of sweetness. This salad is not just tasty; it is also healthy. Each serving has about: - Calories: 350 - Fats: 25g - Proteins: 8g - Carbohydrates: 30g By using wholesome ingredients, you create a dish that nourishes as well as delights. This salad contains common allergens: - Dairy (goat cheese) - Nuts (walnuts) Always check for allergies before serving. You can easily swap goat cheese and walnuts for alternatives if needed. To start, heat your oven to 400°F (200°C). Wrap each beet in aluminum foil. Make sure they are sealed tight so they steam well. Place the wrapped beets on a baking sheet. This will catch any drips. Roast the beets for about 45 minutes to 1 hour. They should be tender when pierced with a fork. Once done, take them out and let them cool. When they are cool enough, peel off the skins. You might want to wear gloves to keep your hands clean. For the dressing, gather these ingredients: - 1/4 cup extra virgin olive oil - 2 tablespoons balsamic vinegar - 1 teaspoon honey - Salt and pepper to taste In a small bowl, whisk the olive oil, balsamic vinegar, honey, and a pinch of salt and pepper. Taste it to see if you like the balance of flavors. Adjust the seasoning if needed. This dressing will add a nice tangy kick to your salad. Now it's time to put everything together. Slice the cooled beets into wedges or rounds. In a large bowl, combine the mixed greens, sliced beets, toasted walnuts, and dried cranberries or pomegranate seeds. Toss them gently to mix evenly. Drizzle some of the dressing over the salad and toss again, so all ingredients are coated. For presentation, transfer the salad to a nice serving platter or divide it into individual plates. Crumble the goat cheese over the top for a creamy texture. Drizzle a bit more dressing over the cheese. If you like, add fresh parsley for color and flavor. Follow the [Full Recipe] for detailed steps and measurements. Remember, a beautiful salad is always a joy to eat! Choosing the right beets Select firm, smooth beets. Look for small to medium sizes, as they roast better. Avoid any that feel soft or have spots. How to tell when beets are done Beets are ready when a fork easily pierces them. Depending on size, this takes 45 minutes to 1 hour at 400°F. Let them cool before peeling. Substitutions for balsamic vinegar If you want a twist, use red wine vinegar or apple cider vinegar. Both add a tasty zing without losing the salad's charm. Adding herbs to the dressing Fresh herbs like thyme or basil brighten the dressing. Chop them finely and mix in for added flavor. A little goes a long way. Ideal accompaniments This salad pairs well with crusty bread or a light soup. These sides enhance the meal without overpowering the main dish. Pairing with proteins for a meal Add grilled chicken or shrimp for a hearty option. If you're vegetarian, consider roasted chickpeas or tofu. Both options make it filling and delicious. For the full recipe, check out the [Full Recipe]. {{image_4}} You can make your salad heartier by adding proteins. Grilled chicken or shrimp works well. Simply cook the protein and slice it. Top your salad with it for extra flavor. If you want a vegetarian option, use tofu. Cube the tofu and sauté it until golden. This adds protein and a nice texture. Incorporating seasonal fruits or veggies can elevate your salad. In spring, try fresh strawberries or asparagus. In the fall, add diced apples or roasted squash. These ingredients not only taste great but also add color. Consider swapping nuts for crunch. Almonds, pecans, or sunflower seeds are all tasty options. For a vegan version, simply replace goat cheese. Use cashew cream or a vegan cheese. These alternatives still give you that creamy texture. You can also experiment with dressings. A lemon vinaigrette or tahini dressing adds a new twist. Both options keep the salad fresh while staying plant-based. For the full recipe, check out the complete guide above! To store leftovers, place the salad in an airtight container. This keeps it fresh and prevents the greens from wilting. You can add a paper towel to absorb excess moisture. Store it in the fridge for up to three days. Keep the dressing separate until serving. This helps maintain the salad's crunch. You cannot freeze the whole salad. Freezing changes the texture of the greens, making them mushy. However, you can freeze roasted beets. Place them in a freezer-safe bag and squeeze out the air. They will stay fresh for about three months. Thaw them in the fridge before using. Beets last about one to two weeks in the fridge. Keep them unpeeled in a cool, dark place. Mixed greens should be used within five days for best taste. Goat cheese stays fresh for about one week once opened. Keep it tightly wrapped to avoid drying out. Roasting beets is simple and rewarding. Here’s how: 1. Preheat your oven to 400°F (200°C). 2. Scrub each beet clean and trim off the tops and bottoms. 3. Wrap each beet in aluminum foil. This keeps them moist. 4. Place the wrapped beets on a baking sheet. 5. Roast for 45 minutes to 1 hour. They are done when a fork easily pierces them. 6. Let them cool, then peel off the skins. Wear gloves to avoid staining your hands. Roasting beets brings out their natural sweetness. It makes them tender and full of flavor. You can use them in salads, sandwiches, or as a side dish. You can get a head start on this salad! Here are some tips: - Roast the beets a day early. Store them in the fridge. They will stay fresh. - Prepare the dressing ahead of time. Keep it in a jar. Shake before use. - Wash and dry the mixed greens. Store them in a container with a paper towel to absorb moisture. Assemble the salad just before serving. This keeps it crisp and fresh. If you need an alternative to goat cheese, here are some creamy options: - Feta cheese adds a salty flavor and crumbly texture. - Cream cheese is soft and rich, perfect for spreading. - Ricotta cheese is light and fluffy, giving a mild taste. These substitutes work well in the salad. Choose one that you like best! For the full recipe, check out the Roasted Beet and Goat Cheese Salad. This blog shared a tasty beet salad recipe, from ingredients to storage tips. You learned how to roast beets and mix a great dressing. I also provided variations to suit different diets, plus storage advice. Keep experimenting with ingredients and enjoy the colorful flavors. Simple changes can make each meal unique. This salad is not just healthy; it's fun and versatile. Enjoy your cooking journey and impress your family and friends with this easy dish!](https://goldendishy.com/wp-content/uploads/2025/06/47a93f65-23b8-4270-bc0e-899490eb93a9-768x768.webp)
