Air Fryer Garlic Edamame Quick and Flavorful Snack

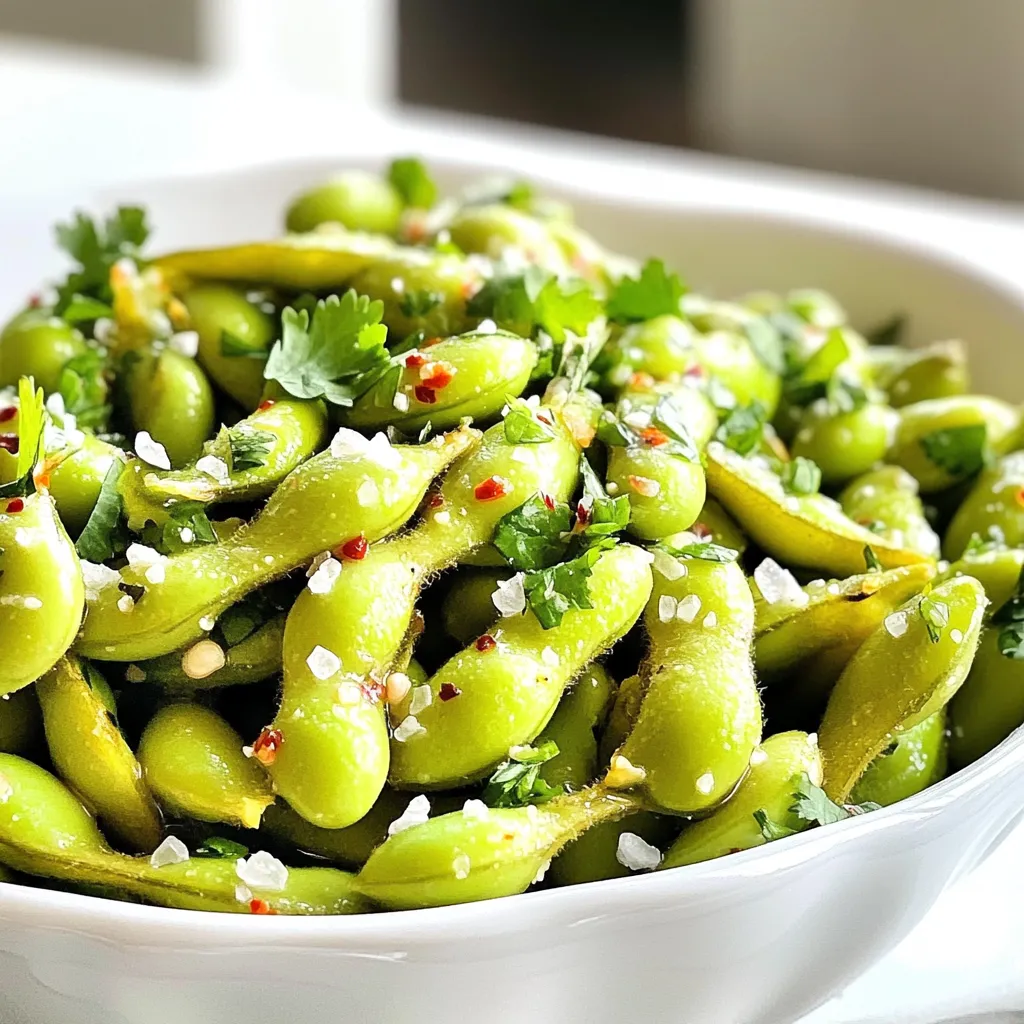
Craving a quick snack that’s full of flavor? You’ll love this Air Fryer Garlic Edamame recipe! It’s easy to prep, packed with tasty garlic, and just the perfect crunch. I’ll guide you through essential ingredients, step-by-step cooking, and clever tips to elevate your snack game. Whether you’re hosting friends or just need a tasty bite, this recipe will satisfy your hunger in no time. Ready to get started? Let’s dive in!
Ingredients
Essential Ingredients for Air Fryer Garlic Edamame
For this tasty snack, you need just a few key items:
– 2 cups frozen edamame pods
– 2 tablespoons extra virgin olive oil
– 4 cloves garlic, finely minced
– 1 teaspoon flaky sea salt
– Juice of ½ fresh lime
These ingredients come together to create a snack bursting with flavor. The frozen edamame offers a rich source of protein, while olive oil adds a touch of healthy fat. Minced garlic brings an aromatic punch, and flaky sea salt enhances the overall taste. The lime juice gives it a bright and zesty finish.
Optional Ingredients for Extra Flavor
You can add a little kick to your edamame with some optional ingredients:
– 1 teaspoon crushed red pepper flakes (for heat)
If you enjoy spicy food, add the red pepper flakes. They bring warmth and depth to the dish. If not, feel free to skip this step.
Recommended Garnishes for Presentation
To make your dish visually appealing, consider these garnishes:
– Fresh cilantro leaves
– Sliced green onions
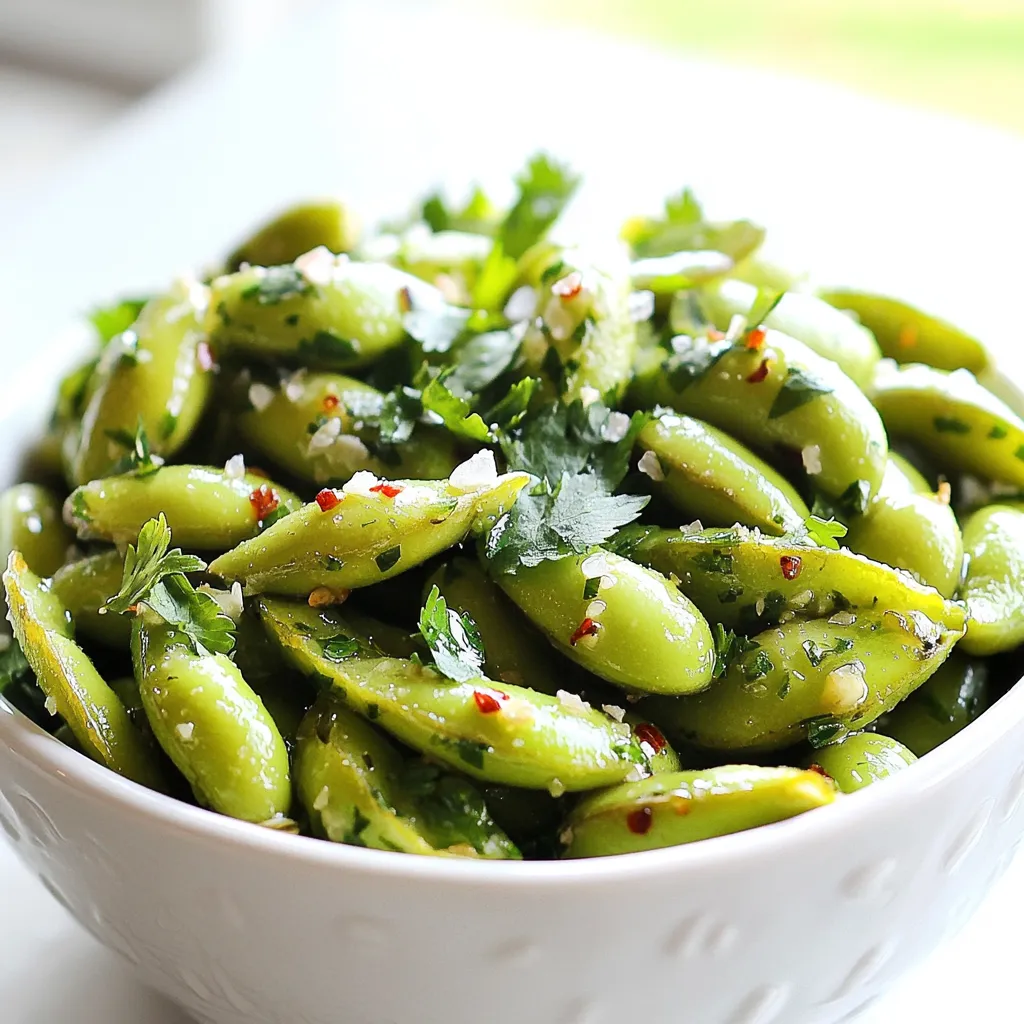
These garnishes not only add color but also fresh flavors. Sprinkle them on top before serving. For an extra touch, serve lime wedges on the side for guests to squeeze. This will allow everyone to enjoy a burst of citrus flavor according to their taste.
Step-by-Step Instructions
Preheating the Air Fryer
First, set your air fryer to 390°F (200°C). Preheating helps the edamame cook evenly. This step takes just a few minutes. While you wait, gather your ingredients.
Preparing the Edamame Mixture
In a big mixing bowl, add 2 cups of frozen edamame pods. Pour in 2 tablespoons of extra virgin olive oil. Next, add 4 cloves of finely minced garlic. Sprinkle in 1 teaspoon of flaky sea salt. If you like heat, toss in 1 teaspoon of crushed red pepper flakes. Mix everything until the edamame is well coated.
Air Frying Process
Now, place the seasoned edamame into the air fryer basket. Make sure they are in a single layer. If your air fryer is small, cook in batches. Air fry the edamame for 8 to 10 minutes. Shake the basket halfway through cooking. This step helps them cook evenly. Keep an eye on the garlic to avoid burning. You want a nice golden color. Once done, take the edamame out carefully. Squeeze juice from half a fresh lime over them. This adds a fresh kick. Garnish with fresh cilantro or sliced green onions for a pop of color. Serve in a shallow bowl to show off their vibrant green.
Tips & Tricks
Best Practices for Even Cooking
To cook edamame evenly, spread them in a single layer in the air fryer. Overcrowding can lead to uneven cooking. Shake the basket halfway through to mix them up. This step helps all pods cook well and get that nice crunch. Keep an eye on them as they cook. You want a golden color, not burnt.
How to Avoid Burning Garlic
Garlic can burn fast in the air fryer. To avoid this, add it later in the cooking time. Try cooking the edamame for 4-5 minutes first. Then, add the minced garlic and continue cooking. This method gives you the tasty garlic flavor without the burnt bits.
Serving Suggestions and Pairings
Air fryer garlic edamame makes a great snack or appetizer. Serve them with lime wedges on the side for a fresh squeeze. You can also pair them with beverages like beer or sake. For a fun twist, try them with a dipping sauce like soy sauce or spicy mayo. Garnish with cilantro or green onions for a pop of color.

Variations
Spicy Garlic Edamame with Extra Heat
If you like a kick, add crushed red pepper flakes. This spice boosts the flavor. Use one teaspoon for a mild heat. For more, try two teaspoons. You can mix the flakes in with the olive oil and garlic. This gives every pod a spicy touch. Remember, adjust the heat to your taste!
Asian-Inspired Selections
You can create a fun twist by adding soy sauce or sesame oil. A splash of soy sauce makes the dish richer. You could also sprinkle some sesame seeds for a nutty crunch. Another option is to add a few drops of rice vinegar. This adds a tangy note that pairs well with garlic.
Vegan and Gluten-Free Modifications
Good news! This dish is already vegan and gluten-free. The ingredients are simple and clean. Use tamari instead of soy sauce for a gluten-free choice. You can also swap in coconut aminos for a sweeter flavor. These changes keep the dish healthy and fun, perfect for all diets.
Storage Info
How to Store Leftover Edamame
To store leftover edamame, let them cool completely. Place them in an airtight container. You can keep them in the fridge for up to three days. If you want them to last longer, freeze the edamame. Just make sure to use a freezer-safe bag. This way, they stay fresh for up to three months.
Reheating Tips for Optimal Flavor
When you’re ready to eat the leftovers, reheat them for the best taste. The microwave works well for this. Heat them in short bursts of 30 seconds. Check often to avoid overcooking. You can also reheat them in the air fryer. Set it to 350°F (175°C) and heat for about 5 minutes. Toss them halfway through to warm evenly.
Expiry and Shelf Life
Frozen edamame can last a long time if stored correctly. Check the packaging for the best-by date. When stored in the freezer, they can last up to one year. Once cooked, eat them within three days for the best flavor. Always check for any signs of freezer burn or off smells before cooking.
FAQs
Can I use fresh edamame instead of frozen?
Yes, you can use fresh edamame. Fresh edamame cooks faster than frozen. You should steam fresh edamame pods for about 3-5 minutes before air frying. This helps to soften them, so they cook evenly. You can follow the same steps as the frozen version, but adjust the time in the air fryer. Keep an eye on them as they may need less time.
How can I adjust the spice level?
To adjust the spice level, you have options. If you want more heat, add extra crushed red pepper flakes. If you like it milder, reduce or skip the flakes. You can also add a dash of hot sauce after cooking. Taste as you go to find your perfect balance.
What other seasonings can I use?
You can get creative with seasonings. Some tasty options include soy sauce, sesame oil, or a sprinkle of smoked paprika. You could also try adding ginger for a bit of zing. Experiment until you find a mix that you love!
This guide covered how to make air fryer garlic edamame from start to finish. We discussed key ingredients, cooking steps, and smart tips to enhance your dish. Explore variations like spicy options or Asian flavors to keep things exciting. Store leftovers properly to enjoy them later. This simple recipe brings a tasty, healthy snack to your table. Enjoy air frying and impress your friends with your skills. Your new favorite snack is just a click away!


. 1. Heat olive oil in a large skillet over medium heat. 2. Add finely chopped red onion to the skillet. 3. Sauté the onion for 2-3 minutes until it becomes soft. 4. Now, add diced red and green bell peppers to the skillet. 5. Cook for 3-4 minutes until the peppers soften. 6. Stir in corn kernels and black beans. 7. Season with ground cumin, smoked paprika, garlic powder, salt, and pepper. 8. Mix well and cook for 5 more minutes until hot. 1. Heat another skillet over medium heat. 2. Place a tortilla in the skillet and sprinkle ¼ cup of cheese on it. 3. Layer ½ cup of the veggie mixture over the cheese. 4. Top with another ¼ cup of cheese for extra flavor. 5. Fold the tortilla in half, covering the filling. 6. Cook for 3-4 minutes until golden brown on one side. 7. Flip the quesadilla gently using a spatula. 8. Cook for another 3-4 minutes until crispy and cheese melts. - Keep the heat at medium for a crispy texture. - Use a spatula to flip the quesadilla easily. - Check for doneness by ensuring both sides are golden brown. These simple steps make it easy to create loaded veggie quesadillas at home. For the full recipe, refer to the recipe section above. Enjoy the process! Choosing the right cheese is key. I love a mix of cheddar and mozzarella. This mix melts well and adds great flavor. You want the cheese to stretch and pull when you take a bite. Balancing spices and seasonings is also important. Start with the basics like salt and pepper. Then, add spices like cumin and smoked paprika. Adjust them to fit your taste. A little heat can come from red pepper flakes if you like it spicy. Day-to-day storage tips help keep your quesadillas fresh. Place leftovers in an airtight container. Keep them in the fridge for up to three days. You can also wrap them tightly in foil or plastic wrap. Reheating suggestions for best flavor include using the oven or skillet. For the oven, preheat to 350°F. Heat the quesadillas for about 10 minutes. In a skillet, cook them over medium heat. This method keeps them crispy and delicious. Plating ideas can make your meal pop. Arrange the quesadillas in a fan shape on a colorful plate. This makes them look fun and inviting. Adding colorful garnishes like fresh cilantro adds a nice touch. You can also sprinkle some diced tomatoes or avocado on top. These small changes make your meal look gourmet. Enjoy your loaded veggie quesadillas! For the full recipe, check out the Loaded Veggie Quesadillas 🥑 section. {{image_4}} You can make loaded veggie quesadillas even more fun. Here are some easy ideas. Want some extra protein? You can add grilled chicken or tofu. Just cook them first, then slice and add to your quesadilla mix. If you like seafood, try shrimp. Cook them quickly and toss them in for a tasty twist. Spices can change the game. Try different spices like chili powder or oregano. They add depth and warmth. You can also add sauces or marinades. A dash of hot sauce or a sprinkle of lime juice can elevate your quesadillas. Need gluten-free options? Use gluten-free tortillas. They work great and taste just as good. If you're vegan, swap out the cheese for a plant-based version. There are many tasty dairy-free cheeses out there that melt well. You can find the full recipe for loaded veggie quesadillas to get started on these variations. To keep your uncooked quesadillas fresh, wrap them tightly in plastic wrap. This keeps out moisture and air. You can also place them in an airtight container. If you want to freeze them, stack the quesadillas with parchment paper in between. This prevents them from sticking together. Uncooked quesadillas can stay in the freezer for up to three months. After cooking, let the quesadillas cool completely. Then, wrap them in foil or place them in a container. Store them in the fridge for up to four days. I find they taste best within the first two days. If you notice any odd smell or mold, it’s best to toss them. To reheat, use an oven or a skillet. For the oven, preheat to 350°F (175°C). Place the quesadilla on a baking sheet and heat for about 10 minutes. If using a skillet, add a little oil and heat over medium heat for about 3-4 minutes on each side. Leftover quesadillas can also become a fun breakfast. Chop them up and add them to scrambled eggs for a tasty twist. For more ideas, check out the Full Recipe. Making loaded veggie quesadillas is quick and easy. It takes about 10 minutes to prep. Cooking them takes around 15 minutes. In total, you can make them in about 25 minutes. This makes them a great choice for busy days or quick meals. Yes, you can prep loaded veggie quesadillas in advance. To do this, cook the veggie mixture and let it cool. Then, assemble the quesadillas but do not cook them. Store them in an airtight container in the fridge for up to two days. You can also freeze them for a month. When ready to eat, just cook them straight from the fridge or freezer. This makes meal prepping super easy! You can mix and match many veggies in quesadillas. Some great options include: - Spinach or kale for a green boost - Mushrooms for a savory taste - Zucchini or squash for extra texture - Jalapeños for a spicy kick - Tomatoes for freshness Feel free to get creative! Each veggie adds its own flavor and texture. You can make quesadillas that fit your taste perfectly. For more ideas, check out the Full Recipe. These loaded veggie quesadillas are fun and easy to make. We explored essential ingredients like black beans, bell peppers, and corn. I’ve shared tips for perfect texture, storing leftovers, and creative garnishes. Remember, you can customize them with protein or spices to suit your taste. In the end, these quesadillas are more than just food; they bring flavor and joy. Enjoy making them your own!](https://goldendishy.com/wp-content/uploads/2025/06/a7c52493-2108-4a2f-8f90-ee80e7df7b2a-768x768.webp)
![- 1 pound fresh green beans, trimmed - 4 tablespoons unsalted butter - 4 cloves garlic, finely minced - 1 teaspoon fresh lemon zest - 1 tablespoon fresh lemon juice - 1/2 teaspoon red pepper flakes (optional for heat) - Salt and freshly ground black pepper to taste - 1/4 cup sliced almonds, toasted (for garnish) Fresh green beans are key for this dish. Look for bright, crisp beans without blemishes. The unsalted butter lets you control the salt level. Garlic adds a strong, savory taste, so use fresh cloves when possible. Lemon zest and juice brighten the dish, adding a nice tang. Red pepper flakes give a little kick, but you can skip them if you want a milder flavor. Toasted almonds add a crunchy finish, so don’t skip them! If you can’t find fresh green beans, frozen ones work too. Just thaw and drain them first. For a dairy-free option, use olive oil instead of butter. You can swap garlic for shallots for a milder taste. If you don’t like lemon, try lime juice or vinegar for acidity. Instead of almonds, use walnuts or pine nuts for a different crunch. Feel free to mix and match these options to fit your taste! For the full recipe, check out the step-by-step guide to make these tasty Garlic Butter Green Beans. 1. Boil Water: Start by filling a large pot with water. Add salt and bring it to a boil. 2. Trim Beans: While waiting, trim the ends of the green beans. This simple step makes them easier to eat. 3. Ice Bath Ready: Prepare a bowl with ice water. This will help stop the cooking later. 1. Blanch the Beans: Once the water is boiling, add the green beans. Cook them for 3-4 minutes. They should be bright green and crisp-tender. 2. Cool Down: Quickly move the beans to the ice bath. Let them cool for about 5 minutes. Drain the beans and set them aside. 3. Melt Butter: In a large skillet, add butter over medium heat. Wait until it melts and bubbles. 4. Add Garlic: Put in the minced garlic. Sauté for about 30 seconds. Be careful not to brown the garlic. It can turn bitter. 5. Combine Beans: Add the blanched green beans to the skillet. Toss them gently in the garlic butter. Cook for 4-5 minutes until heated through. 6. Finish with Flavor: Stir in lemon zest, lemon juice, and optional red pepper flakes. Season with salt and pepper. Mix well. 1. Serving Dish: Carefully transfer the green beans to a serving dish. 2. Garnish: Sprinkle toasted almond slices on top. This adds crunch and looks lovely. 3. Presentation: Arrange the green beans neatly. Place lemon wedges on the side for extra flair. Enjoy your Garlic Butter Green Beans! You can find the Full Recipe linked here. To make the best garlic butter green beans, start with fresh green beans. Look for beans that are bright green and firm. Trim the ends for a clean look. Blanching is key. It keeps the beans bright and crisp. Use a large pot of salted water for boiling. An ice bath helps stop the cooking. This gives you that perfect crunch! To add more flavor, try using garlic oil instead of butter. This gives a nice twist to the dish. Adding lemon zest brightens the taste too. If you like spice, sprinkle in red pepper flakes. For extra crunch, toast almond slices before adding them on top. These small steps really boost the flavor and texture. One common mistake is overcooking the beans. They should be crisp-tender, not mushy. Be careful with the garlic; it can burn quickly. If it turns brown, it will taste bitter. Also, don’t skip the ice bath after blanching. It keeps your beans looking fresh and vibrant. Following these tips will help you create a stunning side dish. For a full recipe, check out the complete details above. {{image_4}} You can change the flavor of garlic butter green beans easily. Try adding herbs like thyme or basil for a fresh twist. If you prefer a spicy kick, use diced jalapeños instead of red pepper flakes. For a unique taste, mix in some soy sauce or balsamic vinegar. These additions bring out different flavors and keep the dish exciting. Want to make your green beans a full meal? Consider adding protein. Cooked chicken or shrimp pairs well with the garlic butter. Just toss them in the skillet with the green beans. For a plant-based option, add chickpeas or tofu. These ingredients not only enhance flavor but also make the dish heartier. Switching ingredients based on the season can elevate your green beans. In spring, consider adding fresh peas for sweetness. During summer, cherry tomatoes add a burst of flavor. In fall, roasted butternut squash brings warmth. Winter calls for crispy Brussels sprouts for a crunchy contrast. These swaps keep your dish fresh and interesting all year round. For the complete recipe, check out the [Full Recipe]. To store leftover Garlic Butter Green Beans, place them in an airtight container. Make sure they are completely cool before sealing. This helps keep them fresh. Store the container in the fridge for up to three days. When you want to enjoy your leftovers, you can reheat them easily. You can use the microwave or a skillet. For the microwave, heat for about 30 seconds. Stir and check if they are warm enough. If using a skillet, add a little butter and heat on low. Stir until hot, about 3-4 minutes. You can freeze Garlic Butter Green Beans, but they may lose some crunch. To freeze, first, blanch the beans as in the recipe. Cool them in ice water, then drain well. Place the beans in a freezer-safe bag. Remove as much air as possible before sealing. They can freeze for up to three months. When you are ready to use them, thaw overnight in the fridge before reheating. For the full recipe, check out the details above. To make Garlic Butter Green Beans vegan, swap the butter for vegan butter or olive oil. Use the same amount for a rich flavor. The garlic and lemon will still shine through. This change keeps the dish tasty while meeting vegan needs. The best ways to prepare green beans include blanching, steaming, or sautéing. Blanching keeps them bright and crisp. Sautéing with garlic, like in this recipe, adds great flavor. You can also roast them for a lovely char. Each method brings out the green beans' natural sweetness. Yes, you can make Garlic Butter Green Beans ahead of time. Cook them fully and let them cool. Store in an airtight container in the fridge for up to three days. When ready to serve, reheat in a pan. This keeps the flavors fresh and vibrant. For the full recipe, check out the details above. You learned about the key ingredients for Garlic Butter Green Beans and how to use them. I shared tips to make your dish better, avoid common mistakes, and add variety. You'll know how to store leftovers, reheat, and even freeze them. Remember to tweak the recipe based on your taste or what you have on hand. Cooking should be fun, so feel free to try new things. Enjoy making this dish and impressing your family or friends!](https://goldendishy.com/wp-content/uploads/2025/07/f7ec476a-8ba6-4070-896d-8b390928597f-768x768.webp)

![- 2 cups shredded cooked chicken - 1 (8 oz) package of cream cheese - 1/2 cup buffalo sauce - 1/2 cup ranch dressing For buffalo chicken dip, the main ingredients create a creamy and rich base. Shredded cooked chicken gives it that hearty texture. You can use rotisserie chicken to save time. Cream cheese adds smoothness, while buffalo sauce brings the heat. Ranch dressing balances the flavors and adds a nice creaminess. - 1/2 cup crumbled blue cheese - 1 green onion for garnish - Tortilla chips or celery sticks for serving Optional ingredients enhance the dip. Crumbled blue cheese adds a bold taste that many love. It pairs well with the spicy buffalo flavor. A sprinkle of green onion on top looks great and adds freshness. For serving, I recommend crunchy tortilla chips or crisp celery sticks. They both complement the dip's rich and creamy texture. Always remember to adjust the buffalo sauce to match your spice preference. You can find the full recipe in the section above for more detailed steps! 1. First, preheat your oven to 350°F (175°C). This helps the dip cook evenly. 2. In a large bowl, combine the shredded chicken, cream cheese, buffalo sauce, and ranch dressing. Mix until smooth. 1. Now, gently fold in the shredded cheddar cheese and blue cheese, if you use it. This adds great flavor and creaminess. 2. Next, transfer the chicken mixture to a baking dish. Spread it evenly with a spatula. 3. Bake the dip for 20-25 minutes. Look for bubbling edges and a slightly golden top. 1. When your dip is done, take it out and garnish with sliced green onions. This adds freshness. 2. Serve it warm with tortilla chips or celery sticks. Enjoy this creamy and flavorful delight! For the full recipe, check out the details above. Adjusting buffalo sauce is key for your dip. If you love heat, add more buffalo sauce. If you prefer mild dishes, use less. Start small and taste as you go. You can always add more but can’t take it out. If you want a cream cheese alternative, try Greek yogurt. It gives a nice tang and cuts some fat. You can also use vegan cream cheese for a plant-based option. This keeps the dip creamy without dairy. To get the perfect crust, bake your dip until it’s bubbly and golden. This usually takes about 20-25 minutes at 350°F. You want the edges to have a light brown color. This shows the dip is ready and adds flavor. For a crispy top, use a broiler after baking. Set your oven to broil and watch closely. Just a few minutes under the broiler can give your dip a nice crunch. Be careful not to burn it! When serving at parties, focus on presentation. Put the dip in the center of a colorful platter. Surround it with chips and celery sticks. This makes it look inviting and fun. For drinks, consider pairing it with light beers or sparkling water. The lightness balances the richness of the dip. You can also serve it with a side of fresh veggies for a nice crunch. {{image_4}} You can make buffalo chicken dip healthier with just a few swaps. - Low-fat cream cheese options: Use low-fat cream cheese. It cuts fat and calories but keeps the creaminess. - Using Greek yogurt instead of ranch dressing: Greek yogurt adds a tangy taste and protein. It's a great way to lower calories while keeping it creamy. You might want to kick up the flavor in your dip. - Additions like diced jalapeños or hot peppers: These add heat and a fresh taste. Adjust to your spice level. - Incorporating other cheeses for unique flavors: Try mixing in mozzarella or gouda. Each cheese adds its own twist to the dip's flavor. Change how you serve your buffalo chicken dip for fun. - Buffalo chicken dip stuffed in peppers: Hollow out mini bell peppers and fill them with the dip. Bake until warm for a tasty bite. - Spinach and buffalo chicken dip combo: Mix in fresh spinach. It adds color and nutrition, making the dip even better. For the complete recipe, check out the [Full Recipe]. To keep buffalo chicken dip fresh, place it in an airtight container. This helps prevent it from drying out. Store the dip in the fridge for up to five days. You may notice the flavors deepen as it sits. Just be sure to cover it well to avoid any fridge odors. You can freeze buffalo chicken dip for longer storage. First, let the dip cool completely. Then, transfer it to a freezer-safe container. Press plastic wrap directly on the dip before sealing. It can last for up to three months in the freezer. When you're ready to enjoy it, thaw it in the fridge overnight. You have two great options to reheat buffalo chicken dip: the oven or microwave. If using the oven, preheat it to 350°F (175°C). Place the dip in an oven-safe dish and heat for about 20 minutes. Stir halfway through for even warming. If you choose the microwave, heat in 30-second intervals. This prevents hot spots and keeps the dip creamy. To maintain texture, avoid overheating. Let the dip sit for a minute after reheating. This helps the flavors come back together. Enjoy your dip warm with chips or celery sticks! Yes, you can make buffalo chicken dip ahead of time. To prepare in advance, follow these steps: - Mix the ingredients: Combine the shredded chicken, cream cheese, buffalo sauce, and ranch dressing. - Store it: Place the mixture in a baking dish, cover it with plastic wrap, and put it in the fridge. - Bake when ready: When you are ready to serve, take it out and bake it at 350°F for 20-25 minutes. This way, you save time and enjoy a warm dip at your gathering. If you want to swap ranch dressing, here are some great options: - Blue cheese dressing: This adds a tangy flavor that works well. - Greek yogurt: Use plain Greek yogurt for a healthier twist. - Caesar dressing: This offers a different but tasty flavor profile. Feel free to experiment with your favorite dressings! To kick up the spice level, try these ideas: - Extra buffalo sauce: Add more buffalo sauce to your mix. - Diced jalapeños: Mix in fresh or pickled jalapeños for heat. - Hot sauce: Drizzle hot sauce on top before serving for an extra kick. Adjust the spice to match your taste, and enjoy the heat! Buffalo chicken dip can be gluten-free, but check your ingredients. Here’s what to know: - Buffalo sauce: Most brands are gluten-free, but confirm by reading the label. - Ranch dressing: Look for gluten-free options if using store-bought. - Dipping options: Use gluten-free tortilla chips or fresh veggies for dipping. With careful choices, everyone can enjoy this dip! You now know how to make buffalo chicken dip from scratch. We covered key ingredients like chicken, cream cheese, and buffalo sauce. I shared step-by-step instructions to get delicious results. You learned tips for adjustments and variations to suit your taste. Remember, this dip is versatile; you can customize it for any gathering. Enjoy experimenting with flavors and serving styles. Your next snack night will be a hit!](https://goldendishy.com/wp-content/uploads/2025/07/99cdad4a-7337-4a60-a9b0-2f79e024797e-768x768.webp)

![- 1 can (15 oz) chickpeas, thoroughly drained and rinsed - 1 large cucumber, diced into bite-sized pieces - 1 cup cherry tomatoes, halved for a burst of flavor - 1 red bell pepper, diced for sweetness and crunch - 1 small red onion, finely chopped for subtle sharpness - 1/4 cup fresh parsley, roughly chopped for a fresh aroma - 1/4 cup feta cheese, crumbled (optional; adds creaminess) - Juice of 2 fresh lemons, providing that zesty kick - 3 tablespoons extra-virgin olive oil for richness - 1 teaspoon Dijon mustard for a hint of tang - 1 teaspoon honey (or maple syrup for a vegan option) to balance flavors - Salt and freshly ground black pepper to taste This salad is packed with nutrients. It has about 200 calories per serving. You get protein from chickpeas, fiber from veggies, and healthy fats from olive oil. Plus, it provides vitamins A and C. This makes it not just tasty, but also good for you. Start by gathering a large mixing bowl. Add the chickpeas, diced cucumber, halved cherry tomatoes, red bell pepper, red onion, and parsley. Mix these fresh ingredients well. You want each piece to shine in your salad. If you enjoy cheese, sprinkle in the crumbled feta for a creamy touch. This adds a nice contrast to the crunch of the veggies. For the dressing, take a smaller bowl. Whisk together the lemon juice and olive oil. This forms the base of your zesty dressing. Next, add the Dijon mustard and honey. These ingredients give a perfect balance of flavor. Season with salt and black pepper. Whisk until the mixture looks smooth and well combined. Now it’s time to bring everything together. Drizzle the dressing over your salad mix. Use a spatula or wooden spoon to toss gently. You want all the ingredients to be evenly coated without mashing them. If you added feta, do a light toss to keep the cheese intact. Taste your salad and adjust the seasoning if needed. Cover it and let it chill in the fridge for at least 30 minutes. This helps the flavors meld beautifully. For the full recipe, you can refer back to the recipe card. To make your Zesty Lemon Chickpea Salad shine, focus on seasoning. Start with salt and pepper. Taste as you go. You may want more lemon juice for tang. If you like a sweeter flavor, drizzle more honey. For different dressings, try balsamic vinegar or apple cider vinegar. You can also mix in tahini for creaminess. Each option gives a new twist to the salad. Serving your salad well makes it more enticing. Use a large, colorful bowl for a rustic look. Add fresh parsley on top for a pop of green. You can even place lemon wedges around the bowl for a bright touch. If you want individual servings, use clear cups. This way, the layers show off the bright colors. A light drizzle of olive oil on each cup adds elegance. Prepping this salad in advance is easy. Make it a few hours before serving. The flavors develop more when they sit. For best results, chill the salad for at least 30 minutes. This helps the flavors mix well. You can store leftovers in the fridge for up to three days. Just keep the dressing separate if you want it fresh. For the full experience, check out the Full Recipe. {{image_4}} You can make this salad even better by adding veggies. Try adding avocados. They bring creaminess and healthy fats. Carrots can add a nice crunch. You can also toss in diced mango or apple. These fruits add sweetness and a fun twist. Want to make this salad heartier? Add some protein! Grilled chicken works great for meat lovers. Shrimp is a tasty option too. For a plant-based choice, use tofu. It soaks up flavors well and adds nutrition. Switch up the dressing for a new taste! Try using different vinegars, like balsamic or apple cider. You can also squeeze in more citrus juice for extra zing. For a creamier touch, mix in yogurt or tahini. Both add richness and make the salad more filling. Check out the [Full Recipe] to see how these variations can fit into your meal! Store your Zesty Lemon Chickpea Salad in a sealed container. This keeps it fresh and tasty. It lasts about 3 to 5 days in the fridge. Make sure to check for any signs of spoilage before eating. Freezing this salad is not ideal. The vegetables may lose their crunch. If you want to freeze it, consider freezing just the chickpeas. Place them in an airtight bag. When you want to use them, thaw overnight in the fridge. Leftover salad is great for new meals! You can add it to wraps for a quick lunch. Toss it in grain bowls for added flavor. Or, layer it in sandwiches for a fresh twist. You can even mix it into soups for a hearty touch. Enjoy creating new dishes with your leftover salad! For the full recipe, refer to the [Full Recipe]. Yes, you can make this salad ahead of time. In fact, it often tastes better after chilling. The flavors mix well when you let it sit. I suggest making it a few hours before serving. Just cover it with plastic wrap and place it in the fridge. This way, the lemon juice and olive oil soak into the chickpeas and veggies. You will enjoy a zesty and bright flavor profile! Yes, this salad is gluten-free. Chickpeas, fresh veggies, and the dressing contain no gluten. If you want to check other ingredients, always read the labels. Most items are safe, but it’s best to confirm. This makes the salad a great option for those with gluten sensitivities. You can serve it to everyone without worry! If you can’t eat chickpeas, no problem! You can use other beans like black beans or kidney beans. These will add protein and texture. Another option is to use cooked quinoa or lentils. These alternatives keep the salad hearty and filling. Each will bring a unique taste, so feel free to explore. Get creative based on what you have! This blog post provided a clear guide to making a Zesty Lemon Chickpea Salad. We covered the key ingredients, from fresh veggies to the zesty dressing. You learned how to prepare, dress, and assemble the salad for the best flavor. I shared tips for meal prep, variations to try, and how to store leftovers. Remember, this salad is not just easy to make; it’s also packed with nutrients. Enjoy your creation, explore the variations, and make it your own!](https://goldendishy.com/wp-content/uploads/2025/07/e89bc11c-d040-4055-8bd2-d62839faab5f-768x768.webp)