Air Fryer Crispy Parmesan Green Beans Delight

Craving a tasty snack that’s both healthy and easy to make? Let me introduce you to Air Fryer Crispy Parmesan Green Beans! With just a few simple ingredients and a little time, you can whip up this crunchy delight that’s perfect as a side dish or a standalone snack. Join me as I share my step-by-step guide to making these irresistible green beans that will impress your family and friends!
Ingredients
Fresh Green Beans
– 1 pound fresh green beans, trimmed and washed
Fresh green beans are the star of this dish. Look for bright green beans that snap when you bend them. They should not be limp. Wash them well, and trim the ends. This step makes them ready for the air fryer.
Seasonings and Spices
– 1 tablespoon extra virgin olive oil
– 1/2 cup freshly grated Parmesan cheese
– 1 teaspoon garlic powder
– 1/2 teaspoon onion powder
– 1/4 teaspoon red pepper flakes (adjust according to spice preference)
– Salt and freshly cracked black pepper to taste
The magic lies in the seasonings. Olive oil helps the cheese stick. Parmesan cheese adds a rich flavor. Garlic powder and onion powder give depth. Red pepper flakes add a bit of heat. Salt and pepper enhance all the flavors. You can adjust the spice level to fit your taste.
Optional Add-ins
– 1/4 cup panko breadcrumbs (optional, for added crunch)
If you want extra crunch, add panko breadcrumbs. These breadcrumbs make the beans even crispier. Toss them in with the other ingredients. This step is not required, but it can make a big difference.
Step-by-Step Instructions
Preheat the Air Fryer
First, set your air fryer to 400°F (200°C). Preheating takes about 5 minutes. This step is key for even cooking. You want those green beans to get crispy, not soggy.
Preparing the Green Beans
Next, take 1 pound of fresh green beans. Trim the ends and wash them well. In a large bowl, add the green beans. Pour in 1 tablespoon of extra virgin olive oil. Toss the beans gently until they are coated with oil. This helps the seasoning stick.
Now, it’s time to season. Add 1/2 cup of freshly grated Parmesan cheese. Then, mix in 1 teaspoon of garlic powder, 1/2 teaspoon of onion powder, and 1/4 teaspoon of red pepper flakes if you like some heat. Finally, sprinkle in salt and black pepper to taste. Mix well until every bean is covered in the tasty blend.
If you want extra crunch, add 1/4 cup of panko breadcrumbs. Gently toss the mixture again. Be careful not to break the beans.
Arranging and Cooking
Now, it’s time to arrange the beans. Place them in the air fryer basket in a single layer. Don’t overcrowd; if needed, cook in batches. This ensures they cook evenly.
Cook the green beans for 8 to 10 minutes. Shake the basket halfway through to help them crisp up. They should come out looking golden and delicious. Once done, let them sit for about a minute before serving. Enjoy your crispy green beans!
Tips & Tricks
Achieving the Perfect Crisp
To get that crispy texture, use fresh green beans. Trim them well and wash them thoroughly. Olive oil is your friend here; it helps the cheese stick and crisp up. Preheat your air fryer to 400°F (200°C) for even cooking. Arrange the beans in a single layer. If they are too crowded, they won’t crisp up right. Shake the basket halfway through cooking. This step helps all the beans cook evenly.
Adjusting Flavors and Heat
You can customize the seasoning to your taste. If you love garlic, add more garlic powder. For some heat, increase the red pepper flakes. You can also try different spices, like smoked paprika or Italian herbs. Don’t forget the salt and pepper; they make a big difference. Taste the bean mixture before cooking to ensure the flavors are just right.
Serving Suggestions
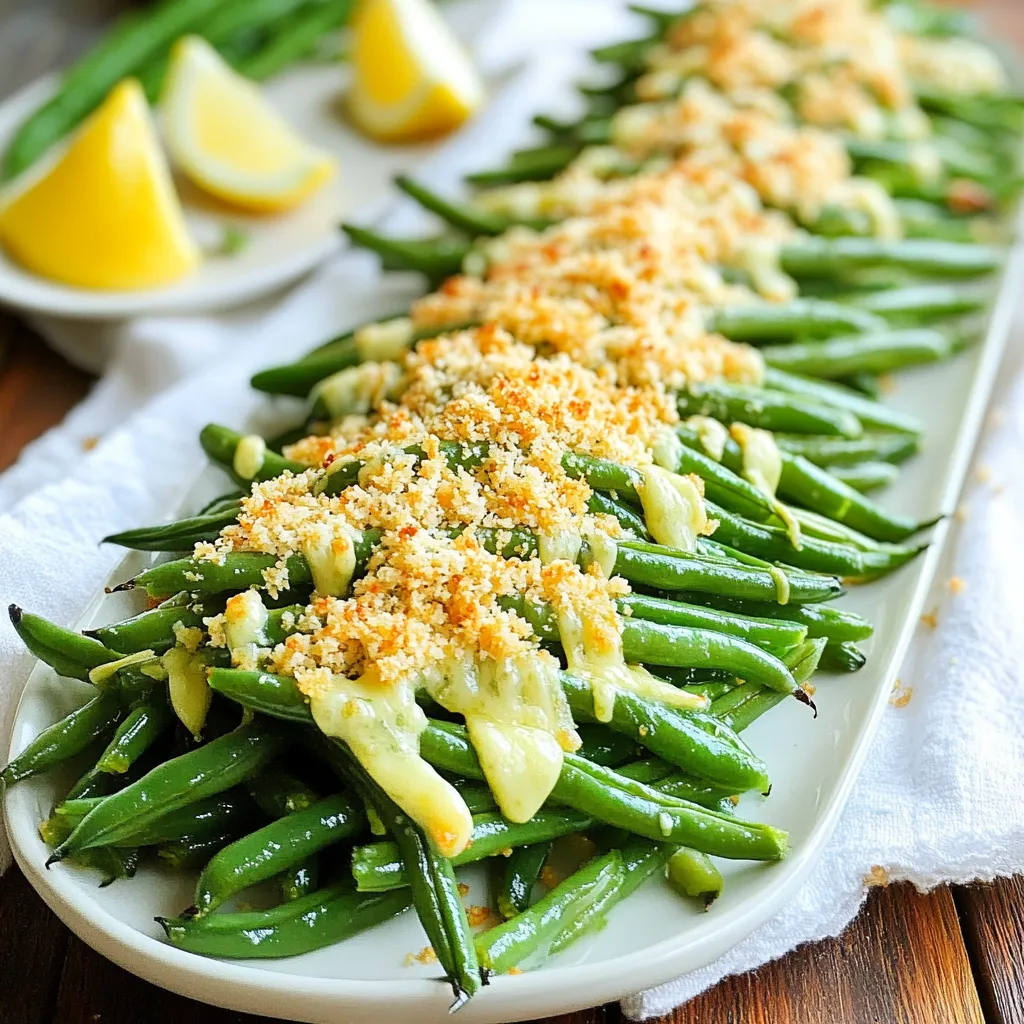
Serve these green beans on a pretty platter. A sprinkle of fresh Parmesan on top makes them look fancy. Add lemon wedges for a zesty touch. You can pair these green beans with grilled chicken or fish for a complete meal. They also make a great snack on their own. Enjoy them hot for the best flavor and crunch!

Variations
Adding Different Cheeses
You can switch up the cheese in this recipe. Try using sharp cheddar or crumbled feta. Both add unique flavors. Grate or crumble the cheese before mixing it with the green beans. This change can give a new twist to your dish. Cheese adds richness and depth. Just remember to adjust the amount to your taste.
Spicing It Up with Other Ingredients
Want to add more flavor? You can mix in a variety of spices. Try smoked paprika for a smoky kick. Or add lemon zest for a bright taste. You can even toss in some chopped fresh herbs like thyme or basil. Garlic powder is a great start, but fresh minced garlic can add more punch. The options are endless, so feel free to get creative.
Vegan or Gluten-Free Alternatives
If you need a vegan option, skip the cheese. Use nutritional yeast instead. It gives a cheesy flavor without dairy. For a gluten-free version, simply leave out the panko breadcrumbs. You can also use gluten-free breadcrumbs if you want that extra crunch. These swaps keep your dish tasty while fitting your diet needs.
Storage Info
Storing Leftovers
After enjoying your Air Fryer Crispy Parmesan Green Beans, you may have some leftovers. To store them, let the beans cool completely. Place them in an airtight container. They will stay fresh in the fridge for up to three days. Make sure to label your container with the date. This helps you track freshness.
Reheating Instructions
Reheating these green beans can be tricky. You want to keep them crispy. To do this, use your air fryer again. Preheat it to 350°F (175°C). Place the green beans in the basket in a single layer. Heat them for about 3 to 5 minutes. Check them often to avoid overcooking. This method keeps the beans crunchy and tasty.
Freezing Crispy Green Beans
Freezing crispy green beans is possible, but they lose some texture. If you want to freeze them, first cool them completely. Spread them out on a baking tray in a single layer. Freeze for about an hour until they are firm. After that, transfer them to a freezer bag. Remove as much air as possible before sealing. They can last up to three months in the freezer. When you’re ready to eat them, reheat in the air fryer as mentioned above.
FAQs
How do I keep green beans crispy in the air fryer?
To keep your green beans crispy, ensure you coat them lightly with olive oil. If you add too much oil, they may become soggy. It’s also key to preheat your air fryer. This helps cook the beans quickly, giving them a nice crunch. Arrange the beans in a single layer in the basket. Do not overcrowd them. This allows hot air to circulate freely for even cooking. Finally, shake the basket halfway through cooking to help them crisp up.
Can I make this recipe without Parmesan cheese?
Yes, you can make this recipe without Parmesan cheese. The green beans will still taste great. Try using nutritional yeast for a cheesy flavor without dairy. You could also use a different cheese, like cheddar or feta. Just remember, the taste will change based on your choice. If you skip the cheese, be sure to add extra seasonings to keep the flavor strong.
What are the best dipping sauces for crispy green beans?
The best dipping sauces for crispy green beans include ranch dressing and garlic aioli. Both add creamy flavor that pairs well with the crunch of the beans. You can also try a spicy sriracha sauce for a kick. Soy sauce or a sweet chili dip can add an Asian twist. Feel free to get creative! Mixing different sauces can also lead to fun new flavors.
We covered how to make crispy green beans in the air fryer. Fresh green beans, spices, and add-ins can boost flavor. I shared tips for crispness and adjusting taste. You can try different cheeses or make it vegan. Storing leftovers and reheating keeps them tasty. With these steps, you can enjoy this dish anytime. Try it and make your green beans shine!


. You should refrigerate any leftover avocado egg salad in an airtight container. This way, it stays fresh for up to one hour before serving. However, I recommend eating it right away for the best taste. The flavors blend nicely when it’s fresh, and the texture remains creamy. Freezing avocado egg salad is not a good idea. The avocado will change texture and become mushy when thawed. To enjoy the best taste and texture, consume this dish fresh. You can prep the egg salad a day ahead of time. Store it in an airtight container in the fridge. Keep the salad separate from the lettuce leaves. This way, the lettuce stays crisp when you serve the wraps. For the full recipe, check the earlier section. No, fresh hard-boiled eggs provide better texture and flavor. Canned eggs lack the richness and depth that fresh eggs bring. When you boil eggs, the yolk stays creamy, while the whites turn firm. This contrast makes each bite delightful and satisfying. Consume within 1-2 days for best quality. As time passes, the avocado can brown, and the salad loses its fresh taste. Store it in an airtight container to keep it as fresh as possible. If you see browning, you can mix in a little lemon juice to help revive the color. Pair with fresh fruit, vegetable sticks, or a light soup. Fresh fruit adds sweetness, while crunchy vegetable sticks give texture. A light soup can balance the meal and add warmth. These sides complement the wraps and make for a well-rounded meal. In this post, we explored a simple, healthy recipe for avocado egg salad lettuce wraps. We covered the essential ingredients, step-by-step preparation, and tips for the best flavor and texture. These wraps are a great way to enjoy nutritious foods without heavy carbs. As you try this recipe, feel free to make it your own. Enjoy experimenting with different ingredients and variations. Eating healthy can be fun and tasty!](https://goldendishy.com/wp-content/uploads/2025/07/cd9e1d49-3f1d-44c5-8cf3-19f4c22fda08-768x768.webp)


![- 1 pound fresh green beans, trimmed - 4 tablespoons unsalted butter - 4 cloves garlic, minced - 1/2 teaspoon red pepper flakes (optional) - Salt and freshly ground black pepper - Juice of 1/2 lemon - 1/4 cup toasted pine nuts - Fresh parsley, finely chopped Garlic butter green beans shine with fresh flavors. The fresh green beans add crunch, while garlic brings warmth. I love using unsalted butter for its rich taste. The red pepper flakes are optional. They give a nice kick if you want some heat. Salt and pepper elevate the dish, enhancing its natural flavors. The lemon juice adds brightness to the beans. It balances the richness of the butter. Finally, toasted pine nuts bring a nutty crunch that you will enjoy. Garnishing with fresh parsley makes the dish pop with color. All these ingredients work together to create a simple, tasty side. For the full recipe, check out the details above. Start by boiling a large pot of salted water. The water should bubble hard. Add 1 pound of fresh green beans to the pot. Cook them for 3 to 4 minutes. You want them bright green and tender-crisp. This step keeps the beans fresh and crunchy. Once the beans are done, drain them quickly. Move them to a large bowl filled with ice water. This ice bath stops the cooking right away. It also helps keep their color. Leave them in the ice water for a few minutes. Then, drain the beans well and set them aside. In a large skillet, melt 4 tablespoons of unsalted butter over medium heat. When the butter is melted, add 4 cloves of minced garlic. If you want a kick, add 1/2 teaspoon of red pepper flakes. Stir this mix for 1 to 2 minutes. You want it fragrant, but not brown. Brown garlic can taste bitter. Add the blanched green beans to the skillet. Gently toss them in the garlic butter. Make sure they are well-coated. Cook for another 2 to 3 minutes. This lets the green beans soak up those tasty flavors. Squeeze the juice of half a lemon over the green beans. Season them with salt and freshly ground black pepper. Toss everything together again. You want the flavors to blend nicely. Transfer the garlic butter green beans to a serving dish. Top them with 1/4 cup of toasted pine nuts and some finely chopped fresh parsley. This adds a nice crunch and a pop of color. Enjoy your tangy and flavorful side! For the complete recipe, check the Full Recipe section. To get the best green beans, start with fresh ones. Trim the ends for a clean look. Bring a large pot of salted water to a rolling boil. Once boiling, add the beans. Blanch them for 3-4 minutes. You want them bright green and tender-crisp. After blanching, quickly drain the beans. Transfer them to a bowl of ice water. This stops the cooking process and keeps their color. Leave them in the ice bath for a few minutes. Then, drain them well before using. Garlic adds great taste, but it can burn fast. To sauté garlic, melt unsalted butter in a skillet over medium heat. Once melted, add minced garlic. Stir it for 1-2 minutes. Watch closely; you want it fragrant, not brown. If it turns brown, it will taste bitter. For an extra kick, add red pepper flakes during this step. This will bring a nice warmth to the dish. Feel free to get creative with your garlic butter green beans! Try adding toasted almonds or sesame seeds for extra crunch. You can also sprinkle some grated Parmesan cheese for a cheesy flavor. If you love herbs, toss in some thyme or dill. These add fresh notes to the dish. For a touch of sweetness, consider adding a drizzle of honey or maple syrup. Each of these options can make the dish your own. For the full recipe, check out the [Full Recipe]. {{image_4}} You can jazz up garlic butter green beans in many ways. Here are a few ideas: - Toasted almonds add a nice crunch and nutty taste. - Sesame seeds bring an Asian flair and a bit of texture. - Bacon bits offer a savory, smoky flavor that pairs well. - Parmesan cheese adds richness and depth to the dish. These simple tweaks can really boost your green beans. Feel free to mix and match! If you want a vegan version, you can swap out the butter. Here are some great options: - Olive oil works well and adds healthy fats. - Vegan butter is a direct substitute that keeps the flavor. - Coconut oil gives a unique twist with a slight sweetness. Using these substitutes lets everyone enjoy this side dish. You can prepare garlic butter green beans in various ways. Each method offers a different taste: - Grilling gives a smoky flavor and nice char marks. - Oven-roasting caramelizes the beans, making them sweet and tender. - Steaming keeps them crisp and vibrant in color. No matter how you cook them, the garlic butter flavor shines through. This flexibility makes it easy to fit your style! To store leftover garlic butter green beans, first let them cool. Place the beans in an airtight container. Make sure to cover them tightly. They will stay fresh in the fridge for up to three days. If you want to keep them longer, consider freezing. To reheat, you can use a skillet or microwave. For the skillet, heat a bit of butter over medium heat. Add the green beans and stir until warmed through. If using a microwave, place them in a bowl and cover it with a lid. Heat in short bursts of 30 seconds, stirring in between, until hot. If you want to freeze garlic butter green beans, cool them completely first. Pack the beans into freezer bags, removing as much air as possible. Label the bags with the date. You can freeze them for up to three months. To use, thaw in the fridge overnight before reheating. Enjoy the fresh taste even after freezing! Garlic butter green beans last about 3 to 4 days in the fridge. Store them in an airtight container. This keeps them fresh and tasty for your next meal. Yes, you can use frozen green beans. Just cook them according to the package instructions before adding them to the garlic butter. They may not have the same crispness as fresh beans, but they still taste great. Green beans are low in calories and high in nutrients. They are a good source of vitamins A, C, and K. Eating green beans can help support a healthy heart and improve digestion. They also provide fiber, which is important for gut health. Yes, you can prepare garlic butter green beans ahead of time. Cook them, then store them in the fridge. When you are ready to eat, just reheat them in a skillet for a few minutes. This keeps them tasty and quick to serve. Garlic butter green beans pair well with many dishes. They go great with roasted chicken, grilled fish, or steak. You can also serve them with pasta or rice for a complete meal. Consider them a versatile side that complements many flavors. Garlic butter green beans brighten any meal with their vibrant flavor. They are easy to make and add a touch of elegance. Garlic butter green beans are a side dish made with fresh green beans, garlic, and butter. The dish is quick to prepare and is perfect for any occasion. Blanching gives the green beans a bright color and crisp texture. This process makes them tender yet still crunchy. It also helps to lock in their nutrients. To create garlic butter, melt unsalted butter in a skillet. Then, add minced garlic and optional red pepper flakes. This mix brings rich flavor and a gentle heat to the dish. After tossing the green beans in the garlic butter, squeeze half a lemon over them. This adds a fresh, tangy taste. Then, season with salt and pepper to enhance the flavors. To finish, add toasted pine nuts for a nutty crunch. Sprinkle chopped fresh parsley on top for color and added freshness. You can find the full recipe above to try this tasty dish at home! In this post, we covered a simple and tasty recipe for garlic butter green beans. You learned about key ingredients, steps to prepare, and how to store the dish. I shared tips for cooking and adding your favorite flavors. Green beans are not only delicious but also healthy. You can enjoy them fresh or frozen. Now, you can make this dish with confidence and impress your family or friends. Try it out and have fun!](https://goldendishy.com/wp-content/uploads/2025/06/25c5d3d6-959d-413a-b3ac-306353b9d5bf-768x768.webp)