
Looking for a tasty and simple recipe? These Air Fryer Crispy Honey Garlic Tofu Bites are perfect for a quick snack or meal. With just a few easy steps, you’ll transform firm tofu into golden, crispy bites coated in a sweet and savory sauce. Whether you’re a tofu lover or a curious beginner, this dish will delight your taste buds. Ready to dive into this culinary adventure? Let’s get cooking!
Ingredients
Main Ingredients
– 14 oz firm tofu, pressed and cubed
– 2 tablespoons cornstarch
– 1 tablespoon extra virgin olive oil
– 3 tablespoons pure honey (or agave syrup for vegan)
Flavor Components
– 3 cloves garlic, minced
– 2 tablespoons low-sodium soy sauce
– 1 tablespoon rice vinegar
– 1 teaspoon sesame oil
– 1/4 teaspoon red pepper flakes (optional)
Garnishing
– Fresh cilantro leaves, chopped
– Toasted sesame seeds
To make the Air Fryer Crispy Honey Garlic Tofu Bites, you need simple ingredients. The main ingredient is firm tofu. You want the tofu to be pressed and cubed. This helps it get crispy. Cornstarch is key for a crunchy outside. Extra virgin olive oil adds richness and helps the cornstarch stick. Honey gives sweetness. If you want a vegan option, use agave syrup instead.
For flavor, garlic is a must. Minced garlic gives great taste. Low-sodium soy sauce adds saltiness. Rice vinegar brings a bit of tang. Sesame oil adds depth. If you like heat, add red pepper flakes.
For garnishing, fresh cilantro adds color and flavor. Toasted sesame seeds give a nice crunch. All these ingredients work together to create tasty tofu bites. They are perfect for snacking or as part of a meal.
Step-by-Step Instructions
Preparing the Tofu
To start, we need to press the tofu. This step is key to get rid of extra moisture. You can use a tofu press or wrap the tofu in a clean towel. Place a heavy object on top for about 20-30 minutes. Once it’s pressed, cut the tofu into bite-sized cubes, about 1 inch each.
Coating the Tofu
In a large bowl, add the pressed tofu cubes. Drizzle 1 tablespoon of extra virgin olive oil over the tofu. Gently toss the cubes to coat them evenly with the oil. Next, sprinkle 2 tablespoons of cornstarch over the tofu. Toss again to make sure every piece is covered. This will help the tofu turn crispy when it cooks.
Air Frying Process
Now, let’s preheat the air fryer. Set it to 375°F (190°C) and let it run for about 5 minutes. Once it’s hot, arrange the tofu cubes in a single layer in the air fryer basket. Make sure to leave some space between the cubes for air to flow. If needed, cook them in batches.
Making the Honey Garlic Sauce
While the tofu is air frying, we can make the honey garlic sauce. In a small saucepan, mix together 3 tablespoons of honey, 3 cloves of minced garlic, 2 tablespoons of low-sodium soy sauce, 1 tablespoon of rice vinegar, and 1 teaspoon of sesame oil. If you like some heat, add 1/4 teaspoon of red pepper flakes. Stir the mixture over medium heat until it simmers and thickens, about 3-5 minutes.
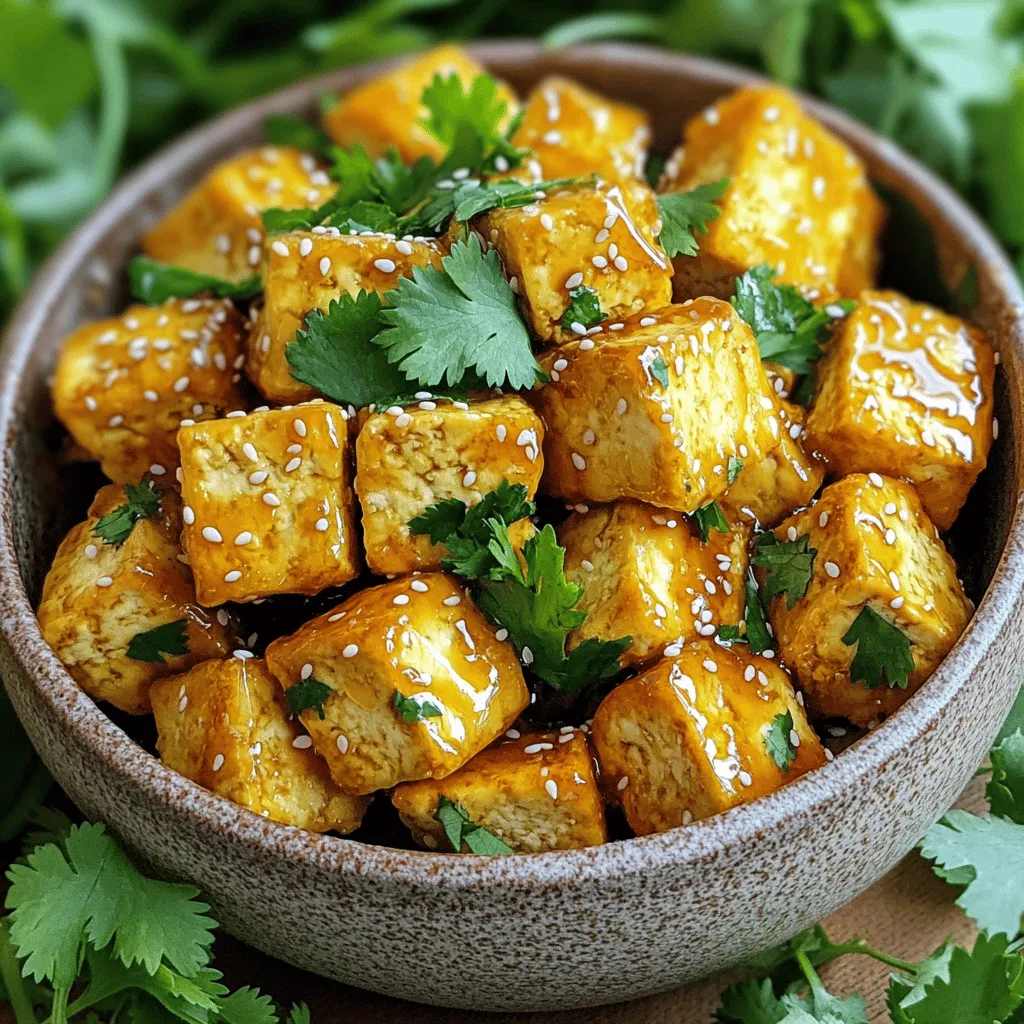
Finishing Touches
Once the tofu is crispy and golden, transfer it to a large bowl. Pour the honey garlic sauce over the tofu and gently toss it until each piece is well coated and shiny. For serving, consider garnishing with fresh chopped cilantro and toasted sesame seeds. This adds extra flavor and a nice crunch. Enjoy your crispy honey garlic tofu bites!
Tips & Tricks
Perfecting the Crispiness
To get the best crispiness, start by coating the tofu evenly with cornstarch. This coating is key. It helps the tofu become golden and crunchy. Use about 2 tablespoons of cornstarch for 14 oz of tofu. Toss the cubes gently so they are well coated. Next, preheat your air fryer to 375°F (190°C). This step is important. It ensures the tofu cooks evenly. Cook the tofu for 15-20 minutes. Be sure to shake the basket halfway through. This helps all sides get crispy.
Flavor Enhancements
Want to add some heat? Increase the red pepper flakes in the sauce. Adding more will give your bites a nice kick. If you prefer a sweeter taste, swap out honey for agave syrup. This change is perfect for a vegan option. Both sweeteners blend well with the garlic in the sauce. The balance of sweet and spicy creates a tasty bite.
Serving Suggestions
Presentation matters! Serve your crispy tofu bites on a bed of fresh greens. You can also use jasmine rice as a base. This adds color and flavor to the dish. For fun, use chopsticks or skewers to serve. They make eating more enjoyable. Garnish with fresh cilantro and toasted sesame seeds. This adds a nice crunch and a pop of color. Enjoy your beautiful and tasty dish!
Variations
Flavor Variants
You can switch up the flavor by replacing honey with maple syrup. Maple syrup gives the tofu a unique taste. It also keeps the dish sweet without using honey. Another fun option is to try different sauces. You can use teriyaki or sweet and sour sauce instead of the honey garlic sauce. Each sauce brings its own twist, making the dish exciting.
Dietary Alternatives
If you want to make the dish vegan, you can use agave syrup instead of honey. Agave syrup is a great sweetener that works well in this recipe. For those who need gluten-free options, tamari can replace soy sauce. Tamari gives the same great flavor without gluten.
Adding Vegetables
To make this dish more colorful, add vegetables like bell peppers or broccoli. These veggies not only add color but also boost nutrition. You can create a tasty stir-fry by mixing tofu with these veggies. This adds more texture and flavor to your meal. Cooking tofu and veggies together makes a complete dish that everyone will love.
Storage Info
Storing Leftovers
To store your crispy honey garlic tofu bites, use an airtight container. Glass containers work great for this. You can keep them in the fridge for up to four days. This way, you can enjoy leftovers without worry.
Reheating Suggestions
To reheat tofu bites, the air fryer is the best option. Preheat it to 350°F (175°C). Place the tofu in the basket for about 5 to 7 minutes. This keeps them crispy. You can also use a skillet over medium heat. Just add a little oil to keep them crunchy.
Freezing Instructions
You can freeze the tofu bites for later meals. Place them in a single layer on a baking sheet. Freeze them for about an hour, then transfer to a freezer bag. They’ll last about three months in the freezer.
When ready to eat, thaw them in the fridge overnight. Reheat as mentioned above for the best results. Enjoy your tasty bites anytime!
FAQs
Can I use soft tofu for this recipe?
Using soft tofu changes the dish. Soft tofu is delicate and won’t hold shape. Firm tofu stands up well during cooking. It gives a nice crispy bite. For this recipe, always pick firm tofu for the best results.
How do I make this dish spicier?
To add more heat, use red pepper flakes. You can double the amount for extra spice. Another option is to add sriracha sauce to the honey garlic sauce. Mix in a teaspoon for a nice kick. Adjust based on your taste.
What’s the best way to press tofu?
Pressing tofu is simple and important. Use a tofu press if you have one. If not, wrap the tofu in a clean towel. Place a heavy object on top, like a cast iron skillet. Let it sit for 20-30 minutes to remove moisture.
Can I use the sauce as a marinade?
Yes, you can use the honey garlic sauce as a marinade. Coat the tofu in the sauce before cooking. Let it marinate for at least 30 minutes. This adds flavor throughout the tofu. Remember to reserve some sauce for later!
This blog post covered how to make crispy tofu with a sweet and savory honey garlic sauce. You learned about the key ingredients like firm tofu, cornstarch, and flavor components such as garlic and soy sauce. I shared step-by-step instructions for preparation, cooking, and finishing touches. You also found tips for perfecting the tofu’s crispiness and creative serving ideas.
Tofu is flexible and tasty, making it a great dish for everyone. Enjoy experimenting with variations to find your favorite twist!


