
Lemon Herb Roasted Chicken Thighs Simple and Flavorful
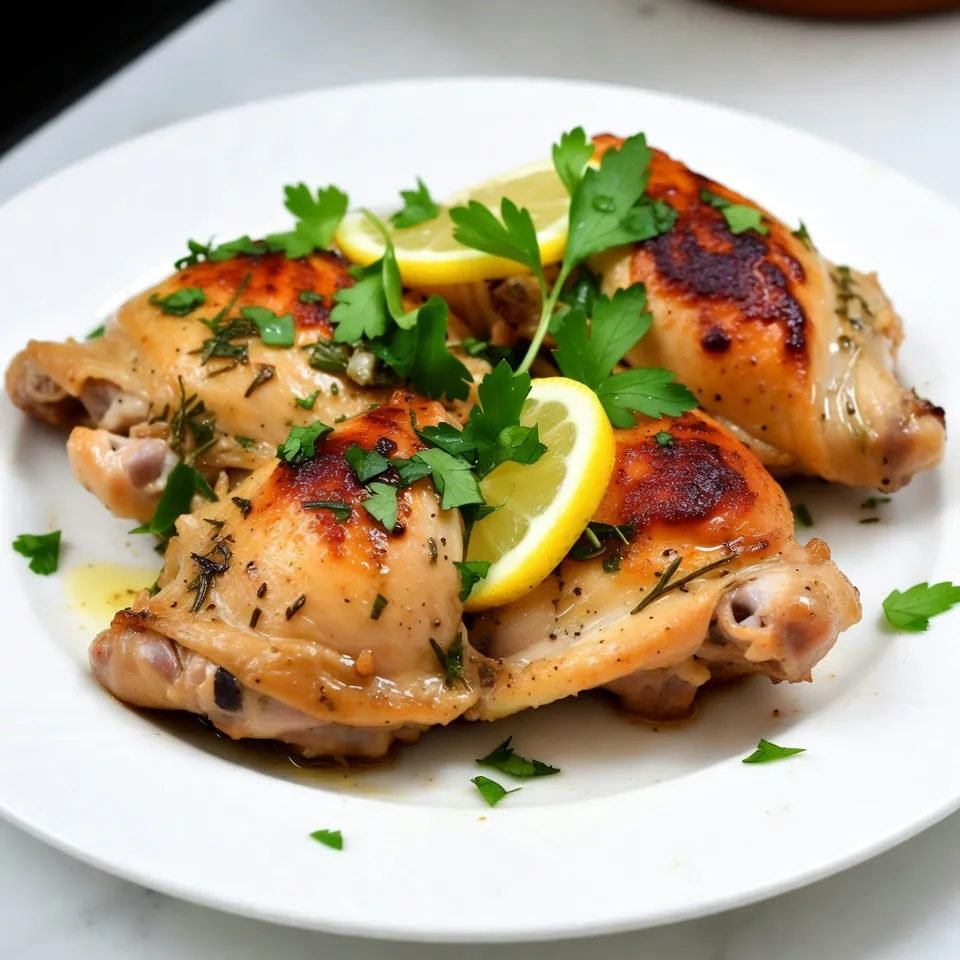

Are you ready to impress your family and friends with a dish that is both simple and delicious? Lemon Herb Roasted Chicken Thighs are the perfect balance of tart and savory flavors. With just a few key ingredients, you can create a meal that pleases everyone. Join me as I guide you through the easy steps to achieve crispy skin, juicy meat, and vibrant taste. Let’s get cooking!
Why I Love This Recipe
- Flavorful Marinade: The combination of lemon, garlic, and fresh herbs creates a vibrant marinade that infuses the chicken with delicious flavors.
- Crispy Skin: Patting the chicken dry before roasting ensures a perfectly crispy skin, making each bite satisfying and delightful.
- Easy to Prepare: This recipe requires minimal prep and can be marinated ahead of time, making it a convenient choice for weeknight dinners.
- Versatile Presentation: Serve the chicken with seasonal vegetables for a colorful and inviting meal that pleases the eyes as much as the palate.
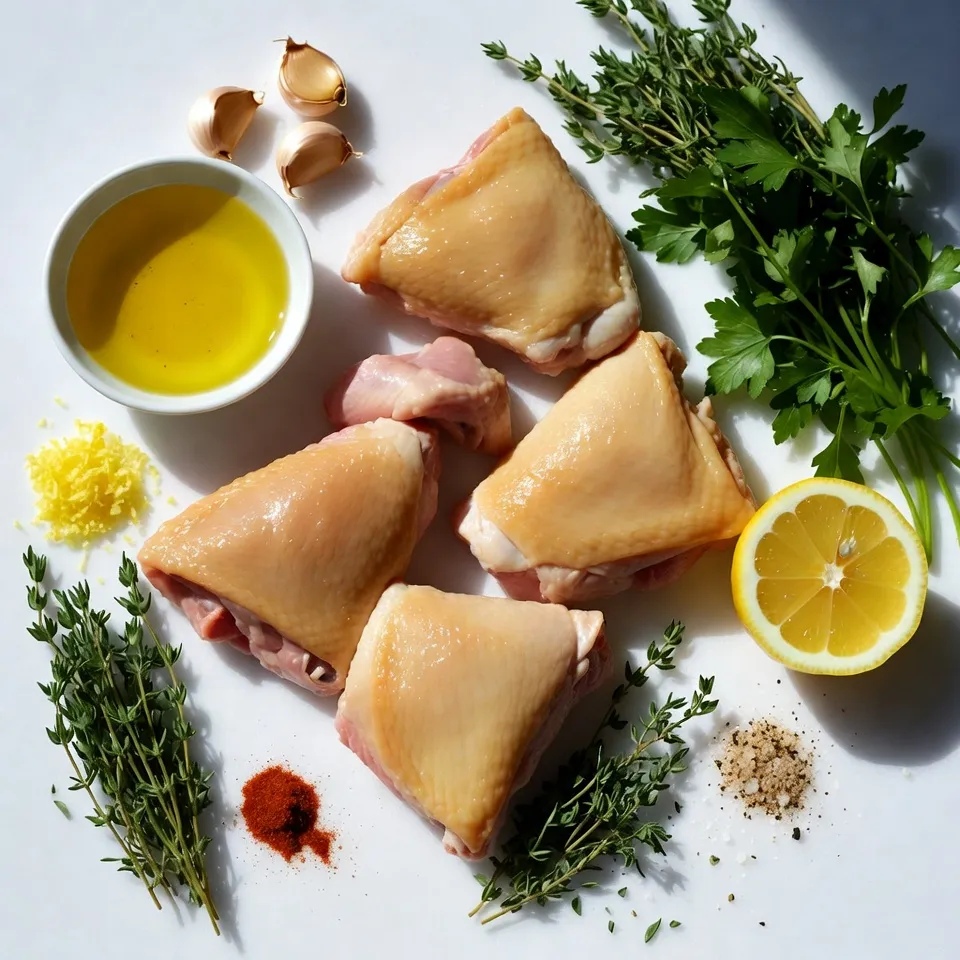
Ingredients
Main Ingredients for Lemon Herb Roasted Chicken Thighs
To make Lemon Herb Roasted Chicken Thighs, you need a few key ingredients:
– 4 bone-in, skin-on chicken thighs
– 2 tablespoons extra virgin olive oil
– 3 cloves garlic, finely minced
– Zest of 1 medium lemon
– Juice of 1 medium lemon
These ingredients give the chicken its juicy flavor and crispy skin.
Essential Herbs and Spices
The herbs and spices add depth to the dish:
– 1 tablespoon fresh rosemary, finely chopped
– 1 tablespoon fresh thyme, finely chopped
– 1 teaspoon smoked paprika
– Salt and freshly ground black pepper to taste
Fresh herbs bring bright notes. Smoked paprika adds warmth and color.
Suggested Garnishes and Accompaniments
For a great finish, consider these garnishes and sides:
– Fresh parsley, roughly chopped, for garnish
– Colorful roasted seasonal vegetables
– Lemon wedges for serving
These add color and a fresh touch to your meal. Enjoy!
Step-by-Step Instructions
Prepping the Chicken and Marinade
Start by setting your oven to 400°F (200°C). This heat helps the chicken turn golden and crispy. In a large bowl, mix 2 tablespoons of olive oil, 3 minced garlic cloves, the zest and juice of one lemon, 1 tablespoon each of fresh rosemary and thyme, 1 teaspoon of smoked paprika, and salt and pepper. Whisk this mix well until it blends nicely.
Next, dry the chicken thighs with paper towels. This step is key for crispy skin. Place the thighs in a resealable bag or a shallow dish. Pour the marinade over the chicken. Make sure each piece is coated well. Seal the bag or cover the dish tightly.
Marinating Time
Let the chicken marinate in the fridge for at least 30 minutes. If you have more time, you can let it sit for up to 4 hours. Longer marinating helps the flavors soak in better.
Roasting Techniques and Temperature
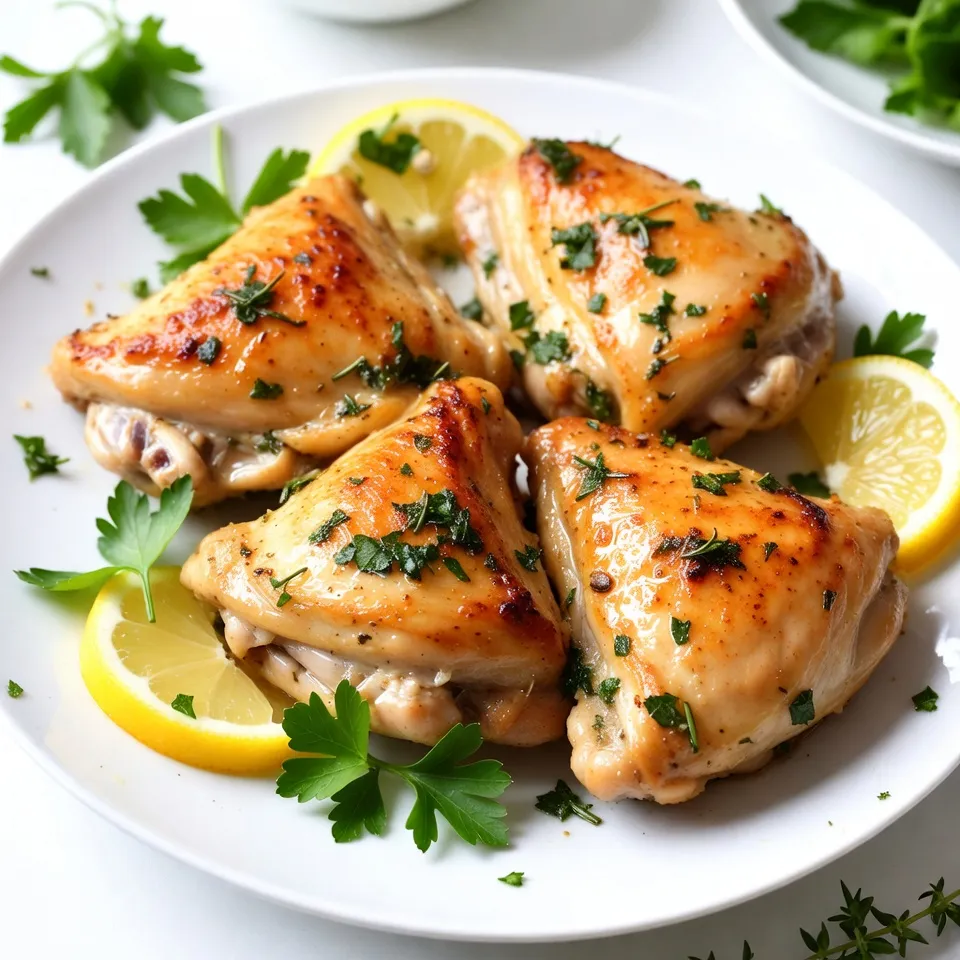
Once the chicken has marinated, arrange the thighs skin-side up on a parchment-lined baking sheet or in a cast-iron skillet. Cook in the preheated oven for 35 to 40 minutes. Look for golden brown skin and check that the internal temperature reaches 165°F (75°C). After baking, let the chicken rest for about 5 minutes to keep it juicy. Finally, sprinkle fresh parsley on top before serving for a fresh touch.
Tips & Tricks
Achieving Crispy Chicken Skin
To get crispy chicken skin, start by drying the chicken thighs with paper towels. This step is key. Moisture on the skin can make it soggy. Next, rub olive oil over the skin and sprinkle salt. Salt helps draw out more moisture. Finally, place the chicken skin-side up on a baking sheet. This position allows the heat to circulate and crisp up the skin nicely.
Enhancing Flavor with Marinade Variations
You can tweak the marinade to match your taste. Try adding different herbs like oregano or basil for new flavors. A splash of soy sauce or honey can bring a sweet and savory twist. You can also add some heat with red pepper flakes. Think about the season too; fresh herbs work great in summer, while dried herbs shine in winter. Let your creativity run wild!
Optimal Cooking Times for Juicy Thighs
Cook the chicken thighs for about 35-40 minutes at 400°F (200°C). You want the skin golden brown and crispy. Use a meat thermometer to check the internal temperature. It should reach 165°F (75°C) for safety. If you want extra juicy meat, let the chicken rest for 5 minutes after cooking. This resting time helps keep the juices locked inside.
Pro Tips
- Marinate Longer for Flavor: If time allows, marinate the chicken thighs for up to 4 hours to enhance the flavor profile.
- Use a Meat Thermometer: Ensure perfect doneness by using a meat thermometer to check that the internal temperature reaches 165°F (75°C).
- Rest the Chicken: Letting the chicken rest for 5 minutes after roasting allows the juices to redistribute, resulting in a juicier bite.
- Customize Your Herbs: Feel free to mix and match your favorite fresh herbs like oregano or basil for a personalized twist on the recipe.
Variations
Lemon Herb Chicken Thighs with Vegetables
To make lemon herb chicken thighs with vegetables, add your favorite veggies. You can use carrots, potatoes, or bell peppers. Chop them into even pieces for even cooking. Toss the vegetables in olive oil, salt, and pepper. Arrange them around the chicken on the baking sheet. The veggies soak up the chicken’s flavors as they roast. This adds color and nutrition to your meal.
Spicy Lemon Herb Roasted Chicken Thighs
If you like heat, try spicy lemon herb roasted chicken thighs. Add red pepper flakes or cayenne pepper to the marinade. Adjust the amount to your taste. This gives the dish a nice kick. You can also add some hot sauce to the marinade for extra flavor. The spicy notes mix well with the lemon and herbs.
Grilled Lemon Herb Chicken Thighs
For grilled lemon herb chicken thighs, marinate the chicken as usual. Then, preheat your grill to medium heat. Place the chicken thighs skin-side down on the grill. Cook for 6-7 minutes per side. This gives you a nice char and smoky taste. Make sure the internal temperature reaches 165°F (75°C). Serve with fresh lemon wedges for added zest.
Storage Info
Refrigeration and Reheating Tips
You can store leftover lemon herb roasted chicken thighs in the fridge. Place them in an airtight container. They stay fresh for about 3 to 4 days. To reheat, preheat your oven to 350°F (175°C). Place the thighs in a baking dish and cover with foil. Heat for about 20 minutes or until warmed through. This method helps keep the skin crispy.
Freezing Lemon Herb Roasted Chicken Thighs
If you want to save some for later, freezing is a great option. After cooking, let the chicken cool completely. Wrap each thigh in plastic wrap, then place them in a freezer bag. They can last up to 3 months in the freezer. When you’re ready to eat, thaw them in the fridge overnight. Reheat as mentioned before for the best taste.
Best Practices for Meal Prep
Meal prep makes weeknight dinners easy. You can marinate the chicken ahead of time. Store it in the fridge for up to 4 hours. Cook a batch of chicken thighs on the weekend. Use them in salads, wraps, or as a main dish. Having cooked chicken ready saves time and makes meals simple.
FAQs
How long to marinate chicken thighs for the best flavor?
For the best flavor, marinate chicken thighs for at least 30 minutes. This time allows the herbs and lemon to soak into the meat. If you have more time, let them sit in the marinade for up to 4 hours. Longer marinating gives a richer taste.
What’s the best way to tell if chicken thighs are cooked through?
To check if chicken thighs are cooked through, use a meat thermometer. The internal temperature should reach 165°F (75°C). If you don’t have a thermometer, look for clear juices when you cut into the meat. No pink means it is done.
Can I use boneless chicken thighs for this recipe?
Yes, you can use boneless chicken thighs. They will cook faster than bone-in thighs. Check for doneness at around 20-25 minutes in the oven. Adjust the cooking time to ensure they stay juicy and flavorful.
In this post, we explored how to create delicious lemon herb roasted chicken thighs. We covered the key ingredients, step-by-step instructions, and helpful tips. You learned about flavor variations and how to store your dish properly.
For the best taste, marinate well and roast at the right temperature. Enjoy these chicken thighs as a tasty meal or meal prep option. I hope you feel excited to try this recipe at home. It’s simple and sure to impres

Lemon Herb Roasted Chicken Thighs
Ingredients
- 4 pieces bone-in, skin-on chicken thighs
- 2 tablespoons extra virgin olive oil
- 3 cloves garlic, finely minced
- 1 medium lemon zest
- 1 medium lemon juice
- 1 tablespoon fresh rosemary, finely chopped
- 1 tablespoon fresh thyme, finely chopped
- 1 teaspoon smoked paprika
- to taste salt
- to taste freshly ground black pepper
- for garnish fresh parsley, roughly chopped
Instructions
- Begin by preheating your oven to 400°F (200°C) to ensure it’s hot and ready for roasting.
- In a mixing bowl, combine the extra virgin olive oil, minced garlic, lemon zest, lemon juice, chopped rosemary, chopped thyme, smoked paprika, and a generous pinch of salt and freshly ground black pepper. Whisk the marinade until thoroughly blended.
- Pat the chicken thighs dry with paper towels to help achieve crispy skin during the roasting process. Next, place the chicken thighs in a large resealable plastic bag or a shallow dish. Pour the marinade over the thighs, ensuring each piece is evenly coated. Seal the bag securely or cover the dish, then set it in the refrigerator to marinate for at least 30 minutes, up to 4 hours for enhanced flavor.
- Once the marinating time is complete, take the chicken out of the refrigerator and arrange the thighs skin-side up on a baking sheet lined with parchment paper, or place them in a well-preheated cast-iron skillet for added rustic charm.
- Roast the chicken in your preheated oven for approximately 35-40 minutes. The thighs are ready when the skin is a beautiful golden brown and crispy, and the internal temperature reaches a safe 165°F (75°C).
- Carefully remove the baking sheet or skillet from the oven and allow the chicken to rest for about 5 minutes. This resting time keeps the meat juicy and tender.
- Just before serving, sprinkle the freshly chopped parsley over the chicken thighs for a pop of color and flavor.

![To make Garlic Butter Shrimp Skewers, you'll need: - 1 pound large shrimp, peeled and deveined - 4 tablespoons unsalted butter - 4 cloves garlic, minced - 1 teaspoon red pepper flakes (adjust based on desired spiciness) - 1 tablespoon fresh parsley, finely chopped - 1 tablespoon freshly squeezed lemon juice - Salt and pepper to taste - 1 teaspoon smoked paprika - Skewers (either wooden, soaked, or metal) When choosing shrimp, fresh is often best. Look for shrimp that smell like the ocean, not fishy. The shells should be shiny and clean. If fresh shrimp isn’t available, frozen shrimp is a great option. Frozen shrimp can be just as good if they are properly handled. - Check for a firm texture. - Avoid shrimp that are mushy or have black spots. - If buying frozen, look for shrimp with no added ingredients. Using quality ingredients makes a big difference. For butter, I recommend brands like Kerrygold or Plugrá. They offer rich flavor that enhances the dish. For spices, consider McCormick or Penzeys. They have high-quality spices that bring out the best in your garlic butter. Using fresh herbs, like parsley, also boosts the flavor. Look for herbs that are bright and fragrant. This ensures your Garlic Butter Shrimp Skewers taste amazing! For the full recipe, check out the complete instructions above. Start by gathering your ingredients. If you use wooden skewers, soak them in water for at least 30 minutes. This step stops them from burning. While they soak, you can mince the garlic. Use a sharp knife to chop the garlic finely. The smaller the pieces, the better the flavor will blend. Next, melt 4 tablespoons of unsalted butter in a medium saucepan over medium heat. As it melts, add the minced garlic and red pepper flakes. Stir it often for about 1-2 minutes. Watch closely; you want the garlic fragrant but not browned. Once ready, remove the pan from heat. Add 1 tablespoon of lemon juice and chopped parsley. Then season with salt, pepper, and smoked paprika to taste. Mix well to create a rich garlic butter flavor. Now, it’s time to grill! Add the shrimp to a large bowl. Pour half of the garlic butter mixture over them. Toss gently to coat each shrimp. Thread 4-5 shrimp onto each skewer. Preheat your grill or grill pan over medium-high heat. Lightly grease the grill with oil. This helps prevent sticking. Place the skewers on the grill. Cook for about 2-3 minutes on each side. You’ll know they are done when the shrimp turn pink and opaque. Brush on some of the reserved garlic butter mixture while grilling for extra flavor. Once cooked, drizzle any remaining garlic butter over the skewers before serving. This dish is ready to impress! For the full recipe, check out the section above. To make perfect shrimp skewers, focus on time and heat. Grill the shrimp for about 2-3 minutes on each side. Use medium-high heat to get a nice sear. If your grill is too hot, the shrimp may cook too fast and become tough. Always keep an eye on them. One common mistake is not soaking wooden skewers. Soak them for at least 30 minutes. This stops them from burning. Another mistake is overcooking the shrimp. They should be pink and opaque when done. If they curl too much, they may be overcooked. Lastly, don’t forget to brush on more garlic butter while grilling. It boosts the flavor! You can easily enhance the flavor of your shrimp skewers. Add fresh herbs like basil or cilantro for a burst of freshness. Consider using spices like cumin or coriander for a warm twist. A dash of lemon zest can also brighten the dish. Feel free to play around with flavors to find your favorite mix. For a detailed recipe, check out the [Full Recipe]. {{image_4}} You can swap shrimp for other proteins. Chicken is a great choice. Use boneless, skinless chicken breast. Cut it into bite-sized pieces. Just marinate it in the same garlic butter mix. You can also use fish. Salmon or swordfish work well. They add a rich flavor. Follow the same steps for grilling. Adding veggies to your skewers makes a full meal. Bell peppers, zucchini, and cherry tomatoes are perfect. They add color and crunch. Cut all veggies into similar sizes. This way, they cook evenly with the shrimp. Thread them onto the skewers with the shrimp. This adds a tasty twist to your dish. You can change up the flavors easily. For a spicy kick, add more red pepper flakes. If you love herbs, try fresh basil or thyme. Mix these herbs into the garlic butter. For a citrus twist, add lime juice instead of lemon. You can even add zest from the citrus fruits. This will bring a fresh taste to your skewers. Enjoy experimenting with different flavors from the Full Recipe! Store leftover shrimp skewers in an airtight container. Let them cool to room temperature first. Place a piece of parchment paper between layers to avoid sticking. Keep them in the fridge for up to three days. To reheat, gently warm the skewers in a skillet over low heat. Add a little butter or oil to keep them moist. Heat for about 3-5 minutes until warm. You can also use a microwave, but be careful not to overcook. Heat for 30 seconds at a time, checking often. If you want to freeze shrimp skewers, first wrap them tightly in plastic wrap. Then, place them in a freezer bag. Remove as much air as possible. They can last up to three months in the freezer. When ready to eat, thaw in the fridge overnight before reheating. For the full recipe, check out the details above. Enjoy your garlic butter shrimp skewers! The best skewers for grilling shrimp are metal or soaked wooden skewers. Metal skewers handle high heat well and are reusable. Soaking wooden skewers for at least 30 minutes prevents them from burning. Both types work great for Garlic Butter Shrimp Skewers. Shrimp are fully cooked when they turn pink and opaque. They also curl into a "C" shape. If they look gray or have a rubbery texture, they need more time. For the best results, grill shrimp for about 2-3 minutes on each side. Yes, you can prepare Garlic Butter Shrimp Skewers ahead of time. Marinate the shrimp in the garlic butter mixture and store them in the fridge. They can stay fresh for up to 24 hours. Just grill them right before serving for the best taste. To sum up, this guide covered Garlic Butter Shrimp Skewers in detail. We explored key ingredients, cooking steps, and tips for the perfect dish. Remember, choosing good shrimp and seasoning well makes a difference. Enjoy grilling with variations like chicken or veggies to switch things up. Proper storage ensures your leftovers stay tasty. Follow these steps for delicious results every time. Your journey to perfect skewers starts here—enjoy every bite you take!](https://goldendishy.com/wp-content/uploads/2025/06/728f68f4-b8bf-4bba-b9a3-49ab34a89912-768x768.webp)