
Matcha Coconut Energy Balls Nourishing Snack Idea
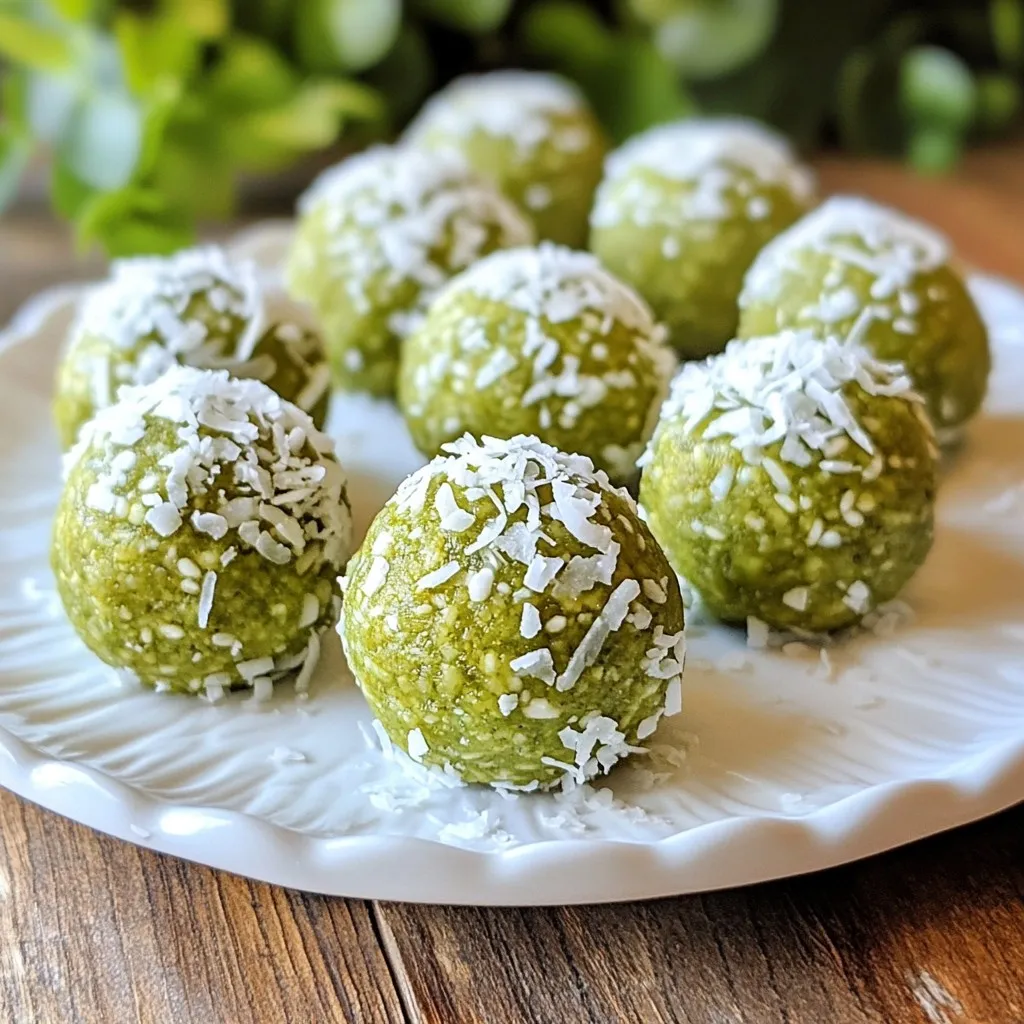

Looking for a healthy snack that boosts your energy? Try my Matcha Coconut Energy Balls! They’re simple to make and packed with wholesome ingredients like rolled oats, almond butter, and, of course, matcha powder. These bites not only taste great but also provide lasting energy for your busy day. Let’s dive into how you can whip up these delicious and nourishing treats!
Why I Love This Recipe
- Healthy Ingredients: These energy balls are packed with wholesome ingredients like oats, almond butter, and chia seeds, making them a nutritious snack option.
- Easy to Make: With just a few simple steps, you can whip up these delicious energy balls in no time, perfect for busy schedules.
- Customizable: Feel free to adapt the recipe by adding your favorite nuts, seeds, or superfoods to make them truly your own.
- Perfect for On-the-Go: These energy balls are a great snack to take along for hikes, workouts, or busy days, providing a quick energy boost when you need it.
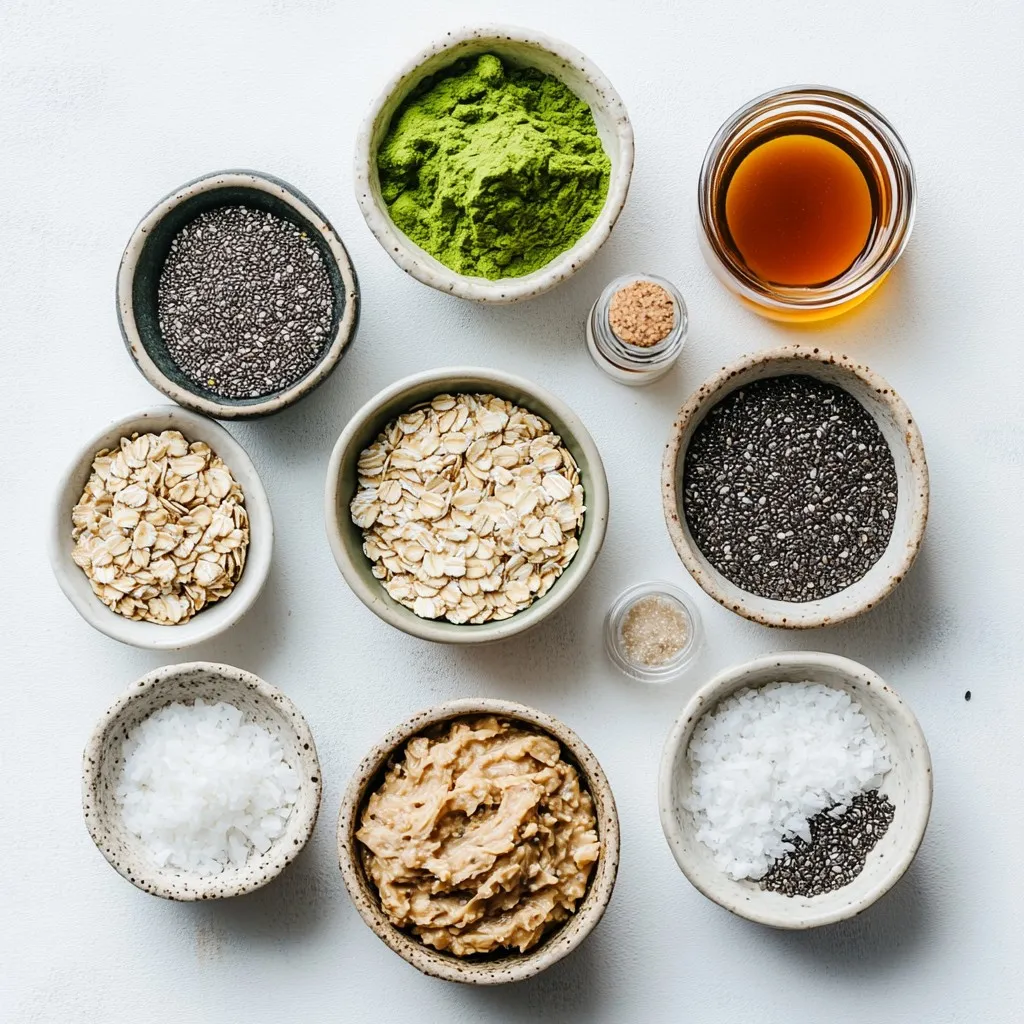
Ingredients
To make Matcha Coconut Energy Balls, you need simple, wholesome ingredients. Here’s what you will need:
– 1 cup rolled oats
– 1/2 cup almond butter
– 1/4 cup pure maple syrup
– 1/4 cup unsweetened shredded coconut
– 1 tablespoon matcha green tea powder
– 1/4 cup chia seeds
– 1/2 teaspoon pure vanilla extract
– A pinch of fine sea salt
– Extra unsweetened shredded coconut for rolling (optional)
Each ingredient adds a unique touch. Rolled oats provide fiber and texture. Almond butter offers healthy fats and protein. Pure maple syrup adds a natural sweetness. Unsweetened shredded coconut brings a tropical twist. Matcha green tea powder gives a vibrant color and rich flavor. Chia seeds contribute to nutrition and help bind the mixture. Pure vanilla extract enhances the taste, while sea salt balances the sweetness. Optionally, you can roll the balls in extra coconut for a pretty finish.
This blend of ingredients makes a tasty, healthy snack you can enjoy anytime!
Step-by-Step Instructions
Combine Ingredients
In a large mixing bowl, add the following ingredients:
– 1 cup rolled oats
– 1/2 cup almond butter
– 1/4 cup pure maple syrup
– 1/4 cup unsweetened shredded coconut
– 1 tablespoon matcha green tea powder
– 1/4 cup chia seeds
– 1/2 teaspoon pure vanilla extract
– A pinch of fine sea salt
Mixing these ingredients together creates a tasty base for your energy balls.
Mix Thoroughly
Use a spatula or wooden spoon to blend the ingredients well. Make sure everything is evenly combined. The mixture should feel sticky and hold together when pressed. If it crumbles too much, add a bit more almond butter or maple syrup. This step helps bind everything together.
Form the Balls
With clean hands, take small amounts of the mix. Roll them into balls about 1 inch in size. Compact the mixture gently. This helps the balls stay together and not fall apart.
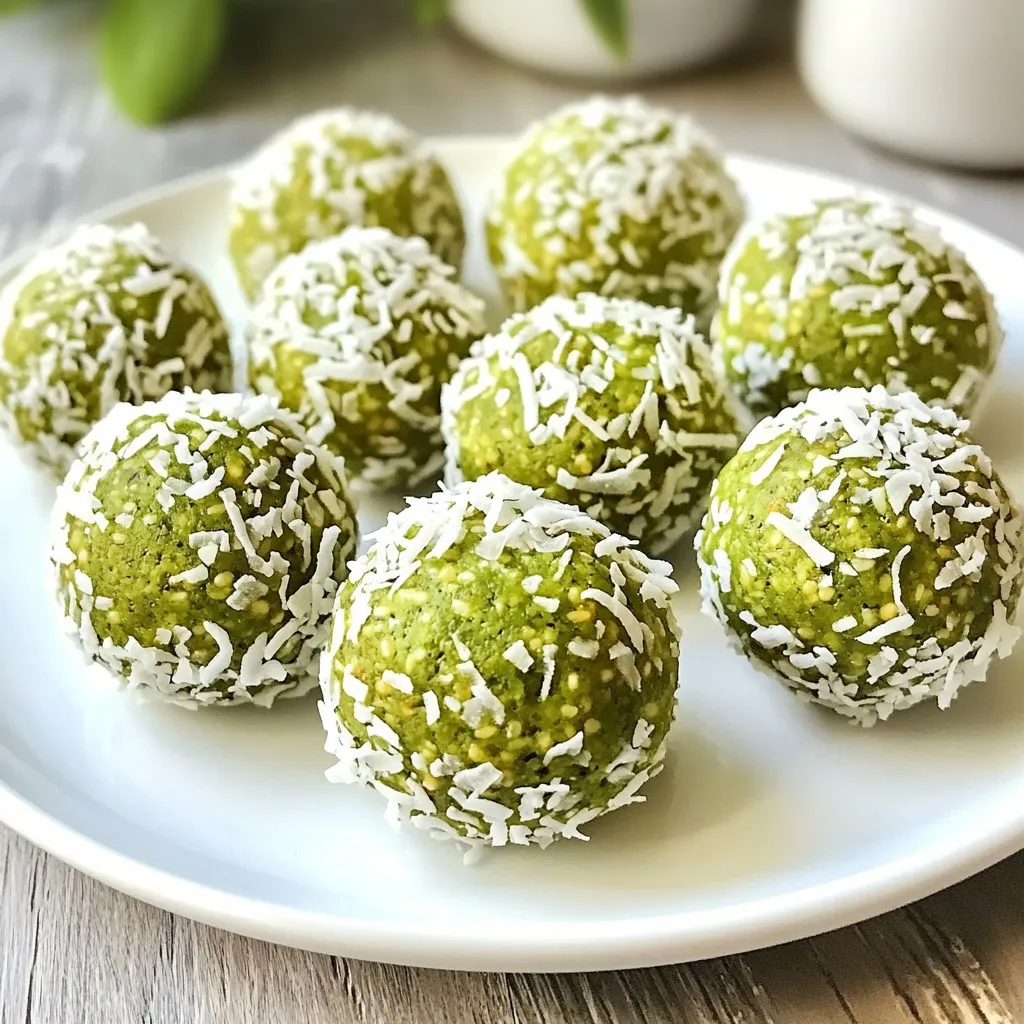
Coat with Coconut (Optional)
If you want, roll each ball in extra shredded coconut. This step adds flair and a bit more coconut flavor. It’s a fun way to make them look nice too!
Chill the Energy Balls
Place the balls on a baking sheet lined with parchment paper. Space them apart to avoid sticking. Chilling helps them firm up and makes them easier to handle.
Firm Up
Refrigerate the balls for at least 30 minutes. This step is key. Chilling makes them sturdy and ready to eat.
Store Properly
Once chilled, move the energy balls to an airtight container. They stay fresh in the fridge for up to one week. This makes them a great snack for busy days or after workouts!
Tips & Tricks
Adjusting Consistency
If your mixture feels too dry, add more almond butter. You can also add a bit more maple syrup. If it feels too wet, add a bit more oats or shredded coconut. You want the mixture to be sticky but not runny. This makes rolling easier.
Serving Suggestions
Serve these energy balls as a quick snack or a healthy dessert. They pair well with tea or smoothies. You can also pack them for lunch or take them on hikes. They are great for energy on the go.
Presentation Tips
For a great look, place the energy balls on a nice plate or in a jar. You can sprinkle some extra shredded coconut around them. This adds a nice touch and makes them more inviting. Make them the star of your snack table!
Pro Tips
- Adjust Sweetness: If you prefer a sweeter energy ball, feel free to add a touch more maple syrup or a sprinkle of stevia to the mixture.
- Experiment with Flavors: Try adding different flavor extracts like almond or coconut for a unique twist, or mix in spices like cinnamon for extra warmth.
- Chill for Better Texture: For the best texture, ensure to refrigerate the energy balls for at least 30 minutes, as this helps them firm up nicely.
- Bulk Preparation: Consider making a double batch and freezing half for a quick snack option later on. They freeze well and can be ready in minutes!
Variations
Adding Nuts or Seeds
You can add nuts or seeds to your energy balls for extra crunch. I love using chopped almonds or walnuts. They add healthy fats and protein. Try sunflower seeds or pumpkin seeds for a nut-free option. Adding these ingredients can give your snack a fun twist. Just mix them in when you combine the other ingredients.
Different Sweeteners
If you want to change the sweetness, swap maple syrup for honey or agave. Each sweetener has its own flavor, which can change the taste of your energy balls. I enjoy using dates as a natural sweetener. Just blend them into a paste and mix them in. This adds a rich sweetness and chewy texture.
Flavor Infusions
You can also play with flavors! Add a pinch of cinnamon or cocoa powder for a new taste. For a tropical vibe, try a splash of pineapple juice or some finely chopped dried fruit. Each addition can change your energy balls into a unique snack. Don’t be afraid to experiment and find your favorite flavor combo!
Nutritional Information
Macronutrient Breakdown
Each Matcha Coconut Energy Ball has a balanced mix of nutrients. The rolled oats give you healthy carbs for energy. Almond butter adds protein and healthy fats. Chia seeds are great for fiber and omega-3s. Matcha brings antioxidants and boosts your metabolism. Here’s a quick breakdown per ball:
– Calories: About 100
– Protein: 3 grams
– Carbohydrates: 12 grams
– Fats: 5 grams
– Fiber: 2 grams
Health Benefits of Ingredients
These energy balls pack a powerful punch with their ingredients.
– Rolled Oats: They help keep you full. They lower cholesterol and stabilize blood sugar.
– Almond Butter: This nut butter is rich in vitamin E. It supports heart health and reduces inflammation.
– Maple Syrup: This natural sweetener has minerals. It offers antioxidants and is lower on the glycemic index.
– Coconut: Unsweetened coconut supports hydration. It also adds fiber to your diet.
– Matcha: This green tea powder boosts energy. It enhances focus and is rich in catechins, which fight disease.
– Chia Seeds: These tiny seeds are full of fiber. They help with digestion and provide protein.
Caloric Content per Serving
You can enjoy these energy balls guilt-free! Each ball has about 100 calories. This makes them a great snack for any time of day. If you eat two, it’s still a good choice! They are perfect for busy days or after workouts. Just remember to store them in the fridge to keep them fresh.
FAQs
Can I use a different nut butter?
Yes, you can! Any nut butter works well. Try peanut butter or cashew butter. Each nut butter adds its own flavor. Almond butter gives a creamy taste, while peanut butter is more robust. Choose what you love!
How long do these energy balls last?
These energy balls last up to one week in the fridge. Store them in an airtight container. They stay fresh and tasty for your snacking needs. If you want them to last longer, keep them in the freezer.
Can I freeze Matcha Coconut Energy Balls?
Absolutely! Freezing is a great option. Place them in a single layer in a freezer-safe bag. They can last for about three months in the freezer. Just thaw them overnight in the fridge before enjoying them.
What are the health benefits of matcha?
Matcha is a superfood! It boosts energy and improves focus. It has antioxidants that fight free radicals. This can help reduce inflammation and keep your body healthy. Matcha also supports metabolism, which can help with weight management.
Are these energy balls suitable for a vegan diet?
Yes, these energy balls are vegan-friendly! They contain no animal products. Use maple syrup for sweetness, making them a perfect snack for plant-based diets. Enjoy these delicious bites without any worries!
In this post, we explored how to make Matcha Coconut Energy Balls using simple ingredients. We covered the steps from mixing to chilling, ensuring you have a delicious snack. I shared tips for adjusting texture and different variations to suit your taste. Remember, these energy balls are not only tasty but also packed with nutrients. Embrace your creativity and enjoy experimenting with flavors and toppings. You can make a healthy treat that fuels your da

Matcha Coconut Energy Balls
Ingredients
- 1 cup rolled oats
- 0.5 cup almond butter
- 0.25 cup pure maple syrup
- 0.25 cup unsweetened shredded coconut
- 1 tablespoon matcha green tea powder
- 0.25 cup chia seeds
- 0.5 teaspoon pure vanilla extract
- a pinch fine sea salt
- extra unsweetened shredded coconut for rolling (optional)
Instructions
- In a large mixing bowl, add the rolled oats, almond butter, maple syrup, unsweetened shredded coconut, matcha powder, chia seeds, vanilla extract, and a pinch of sea salt.
- Use a spatula or wooden spoon to mix all the ingredients together until they are evenly combined. The mixture should be sticky and hold together when pressed. If too crumbly, incorporate a little more almond butter or maple syrup until desired consistency is reached.
- With clean hands, take small portions of the mixture and roll them into balls, approximately 1 inch in diameter. Compact the mixture slightly to ensure the balls hold their shape.
- If you wish, roll each energy ball in extra shredded coconut to coat them lightly.
- Lay the prepared energy balls on a baking sheet lined with parchment paper, ensuring they are spaced apart to prevent sticking.
- Refrigerate the energy balls for a minimum of 30 minutes to firm up.
- Once chilled, transfer the energy balls to an airtight container.
![- 2 cups fresh blueberries, rinsed and drained - 2 cups ripe peaches, diced (approximately 3 medium-sized peaches) - 1 tablespoon freshly squeezed lemon juice - 1/2 cup granulated sugar (adjust based on your sweetness preference) - 1 tablespoon cornstarch - 1 teaspoon pure vanilla extract - 1 1/2 cups rolled oats - 1 cup all-purpose flour - 1/2 cup packed brown sugar - 1/2 teaspoon baking powder - 1/4 teaspoon fine salt - 1/2 cup unsalted butter, melted and slightly cooled - 1 teaspoon ground cinnamon (optional, for added warmth) These simple ingredients create a tasty balance of sweet and tart flavors. The fresh blueberries and ripe peaches shine in each bite. You can change the sugar to fit your taste. I often add a bit more if the fruit is not very sweet. I love using oats for texture; they give a nice chewiness. This recipe is so flexible. You can swap out fruit or adjust flavors based on what you have at home. For example, try adding a pinch of nutmeg for a warm spice twist. This recipe takes only 15 minutes to prepare. It bakes in about 30 to 35 minutes. You will get about 12 bars from this batch, perfect for sharing with friends or family. If you want the full recipe, check the section below. - Preheat your oven to 350°F (175°C). - Grease a 9x13-inch baking dish or line it with parchment paper. - In a medium mixing bowl, combine 2 cups of fresh blueberries, 2 cups of diced peaches, 1 tablespoon of lemon juice, 1/2 cup of granulated sugar, 1 tablespoon of cornstarch, and 1 teaspoon of vanilla extract. - Gently mix the ingredients until the fruit is coated. Let it sit for a few minutes to enhance the flavor. - In a large mixing bowl, whisk together 1 1/2 cups of rolled oats, 1 cup of all-purpose flour, 1/2 cup of brown sugar, 1/2 teaspoon of baking powder, 1/4 teaspoon of salt, and 1 teaspoon of cinnamon if desired. - This mixture will give your bars that perfect crumb texture. - Pour 1/2 cup of melted butter into the dry mixture and stir until it looks like coarse crumbs. - Reserve about 1 cup of this crumb mixture for later. - Press the remaining crumb mixture into the bottom of your greased dish to form the crust. - Spread the fruit mixture evenly over the crust, then sprinkle the reserved crumbs on top. - Bake in your preheated oven for about 30-35 minutes. - Look for golden brown color and bubbling filling to know it's done. - Once baked, let the bars cool on a wire rack for 15-20 minutes before slicing into squares. - This cooling time helps the bars set well for easy serving. Enjoy making these Blueberry Peach Crumble Bars with the [Full Recipe]. - Check for doneness by ensuring the filling is bubbling and the top is golden brown. - Letting the bars cool completely aids in easier slicing. This step prevents squishing the filling and keeps the layers intact. - Use frozen blueberries or peaches if fresh ones are unavailable. Frozen fruit works well and saves time. - Substitute brown sugar with coconut sugar for a healthier option. Coconut sugar adds a nice depth to the flavor. - Serve warm or at room temperature. This allows the flavors to shine. - Pair with vanilla ice cream or whipped cream. This adds a creamy texture that balances the tartness of the fruit. For an extra touch, garnish with fresh blueberries or peach slices. You can find the Full Recipe above for detailed instructions on making these delightful bars! {{image_4}} You can mix things up with different fruits. For a fresh twist, switch blueberries and peaches for raspberries and apples. The tartness of raspberries pairs well with sweet apples. You can also try plums or cherries. Both add their unique flavors and keep the bars fun and exciting. Want to make these bars gluten-free? No problem! Just replace all-purpose flour with a gluten-free flour blend. Many good mixes are available at stores. Also, ensure that your oats are certified gluten-free. This small change lets everyone enjoy this tasty dessert. For a vegan version, swap unsalted butter for coconut oil or vegan butter. Both options work well and keep the bars rich and tasty. If your recipe includes eggs, you can use flax eggs instead. To make a flax egg, mix one tablespoon of ground flaxseed with two and a half tablespoons of water. Let it sit for five minutes. This creates a great egg substitute that still binds everything together. Store your Blueberry Peach Crumble Bars in an airtight container. They stay fresh at room temperature for up to 3 days. This makes them great for quick snacks or dessert. To keep them longer, refrigerate the bars. They will stay fresh for up to a week. For even longer storage, you can freeze the bars. Wrap them tightly in plastic wrap or aluminum foil. They can be frozen for up to 3 months. When you're ready to enjoy your frozen bars, reheating is easy. Simply pop them in the microwave for a few seconds. You can also warm them in the oven at 350°F (175°C). This brings back their delicious taste and texture. For the full recipe and tips, check out the detailed instructions above. Enjoy your tasty treat! Yes, you can make these bars a day in advance. Just store them in the fridge. This helps the flavors blend nicely. Look for bubbling filling and a golden brown topping. This shows they are ready to eat. Yes, you can add chopped nuts like almonds or walnuts. They give the bars extra crunch and flavor. I love pairing them with a scoop of ice cream or yogurt. It makes a delicious treat. Store them in an airtight container at room temperature. You can also refrigerate them for up to a week. - Blueberry Peach Crumble Bars 🫐 To make these delicious Blueberry Peach Crumble Bars, you need simple, fresh ingredients. Here’s what you will need: - 2 cups fresh blueberries, rinsed and drained - 2 cups ripe peaches, diced (approximately 3 medium-sized peaches) - 1 tablespoon freshly squeezed lemon juice - 1/2 cup granulated sugar (adjust based on your sweetness preference) - 1 tablespoon cornstarch - 1 teaspoon pure vanilla extract - 1 1/2 cups rolled oats - 1 cup all-purpose flour - 1/2 cup packed brown sugar - 1/2 teaspoon baking powder - 1/4 teaspoon fine salt - 1/2 cup unsalted butter, melted and slightly cooled - 1 teaspoon ground cinnamon (optional, for added warmth) These ingredients come together to create a wonderful balance of sweet and tart flavors. The fresh blueberries and peaches mix well with the lemon juice. This adds a nice zing to the bars. The sugar and cornstarch help create a thick, juicy filling. The crumble topping is a blend of oats, flour, and sugars. It gives the bars a crunchy texture that pairs perfectly with the soft fruit layer. The butter adds richness, while the cinnamon gives a warm, cozy vibe to each bite. If you want to try this recipe, check the Full Recipe for step-by-step instructions. You'll love making and sharing these bars! These Blueberry Peach Crumble Bars are easy to make and full of flavor. You learned about the key ingredients, simple steps, and different variations. Remember, you can swap fruits or adjust sweetness to fit your taste. Store leftovers in a container for later. Enjoy these bars warm or with ice cream for a tasty treat. Happy baking!](https://goldendishy.com/wp-content/uploads/2025/06/77e155cd-d820-4acd-a50c-b849e6ba2e1e-768x768.webp)
![- 1 cup strawberries, hulled and sliced - 1 cup blueberries - 1 ripe mango, peeled and diced - 1 cup pineapple, diced - 1 banana, sliced The fruit selection is key. I enjoy using a mix of colors and flavors. Strawberries bring sweetness, while blueberries add a nice pop of tartness. The mango gives a tropical vibe, and pineapple adds a refreshing taste. The banana adds creaminess and helps balance the flavors. - 1/4 cup honey - 2 tablespoons freshly squeezed lime juice - Zest of 1 lime The dressing pulls everything together. I use honey for natural sweetness. Fresh lime juice brightens the dish, making it taste fresh. The lime zest adds an extra layer of flavor that's hard to resist. - Fresh mint leaves, for garnish Mint leaves add a beautiful touch. They not only look good but also give a nice hint of freshness. If you want to impress guests, sprinkle some mint on top before serving. Make sure to check out the Full Recipe for a detailed guide on how to combine these ingredients into a delicious Honey Lime Fruit Salad. To start, gather your fruits. Grab one cup of hulled and sliced strawberries, one cup of blueberries, one ripe mango peeled and diced, one cup of diced pineapple, and one sliced banana. In a large mixing bowl, combine all these fruits. Gently mix them to spread the flavors evenly. This step helps each fruit shine in the salad. Next, we make the dressing. In a separate bowl, add a quarter cup of honey, two tablespoons of freshly squeezed lime juice, and the zest of one lime. I like to whisk these together until the mixture is smooth. This dressing adds a sweet and zesty kick to the salad. Now, it's time to bring it all together. Drizzle the honey-lime dressing over your prepared fruits. Toss everything gently with a spatula or large spoon. Make sure each piece of fruit gets coated in the dressing. Let the salad sit for about ten minutes at room temperature. This resting time lets the flavors blend beautifully. Enjoy your fresh and colorful Honey Lime Fruit Salad! You can find the Full Recipe for details on preparation. To make a great Honey Lime Fruit Salad, choose ripe, seasonal fruits. Fresh fruits provide the best taste and texture. Look for strawberries with bright red color. Blueberries should be plump and firm. Pick mangoes that give slightly when you press them. Pineapples should smell sweet at the base. Bananas need to be ripe but not brown. When you select these fruits, you ensure a delightful salad. Let your salad rest for at least 10 minutes before serving. This short wait helps the flavors blend. The honey lime dressing seeps into the fruits. This makes each bite burst with flavor. The longer the salad sits, the better it tastes. You can prepare this ahead of time for easy serving. Presentation matters when serving this salad. You can use individual bowls for a personal touch. A large platter works well for gatherings. Arrange the fruits in a colorful pattern. Add lime wedges on the side for extra zest. A few fresh mint leaves on top make it look appealing. Your guests will love the bright colors and fresh taste. For the full recipe, check the instructions above. {{image_4}} You can easily change this fruit salad to suit your taste. Adding fruits like kiwi or grapes can make it even better. Kiwi adds a bright green color and a tangy taste. Grapes are sweet, crunchy, and add variety. Just chop them up and toss them in. Mix and match to create your dream fruit salad! For a fun tropical vibe, try adding shredded coconut or a splash of coconut juice. Shredded coconut gives a chewy texture and a hint of sweetness. Coconut juice can make the dressing even more refreshing. This twist takes your fruit salad to a whole new level. You’ll feel like you’re on a sunny beach with every bite! If you want a vegan option, use agave syrup instead of honey. Agave syrup is a great sweetener that works well in this recipe. It blends nicely with lime juice and keeps the salad tasty. This swap still gives you that sweet flavor without using honey. Enjoy your fruit salad without any worries! For the full recipe, check out the [Full Recipe]. Keep the salad in an airtight container in the fridge. This helps keep it fresh. Avoid letting the salad sit out for too long. If you plan to serve it later, store it right away. Consume within 1-2 days for best freshness. The fruits will start to lose their crispness after that. If you notice any browning, it’s time to toss it out. Always check for changes in smell or texture. Freezing fruit salad can change its texture. If you want to freeze it, use firm fruits like pineapple and mango. Avoid bananas, as they turn mushy. To freeze, place the salad in a freezer-safe container. When ready to eat, let it thaw in the fridge. You can also add fresh honey-lime dressing after defrosting for extra flavor. Yes, you can use frozen fruits in this salad. Frozen fruits can be a great option when fresh fruits are out of season. They are often picked at their peak and frozen right away, keeping their nutrients intact. However, frozen fruits can release more water as they thaw. This might make the salad a bit watery. To avoid this, let the frozen fruits thaw and drain excess liquid before mixing them in. Fresh fruits offer a crunchier texture and vibrant look, so choose based on your preference. No, this salad is not vegan due to honey. Honey comes from bees, making it an animal product. If you want a vegan option, you can easily replace honey with agave syrup or maple syrup. Both alternatives provide sweetness and work well with lime. The taste will differ slightly, but the salad will still be delicious. Just make sure to use the same amount of the substitute for the best flavor balance. This fruit salad is packed with vitamins and minerals. Here are some key benefits of its ingredients: - Strawberries: High in vitamin C and antioxidants, good for your skin. - Blueberries: Great for brain health, rich in fiber, and low in calories. - Mango: Full of vitamins A and C, supports eye health and boosts immunity. - Pineapple: Contains bromelain, which helps digestion and reduces inflammation. - Banana: A good source of potassium, great for heart health. Overall, this salad provides a mix of nutrients that can boost energy and support overall health. It’s a tasty way to enjoy fruits every day. For the full recipe, check out the details above. This blog post shared how to make a delicious Honey Lime Fruit Salad. I covered the best ingredients, including fresh fruits and a zesty dressing. You learned how to prepare everything step-by-step and found tips for picking juicy fruits. I also shared fun ways to adapt the salad to your taste. Finally, remember to store it properly to keep it fresh. Enjoy this vibrant mix and feel good about your healthy choice!](https://goldendishy.com/wp-content/uploads/2025/07/db0dca5e-aa0e-4365-a3c2-c9e5564148e0-768x768.webp)