
Pumpkin Spice Churros Air Fryer Irresistible Delight

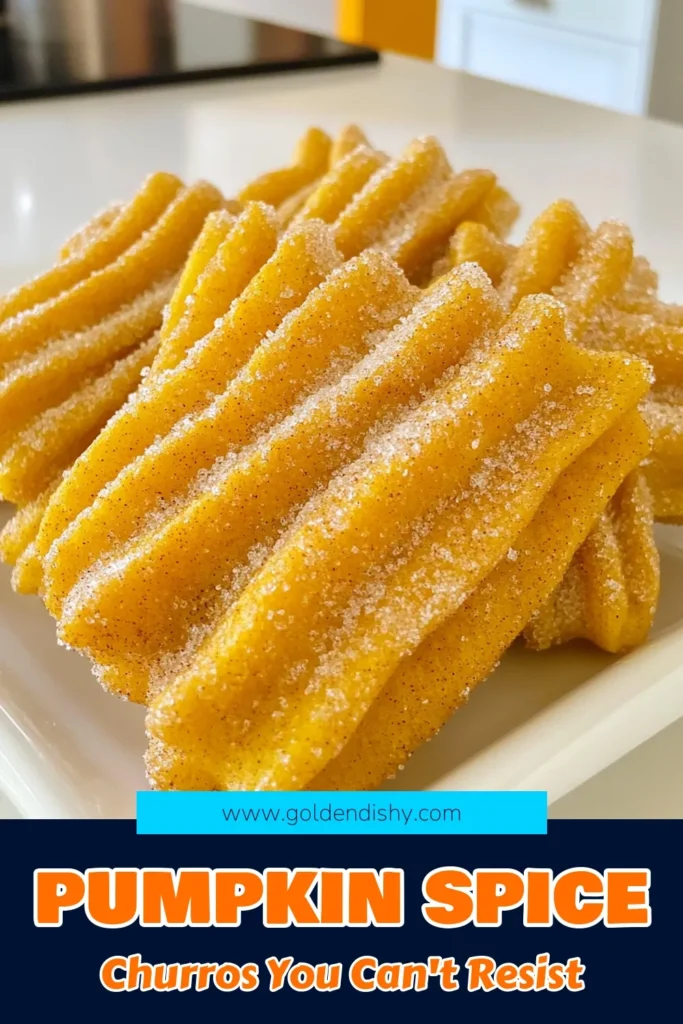
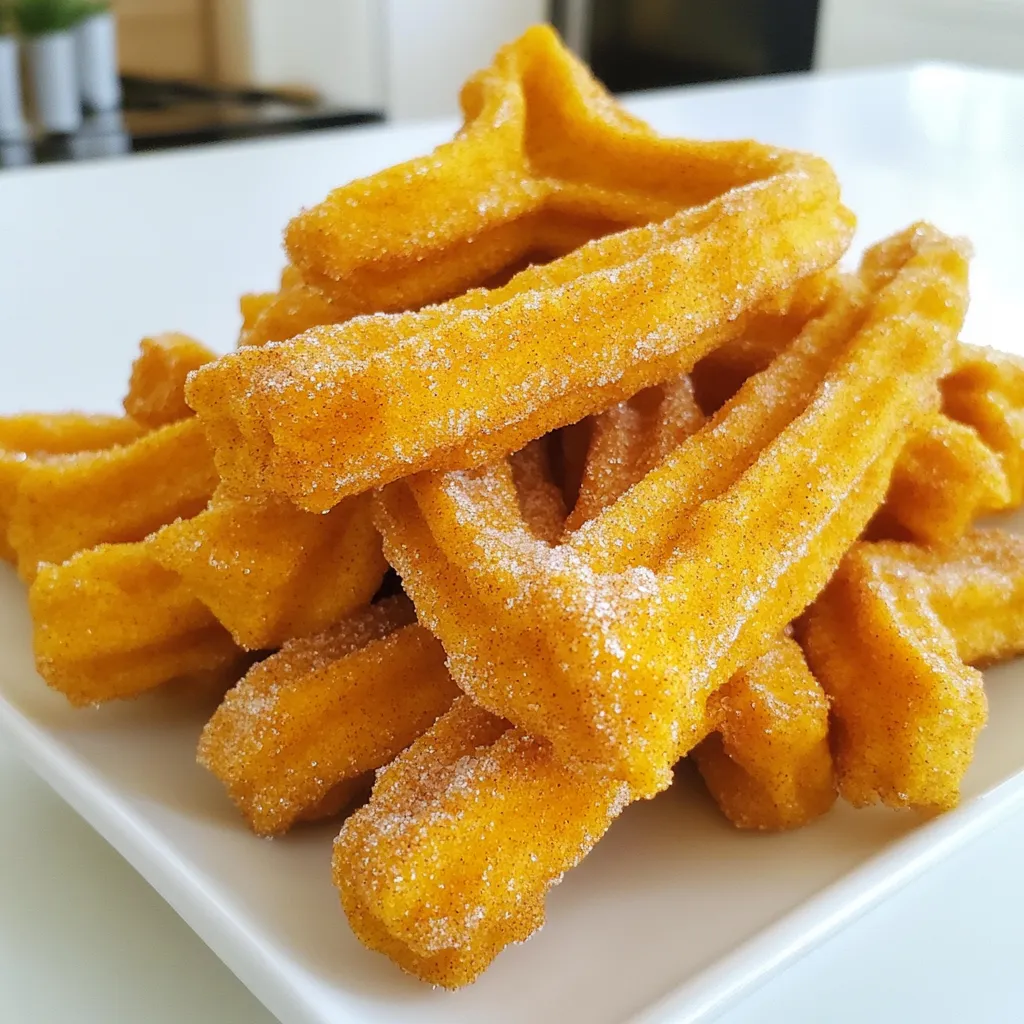
Get ready to indulge in the ultimate fall treat with my Pumpkin Spice Churros Air Fryer recipe! These warm, crispy churros are packed with cozy pumpkin spice flavors and air-fried for a guilt-free delight. Whether you want a sweet snack or a dessert to impress friends, I’ll guide you through every step. Let’s dive in and transform ordinary churros into a festive masterpiece you won’t forget!
Ingredients
Complete List of Ingredients
– 1 cup all-purpose flour
– 1 tablespoon pumpkin puree
– 1 teaspoon pumpkin pie spice
– 1 tablespoon granulated sugar (for dough)
– 1/2 teaspoon baking powder
– 1/2 teaspoon salt
– 1 cup water
– 2 tablespoons unsalted butter, cut into small cubes
– 1/2 cup granulated sugar (for coating)
– 1 tablespoon ground cinnamon
– Cooking spray (for air frying)
Specialty Ingredients & Possible Substitutions
The key to these churros is pumpkin puree. You can swap it with applesauce for a different flavor. If you lack pumpkin pie spice, mix cinnamon, nutmeg, and ginger in equal parts. If you want a gluten-free option, use a gluten-free all-purpose flour blend. Each choice gives a unique taste but keeps the joy of churros alive.
Measurement Tips for Precision
Measuring your ingredients correctly is vital for the best dough texture. Use a dry measuring cup for flour. Scoop the flour into the cup, then level it with a knife. For liquids, use a clear measuring cup. Pour the water to the line for accuracy. If your butter is cold, cut it into small pieces for easy melting. This ensures even blending.
Step-by-Step Instructions
Preparing the Dough
To start, grab a medium-sized saucepan. Add 1 cup of water, 1 tablespoon of granulated sugar, and 2 tablespoons of unsalted butter. Heat this mix over medium heat. You want to stir until the butter melts and the sugar dissolves. Bring it to a gentle boil.
Once boiling, take the saucepan off the heat. Now, add 1 cup of all-purpose flour, 1 tablespoon of pumpkin puree, 1 teaspoon of pumpkin pie spice, 1/2 teaspoon of baking powder, and 1/2 teaspoon of salt. Stir this mix hard until it forms a smooth dough. There should be no lumps! Let the dough cool for about 5 minutes before moving on.
Air Frying the Churros
Next, preheat your air fryer to 375°F (190°C). This step is key for even cooking. Now, take the cooled dough and put it into a piping bag. Make sure to fit it with a star-shaped tip.
Pipe out 4-inch long churros onto a tray lined with parchment paper. Keep them spaced out to make cooking easier. Lightly spray the churros with cooking spray. This helps them get nice and crisp. Place them in the air fryer basket. Arrange them in a single layer without touching. Cook for 8-10 minutes. Flip them halfway through to get an even golden brown color.
Coating and Serving Tips
While the churros cook, mix together 1/2 cup of granulated sugar and 1 tablespoon of ground cinnamon in a bowl. This will be your coating. Once the churros finish cooking, take them out of the air fryer carefully. Toss them in the cinnamon-sugar mixture right away. Make sure they are evenly coated!
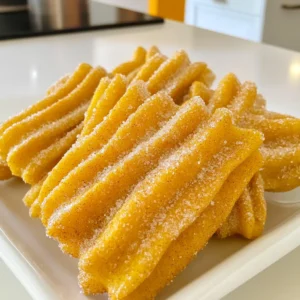
For serving, place the churros on a decorative plate while they are warm. They taste great on their own, but you can add a creamy dip. Try chocolate or spiced caramel sauce for a fun twist!
Tips & Tricks
Achieving the Perfect Texture
For the best pumpkin spice churros, focus on the dough. After mixing, let it cool for about five minutes. This step helps the churros hold their shape. Use a piping bag with a star tip. This creates those lovely ridges that hold the cinnamon sugar well. Lightly spray the churros with cooking spray before cooking. This adds crispness, making each bite a delight.
Flavor Enhancements for Churros
To elevate the flavor, consider adding more spices. You can mix in a bit of nutmeg or ginger. These spices pair nicely with pumpkin. You could also add a splash of vanilla extract for extra warmth. When coating the churros, use a mix of sugar and cinnamon. This classic combination works wonders. For a fun twist, try adding cocoa powder for a chocolatey touch.
Air Fryer Best Practices
Preheat your air fryer to 375°F (190°C) for optimal cooking. This helps the churros cook evenly. Place them in a single layer, without touching each other. This ensures they get crispy all around. Flip them halfway through to promote even browning. Keep an eye on them as they cook, since air fryers can vary. You want a nice golden brown color for the perfect finish.
Variations
Alternative Flavors and Additions
You can play with flavors to make these churros even more fun. Try adding chocolate or caramel to the dough. A few drops of vanilla extract can enhance the taste too. You can even swap the pumpkin spice for other spices like cinnamon or nutmeg. Each change gives a unique twist to the churros.
Gluten-Free Version of Pumpkin Spice Churros
If you need a gluten-free option, swap the all-purpose flour for a gluten-free blend. Many blends work well here, but make sure it has xanthan gum. It helps with the dough’s texture. Follow the same steps, and you will have tasty gluten-free churros.
Serving Ideas and Pairings
When serving these churros, warm is best. Place them on a nice plate to impress your guests. You can serve them with a dip like chocolate sauce or spiced caramel. Whipped cream adds a nice touch too. Fresh fruit or ice cream can turn your churros into a fun dessert. Enjoy them at parties or as a cozy treat at home.
Storage Information
Storing Leftover Churros
After you enjoy your pumpkin spice churros, store any leftovers in an airtight container. This keeps them fresh and soft. Place a paper towel in the container to absorb moisture. Store them at room temperature for up to two days. If they last longer, you can move them to the fridge for up to a week.
Reheating Tips for Best Results
To reheat your churros, use the air fryer for the best taste. Set the air fryer to 350°F (175°C). Heat the churros for about 3-5 minutes. This brings back their crispy texture. You can also use a microwave, but they may turn soft. If using a microwave, heat them for 10-15 seconds at a time.
Freezing Churros for Later Use
If you want to save churros for later, freezing is a great option. Let them cool completely before freezing. Place them in a single layer on a baking sheet, then freeze for about 1-2 hours. Once frozen, transfer them to a freezer bag. They can last for up to two months. When you’re ready to enjoy, reheat them in the air fryer, just as before.
FAQs
Can I use fresh pumpkin instead of pumpkin puree?
Yes, you can use fresh pumpkin. Start by cooking the pumpkin until soft. Then, mash it well. Make sure to remove as much water as possible. This will help keep your churro dough from getting too wet. Fresh pumpkin adds a nice flavor but requires more prep time.
How do I know when the churros are done?
You will know the churros are done when they turn a golden brown color. Cooking them takes about 8-10 minutes in the air fryer. Flip them halfway through for even cooking. If they are too pale, give them a few more minutes. Keep an eye on them to avoid burning.
What other dips or toppings work well with churros?
Churros are great with many dips. Here are some fun ideas:
– Chocolate sauce for a rich treat.
– Spiced caramel sauce for a warm flavor.
– Creamy vanilla dip for a classic touch.
– Whipped cream for a light option.
Feel free to get creative with your dips. You can even try a pumpkin spice dip to match the churros!
This blog covered all you need for making churros. We discussed ingredients, step-by-step instructions, and useful tips. You learned about flavor variations and storage methods, too. Churros can be fun and easy to make at home. I hope you try them and enjoy each step. With these tips, you’ll impress friends and family. Remember, the more you practice, the better your churros will taste. Enjoy your cooking!
![- 1 cup rolled oats - 1/2 cup natural peanut butter (smooth or crunchy) - 1/3 cup honey or maple syrup The main ingredients form the base of these bites. Rolled oats give them a hearty texture and fiber. Natural peanut butter adds creaminess and protein. Honey or maple syrup provides natural sweetness. - 1/2 cup ground flaxseed - 1/4 cup mini chocolate chips - 1/4 cup chia seeds These add-ins let you customize your bites. Ground flaxseed boosts nutrition and fiber. Mini chocolate chips make them fun and tasty. Chia seeds add crunch and healthy fats. - 1/2 teaspoon ground cinnamon - A pinch of salt Seasonings enhance the flavor. Ground cinnamon adds warmth and sweetness. A pinch of salt balances the flavors, making them pop. These ingredients come together to create a snack that is both simple and packed with energy. You can find the full recipe above to guide you through the steps of making these no-bake energy bites. - Measure 1 cup of rolled oats. - Mix 1/2 cup ground flaxseed and 1/4 cup chia seeds. - In a separate bowl, combine 1/2 cup natural peanut butter and 1/3 cup honey or maple syrup. Start by mixing the dry ingredients in a large bowl. This includes your oats, flaxseed, chia seeds, chocolate chips, cinnamon, and salt. Stir well to make sure everything is evenly spread. Then, in your other bowl, blend the peanut butter and honey until smooth. This makes a sticky base for your bites. Next, pour the wet mix into the dry mix. Use a spoon or your hands to combine them. You want to make sure everything is well mixed. The result should feel sticky but hold its shape when pressed. Now it's time to scoop out the mixture. Use clean hands to grab small amounts, about the size of a tablespoon. Roll these into balls and place them on a baking sheet lined with parchment paper. Once all your bites are shaped, pop the sheet in the fridge for at least 30 minutes. This helps them set, making them easier to eat. After chilling, your No-Bake Energy Bites are ready! For more details on the recipe, check the Full Recipe. You can easily swap ingredients for your No-Bake Energy Bites. If you want a vegan option, replace honey with maple syrup. It will still add sweetness and help bind the bites. For nut-free alternatives, use sun butter or soy nut butter instead of peanut butter. These options keep the texture while avoiding nuts. Getting the right texture is key. If your mixture feels too dry, add a bit more nut butter or syrup. This will help everything stick together. When rolling your bites, keep your hands slightly wet. This helps prevent sticking. Aim for even sizes to get uniform bites that chill well. To boost flavor, add spices like vanilla or nutmeg. These can add a nice kick and make them more exciting. You can also use flavored nut butters, like almond or cashew butter. This twist changes the taste while keeping the bites healthy. If you're looking for the complete instructions, check the Full Recipe. {{image_4}} You can mix flavors to make the bites even more fun. One favorite is chocolate peanut butter. Just add cocoa powder or more mini chocolate chips. This gives you a rich taste. Another great option is almond joy-inspired bites. Use almond butter, shredded coconut, and chopped almonds. This adds a tropical twist. Want to make these bites even better? Consider adding protein powder. It boosts protein without changing the taste. You can also mix in dried fruits like raisins or cranberries. These add natural sweetness and fiber. Pumpkin seeds or sunflower seeds work great too. They add crunch and healthy fats. You can create themed bites for different times of the year. In fall, try pumpkin spice bites. Just add pumpkin puree and pumpkin spice. For winter holidays, think about gingerbread energy bites. Mix in ginger, nutmeg, and a bit of molasses. These variations keep your snacks exciting and seasonal. For the full recipe, check out the No-Bake Energizing Peanut Butter Bliss Bites. To keep your energy bites fresh, store them in airtight containers. Glass or plastic containers work well. Make sure to seal them tight. This helps prevent them from drying out. For longer freshness, keep them in the fridge. They taste great cold and stay firm. You should eat your energy bites within one week. After that, they may lose flavor and texture. Signs of spoilage include a strange smell or dry spots. If they feel crumbly or hard, it’s time to toss them. You can freeze your energy bites for later. To freeze, place them in a single layer on a baking sheet. Once frozen, transfer them to a freezer bag. Make sure to remove as much air as possible. They can last up to three months in the freezer. To thaw, simply take out what you need. Leave them on the counter for about 30 minutes. You can also pop them in the fridge overnight. Now you have a quick snack ready anytime! No-Bake Energy Bites stay fresh for about one week in the fridge. Store them in an airtight container. This keeps them tasty and safe to eat. Yes, you can make No-Bake Energy Bites ahead of time! They are perfect for meal prep. Make a batch on the weekend, and enjoy them all week long. Common allergens include peanut butter and honey. Some people may be allergic to oats or chia seeds. Always check for allergies when sharing these bites with others. Absolutely! You can swap peanut butter for almond or cashew butter. Just make sure the nut butter is smooth enough to mix well. You can modify the recipe to suit your needs. Use maple syrup instead of honey for vegan bites. For nut-free options, try sunflower seed butter. Add dried fruits or seeds for extra flavor and nutrition. Check the [Full Recipe] for more ideas. In this blog post, we explored how to make tasty no-bake energy bites. We covered the main ingredients, like oats and peanut butter. You learned about optional add-ins and seasonings you can try. I shared step-by-step instructions to guide you through the process. Remember, you can customize your bites to fit your taste. Try different flavors, adjust for allergens, and store them properly. Enjoy creating these healthy snacks that fit your needs. Happy snacking!](https://goldendishy.com/wp-content/uploads/2025/06/48776490-fb92-4f64-9515-66f21e34c535-768x768.webp)
![- 2 cups fresh blueberries, rinsed and drained - 2 cups ripe peaches, diced (approximately 3 medium-sized peaches) - 1 tablespoon freshly squeezed lemon juice - 1/2 cup granulated sugar (adjust based on your sweetness preference) - 1 tablespoon cornstarch - 1 teaspoon pure vanilla extract - 1 1/2 cups rolled oats - 1 cup all-purpose flour - 1/2 cup packed brown sugar - 1/2 teaspoon baking powder - 1/4 teaspoon fine salt - 1/2 cup unsalted butter, melted and slightly cooled - 1 teaspoon ground cinnamon (optional, for added warmth) These simple ingredients create a tasty balance of sweet and tart flavors. The fresh blueberries and ripe peaches shine in each bite. You can change the sugar to fit your taste. I often add a bit more if the fruit is not very sweet. I love using oats for texture; they give a nice chewiness. This recipe is so flexible. You can swap out fruit or adjust flavors based on what you have at home. For example, try adding a pinch of nutmeg for a warm spice twist. This recipe takes only 15 minutes to prepare. It bakes in about 30 to 35 minutes. You will get about 12 bars from this batch, perfect for sharing with friends or family. If you want the full recipe, check the section below. - Preheat your oven to 350°F (175°C). - Grease a 9x13-inch baking dish or line it with parchment paper. - In a medium mixing bowl, combine 2 cups of fresh blueberries, 2 cups of diced peaches, 1 tablespoon of lemon juice, 1/2 cup of granulated sugar, 1 tablespoon of cornstarch, and 1 teaspoon of vanilla extract. - Gently mix the ingredients until the fruit is coated. Let it sit for a few minutes to enhance the flavor. - In a large mixing bowl, whisk together 1 1/2 cups of rolled oats, 1 cup of all-purpose flour, 1/2 cup of brown sugar, 1/2 teaspoon of baking powder, 1/4 teaspoon of salt, and 1 teaspoon of cinnamon if desired. - This mixture will give your bars that perfect crumb texture. - Pour 1/2 cup of melted butter into the dry mixture and stir until it looks like coarse crumbs. - Reserve about 1 cup of this crumb mixture for later. - Press the remaining crumb mixture into the bottom of your greased dish to form the crust. - Spread the fruit mixture evenly over the crust, then sprinkle the reserved crumbs on top. - Bake in your preheated oven for about 30-35 minutes. - Look for golden brown color and bubbling filling to know it's done. - Once baked, let the bars cool on a wire rack for 15-20 minutes before slicing into squares. - This cooling time helps the bars set well for easy serving. Enjoy making these Blueberry Peach Crumble Bars with the [Full Recipe]. - Check for doneness by ensuring the filling is bubbling and the top is golden brown. - Letting the bars cool completely aids in easier slicing. This step prevents squishing the filling and keeps the layers intact. - Use frozen blueberries or peaches if fresh ones are unavailable. Frozen fruit works well and saves time. - Substitute brown sugar with coconut sugar for a healthier option. Coconut sugar adds a nice depth to the flavor. - Serve warm or at room temperature. This allows the flavors to shine. - Pair with vanilla ice cream or whipped cream. This adds a creamy texture that balances the tartness of the fruit. For an extra touch, garnish with fresh blueberries or peach slices. You can find the Full Recipe above for detailed instructions on making these delightful bars! {{image_4}} You can mix things up with different fruits. For a fresh twist, switch blueberries and peaches for raspberries and apples. The tartness of raspberries pairs well with sweet apples. You can also try plums or cherries. Both add their unique flavors and keep the bars fun and exciting. Want to make these bars gluten-free? No problem! Just replace all-purpose flour with a gluten-free flour blend. Many good mixes are available at stores. Also, ensure that your oats are certified gluten-free. This small change lets everyone enjoy this tasty dessert. For a vegan version, swap unsalted butter for coconut oil or vegan butter. Both options work well and keep the bars rich and tasty. If your recipe includes eggs, you can use flax eggs instead. To make a flax egg, mix one tablespoon of ground flaxseed with two and a half tablespoons of water. Let it sit for five minutes. This creates a great egg substitute that still binds everything together. Store your Blueberry Peach Crumble Bars in an airtight container. They stay fresh at room temperature for up to 3 days. This makes them great for quick snacks or dessert. To keep them longer, refrigerate the bars. They will stay fresh for up to a week. For even longer storage, you can freeze the bars. Wrap them tightly in plastic wrap or aluminum foil. They can be frozen for up to 3 months. When you're ready to enjoy your frozen bars, reheating is easy. Simply pop them in the microwave for a few seconds. You can also warm them in the oven at 350°F (175°C). This brings back their delicious taste and texture. For the full recipe and tips, check out the detailed instructions above. Enjoy your tasty treat! Yes, you can make these bars a day in advance. Just store them in the fridge. This helps the flavors blend nicely. Look for bubbling filling and a golden brown topping. This shows they are ready to eat. Yes, you can add chopped nuts like almonds or walnuts. They give the bars extra crunch and flavor. I love pairing them with a scoop of ice cream or yogurt. It makes a delicious treat. Store them in an airtight container at room temperature. You can also refrigerate them for up to a week. - Blueberry Peach Crumble Bars 🫐 To make these delicious Blueberry Peach Crumble Bars, you need simple, fresh ingredients. Here’s what you will need: - 2 cups fresh blueberries, rinsed and drained - 2 cups ripe peaches, diced (approximately 3 medium-sized peaches) - 1 tablespoon freshly squeezed lemon juice - 1/2 cup granulated sugar (adjust based on your sweetness preference) - 1 tablespoon cornstarch - 1 teaspoon pure vanilla extract - 1 1/2 cups rolled oats - 1 cup all-purpose flour - 1/2 cup packed brown sugar - 1/2 teaspoon baking powder - 1/4 teaspoon fine salt - 1/2 cup unsalted butter, melted and slightly cooled - 1 teaspoon ground cinnamon (optional, for added warmth) These ingredients come together to create a wonderful balance of sweet and tart flavors. The fresh blueberries and peaches mix well with the lemon juice. This adds a nice zing to the bars. The sugar and cornstarch help create a thick, juicy filling. The crumble topping is a blend of oats, flour, and sugars. It gives the bars a crunchy texture that pairs perfectly with the soft fruit layer. The butter adds richness, while the cinnamon gives a warm, cozy vibe to each bite. If you want to try this recipe, check the Full Recipe for step-by-step instructions. You'll love making and sharing these bars! These Blueberry Peach Crumble Bars are easy to make and full of flavor. You learned about the key ingredients, simple steps, and different variations. Remember, you can swap fruits or adjust sweetness to fit your taste. Store leftovers in a container for later. Enjoy these bars warm or with ice cream for a tasty treat. Happy baking!](https://goldendishy.com/wp-content/uploads/2025/06/77e155cd-d820-4acd-a50c-b849e6ba2e1e-768x768.webp)