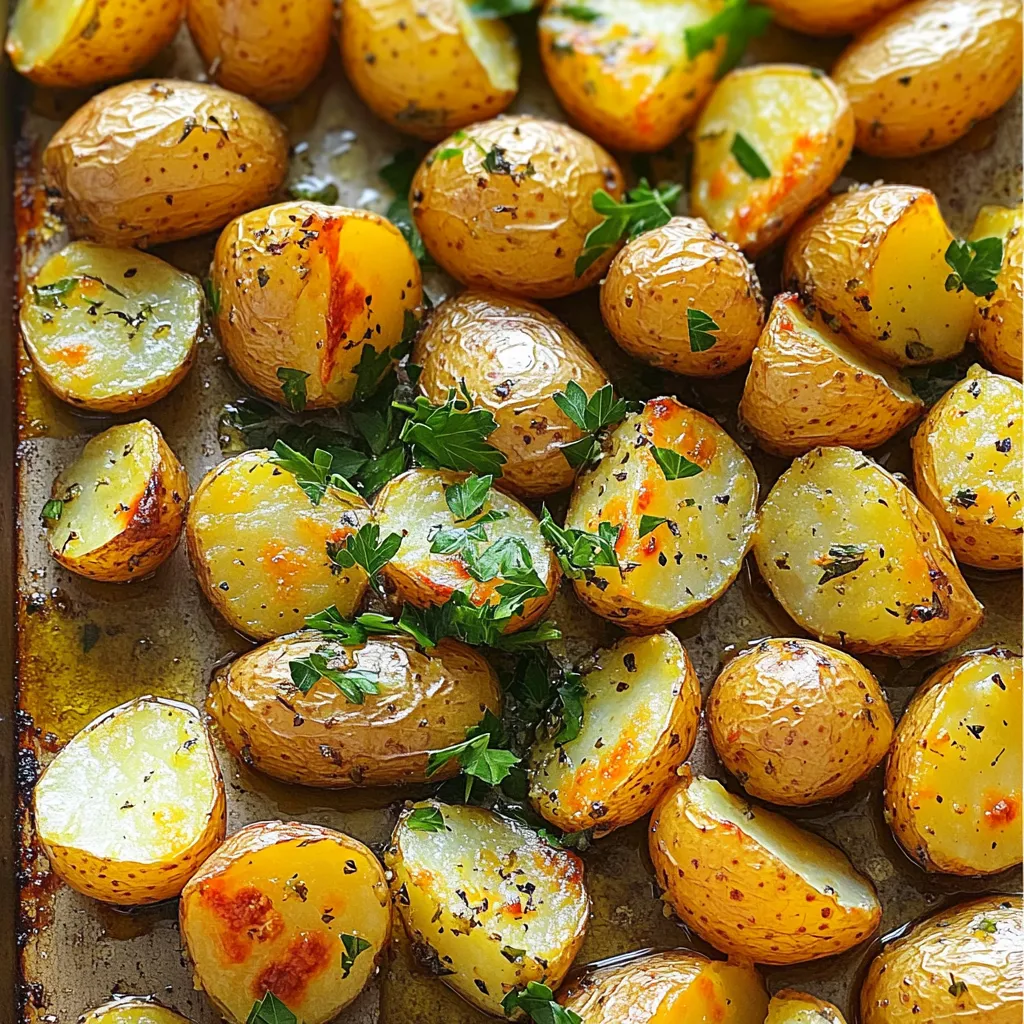
Garlic Herb Roasted Baby Potatoes Simple and Tasty
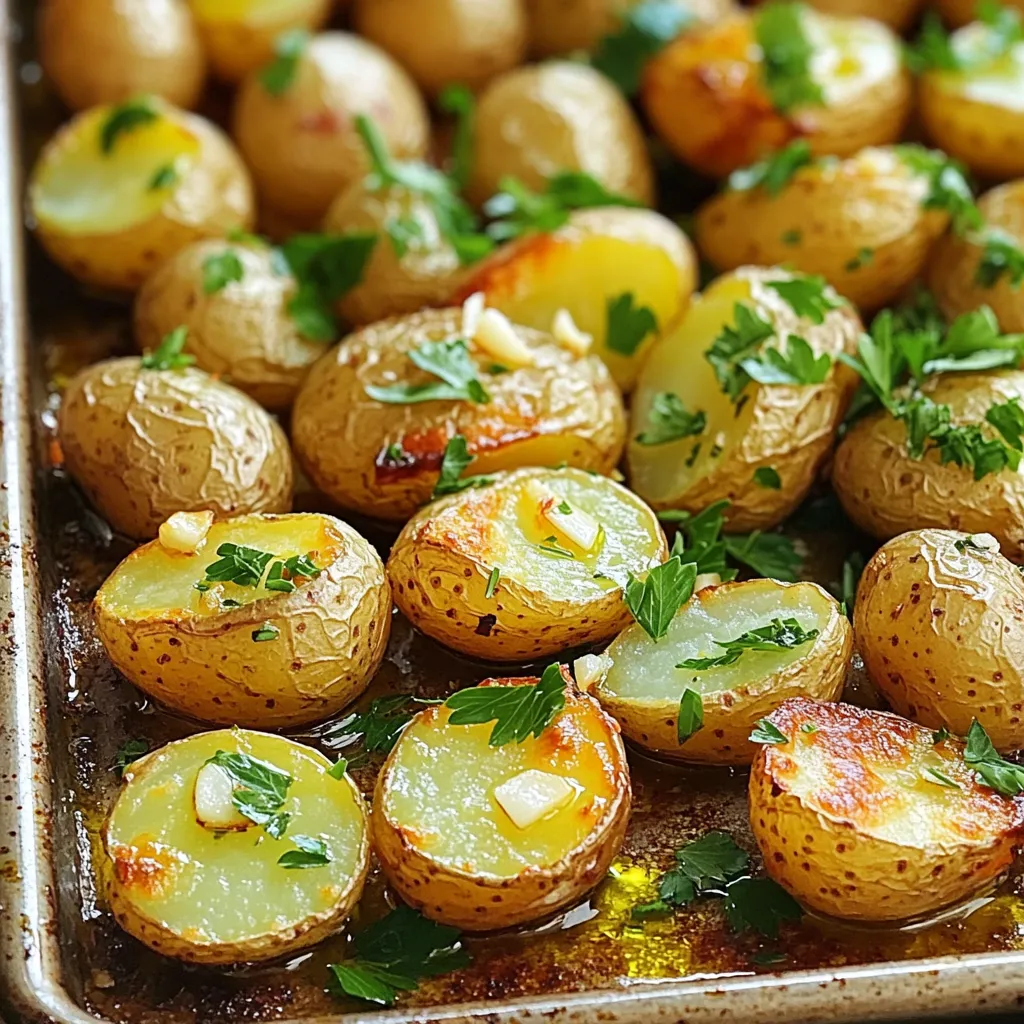
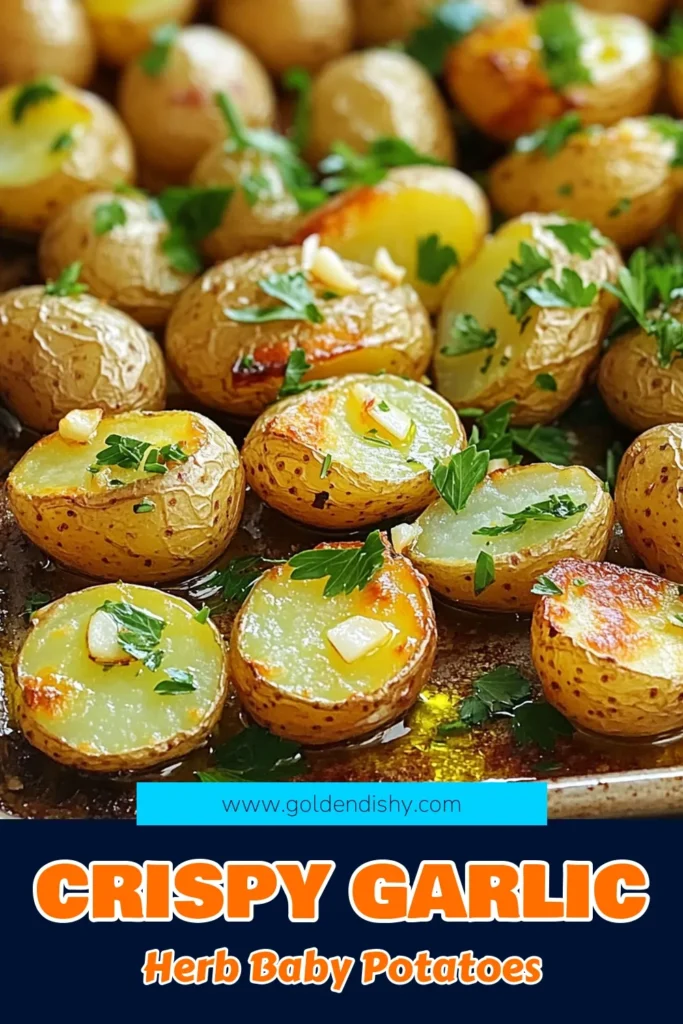
Are you ready to savor some delicious Garlic Herb Roasted Baby Potatoes? This simple dish combines fresh herbs and garlic to create a mouthwatering side that pairs well with any meal. In just a few easy steps, you can turn basic baby potatoes into a crispy, flavorful treat. Whether you’re cooking for family or impressing friends, these roasted potatoes are sure to delight! Let’s dive in and explore this tasty recipe!
Ingredients
List of Ingredients
– 1.5 lbs baby potatoes, halved
– 4 cloves garlic, minced
– 3 tablespoons olive oil
– 1 tablespoon fresh rosemary, finely chopped
– 1 tablespoon fresh thyme, finely chopped
– 1 teaspoon sea salt
– ½ teaspoon freshly ground black pepper
– 1 tablespoon fresh parsley, finely chopped (for garnish)
Ingredient Substitutions
You can swap herbs for a new twist. Try oregano or basil for a different flavor. You can also mix dried herbs if you have them. For potatoes, you can use red or yellow ones. They may change the taste a bit, but they will still taste great. If you want a creamier bite, try Yukon Gold potatoes. They are smooth and buttery.
Step-by-Step Instructions
Preheating the Oven
Set your oven to 425°F (220°C). This temperature is key for crispy potatoes. Preheating helps the potatoes cook evenly. If the oven isn’t hot enough, the potatoes can become soggy.
Preparing the Potatoes
Start by halving the baby potatoes. Use a sharp knife and cut them down the middle. Place them in a large bowl. Next, add the minced garlic to the bowl. Pour in the olive oil. Sprinkle in the finely chopped rosemary and thyme. Don’t forget the sea salt and black pepper. Use a wooden spoon or your hands to mix everything well. Each potato should be coated in the garlic and herbs.
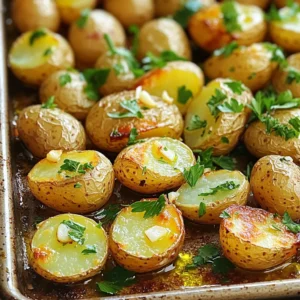
Roasting Process
Spread the seasoned potatoes on a large baking sheet. Make sure they are in a single layer. Leave space between them for better roasting. Place the baking sheet in the oven. Roast the potatoes for about 25 to 30 minutes. Halfway through, shake the pan gently. This helps them brown evenly. When they are golden brown and tender, take them out of the oven. Before serving, sprinkle fresh parsley on top for color and taste. Enjoy your garlic herb roasted baby potatoes!
Tips & Tricks
Achieving Crispy Potatoes
To get crispy potatoes, use enough oil. Olive oil helps the potatoes brown. Season them well with salt and pepper. This adds flavor and texture. Spread the potatoes out on the baking sheet. Space them so hot air can reach all sides. This step is key for even roasting. Shake the pan halfway through the cooking time. This helps them cook evenly.
Serving Suggestions
Garlic herb roasted baby potatoes pair well with many main dishes. They go great with grilled chicken or fish. You can also serve them alongside a fresh salad. For visual appeal, add a sprinkle of fresh parsley on top. It adds color and freshness to your dish. You can also drizzle a bit of extra olive oil for shine.
Additional Cooking Methods
If you want to try something new, consider grilling or air frying. Grilling adds a smoky flavor. Just toss the potatoes in oil and seasonings, then place them on the grill. For air frying, use the same method. Set your air fryer to a high temperature for crispy results. Both methods keep the flavor while giving you a different texture.
Variations
Flavor Enhancements
You can make garlic herb roasted baby potatoes even better. Try adding cheese for a creamy touch. Parmesan or feta works great. You can also sprinkle some paprika for a smoky hint. This adds depth to the flavor profile.
Experimenting with different herbs is fun too. Basil, oregano, or dill can change the taste. Fresh or dried herbs are both good. Mix and match them to find your favorite blend.
Dietary Modifications
If you want to make these potatoes vegan-friendly, swap out the cheese. You can use nutritional yeast for a cheesy flavor without dairy. This keeps the dish tasty and plant-based.
For gluten-free versions, you’re in luck! This recipe is already gluten-free. Just ensure that any added seasonings or cheese are also gluten-free.
Seasonal Variations
You can change the ingredients based on the season. In spring, add fresh asparagus or peas. In fall, mix in some diced butternut squash. Seasonal veggies add freshness and color.
Using vegetables that are in season boosts flavor and nutrition. Plus, it supports local farmers. Always check what’s fresh at your market to inspire your dish.
Storage Info
Storing Leftovers
To keep your garlic herb roasted baby potatoes fresh, let them cool first. Place them in an airtight container. This helps to keep moisture out. Store them in the fridge. They will stay good for up to 3 days. If you need some for later, make sure to check for any signs of spoilage before eating.
Reheating Tips
When you reheat your potatoes, you want them crispy again. The best way is to use an oven. Preheat the oven to 375°F (190°C). Spread the potatoes on a baking sheet. Heat them for about 10 minutes. This method keeps them nice and crunchy. You can also use a microwave, but it may make them soft. If you do, heat in short bursts and check often.
Freezing Instructions
Yes, you can freeze garlic herb roasted potatoes! First, let them cool completely. Then, place them in a freezer-safe bag. Remove as much air as you can before sealing. They can last for up to 2 months in the freezer. To thaw, place them in the fridge overnight. Reheat them in the oven to get them crispy again.
FAQs
How long does it take to roast baby potatoes?
It takes about 25 to 30 minutes to roast baby potatoes. You want them golden brown and fork-tender. Roast at 425°F (220°C) for best results. Halfway through, shake the pan to help them cook evenly. This ensures every potato gets crispy and delicious.
Can I use regular potatoes instead of baby potatoes?
Yes, you can use regular potatoes! Just cut them into smaller pieces. Aim for similar sizes to ensure even cooking. Larger potatoes might take longer to roast, so keep an eye on them. The flavor will be just as tasty, and you can still enjoy that garlic and herb goodness.
What are the best herbs to use for garlic herb roasted potatoes?
Fresh herbs work best for flavor. I love using rosemary and thyme in this recipe. They blend nicely with garlic. You can also try parsley, oregano, or even dill for a twist. Feel free to mix and match based on your taste. Fresh herbs bring out the best in roasted potatoes.
Can I add cheese to my roasted potatoes?
Absolutely! Sprinkling cheese, like parmesan or feta, on top can add a rich flavor. Just add it in the last few minutes of roasting, so it melts beautifully without burning.
How do I store leftover roasted potatoes?
Store leftovers in an airtight container in the fridge. They can last about 3 to 5 days. Just reheat them in the oven or a skillet to regain some crispiness. Avoid microwaving, as it may make them soggy.
Can I make these potatoes ahead of time?
Yes, you can prep the potatoes ahead. Toss them with garlic and herbs, then store in the fridge for a day. When you’re ready, just roast them as usual. This saves time and still gives you tasty potatoes!
What can I serve with garlic herb roasted potatoes?
These potatoes pair well with many dishes. Serve them alongside grilled chicken, steak, or roasted vegetables. They also make a great side for salads or as part of a brunch spread. The garlic and herbs add a nice touch to any meal!
In this post, we explored how to make garlic herb roasted potatoes. We covered ingredients, step-by-step instructions, and tips for perfect results. You learned how to tweak this dish with substitutes too. Remember, the key to great potatoes lies in the right seasoning and cooking method. Don’t hesitate to experiment with flavors and cooking styles. With these simple steps, you’ll create tasty, crispy potatoes every time. Enjoy this delicious side dish at your next meal!
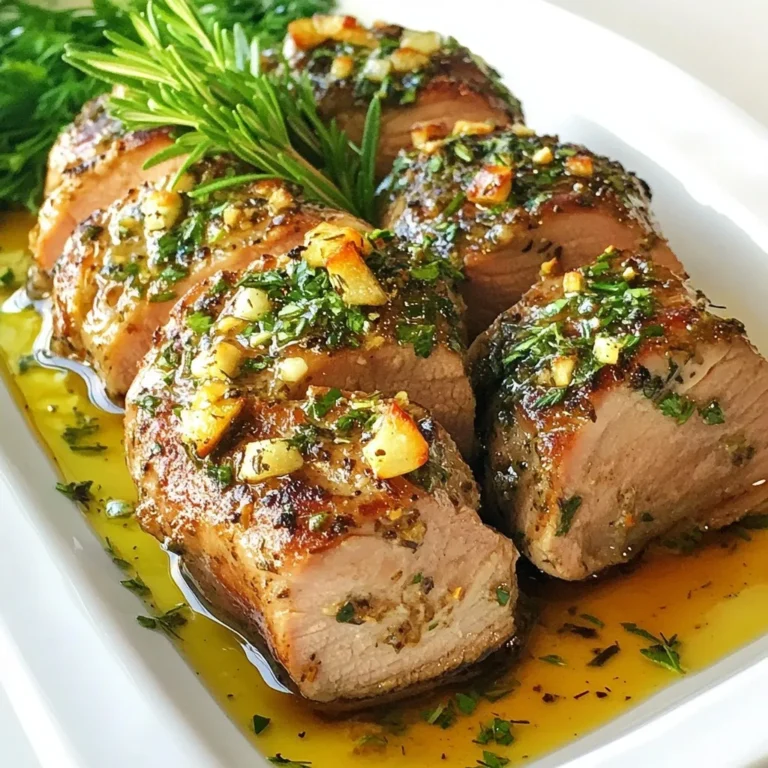
![For this recipe, you need key ingredients to make the salmon shine. Here’s what to gather: - 4 salmon fillets (approximately 6 oz each) - 2 tablespoons Sriracha sauce - 3 tablespoons honey - 1 tablespoon soy sauce - 2 cloves garlic, finely minced - 1 tablespoon fresh ginger, finely grated - 2 tablespoons olive oil - Salt and freshly ground black pepper, to taste These main ingredients create a sweet and spicy glaze that makes the salmon pop. Seasoning is crucial in cooking. It helps to enhance the natural flavors of the fish. Use these simple items: - Salt - Freshly ground black pepper Make sure to season both sides of the salmon. This step adds depth to every bite. Garnishes make your dish look great and add extra flavor. For this salmon recipe, you will need: - 1 tablespoon sesame seeds - 2 green onions, thinly sliced Sprinkling these on top gives the meal a beautiful finish. The sesame seeds add crunch, while green onions bring freshness. To see the full details for cooking, check the [Full Recipe]. To make the glaze, grab a medium bowl. Combine 2 tablespoons of Sriracha sauce, 3 tablespoons of honey, and 1 tablespoon of soy sauce. Add 2 minced garlic cloves and 1 tablespoon of freshly grated ginger. Whisk these together until the mixture is smooth. This sweet and spicy glaze will add the perfect flavor to your salmon. Set this aside for later use. Next, take 4 salmon fillets and dry them with a paper towel. This step helps the skin get crispy. Now, sprinkle salt and pepper on both sides of each fillet. Make sure to cover every inch. This simple seasoning enhances the natural taste of the fish. Now, heat 2 tablespoons of olive oil in a large skillet over medium-high heat. Once the oil shimmers, carefully place the salmon fillets in the skillet, skin-side down. Sear them for about 4-5 minutes until the skin turns golden and crispy. Once that happens, gently flip the fillets over. Lower the heat to medium and pour the glaze over the salmon. Cook for another 4-5 minutes, basting the salmon occasionally with the glaze. When it is cooked through and caramelized, remove the fillets from the skillet. Enjoy every bite of this flavorful salmon dish! For the full recipe, check out the details above! To get that perfect crispy skin, start with dry salmon. Use a paper towel to pat it well. This removes extra moisture, which helps the skin crisp nicely. Heat your skillet until it shimmers before adding the salmon. Place the fillets skin-side down and don’t move them for the first few minutes. This helps create a nice golden crust. Sear for about 4-5 minutes, then flip gently to finish cooking. If you like a milder glaze, reduce the Sriracha amount. Start with 1 tablespoon instead of 2. You can also add extra honey to balance the heat. For spice lovers, add more Sriracha or a pinch of cayenne pepper. Taste the glaze before pouring it on the salmon. This way, you can adjust it to your liking. Using the right tools makes cooking easier. Here’s what I recommend: - Large skillet for searing - Mixing bowl for the glaze - Whisk for blending ingredients - Paper towels for drying salmon - Spatula for flipping fillets These tools help you create a delicious Sriracha honey glazed salmon from the [Full Recipe]. {{image_4}} You can switch up the Sriracha honey glaze if you want. Try a sweet soy glaze instead. Mix soy sauce, brown sugar, and ginger for a tasty alternative. You can also use teriyaki sauce for a different flavor. It adds a rich, savory taste that pairs well with salmon. Another option is a citrus glaze. Mix orange juice and honey for a bright, zesty twist. While salmon shines in this recipe, other fish work too. Try using trout, which has a similar flavor and texture. Mahi-mahi also holds up well to grilling and glazing. Cod is another great option, as it absorbs flavors nicely. Each fish brings its own unique taste, so feel free to experiment. Toppings can elevate your dish further. Try adding sliced avocados for creaminess. Chopped cilantro or parsley adds a fresh touch. You can also sprinkle crushed peanuts or cashews for crunch. For a spicy kick, add sliced jalapeños. These toppings can make your meal even more fun and flavorful. Enjoy customizing your Sriracha honey glazed salmon with these ideas! Store your leftover salmon in an airtight container. Make sure to let it cool first. Place a piece of parchment paper between layers if stacking. This keeps the fish from sticking together. Refrigerate the salmon for up to three days. If you plan to keep it longer, freezing is a better option. To reheat, use the oven for the best taste. Preheat to 350°F (175°C). Place the salmon on a baking sheet and cover it with foil. Heat for about 10 to 15 minutes. This keeps the salmon moist and tasty. You can also use the microwave. Heat it in short bursts of 30 seconds. Check often to avoid overcooking. If you want to freeze your salmon, do it right after cooking. Wrap each piece tightly in plastic wrap. Then, place them in a freezer bag. Remove as much air as you can before sealing. You can freeze it for up to three months. When ready to eat, thaw it in the fridge overnight before reheating. For more ideas, check out the Full Recipe. You can tell if the salmon is cooked when it flakes easily with a fork. The flesh should be opaque and no longer translucent. A good rule is to cook it for about 4-5 minutes per side, depending on thickness. Use a food thermometer if you want to be precise. The internal temperature should reach 145°F (63°C). Cooking it just right keeps it moist and tasty. Yes, you can prepare the glaze ahead of time. Just store it in the fridge in an airtight container. This makes cooking easier later. However, I recommend cooking the salmon fresh. This keeps it juicy and full of flavor. If you must, you can cook the salmon and store it in the fridge for up to 2 days. For a full meal, pair the salmon with fluffy jasmine rice or quinoa. Steamed broccoli or snap peas add color and crunch. You can also serve it with a fresh salad for a light touch. If you want something more filling, try roasted potatoes or sweet potatoes. These sides balance the bold flavors of the salmon well. Check out the Full Recipe for more details! This blog post shared key details about making Sriracha Honey Glazed Salmon. You learned what ingredients to use, including seasoning and garnishes. I outlined simple steps to prepare the glaze, season the fish, and achieve that perfect sear. Plus, you found helpful tips for crispy skin and spice adjustments. I also covered variations for sauces and fish, along with storage options for leftovers. Savor this dish and share it with others. Enjoy your cooking!](https://goldendishy.com/wp-content/uploads/2025/07/1e0cb0f2-d69e-43b4-ab0e-316143d411f1-768x768.webp)