
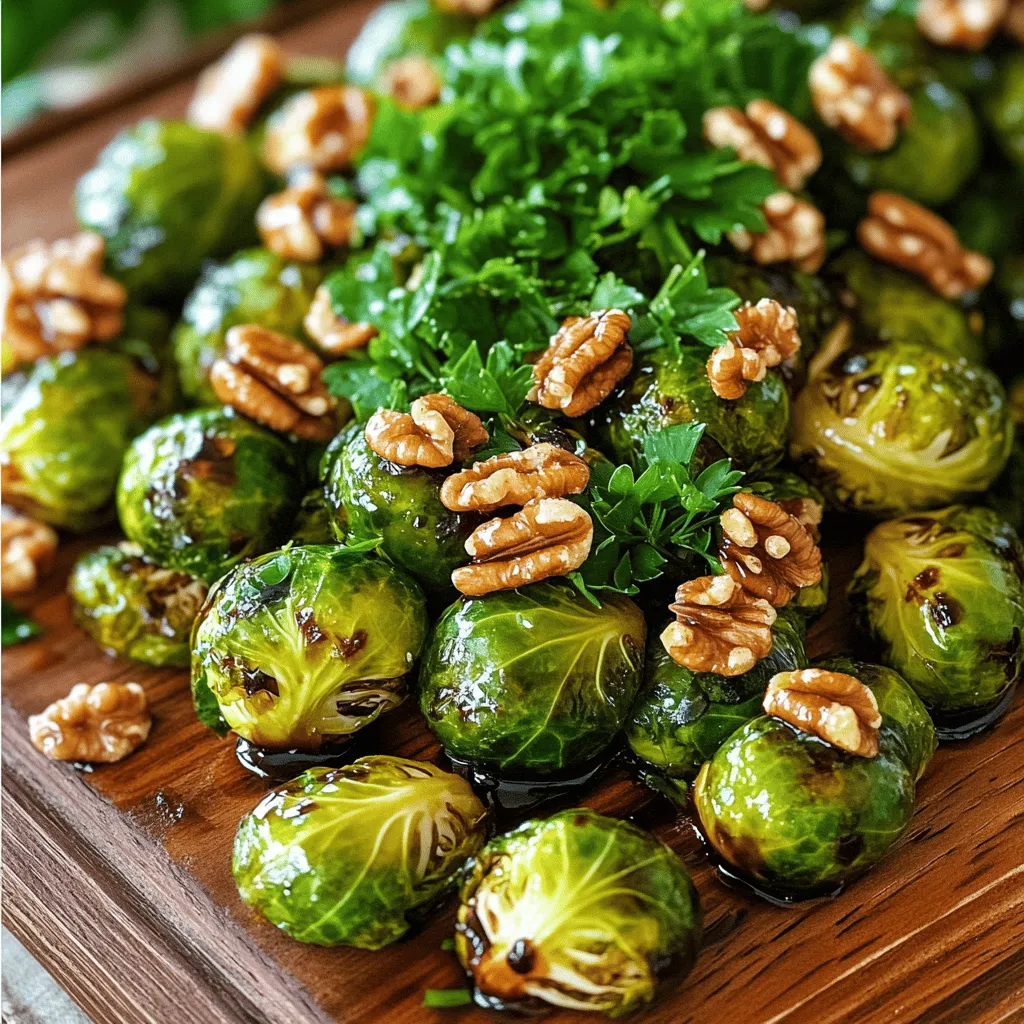
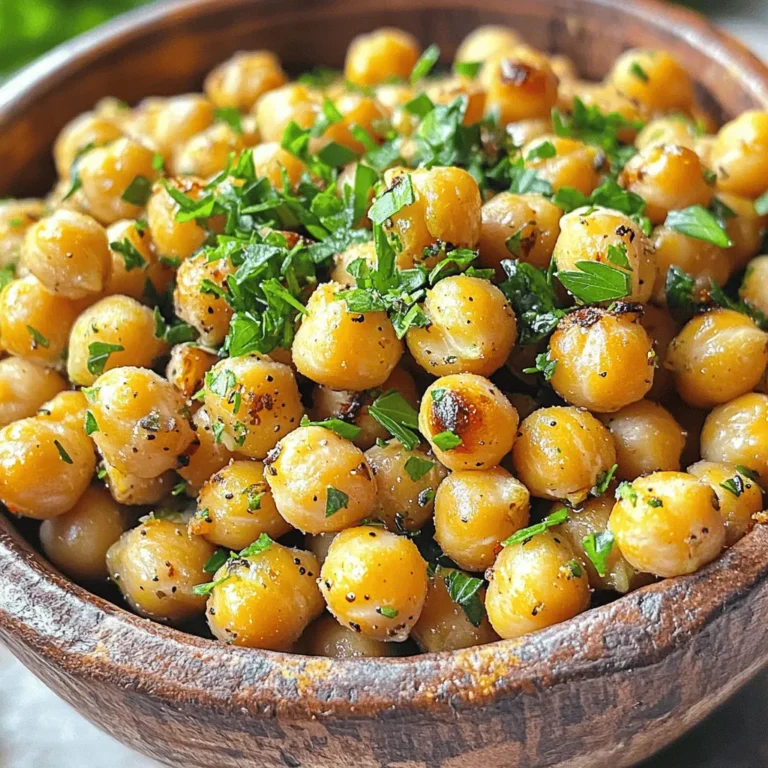
Balsamic Glazed Brussels Sprouts Flavorful Side Dish

Looking for a side dish that’s both easy to make and packed with flavor? Balsamic Glazed Brussels Sprouts are your answer! This dish combines the rich sweetness of balsamic vinegar with the earthy taste of Brussels sprouts, creating a perfect match. You won’t just enjoy the taste—you’ll wow your guests too. Ready to spice up your meals? Let’s dive into this simple recipe that makes Brussels sprouts shine!
Ingredients
Main Ingredients
– 1 pound Brussels sprouts, trimmed and halved
– 3 tablespoons balsamic vinegar
– 2 tablespoons honey
– 2 tablespoons extra-virgin olive oil
– 2 cloves garlic, finely minced
– Salt and freshly ground black pepper, to taste
The main ingredients create a sweet and tangy flavor. The Brussels sprouts add a nice crunch. Balsamic vinegar gives depth, while honey adds sweetness. Olive oil helps with roasting and flavor. Garlic brings a savory note that ties everything together.
Optional Add-ins
– 1/4 cup walnuts, toasted and roughly chopped
– 2 tablespoons fresh parsley, finely chopped (for garnish)
If you like crunch, add walnuts. They toast nicely in the oven and add texture. Fresh parsley brightens the dish and adds color. You can skip these, but they enhance the dish’s flavor.
Recommended Equipment
– Mixing bowl
– Baking sheet
– Parchment paper
Using the right tools makes cooking easier. A mixing bowl helps combine the ingredients well. A baking sheet allows for even roasting. Parchment paper ensures easy cleanup and prevents sticking.
Step-by-Step Instructions
Preparation Steps
– Preheat the oven to 400°F (200°C). This helps the Brussels sprouts roast well.
– In a bowl, combine 3 tablespoons of balsamic vinegar, 2 tablespoons of honey, and 2 tablespoons of olive oil. Whisk until mixed. Add 2 minced garlic cloves, salt, and pepper to taste. Mix well.
Coating the Brussels Sprouts
– Take 1 pound of trimmed and halved Brussels sprouts. Toss them in the balsamic mixture. Use your hands or a spatula for even coating.
– Line a baking sheet with parchment paper. Spread the Brussels sprouts in a single layer, giving them space. This helps them roast evenly.
Roasting Process
– Roast the Brussels sprouts for 20-25 minutes. Halfway through, stir or shake the baking sheet. This helps with browning and caramelization.
– Check if they are tender inside and caramelized outside. If so, they are done!
– In the last 5 minutes, sprinkle 1/4 cup of chopped walnuts on top. This adds a nice crunch.
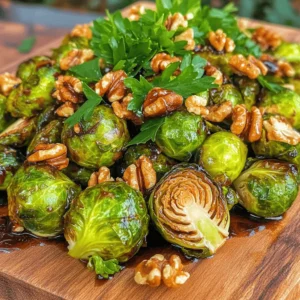
– Remove from the oven and let cool briefly. Transfer to a serving platter and drizzle any leftover glaze over the top.
– Finally, garnish with 2 tablespoons of chopped fresh parsley for a pop of color and flavor.
Tips & Tricks
Achieving the Perfect Glaze
To get the best glaze, balance the sweetness and acidity. The honey in the recipe adds sweetness, while balsamic vinegar brings tang. Mix them well to get that rich flavor. I like to taste the glaze before tossing in the Brussels sprouts. Adjust if needed. The timing is key for caramelization. Roast the sprouts for 20-25 minutes. Halfway through, stir them to ensure even cooking. This helps them brown nicely.
Serving Suggestions
When serving, presentation matters. Use a bright platter to make the dish pop. You can drizzle extra balsamic glaze on top for added flavor. Pair these Brussels sprouts with roasted chicken or grilled fish. They work well with many main dishes.
Enhancing Flavor
For extra crunch, add toppings. Chopped walnuts give a nice texture. You can also sprinkle crispy bacon bits for a savory twist. If you want to change things up, try using maple syrup instead of honey. Adding a pinch of red pepper flakes can bring a little heat. Feel free to experiment with different herbs, like thyme or rosemary, for new flavor profiles.
Variations
Nut-Free Version
To make this dish nut-free, you can simply leave out the walnuts. They add a nice crunch, but you can replace them with crispy fried onions. The fried onions give a savory touch and keep the dish exciting.
Adding Protein
For a heartier meal, consider adding protein. Crispy bacon or savory sausage can blend well with the Brussels sprouts. Just cook the bacon or sausage first, then mix with the Brussels sprouts before roasting. The flavors will enhance each bite.
Flavor Profiles
Feel free to play with herbs and spices. Fresh thyme or rosemary can add a lovely aroma. You could also try a pinch of red pepper flakes for heat. Each addition changes the taste and makes the dish unique. Explore these options to find your favorite flavor profile!
Storage Information
Storing Leftovers
To keep your Balsamic Glazed Brussels Sprouts fresh, use airtight containers. Glass or plastic containers work well. Store them in the fridge. They last for about 3 to 5 days. Make sure they cool down before sealing the container. This helps avoid moisture buildup.
Reheating Instructions
When reheating, you want to keep that crispy texture. The best way is to use an oven. Preheat it to 350°F (175°C). Spread the Brussels sprouts on a baking sheet. Heat for about 10 to 15 minutes. Check for warmth and crispiness. You can also use a skillet over medium heat. Stir them gently for about 5 minutes.
Freezing Recommendations
If you want to freeze the sprouts, do it before roasting. After cleaning and halving, place them in a single layer on a baking sheet. Freeze until solid, then transfer to a freezer bag. When ready to use, thaw overnight in the fridge. Roast straight from the fridge, adjusting the cooking time as needed.
FAQs
How do I choose fresh Brussels sprouts?
To select the best Brussels sprouts, look for small, firm, and bright green sprouts. Avoid any that are yellow or have spots. The leaves should be tightly packed and not loose. Fresh sprouts should feel heavy for their size. You can also check for freshness by gently squeezing them. If they feel firm and not mushy, they are likely fresh.
Can I make balsamic glazed Brussels sprouts in advance?
Yes, you can make balsamic glazed Brussels sprouts in advance. Store them in an airtight container in the fridge for up to three days. When you’re ready to eat them, reheat them in the oven at 350°F (175°C) for about 10-15 minutes. This will help keep the sprouts crispy. You can also heat them in a skillet over medium heat, stirring gently until warm.
What can I substitute for honey in this recipe?
If you want to replace honey, you can use maple syrup or agave nectar. Both options bring sweetness but may change the flavor slightly. You can also use brown sugar mixed with water for a similar effect. If you prefer a sugar-free option, try using a stevia-based sweetener. Adjust the amount based on your taste, as some substitutes can be sweeter than honey.
You learned how to make delicious balsamic glazed Brussels sprouts today. We covered key ingredients, easy steps, and helpful tips. You can add nuts or serve with various meals. Remember to store leftovers correctly and reheat for best taste. Experiment with flavors to make this dish uniquely yours. Enjoy the process and have fun cooking!
![To make Cranberry Orange Energy Bites, you need the right mix of flavors and textures. Here’s what you will need: - 1 cup rolled oats - 1/2 cup almond butter - 1/4 cup honey or maple syrup - 1/2 cup dried cranberries, finely chopped - Zest of 1 medium orange - 1/4 cup freshly squeezed orange juice - 1/4 cup chia seeds - 1/2 teaspoon ground cinnamon - Pinch of sea salt - Optional: 1/4 cup chopped nuts or seeds These ingredients come together to create a tasty and healthy snack. The oats provide fiber and energy. Almond butter adds protein and a creamy texture. Honey or maple syrup gives a touch of sweetness, while dried cranberries add a chewy burst of flavor. The zest and juice of the orange brighten the bites, making them refreshing. Chia seeds add crunch and healthy omega-3s. You can also mix in nuts or seeds for extra texture. They can make your bites even more filling. You can find the full recipe for the perfect energy bites in the recipe section above. - Mixing the Base Ingredients Start by taking a large bowl. Add 1 cup of rolled oats, 1/2 cup of almond butter, and 1/4 cup of honey or maple syrup. Mix with a sturdy spoon until everything blends well. This base forms the heart of your energy bites. - Adding Flavorful Components Next, stir in 1/2 cup of finely chopped dried cranberries, the zest of 1 medium orange, and 1/4 cup of freshly squeezed orange juice. Also, add 1/4 cup of chia seeds, 1/2 teaspoon of ground cinnamon, and a pinch of sea salt. Keep mixing until you see a uniform color and texture. - Achieving the Right Texture Use your hands or a spatula to mix the ingredients thoroughly. You want a sticky but manageable consistency. If it feels too dry, add a bit more orange juice. If it’s too wet, sprinkle in extra oats until it feels just right. - Rolling Into Balls After you’ve mixed everything, cover the bowl with plastic wrap or a lid. Chill the mixture in the fridge for about 30 minutes. Once chilled, take portions and roll them into 1-inch balls. You should get about 15 to 20 bites. - Optional Coating with Nuts or Seeds For added crunch and flavor, roll some of the balls in chopped nuts or seeds. This step is optional, but it gives a nice touch to each bite. - Chilling the Mixture After rolling, arrange the energy bites on a plate. You can chill them for an extra 10 to 15 minutes to firm them up even more. This makes them easier to eat. - Presentation Tips For a pretty display, stack the energy bites or place them in a rustic jar. You can sprinkle some extra orange zest on top for color and aroma. Enjoy your tasty, nutritious snack! Check the [Full Recipe] for more details. - Best Practices for Freshness: Store energy bites in an airtight container. This keeps them moist and tasty. - Duration of Shelf Life: These bites last up to 1 week in the fridge. After that, they may dry out. - Freezing Energy Bites for Later Use: You can freeze these bites. Place them in a single layer on a tray. Once frozen, store them in a bag. They can last for up to 3 months. - Preparing in Bulk: Make a double batch! This way, you always have a quick snack ready. - Overmixing or Undermixing: Mix just enough to combine all ingredients. Too much mixing can make them tough. - Adjusting Consistency: If the mixture is too dry, add more juice. If too wet, mix in more oats. Always aim for a sticky but manageable mixture. For the full recipe, check out Cranberry Orange Energy Bites. {{image_4}} You can mix things up by adding different nuts. Walnuts, almonds, or pecans give a nice crunch. Just chop them finely and fold them into the mix. You can use about 1/4 cup of your choice. Incorporating other fruits can also change the flavor. Try using dried apricots, raisins, or figs. They add sweetness and texture. Just chop them to match the size of the cranberries. If you want a vegan option, swap honey for maple syrup. This keeps the bites sweet without using animal products. Almond butter is already vegan, so you’re set there! For gluten-free substitutions, choose certified gluten-free oats. Most oats are naturally gluten-free but can get cross-contaminated. Make sure to check the label. Using different nut butters can change the taste and texture. Peanut butter or cashew butter works great. Just use the same amount as almond butter. Adjusting crunchiness with seeds is another fun option. Add chia seeds or flaxseeds for some extra bite. You can also toss in sunflower seeds for a nut-free crunch. The cranberry orange energy bites are packed with nutrients. Each ingredient brings unique health benefits. - Rolled oats offer fiber, which helps digestion and keeps you full. - Almond butter is a great source of healthy fats and protein. - Dried cranberries add antioxidants that fight free radicals. - Chia seeds are rich in omega-3s and help with heart health. - Orange juice boosts your immune system with vitamin C. These bites provide energy and nutrients to fuel your day. They are perfect for a quick boost before a workout or during a busy afternoon. How many bites should you eat for a snack? I suggest two to three bites. This gives you enough energy without overdoing it. Each bite is satisfying. Dietary recommendations may vary. Listen to your body. If you feel hungry after two bites, enjoy another! Balance is key. Each bite contains about 70 calories. This makes it easy to track your snack intake. If you want fewer calories, consider adjusting the recipe. You can reduce the honey or use less nut butter. This way, you can fit these bites into your dietary goals without losing flavor. For more details, check the full recipe. Enjoy these tasty energy bites while staying mindful of your nutrition! Cranberry orange energy bites can last up to one week in the fridge. Store them in an airtight container to keep them fresh. If you want to keep them longer, you can freeze them. They can last up to three months in the freezer. Just thaw them in the fridge before enjoying. Yes, you can substitute almond butter with other nut butters. Peanut butter, cashew butter, or sunflower seed butter work well. Each will give a unique taste. Make sure to choose one that fits your dietary needs. You can use the mixture for various snacks. Try spreading it on toast or mixing it into yogurt. You can also make energy bars by pressing the mixture into a pan and slicing it. This way, you have more options for your snack. To make them sweeter, you can add more honey or maple syrup. You can also mix in some chocolate chips or dried fruits like dates. Adjust the sweetness based on your taste. This way, you can create a snack that you love. Yes, there are many alternatives for honey or maple syrup. You can use agave nectar, brown rice syrup, or coconut nectar. Each of these will add a different sweetness. Just make sure to adjust the amount based on how sweet you want your bites to be. For the full recipe, check out the recipe section above. These Cranberry Orange Energy Bites are simple to make and taste great. You mix healthy ingredients, shape them into bites, and enjoy a tasty snack. Remember to store them properly to keep them fresh. You can also tweak ingredients for your tastes or diet. With these tips and flavor ideas, you’ll enjoy these bites any time you need a quick boost. Get creative and make this snack your own!](https://goldendishy.com/wp-content/uploads/2025/06/5774e534-56b3-4e6d-8a48-215f930e3d22-768x768.webp)

. This link has all the details you need to make this tasty snack. We covered all the steps to make crispy sweet potato rounds. You learned the key ingredients, preparation, and baking tips. Remember to space the slices for crispiness and try different seasonings for variety. Store leftovers properly for the best flavor. If you have questions, refer to the FAQs for more help. Enjoy creating a delicious snack or side dish that impresses everyone!](https://goldendishy.com/wp-content/uploads/2025/06/bfac51d6-fd22-4fd5-a48f-0e12de6b57a8-768x768.webp)