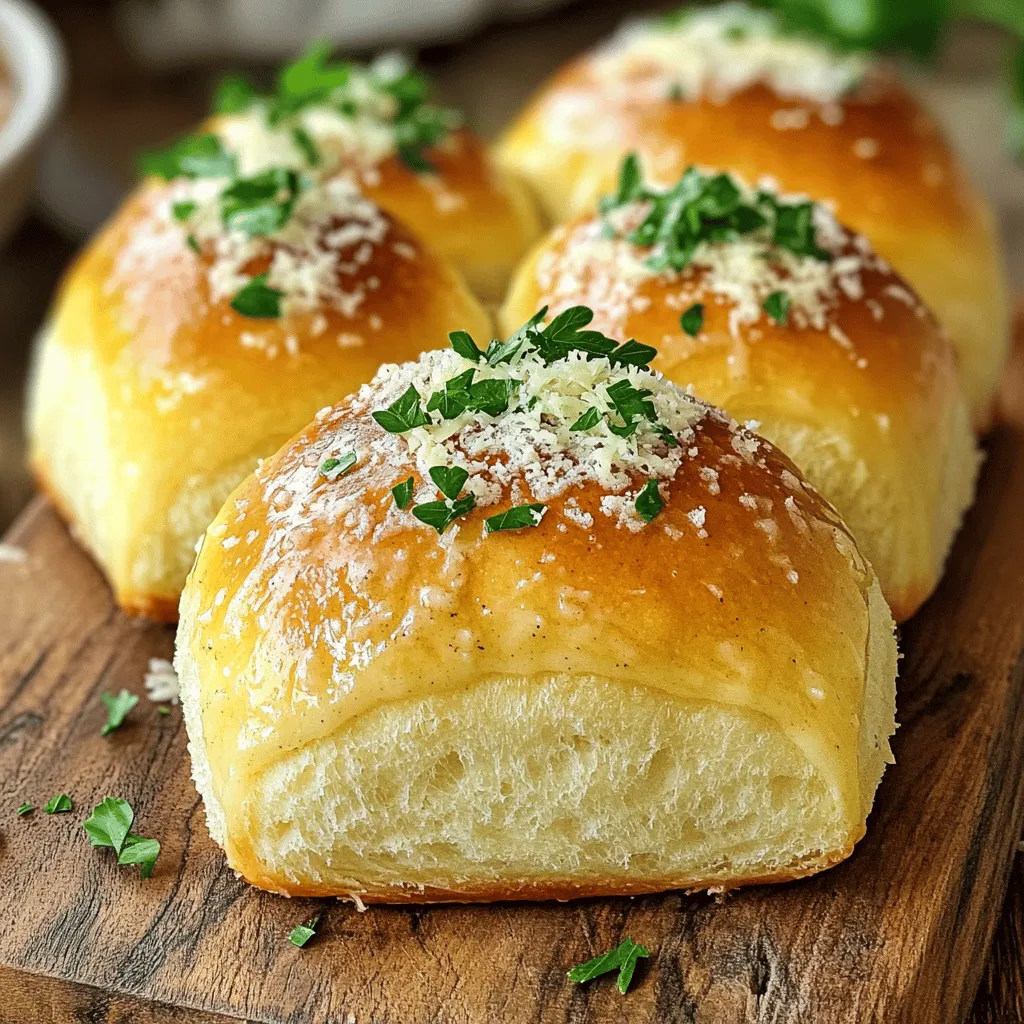
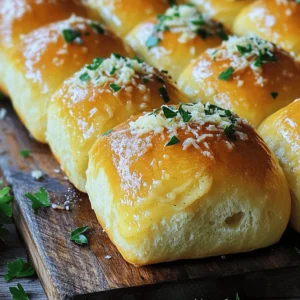
Garlic Parmesan Dinner Rolls Fluffy and Delicious Treat

If you crave soft, fluffy rolls bursting with garlic flavor, you’re in the right place. These Garlic Parmesan Dinner Rolls are not just tasty; they elevate any meal. I’ll show you how to make them from scratch using simple ingredients. Get ready to impress your family with these warm, cheesy delights that pair perfectly with any dish. Let’s dive into making the best rolls of your life!
Ingredients
Main Ingredients
– 2 cups all-purpose flour
– 1 cup warm milk (about 110°F/43°C)
– 2 tablespoons granulated sugar
– 2 teaspoons instant yeast
– 1 teaspoon kosher salt
Flavor Enhancers
– 1/4 cup unsalted butter, melted, plus extra for brushing
– 4 cloves garlic, finely minced
– 1/2 cup freshly grated Parmesan cheese
– 1 tablespoon fresh parsley, finely chopped (optional, for garnish)
The choice of ingredients is key to making these rolls fluffy and flavorful. I use all-purpose flour because it gives the rolls the perfect texture. Warm milk helps activate the yeast. It creates a nice, soft dough. Granulated sugar feeds the yeast, helping it to rise. Instant yeast is a great time-saver. You don’t need to activate it in water first.
Kosher salt adds flavor and helps control the yeast’s activity. For a rich taste, I add melted unsalted butter. It makes the rolls tender and moist. The garlic brings an amazing aroma. I use fresh garlic for the best flavor. Finally, the Parmesan cheese adds a savory kick. It creates a lovely crust on top. Optionally, I sprinkle fresh parsley for some color and freshness.This list gives you everything you need to create these delightful Garlic Parmesan Dinner Rolls.
Step-by-Step Instructions
Preparing the Dough
To start, you need to activate the yeast. In a mixing bowl, pour in the warm milk. It should feel warm to your touch, around 110°F. Sprinkle the sugar and the instant yeast on top. Let it sit for about 5 minutes. You’ll see bubbles form, which means the yeast is ready to work.
Next, add the melted butter and kosher salt into the bowl. Stir until everything combines well. Now it’s time to add the flour. Gradually mix it in using a wooden spoon. Keep stirring until a sticky dough forms.
Once the dough comes together, transfer it to a lightly floured surface. Knead it for about 5-7 minutes. You want the dough to be smooth and slightly tacky.
First Rise
Shape the kneaded dough into a ball. Place it in a greased bowl, turning it to coat with oil. Cover the bowl with a damp cloth or plastic wrap. Set it in a warm spot. Let it rise for about 1 hour. The dough should double in size during this time.
Shaping the Rolls
After the dough has risen, gently punch it down to release air. Turn it out onto a floured surface once more. Divide the dough into 12 equal pieces. Roll each piece into a smooth ball by cupping it in your palms.
Arrange the dough balls on a greased baking tray. Space them about 1 inch apart. Cover them lightly with a cloth. Let them rise again for about 30 minutes to puff up nicely.
Final Rise and Baking
Now, preheat your oven to 375°F. While it heats, mix the finely minced garlic with the remaining melted butter. Brush this flavorful garlic butter over the rolls just before baking.
Sprinkle the freshly grated Parmesan cheese generously on top of each roll. Bake them for 15-20 minutes. They should be golden brown and sound hollow when tapped on the bottom.
As soon as they come out, brush any remaining garlic butter on top. If you like, sprinkle with fresh parsley for extra flavor and color. Enjoy your warm, fluffy Garlic Parmesan Dinner Rolls!
Tips & Tricks
Ensuring Perfect Rolls
To make perfect Garlic Parmesan Dinner Rolls, start with kneading. Knead the dough for about 5-7 minutes. Use your palms to push the dough down and fold it over. This helps develop gluten, giving you a great texture. The dough should feel smooth and a bit tacky, not sticky. If it sticks to your hands too much, dust it lightly with flour.
For soft and fluffy rolls, let the dough rise in a warm spot. Cover it well to keep it moist. I love to use a damp cloth or plastic wrap. This traps heat and helps the dough rise faster. After the first rise, punch the dough down gently. This releases air and makes the rolls light.
Serving Suggestions
When it’s time to serve, presentation matters. Serve the warm rolls in a rustic basket lined with a clean cloth. This keeps them warm and adds a nice touch. You can also offer extra melted butter on the side for dipping.
As for pairing, these rolls go great with soups, salads, or pasta dishes. They also work well with dips like marinara or garlic butter. The flavors of garlic and Parmesan complement many meals, making them a perfect side.
Variations
Flavor Adjustments
You can easily change the taste of your Garlic Parmesan Dinner Rolls. Adding fresh herbs is a great way to enhance flavor. Try rosemary or thyme for a lovely twist. These herbs add a fresh element that pairs well with garlic. You can mix in a teaspoon or two into the dough.
If you want to get creative with cheese, consider adding mozzarella or cheddar. Each cheese offers a different taste and texture. For a stronger flavor, use aged gouda or a sharp cheddar. The choice is yours, and it can completely change your rolls!
Dietary Adjustments
If you want to make these rolls vegan, it’s simple. You can replace the butter with vegan butter or coconut oil. Use almond or soy milk instead of regular milk. These swaps keep the rolls tasty and fluffy.
For those needing gluten-free options, use a gluten-free flour blend. Look for one that includes xanthan gum for the best texture. You may need to adjust the liquid slightly, so keep an eye on your dough. It should still feel soft and slightly sticky. These adjustments ensure everyone can enjoy these delicious rolls!
Storage Info
Short-Term Storage
To keep your Garlic Parmesan Dinner Rolls fresh, store them in an airtight container. This helps to trap moisture and keeps them soft. If you have leftover rolls, let them cool first. Place them in the container once they are at room temperature. Seal the container tightly to avoid any air exposure. You can keep them at room temperature for up to three days.
Long-Term Storage
For long-term storage, freezing is your best bet. To freeze, place the rolls in a single layer on a baking sheet. Freeze them for about an hour until firm. Then transfer the rolls to a freezer bag or airtight container. This way, they won’t stick together. You can freeze them for up to three months.
When you want to enjoy the rolls again, here’s how to reheat them for the best taste:
– Thawing: Remove the rolls from the freezer and let them sit at room temperature for about an hour.
– Reheating: Preheat your oven to 350°F (175°C). Place the rolls on a baking sheet and heat for about 10-15 minutes. This will make them warm and fluffy again. If you want, brush them with melted butter and sprinkle more Parmesan cheese before reheating for extra flavor.
FAQs
How to make Garlic Parmesan Dinner Rolls from scratch?
To make Garlic Parmesan Dinner Rolls from scratch, start with warm milk and sugar. Add instant yeast and let it foam for 5 minutes. Then, stir in melted butter and salt. Gradually mix in the flour to form a sticky dough. Knead it for 5-7 minutes until smooth. Let it rise until doubled in size. After that, shape the dough into balls, let them rise again, and bake.
Can I use fresh garlic instead of minced?
Yes, you can use fresh garlic. If you use fresh cloves, chop them finely for best results. Fresh garlic has a stronger taste, so adjust the amount based on your preference. You can also roast the garlic first for a milder flavor. Both options will work well in your rolls.
What can I serve with Garlic Parmesan Dinner Rolls?
These rolls pair wonderfully with many dishes. Try serving them with pasta, soups, or salads. They also work great alongside grilled meats or as a side to your favorite dip. Consider a garlic butter sauce or marinara for dipping. These rolls can elevate any meal.
How to reheat leftover rolls?
To reheat leftover rolls, use your oven for the best texture. Preheat it to 350°F (175°C). Place the rolls on a baking sheet and cover them with foil. Heat for about 10-15 minutes. You can also use a microwave, but they may become soft. For a quick fix, wrap a roll in a damp paper towel and heat it for 15 seconds. Enjoy them warm and fluffy!
In this blog post, we covered how to make delicious Garlic Parmesan Dinner Rolls. You learned about the key ingredients and each step, from mixing the dough to baking. We shared tips for perfect rolls and ideas for special flavors. You can also find storage advice for keeping the rolls fresh.
Now, you can impress friends and family with these tasty rolls. Enjoy them warm, paired with your favorite meals. Happy baking!
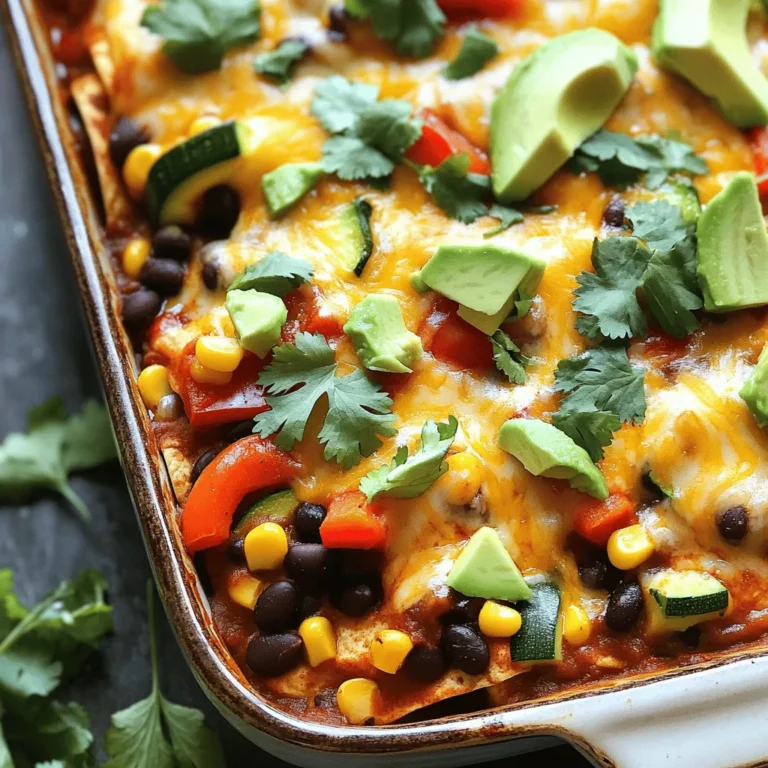
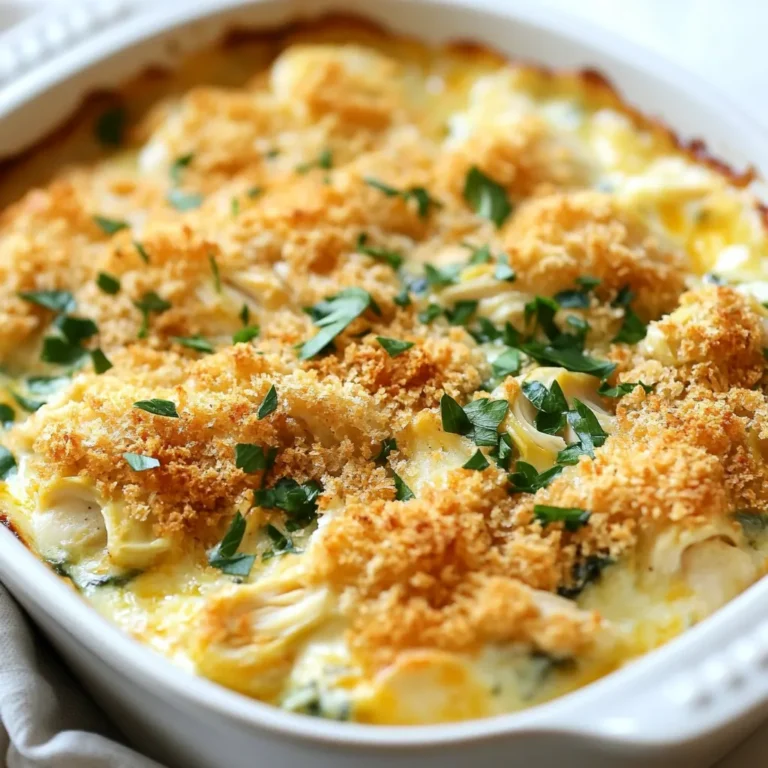
![- Bell Peppers: I like using large bell peppers. You can choose any color you like: red, yellow, or green. They all taste great! Make sure they are firm and fresh. Each pepper should hold the stuffing well. - Ground Chicken and Dairy: Ground chicken adds a light flavor. It cooks quickly and blends well with other ingredients. Pair it with shredded cheddar cheese for a creamy touch. The cheese melts beautifully, making the dish extra yummy. - Enhancing Ingredients: I always add cooked rice to the mix. It gives the dish a nice texture. Black beans are great too; they add protein and fiber. Corn brings sweetness and color. Together, these ingredients create a hearty filling. - Essential Spices: Be sure to use chili powder, ground cumin, garlic powder, and onion powder. These spices pack flavor into the filling. A sprinkle of salt and pepper brings everything together. - Optional Garnishes: Fresh cilantro adds a burst of flavor. It makes the dish look more vibrant. You can also use a dollop of sour cream for creaminess. - Recommended Sides: Serve the stuffed peppers with a simple salad. A side of rice or quinoa pairs well too. You can also add some tortilla chips for crunch. - Display Ideas: For a beautiful presentation, place each stuffed pepper on a plate. Drizzle a bit of olive oil on top for shine. Add some chopped cilantro for color. This makes the meal look as good as it tastes! For the complete recipe, check out the Full Recipe. 1. Preheat your oven to 375°F (190°C). This step is key for even cooking. 2. Grab four large bell peppers. Cut off the tops and remove the seeds. Rinse the insides to clean them well. 3. Lightly coat the outside of each pepper with olive oil. Stand them upright in a 9x13 inch baking dish. 1. Heat a skillet over medium heat. Add 1 pound of ground chicken to the pan. 2. Cook the chicken for 5-7 minutes. Stir and break it apart until it turns brown. 3. Once cooked, mix in 1 cup of cooked rice, 1 cup of rinsed black beans, and 1 cup of corn. 4. Add 3/4 cup of shredded cheddar cheese, 1 teaspoon of chili powder, 1 teaspoon of cumin, 1 teaspoon of garlic powder, and 1/2 teaspoon of onion powder. Season with salt and pepper to taste. Stir for 2-3 minutes. 1. Generously fill each bell pepper with the chicken and cheese mixture. Pack it well. 2. Sprinkle the remaining 1/4 cup of cheese on top of the stuffed peppers. 3. Cover the dish with aluminum foil to trap steam. Bake in the preheated oven for 30 minutes. 4. After 30 minutes, remove the foil. Continue baking for 10-15 minutes, until the cheese is bubbly and golden. 5. Check if the peppers are tender by piercing them with a fork. 6. Allow them to cool for a few minutes after baking. Optionally, garnish with fresh cilantro for extra flavor. For the complete recipe, check out the [Full Recipe]. What are common mistakes to avoid? One mistake is overcooking the chicken. Cook it just until it's brown. If you use too much salt, it can ruin the flavor. Taste your mixture before stuffing the peppers. How can you ensure even cooking? Make sure all your peppers are the same size. This will help them cook at the same rate. Cover them with foil for part of the baking time. This keeps the heat in and helps them cook through. What are some suggestions for adding extra flavor? Try adding diced tomatoes or jalapeños for a kick. You can also mix in some spices like paprika or cayenne pepper. Fresh herbs like parsley or basil can brighten the dish. What are some ingredient swaps for dietary preferences? For a lower-carb option, replace rice with cauliflower rice. Use ground turkey or tofu for a different protein. You can also swap cheddar cheese for a dairy-free cheese for a vegan option. What cooking methods can you use? You can air fry the stuffed peppers for a crispy texture. Just set the air fryer to 375°F and cook them for about 15-20 minutes. Grilling is another fun method. Just wrap the peppers in foil and place them on the grill. How do you maintain moisture in stuffed peppers? Add a splash of chicken broth to the bottom of the baking dish. This creates steam as they cook. Avoid overstuffing the peppers; too much filling can lead to dryness. For the full recipe, check out the recipe section above. {{image_4}} You can change the ground chicken in your stuffed peppers. Use ground turkey or beef instead. These meats add different flavors and textures. If you want a vegetarian option, try using quinoa or lentils. These ingredients pack a protein punch and keep the dish hearty. For a vegan twist, use a mix of beans and mushrooms. They add a nice texture and flavor. You can also use tofu crumbles, which absorb spices well. This makes your meal rich and filling while keeping it plant-based. You can spice up your stuffed peppers with different flavors. Why not try a Mexican twist? Add taco seasoning or jalapeños for heat. A dash of lime juice brightens the dish. If you love Italian flavors, mix in some Italian herbs like oregano or basil. You could also add marinara sauce to the filling. This creates a rich and comforting taste. Want a twist? Try adding olives, capers, or feta cheese. These ingredients bring unique textures and flavors. They turn a simple meal into something exciting. For those needing gluten-free meals, this recipe is easy to adapt. Use rice instead of breadcrumbs for filling. Always check labels on canned items like beans and corn. They should be gluten-free. If you follow a low-carb diet, you can swap rice for cauliflower rice. This keeps the dish light and low in carbs. You can also skip the beans to reduce carbs even more. These variations help everyone enjoy this tasty meal. No matter your diet, you can find a way to enjoy chicken and cheese stuffed peppers. After you make your chicken and cheese stuffed peppers, let them cool down. This helps keep them fresh. Store them in an airtight container. They will stay good in the fridge for about 3 to 4 days. If you have leftovers, try to eat them within this time. To reheat, place them in the oven or microwave until warm. If you want to keep your stuffed peppers for a longer time, freezing is a great option. First, let them cool completely. Wrap each pepper tightly with plastic wrap. Then, put them in a freezer bag or container. This helps avoid freezer burn. They can last up to 3 months in the freezer. When you're ready to eat, take them out and thaw in the fridge overnight. Reheat them in the oven at 375°F until hot. This will keep the flavors and textures intact. Meal prepping can save time on busy weeknights. You can prepare the filling ahead of time. Cook the chicken and mix in the rice, beans, and spices. Store this mixture in the fridge for 2 to 3 days. When you're ready, stuff the peppers and bake them. For batch cooking, consider making a double recipe. Freeze half for later. This way, you have a tasty meal ready whenever you need it. How do you know when stuffed peppers are done? You can tell when stuffed peppers are done by checking the peppers and cheese. The peppers should be tender and the cheese melted and bubbly. If you pierce a pepper with a fork, it should feel soft but not mushy. Can you prepare them in advance? Yes, you can prepare stuffed peppers in advance. Just stuff them and store them in the fridge. Bake them when you're ready to eat. This makes for a quick and easy family meal. Can I use frozen peppers? Yes, you can use frozen peppers. Just thaw them before stuffing. They may cook faster, so keep an eye on them while baking. What to do if I don't have certain ingredients? If you lack certain ingredients, feel free to swap them out. For example, use quinoa instead of rice or a different type of cheese. Get creative based on what you have! Can stuffed peppers be made on the stovetop? Yes, you can make stuffed peppers on the stovetop. Just steam them in a skillet with a little water. Cover with a lid and cook until tender. How to adjust heating times for different ovens? Oven temperatures can vary. If your oven runs hot, check the peppers a few minutes early. If it runs cool, you may need to add a few extra minutes. Always trust your instincts! We covered the best way to make stuffed peppers. You learned about key ingredients like bell peppers, ground chicken, and spices. You also discovered tips for cooking and storing them. There are many ways to adjust the recipe for different diets and tastes. Incorporating these ideas will make your dish delicious. Get creative with flavors and toppings. With practice, you'll master this easy meal for any occasion. Enjoy your cooking journey!](https://goldendishy.com/wp-content/uploads/2025/06/69b5c483-258e-4498-8701-d043fb5fc497-768x768.webp)