
Chicken Alfredo Stuffed Shells Creamy and Comforting Dish
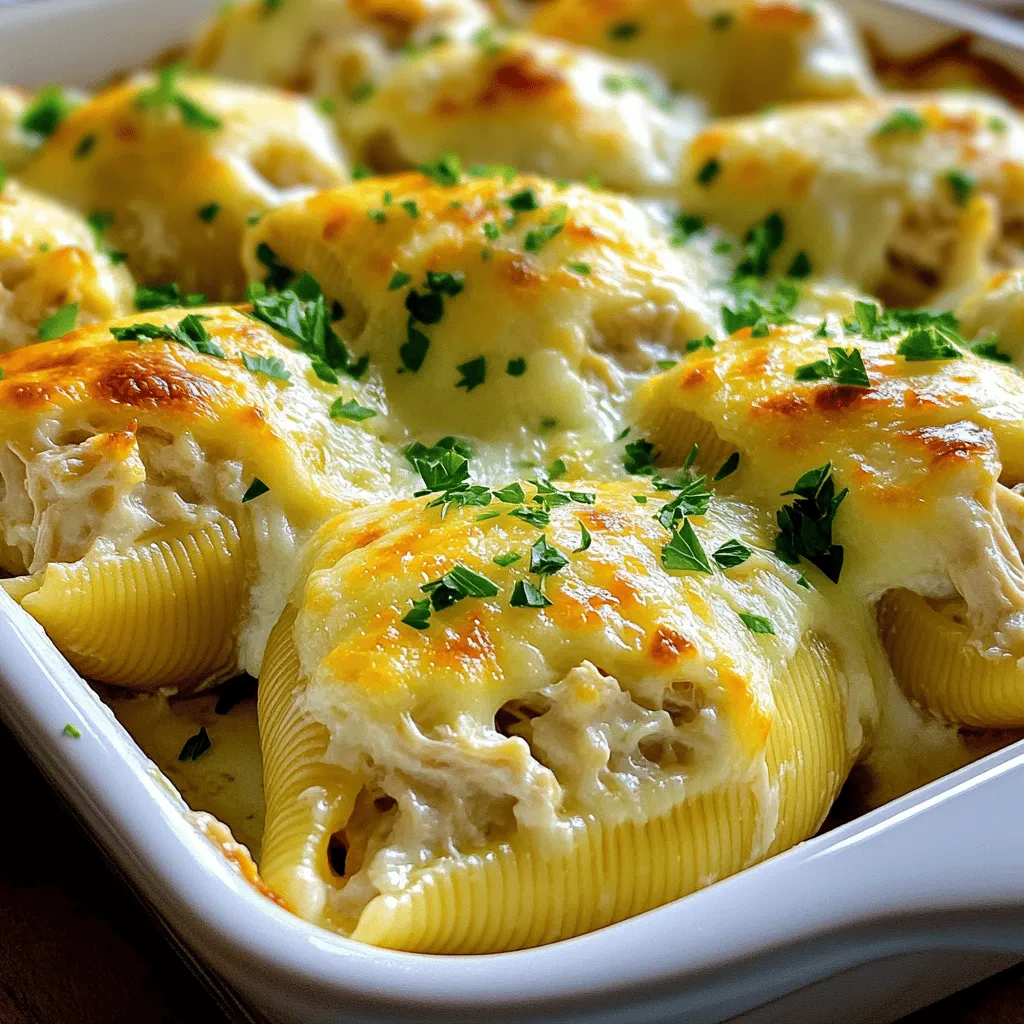
Are you ready to dive into a warm, creamy meal that will satisfy any craving? Chicken Alfredo Stuffed Shells combine tender pasta, rich cheese, and succulent chicken into a comforting dish your family will love. In this post, I’ll walk you through each simple step to make this hearty meal. Grab your apron, and let’s create magic in the kitchen together!
Ingredients
To make Chicken Alfredo Stuffed Shells, you need a few key ingredients. Here’s the complete list:
– 20 jumbo pasta shells
– 2 cups cooked chicken, shredded
– 1 cup ricotta cheese
– 1 cup shredded mozzarella cheese
– 1/2 cup grated Parmesan cheese
– 2 cups Alfredo sauce (store-bought or homemade)
– 1 teaspoon garlic powder
– 1 teaspoon Italian seasoning
– Salt and pepper, to taste
– Fresh parsley, finely chopped (for garnish)
These ingredients come together to create a creamy and comforting dish. You will love the mix of flavors and textures in every bite! The combination of ricotta and mozzarella makes the filling rich and cheesy. Adding shredded chicken gives it heartiness. The Alfredo sauce ties it all together with creamy goodness.
For an even more delightful experience, sprinkle some fresh parsley on top. It not only adds color but also a fresh taste.Enjoy making this delicious meal!
Step-by-Step Instructions
Preparing the pasta
– Preheat the oven to 350°F (175°C).
– Cook the jumbo pasta shells in salted boiling water until al dente. Drain them and place on a tray. This keeps them from sticking.
Making the filling
– In a bowl, combine the shredded chicken, ricotta, and cheeses.
– Add garlic powder, Italian seasoning, and a pinch of salt and pepper.
– Mix well until the filling is creamy and smooth.
Assembling the dish
– Spread one cup of Alfredo sauce in a baking dish.
– Carefully fill each pasta shell with about two tablespoons of the chicken mixture.
– Place the filled shells seam side up in the dish.
Baking the stuffed shells
– Drizzle the remaining Alfredo sauce over the top of the shells.
– Sprinkle the rest of the mozzarella cheese on top.
– Cover the dish with foil and bake for 25 minutes.
– After this, remove the foil and bake for an extra 10-15 minutes until the cheese is golden brown.
These steps make a warm and cozy meal.
Tips & Tricks
How to avoid sticking shells
To prevent your shells from sticking, place them on a parchment-lined tray. After boiling, let the shells cool on the tray. This method stops them from bonding together. It is simple and effective.
Enhancing the flavor
You can easily boost the flavor by adding more garlic or Italian herbs. These ingredients can make your filling pop. Try using fresh basil or oregano for a bright taste. You can also mix in some red pepper flakes for a little heat. This way, you can customize the dish to fit your taste.
Serving suggestions
For a lovely presentation, serve stuffed shells in deep pasta bowls. This makes your dish look warm and inviting. Garnish with extra parsley for color. A drizzle of Alfredo sauce around the plate adds elegance, too. Your family and friends will be impressed!
Variations
Vegetarian option
You can make a great vegetarian version of Chicken Alfredo Stuffed Shells. Just swap the chicken for sautéed vegetables. Think about using spinach, mushrooms, or zucchini. These veggies add flavor and texture. Sauté them in olive oil with garlic for extra taste. This option is not only tasty but also colorful. It makes the dish fun and filling without the meat.
Different cheese combinations
Cheese is key in stuffed shells, and you can mix it up! Instead of the usual ricotta and mozzarella, try cottage cheese or goat cheese. Each type gives a unique taste. You can even add some cream cheese for a richer filling. Mixing different cheeses can create a fun surprise in every bite. So, don’t be afraid to get creative with your cheese choices!
Personalizing the sauce
Using a homemade Alfredo sauce makes a big difference. It is easy to whip up and tastes so fresh. If you want to try it, just melt butter and add garlic. Then, whisk in cream and cheese until smooth. You can also add herbs like basil or parsley for extra flavor. This way, your Chicken Alfredo Stuffed Shells will be even more special.
Storage Info
How to store leftovers
After enjoying your Chicken Alfredo Stuffed Shells, store leftovers in an airtight container. Let them cool to room temperature before sealing. Place the container in the fridge. These shells can stay fresh for up to three days. If you want to keep them longer, consider freezing.
Reheating instructions
To reheat, use the oven for the best results. Preheat your oven to 350°F (175°C). Place the stuffed shells in a baking dish. Add a splash of Alfredo sauce on top to keep them moist. Cover with foil to prevent drying out. Heat for about 20 minutes, or until warmed through. You can also use the microwave, but be careful not to overcook them.
Freezing options
Yes, you can freeze these shells. If you want to freeze unbaked shells, assemble them in the dish and cover tightly with foil. You can freeze them for up to three months. To bake, just add an extra 10-15 minutes to the cooking time. If you freeze baked shells, let them cool first. Wrap them well in plastic wrap and foil. They will stay tasty for two months in the freezer.
FAQs
Can I make Chicken Alfredo Stuffed Shells ahead of time?
Yes, you can prepare Chicken Alfredo Stuffed Shells ahead of time. This makes meal prep easier. To do this, follow these tips:
– Cook and cool the shells: Prepare the pasta shells as directed, then cool them on a tray.
– Make the filling: Mix the cooked chicken, cheeses, and seasonings in advance.
– Assemble the dish: Fill the shells and place them in the baking dish. Cover with Alfredo sauce and cheese.
– Store in the fridge: Wrap the dish tightly with foil or plastic wrap. You can keep it in the fridge for a day or two.
– Bake when ready: When you want to eat, preheat your oven and bake the shells. They may need a few extra minutes if cold.
What can I serve with Chicken Alfredo Stuffed Shells?
Chicken Alfredo Stuffed Shells are rich and creamy. Pair them with lighter side dishes for balance. Here are some great options:
– Garlic bread: This adds a crunchy texture and complements the flavors.
– Green salad: Fresh greens with a simple vinaigrette provide a refreshing contrast.
– Roasted vegetables: Try asparagus or broccoli for a healthy side.
– Steamed green beans: They add color and a slight crunch to your meal.
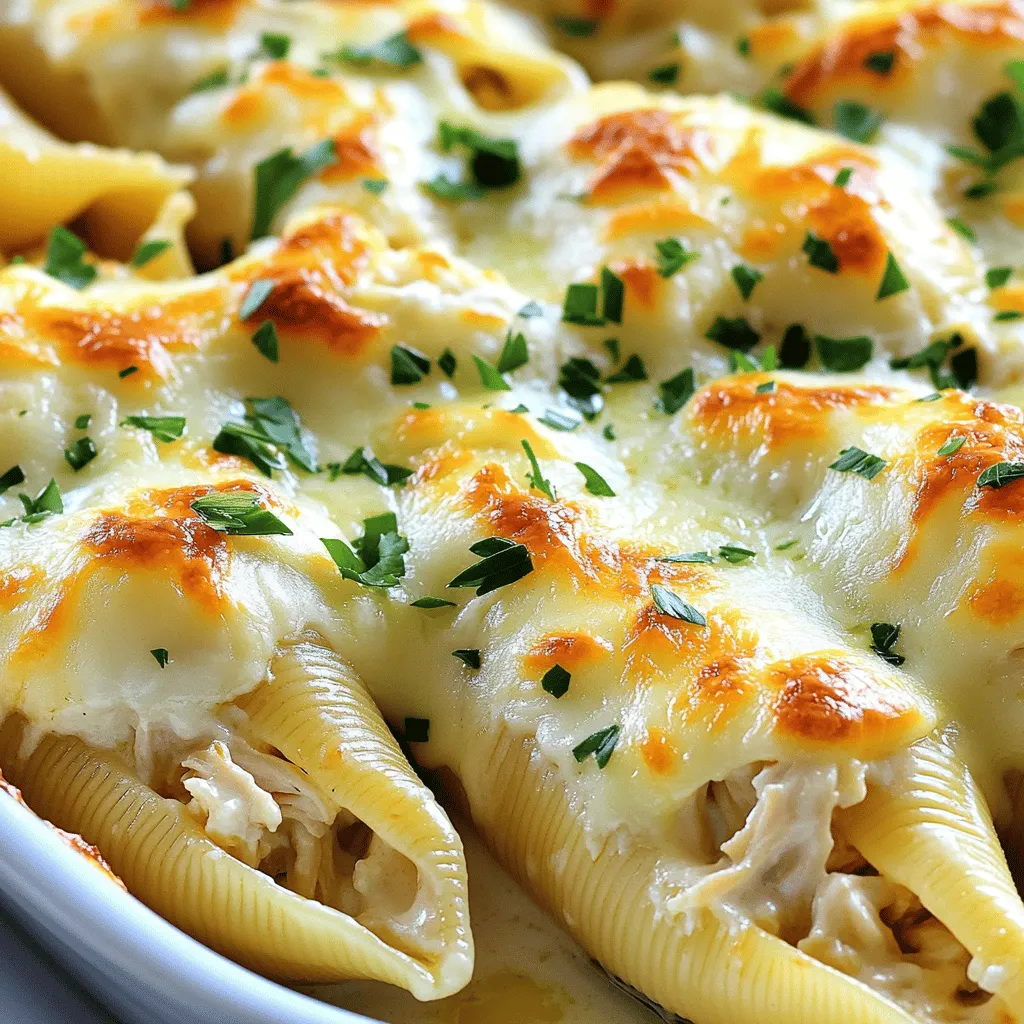
How do I know when the stuffed shells are done?
To check if your stuffed shells are done, look for these signs:
– Bubbling edges: The sauce should be bubbling around the sides of the dish.
– Golden-brown cheese: The cheese on top should be melted and slightly browned.
– Firm shells: The stuffed shells should feel firm and not too soft when you touch them.
Once they show these signs, they are ready to serve!
You now know how to make Chicken Alfredo Stuffed Shells from start to finish. We covered ingredients, steps, and some helpful tips. Remember, you can change up the filling or sauce to make it your own. Don’t shy away from adding extra flavor or trying new cheeses. Enjoy these tasty shells with your favorite side dishes. With careful cooking and some creativity, your meal will impress! Use these tips, and happy cooking!

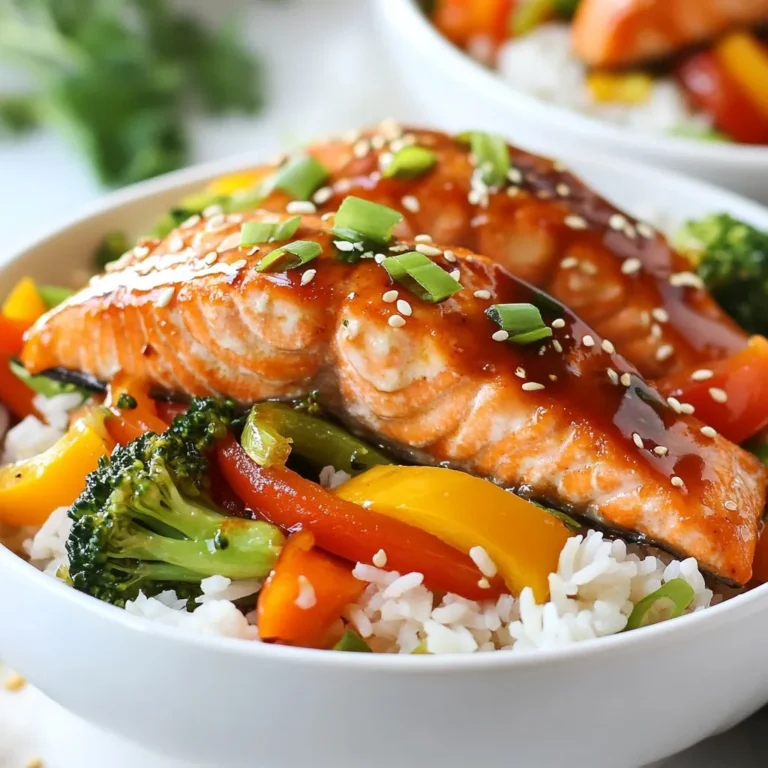
![- 4 large bell peppers (any vibrant color) - 1 cup quinoa, thoroughly rinsed and drained - 2 cups vegetable broth - 1 can (15 oz) black beans, well rinsed and drained - 1 cup corn (fresh, frozen, or canned, drained) - 1 cup cherry tomatoes, halved - 1 teaspoon ground cumin - 1 teaspoon smoked paprika - 1 teaspoon garlic powder - Salt and freshly cracked black pepper to taste - 1 tablespoon extra virgin olive oil - ½ cup shredded cheddar cheese (optional but recommended) - Fresh cilantro or parsley, finely chopped for garnish - Additional vegetables (e.g., zucchini, mushrooms) - Spices and herbs (e.g., oregano, chili powder) When making stuffed bell pepper boats, you have many options. I love using colorful bell peppers. They add a fun look to your dish. Choose ones that are firm and bright. For the filling, I use quinoa. It’s not only healthy but also tasty. Rinse it well before cooking. The vegetable broth adds flavor and makes it rich. Black beans are another great choice. They are filling and packed with protein. Rinse them well too, to get rid of extra salt. Corn brings sweetness to the dish. You can use fresh, frozen, or canned corn. Cherry tomatoes add a nice juicy burst. Spices like cumin and paprika give depth. Garlic powder adds that warm flavor we all love. Don’t forget to season with salt and pepper to make it pop. Finally, I drizzle olive oil on the filling. It helps everything blend together. If you love cheese, add some cheddar on top for creaminess. Feel free to customize your stuffed peppers with optional add-ins. You can mix in other veggies like zucchini or mushrooms. Extra spices can make a big impact too. This recipe is flexible. You can adjust it to fit your taste. Explore and have fun with your stuffed bell pepper boats! For the complete guide, check out the Full Recipe I have shared. - Preheat the oven to 375°F (190°C). - Prepare the bell peppers by cutting off their tops. Carefully remove the seeds and membranes. Make sure they sit upright in a baking dish. - Combine 1 cup of quinoa and 2 cups of vegetable broth in a saucepan. - Bring this mix to a boil, then reduce the heat to low. Cover the pot and let it simmer. Cook for about 15 minutes or until the quinoa is fluffy and the broth has absorbed. - In a large mixing bowl, combine the cooked quinoa with one can of black beans, one cup of corn, and spices. - Add 1 teaspoon of ground cumin, 1 teaspoon of smoked paprika, and 1 teaspoon of garlic powder. Season with salt and black pepper. - Drizzle 1 tablespoon of olive oil over the mixture. Stir until everything is well blended. - Carefully spoon the filling into each prepared bell pepper. Press it down gently to pack it in. - If you like, top each stuffed pepper with ½ cup of shredded cheddar cheese for added flavor. - Pour a little water into the bottom of the baking dish. Cover the dish with aluminum foil. This helps keep the peppers moist. - Bake the stuffed peppers in the preheated oven for 25-30 minutes. Check for doneness; they should be fork-tender. Enjoy your delicious Stuffed Bell Pepper Boats with vibrant colors and flavors! For the full recipe, please refer back to the recipe section. To start, cutting bell peppers right matters. Slice off the tops using a sharp knife. Be careful not to cut too deep. Next, remove the seeds and white membranes inside. A small spoon works great for this. Rinse the peppers under cold water to clean them. For even cooking, place your stuffed peppers tightly in the baking dish. This helps them cook at the same rate. Mixing flavors is key, too. Use spices like cumin and smoked paprika to boost taste. You can taste the filling before you stuff the peppers. Adjust the salt and pepper as needed. Serving your stuffed bell pepper boats can be fun. Use a colorful platter to catch the eye. Arrange the peppers upright, showing off their filling. You can add a wedge of lime on the side for a fresh touch. A sprinkle of chopped cilantro or parsley adds color and flavor. You can prepare stuffed peppers ahead of time. Stuff them and cover with foil. Store them in the fridge for up to a day. This makes meal prep easy for busy nights. For sides, consider a fresh salad or crusty bread. You can also pair them with rice or quinoa for a filling meal. These peppers are great for family dinners or potlucks. For the full recipe, check out Stuffed Bell Pepper Boats. {{image_4}} You can easily make this dish vegetarian. Substituting quinoa with rice or couscous works well. Rice gives a nice texture, while couscous cooks faster. Both options taste great in these stuffed bell pepper boats. Adding different vegetables also boosts flavor and nutrition. Try diced zucchini, mushrooms, or spinach. These veggies add color and crunch. You can mix and match to fit your taste. Want to add meat? Ground turkey or beef makes a hearty filling. Just cook the meat before adding it to the quinoa mixture. This step ensures the meat is safe to eat. When adding meat, adjust the spices. You might want to use more cumin or paprika. This adjustment gives the dish a richer taste. Cheese can take your stuffed peppers to the next level. Mozzarella or feta are great choices. Mozzarella melts beautifully, while feta adds a tangy twist. For even more flavor, add layers of salsa or sauce. It keeps the filling moist and adds a kick. You can also drizzle some sauce on top before baking. This extra step makes the dish even more delicious. Check out the [Full Recipe] for all the details! To keep your stuffed bell pepper boats fresh, store them in an airtight container. This helps lock in moisture and flavor. You can keep them in the fridge for about 3 to 4 days. If you want to save them for later, allow them to cool completely before storing. You can freeze stuffed peppers both before and after baking. If you freeze them before cooking, wrap them tightly in plastic wrap and then in aluminum foil. This keeps out air and prevents freezer burn. If you choose to freeze them after baking, let them cool first. Then, place them in a freezer-safe container. They will stay good for up to 3 months. To reheat your stuffed peppers, the oven works best. Preheat it to 350°F (175°C). Place the peppers in a baking dish and cover with foil. Bake for about 20 to 25 minutes until heated through. You can also use a microwave if you're in a hurry. Just place one pepper on a plate and heat for 2 to 3 minutes. This method may make them a bit softer, but they'll still taste great! To make stuffed bell peppers in advance, prepare the filling first. Cook the quinoa and mix it with your beans, corn, and spices. Once mixed, stuff each bell pepper with the filling. You can store them in the fridge for up to two days before baking. Cover them tightly to keep them fresh. When ready to bake, just pop them into the oven. This saves you time and effort on busy nights. Yes, you can use other types of peppers! Try using poblano, Anaheim, or even jalapeño peppers. Each type adds a unique flavor and spice level. Poblano peppers are mild and have a rich taste. They also hold a good amount of filling. If you like a bit of heat, jalapeños are a great choice. Just remember to adjust the cooking time if your peppers are smaller. Stuffed bell pepper boats pair well with many side dishes. Some great options include a fresh green salad, roasted vegetables, or rice. You can also serve them with a side of guacamole or salsa for added flavor. If you want something warm, consider serving bread or cornbread. These sides complement the flavors and make for a complete meal. To adjust the spice level, you can add or reduce spices. For less heat, skip the cumin and paprika. If you want more flavor, add some chili powder or crushed red pepper. You can also mix in diced jalapeños or hot sauce. Start with a little and taste as you go. This way, you can find the perfect balance for your taste. Yes, this dish can be gluten-free! The main ingredients, like quinoa and beans, are naturally gluten-free. Just be sure to check that your vegetable broth is gluten-free as well. If you add other ingredients, like sauces or spices, check their labels. This way, you can enjoy a safe and tasty meal. Stuffed bell peppers are simple and fun to make. We covered the key ingredients and steps to prepare them. You learned how to customize flavors and presentation. Remember, you can use different spices, grains, or veggies. These peppers can please everyone, regardless of diet. Enjoy your meal prep and share these tasty, healthy treats with friends and family. Happy cooking!](https://goldendishy.com/wp-content/uploads/2025/07/06b7afd9-4005-4ab6-8aaa-ba374b5d3167-768x768.webp)
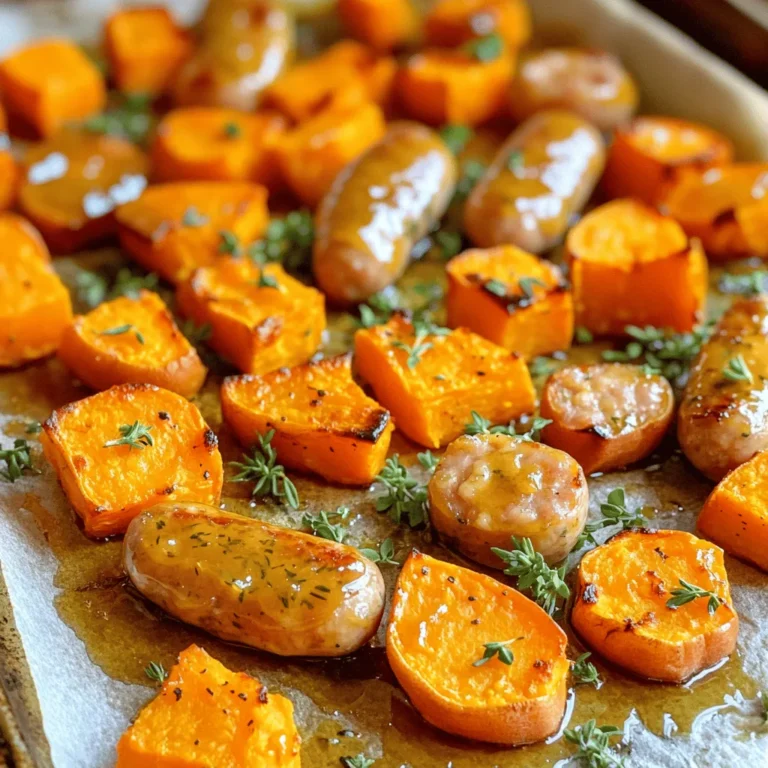
![- 1 cup green or brown lentils, thoroughly rinsed - 1 tablespoon coconut oil - 1 medium onion, finely chopped - 3 garlic cloves, minced - 1-inch piece of fresh ginger, grated - 1 can (14 oz) full-fat coconut milk - 2 ripe tomatoes, diced - 1 tablespoon curry powder - 1 teaspoon ground cumin - 1 teaspoon ground turmeric - 1 cup vegetable broth (use low-sodium if preferred) - 2 cups fresh spinach or kale, chopped - Sea salt and freshly ground black pepper to taste - Fresh cilantro, chopped (for garnish, optional) To make this Easy Vegan Lentil Curry, you need a few key items. The lentils are the base. They bring protein and texture. I prefer green or brown lentils because they hold their shape well. Rinsing them removes dust and ensures you start with clean lentils. Next, the coconut oil adds a rich, creamy taste. It helps sauté the onion, garlic, and ginger. These three ingredients create a fragrant base. They add depth and warmth to the curry. Tomatoes add sweetness and acidity. They balance the creamy coconut milk perfectly. The spices—curry powder, cumin, and turmeric—bring warmth and flavor. They transform the dish into a vibrant, colorful meal. For added nutrition, I recommend spinach or kale. These greens are packed with vitamins. They also bring a lovely color to the curry. Finally, fresh cilantro adds a bright, fresh flavor. You can use it as a garnish or mix it in for extra taste. For the full recipe, check out the detailed instructions. This dish is not only simple but full of flavor! - Heat 1 tablespoon of coconut oil in a medium pot over medium heat. - Once the oil is hot, add 1 finely chopped onion. Sauté for about 5 minutes. The onion should become soft and clear. - Next, add 3 minced garlic cloves and 1-inch grated ginger. Cook for 1 to 2 minutes. You want the kitchen to smell amazing! - Now, add 2 diced tomatoes, 1 tablespoon of curry powder, 1 teaspoon of ground cumin, and 1 teaspoon of ground turmeric. - Stir and cook this mix for about 2 to 3 minutes. This step helps the spices release their lovely flavors and soften the tomatoes. - Add 1 cup of rinsed lentils to the pot. Then, pour in 1 can of full-fat coconut milk and 1 cup of vegetable broth. - Stir well to combine, then bring the mix to a gentle boil. Once it boils, turn the heat down and cover the pot. Let it simmer for 25 to 30 minutes. Check the lentils to see if they are tender and creamy. - After the lentils are cooked, fold in 2 cups of chopped spinach or kale. Cook for about 5 minutes. The greens should be bright and wilted. - Taste the curry and add sea salt and freshly ground black pepper to make it just right for you. For the full recipe, you can check out the details above. Enjoy your cooking! You can adjust spices to suit your taste. If you love heat, add more curry powder. A dash of lime juice brightens the dish. It adds a fresh twist that wakes up the flavors. To save time, use pre-cooked lentils. They cook faster and save you at least 20 minutes. Vegetable broth can boost flavor without much work. It gives your curry a rich taste. Serve your curry in shallow bowls. A sprinkle of cilantro on top creates a nice look. Pair it with fluffy rice or warm naan. This makes your meal more filling and fun to eat. For the full recipe, check out the details above. {{image_4}} You can change the type of lentils in your curry. - Red lentils cook faster and give a smoother texture. - Black or French lentils add more firmness and bite. Using different lentils can change the dish's look and feel. I find red lentils to be a great option for a quick meal. They break down nicely, making the curry creamy. Black lentils keep their shape, adding a nice texture. Spices can make your curry unique. - Try garam masala or chili powder for a spicy kick. - Fresh herbs like cilantro or mint can brighten the flavor. Experimenting with spices can lead to exciting new tastes. Garam masala adds warmth and depth, while chili powder can increase heat. Fresh herbs not only taste great but also add color to your dish. Adding extra vegetables boosts nutrition and flavor. - Carrots or bell peppers add sweetness and crunch. - Swap kale for other leafy greens like Swiss chard. Incorporating more veggies is a fun way to customize your curry. Carrots add a lovely sweetness, while bell peppers bring crunch and color. Swiss chard can be a great substitute for kale and offers a different taste profile. To keep your Easy Vegan Lentil Curry fresh, store leftovers in an airtight container. This method helps maintain flavor and texture. You can keep it in the fridge for up to 4 days. If you want to save it for later, freeze portions for up to 3 months. Just make sure to label the container with the date. When you're ready to enjoy your curry again, reheat it on the stove. Add a splash of vegetable broth to keep it creamy and delicious. Stir it often to ensure even heating. If you're in a hurry, you can microwave it too. Do this in short bursts, stirring frequently to avoid hot spots. Always check for signs of spoilage before eating. Look for any off smells or changes in color. If your curry looks or smells strange, it’s best to discard it. Safety first! Enjoy your meal knowing you stored it well. For the full recipe, check out the earlier sections. - Prep time: 10 minutes, Total time: 40 minutes Making this curry is quick and easy. You will spend about 10 minutes getting ready. Cooking takes an additional 30 minutes. This means you can enjoy a tasty meal in just 40 minutes! - Yes, the flavors meld nicely if made a day ahead You can make this curry in advance. If you prepare it a day before, the flavors will blend well. This makes the dish even tastier when you eat it later. - Great with rice, quinoa, or naan for a hearty meal This curry pairs perfectly with many side dishes. Rice is a classic choice, but quinoa works well too. You can also serve it with warm naan for a filling meal. - Yes, all ingredients are naturally gluten-free You will be glad to know this recipe is gluten-free. All the ingredients, like lentils and coconut milk, do not contain gluten. This makes it a safe choice for anyone avoiding gluten. For the full recipe, check out the [Full Recipe]. This Easy Vegan Lentil Curry is tasty and simple to make. You learned about the main ingredients, step-by-step instructions, flavor tips, and storage info. Customization options, like different lentils and spices, let you make it your own. This dish is perfect for meal prep and serving with rice or naan. Remember to store leftovers properly and watch for spoilage signs. Enjoy this dish that is not only healthy but full of flavor! You will love experimenting with it for your next meal.](https://goldendishy.com/wp-content/uploads/2025/06/33b3e4d2-4af0-4f09-8df6-36adfea2fbd1-768x768.webp)