
Crispy Air Fryer Brussels Sprouts Simple and Flavorful Dish
Looking for a simple yet flavorful dish that impresses? Try my Crispy Air Fryer Brussels Sprouts! These little green gems are tasty, healthy, and fast to make. With just a few ingredients, you’ll have a crunchy side that pairs perfectly with any meal. Plus, I’ll share tips to get them just right! Ready to transform this humble vegetable into a delightful treat? Let’s dive in!
Ingredients
List of Required Ingredients
– 1 lb Brussels sprouts, trimmed and halved
– 2 tablespoons extra virgin olive oil
– 1 teaspoon garlic powder
– 1 teaspoon onion powder
– 1 teaspoon smoked paprika
– ½ teaspoon sea salt
– ¼ teaspoon freshly ground black pepper
– 2 tablespoons balsamic glaze (for drizzling)
– Fresh parsley, finely chopped (for garnish)
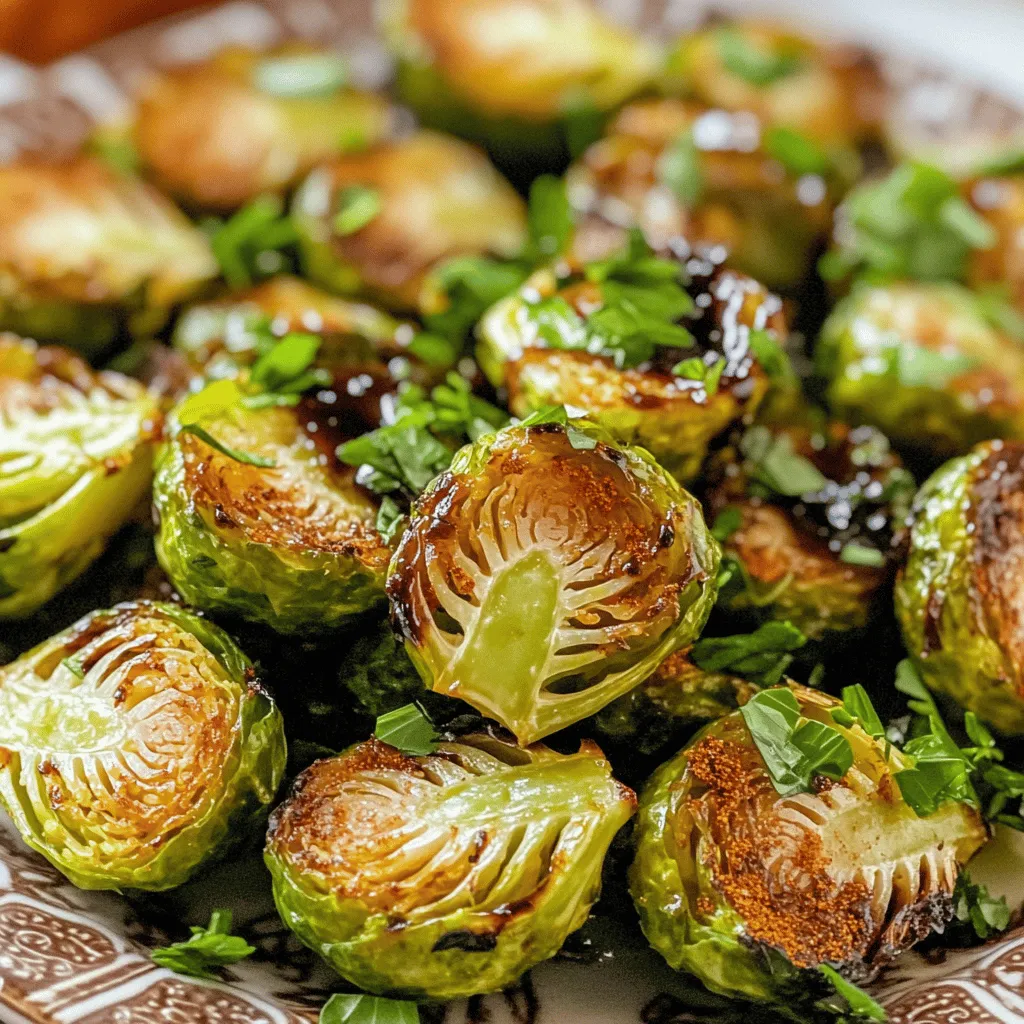
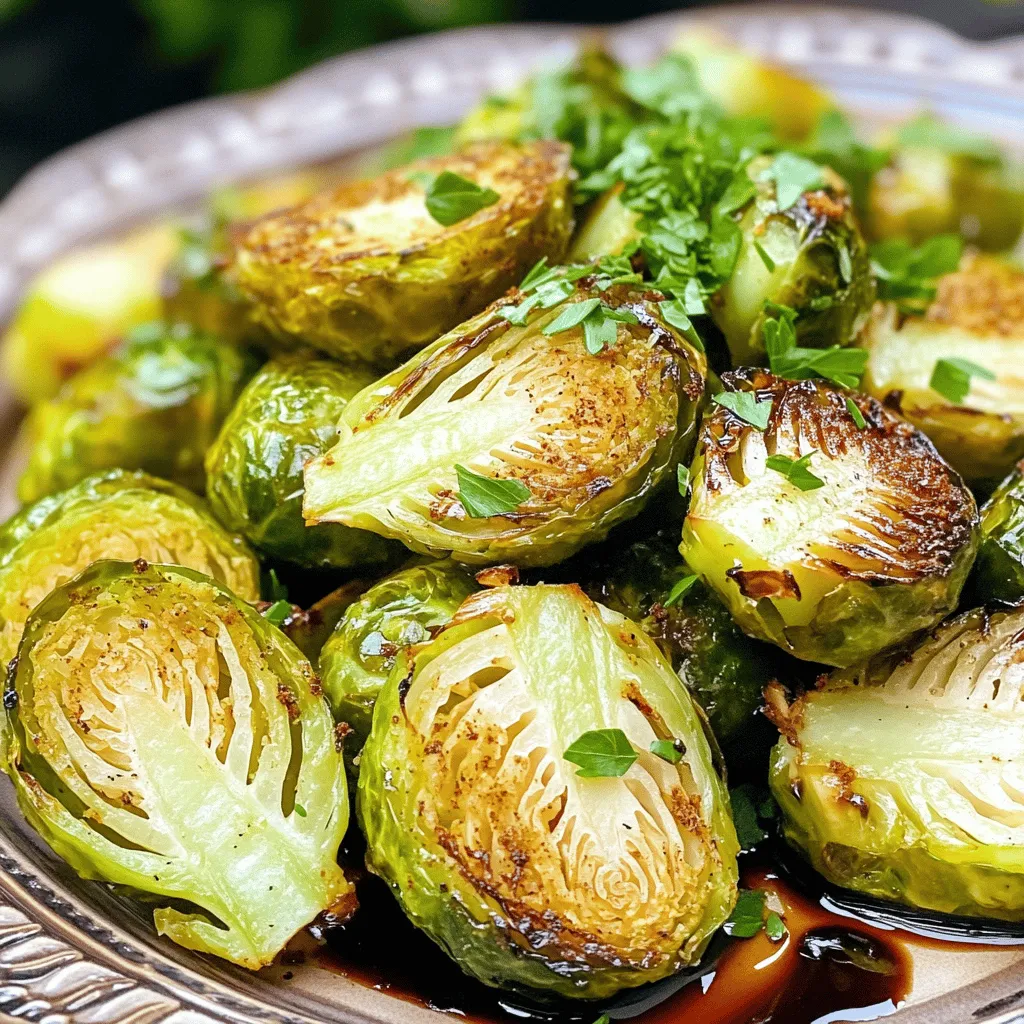
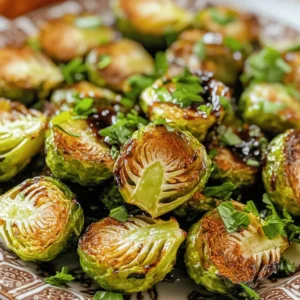
To make crispy air fryer Brussels sprouts, you need fresh Brussels sprouts. Choose bright green ones without blemishes. Halve them for even cooking. The olive oil helps them crisp up nicely. Garlic powder and onion powder add great flavor. Smoked paprika gives a warm, smoky taste. Sea salt and black pepper balance the dish perfectly. Balsamic glaze adds a sweet finish, while parsley brightens the look.
This list creates a simple, tasty dish that anyone can enjoy.
Step-by-Step Instructions
Preheat the Air Fryer
Set the air fryer to 375°F (190°C). Preheat it for 5 minutes. This step ensures your Brussels sprouts cook evenly and get that perfect crisp.
Prepare the Brussels Sprouts
Take 1 pound of trimmed and halved Brussels sprouts. In a large bowl, add 2 tablespoons of extra virgin olive oil. Then, sprinkle in 1 teaspoon of garlic powder, 1 teaspoon of onion powder, 1 teaspoon of smoked paprika, ½ teaspoon of sea salt, and ¼ teaspoon of freshly ground black pepper. Toss everything together until the Brussels sprouts are well coated. This mix brings out their natural flavor and adds a nice kick.
Air Frying the Brussels Sprouts
Place the seasoned Brussels sprouts in the air fryer basket. Make sure they sit in a single layer. This step is key to getting them crispy. Cook for 15 to 18 minutes. Halfway through, shake the basket to ensure all sides get crispy. When they turn golden brown, they’re ready to enjoy!
For a finishing touch, drizzle with balsamic glaze and sprinkle fresh parsley on top.
Tips & Tricks
Achieving Perfect Crispiness
To get your Brussels sprouts crispy, keep a few tips in mind. First, do not overcrowd the air fryer basket. This step is key for even cooking and crispiness. If you pack too many in, they will steam instead of fry. Spread them out in a single layer for the best results.
Next, I recommend cooking them for 15 to 18 minutes. Check them halfway through and shake the basket. This action helps them brown evenly on all sides. If you want them extra crispy, add a few more minutes, but watch closely!
Serving Suggestions
Presentation matters! When serving, place your crispy Brussels sprouts on a nice platter. Drizzle extra balsamic glaze over them for a beautiful finish. Sprinkle chopped parsley on top for color and freshness.
If you want to add a zesty kick, serve lemon wedges on the side. A squeeze of fresh lemon juice can brighten the dish and enhance the flavors. Pair these crispy sprouts with your favorite protein for a complete meal. Enjoy!
Variations
Flavor Variations
You can easily change the flavor of crispy air fryer Brussels sprouts. Here are some ideas:
– Add spices: Try chili powder for heat or cumin for a warm, earthy taste.
– Use fresh herbs: Toss in rosemary or thyme before cooking for a fragrant aroma.
– Alternate cooking methods: If you prefer, roast the Brussels sprouts in the oven. Just heat it to 400°F (200°C) and follow the same steps. The flavors will be rich and the texture nice.
These small changes can take your dish to the next level.
Dietary Adjustments
Adjusting the recipe for dietary needs is simple:
– Vegan option: The recipe is already vegan! Just make sure your balsamic glaze has no added sugars or animal products.
– Gluten-free: This dish is naturally gluten-free. Just check your seasonings to ensure they are gluten-free.
– Low-sodium: Use herbs like garlic powder and lemon juice instead of salt. This keeps flavor high while sodium stays low.
These adjustments make the dish suitable for everyone. Enjoy experimenting with flavors and dietary needs!
Storage Info
Storing Leftovers
To keep your crispy Brussels sprouts fresh, store them in an airtight container. Place them in the fridge within two hours of cooking. They will stay good for about three days. After that, the flavor and texture may decline. Avoid stacking them too high. This helps keep them crispy for longer.
Reheating Tips
When it’s time to enjoy your leftovers, reheating is key. I recommend using the air fryer again. Set it to 350°F (175°C) and heat for about 5 to 7 minutes. This method helps to restore their crispiness. You can also use the oven. Place them on a baking sheet at 375°F (190°C) for about 10 minutes. Either way, enjoy the great taste of your leftover crispy air fryer Brussels sprouts!
FAQs
How can I make Brussels sprouts less bitter?
To reduce bitterness, choose fresh Brussels sprouts. Look for bright green, firm sprouts. When preparing, trim the ends and remove any yellow leaves. You can also soak them in cold water for 10 minutes before cooking. This simple step can help draw out some of the bitter flavors. Roasting or air frying with seasonings like garlic or smoked paprika will add flavor and balance the bitterness.
Can I use frozen Brussels sprouts in this recipe?
Yes, you can use frozen Brussels sprouts! Just remember they may not get as crispy as fresh ones. For frozen sprouts, increase the cooking time by 3 to 5 minutes. Make sure to thaw and drain them first. Pat them dry with a towel to remove excess moisture. This will help achieve better crispiness.
What can I pair with crispy Brussels sprouts for a meal?
Crispy Brussels sprouts are great with many dishes. Pair them with grilled chicken or baked salmon for protein. They also go well with quinoa or mashed potatoes for starch. Add a fresh salad on the side for a colorful touch. Drizzle more balsamic glaze over your meal for extra flavor. Enjoy the balance of textures and tastes!
In this post, we covered how to make crispy Brussels sprouts in an air fryer. You learned essential ingredients, step-by-step cooking instructions, and tips for the perfect crunch. We explored flavor variations and dietary adjustments, plus storage and reheating methods. Enjoy these tasty sprouts as a side or snack! With some practice, you’ll impress with your crispy creations. Keep experimenting, and you’ll find your favorite way to enjoy Brussels sprouts.


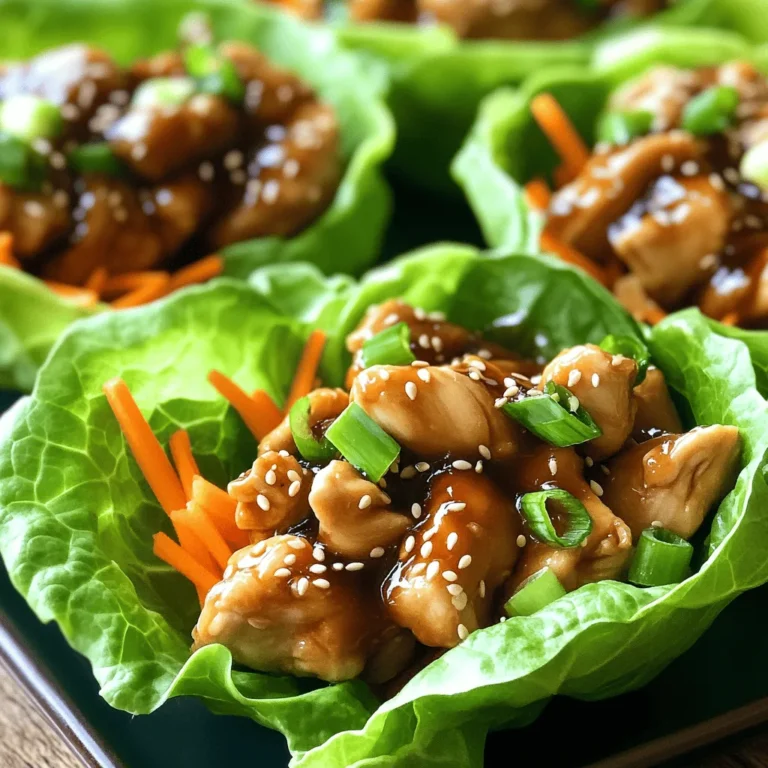
![To make teriyaki chicken lettuce wraps, you need a few key ingredients. These create the rich flavors and fresh textures. Here’s what you’ll need: - 1 lb (450g) boneless, skinless chicken breast, finely diced - 1 tablespoon canola oil - 1/2 cup bell pepper, finely chopped (choose red or yellow for sweetness) - 1/2 cup carrot, grated (for a touch of crunch) - 3 green onions, beautifully sliced - 2 cloves garlic, minced (for aromatic depth) - 1/4 cup low-sodium soy sauce (to control saltiness) - 2 tablespoons honey (for a hint of natural sweetness) - 1 tablespoon rice vinegar (to balance flavors) - 1 teaspoon sesame oil (for a nutty aroma) - 1 teaspoon fresh ginger, grated (adds a zesty kick) - 1 head of butter lettuce or iceberg lettuce, with leaves gently separated These ingredients come together to create a joyful, tasty meal. Garnishes can elevate your dish. While not required, they add flair and flavor. Here are some great options: - Sesame seeds (for garnish, optional but recommended) - Fresh cilantro or parsley, for garnish (optional) Adding these garnishes can make your wraps look and taste even better. Lettuce is key for wraps. It holds the filling perfectly. Here are tips to choose the best lettuce: - Look for crisp, fresh leaves. Avoid any wilting or browning. - Butter lettuce has a soft, pliable texture, perfect for wrapping. - Iceberg lettuce offers a nice crunch but can be thicker. Choose what you like best for your teriyaki chicken lettuce wraps. To start, gather your ingredients. You need: - 1 lb boneless, skinless chicken breast, finely diced - 1 tablespoon canola oil - 1/2 cup bell pepper, finely chopped - 1/2 cup carrot, grated - 3 green onions, beautifully sliced - 2 cloves garlic, minced - 1/4 cup low-sodium soy sauce - 2 tablespoons honey - 1 tablespoon rice vinegar - 1 teaspoon sesame oil - 1 teaspoon fresh ginger, grated - 1 head of butter or iceberg lettuce, leaves separated - Sesame seeds and fresh herbs for garnish Make sure your chicken is chopped small. This helps it cook evenly. Chop the bell pepper finely for sweetness and color. Grate the carrot for crunch. Slice the green onions thin. Mince the garlic and grate the ginger to release their flavors. Heat the canola oil in a large skillet over medium heat. Wait until the oil shimmers. Add the diced chicken and cook it for 5-7 minutes. Stir often until the chicken is brown and fully cooked. Then, add the minced garlic, grated ginger, and chopped bell pepper. Sauté this mixture for 2-3 minutes. The bell pepper should soften and blend with the chicken. In a small bowl, whisk together the soy sauce, honey, rice vinegar, and sesame oil. When well combined, pour this sauce into the skillet. Now, gently fold in the grated carrots and sliced green onions. Cook for another 2-3 minutes. This helps the sauce coat everything and thicken slightly. Remove the skillet from heat. Let the teriyaki chicken cool for a few minutes. This resting time allows the flavors to meld beautifully. To serve, take a lettuce leaf and place a generous spoonful of the teriyaki chicken mixture in the center. This creates your wrap. For added flavor, sprinkle sesame seeds and fresh herbs on top. Serve the wraps right away. Encourage everyone to wrap them up and enjoy the fresh, vibrant flavors. For the full details on making this dish, check out the Full Recipe. For juicy chicken, choose fresh chicken breast. Cut it into small, even pieces. This helps it cook evenly. Heat your skillet before adding oil. Use medium heat to avoid burning. Stir the chicken often. This keeps it from sticking and ensures even cooking. Add garlic and ginger early. This builds a great flavor base. Cook until the chicken is completely brown and firm. To wrap your lettuce, use large, whole leaves. Butter or iceberg lettuce works best. Place a spoonful of chicken in the center. Fold the sides in first, then roll it up. This keeps the filling secure. Make sure the wrap is tight but not too tight. You want it to hold together without falling apart. Arrange your wraps on a platter. Add extra garnishes like sesame seeds for a beautiful look. You can change the flavor of your wraps easily. Add extra veggies like cucumbers or radishes. They give a nice crunch. For a spicy kick, include sliced jalapeños or sriracha sauce. If you like nuts, add chopped peanuts or cashews. You can also switch the protein. Try ground turkey or tofu for a new taste. Mix and match to find your favorite flavor combo. For the complete recipe, check out the [Full Recipe]. {{image_4}} You can switch up the protein in your wraps. If you like beef, use ground beef or diced steak. For a lighter choice, try shrimp or fish, like salmon. If you prefer turkey, ground turkey works well too. Each protein brings its own flavor and texture. Just adjust the cooking time to ensure everything cooks through. To make these wraps vegetarian or vegan, use tofu or tempeh. Both options absorb flavors well. Press and cube the tofu before cooking to remove extra moisture. For a tasty twist, you can use cooked lentils or chickpeas. These options give a hearty bite while keeping your meal plant-based. Add fun flavors to your wraps! You can mix in crushed peanuts or cashews for crunch. Fresh herbs like basil or mint can add a fresh taste. Spice lovers may enjoy a dash of sriracha or chili flakes for heat. You can also add diced pineapple or mango for a sweet twist. These enhancements make your wraps even more exciting! For the complete recipe, check the [Full Recipe]. After enjoying your teriyaki chicken lettuce wraps, you may have leftovers. To store them, place the wraps in an airtight container. Keep the chicken mixture and lettuce leaves separate. This helps keep the lettuce crisp and fresh. Store in the fridge for up to three days. When you're ready to enjoy your leftovers, simply reheat the chicken mixture. Use a skillet over medium heat. Stir until heated through, about 5 minutes. Avoid microwaving the lettuce, as it may become soggy. Assemble the wraps just before eating for the best taste. Meal prepping makes weeknight cooking easy. You can prepare the chicken mixture ahead and store it in the fridge. Use the Full Recipe to guide your prep. To save time, chop vegetables on the weekend. This way, you have everything ready to go when you need a quick dinner. Enjoy your healthy wraps any night! To make the sauce, start with low-sodium soy sauce for a savory base. Add honey for sweetness and rice vinegar for a tangy kick. Then, mix in sesame oil for a nutty aroma. Combine these in a bowl and whisk until smooth. This sauce balances flavors, making your wraps burst with taste. Yes, you can make this dish ahead of time. Prepare the teriyaki chicken mixture and store it in an airtight container. Keep it in the fridge for up to three days. When ready to eat, reheat the mixture in a skillet over medium heat. Serve it with fresh lettuce leaves for a quick meal. Pair your lettuce wraps with some light side dishes. Here are a few great options: - Steamed jasmine rice for a filling side. - Edamame sprinkled with sea salt for a healthy snack. - A simple cucumber salad for a refreshing crunch. - Miso soup for warmth and depth. These sides complement the flavors of the wraps beautifully. For the full recipe, check out [Full Recipe]. Teriyaki chicken lettuce wraps are fun and tasty. We covered key ingredients, cooking steps, and tips to make them juicy. You learned how to customize and store your wraps for busy nights. This dish fits many diets with easy variations and great sides. Enjoy trying new flavors and sharing with friends. You now have all the tools to create delicious wraps that anyone can love. Keep experimenting and have fun in the kitchen!](https://goldendishy.com/wp-content/uploads/2025/06/72f6a023-630c-4819-9e2f-2135bf5b7418-768x768.webp)