Grilled Pineapple Chicken Skewers Juicy and Flavorful
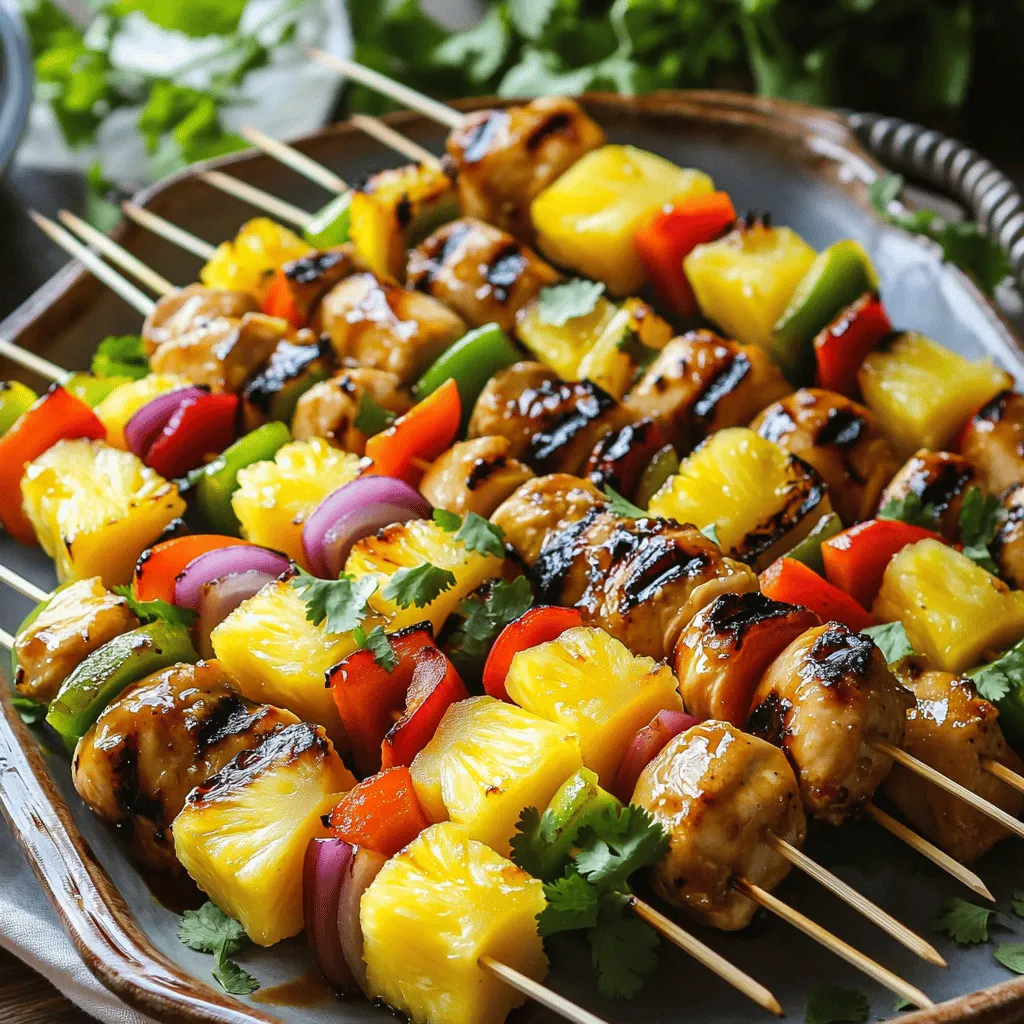
If you’re ready to take your grilling game to the next level, you need to try my Grilled Pineapple Chicken Skewers. Juicy chicken, sweet pineapple, and colorful veggies come together for a burst of flavor in every bite. With a simple marinade and easy grilling steps, you’ll impress your friends and family in no time. Let’s dive into the tasty details and make your next meal unforgettable!
Ingredients
Main Ingredients
– 1 lb chicken breast, cut into 1-inch cubes
– 1 cup fresh pineapple chunks
– 1 red bell pepper, cut into 1-inch squares
– 1 green bell pepper, cut into 1-inch squares
– 1 small red onion, cut into 1-inch squares
Marinade Ingredients
– 3 tablespoons soy sauce
– 2 tablespoons honey
– 1 tablespoon olive oil
– 2 cloves garlic, minced
– 1 teaspoon fresh ginger, grated
– Salt and pepper to taste
Skewers and Preparation
– Skewers (soaked in water if using wooden ones)
To make Grilled Pineapple Chicken Skewers, you need fresh, high-quality ingredients. I like to start with chicken breast because it cooks quickly and stays juicy. The pineapple adds a sweet touch that pairs well with the savory chicken.
When I prepare the veggies, I cut them into 1-inch squares. This size helps them cook evenly on the grill. The red and green bell peppers add color and crunch, while the onion gives a nice flavor boost.
The marinade is key to making these skewers tasty. I mix soy sauce, honey, olive oil, minced garlic, and grated ginger. This blend gives a sweet and savory kick. The salt and pepper help to bring out all the flavors.
I always soak wooden skewers in water to prevent burning. This small step helps keep everything on the skewer intact while grilling.Just follow those steps, and you’ll have delicious skewers ready to enjoy.
Step-by-Step Instructions
Preparing the Marinade
Combine soy sauce, honey, olive oil, garlic, ginger, salt, and pepper. Whisk thoroughly to blend and create a marinade. This step is key for deep flavor. The mix of sweet and salty makes the chicken shine.
Marinating the Chicken
Add cubed chicken and ensure it’s coated in marinade. This helps the chicken absorb all the good flavors. Cover and refrigerate for a minimum of 30 minutes to 2 hours. The longer it sits, the better it tastes.
Assembling the Skewers
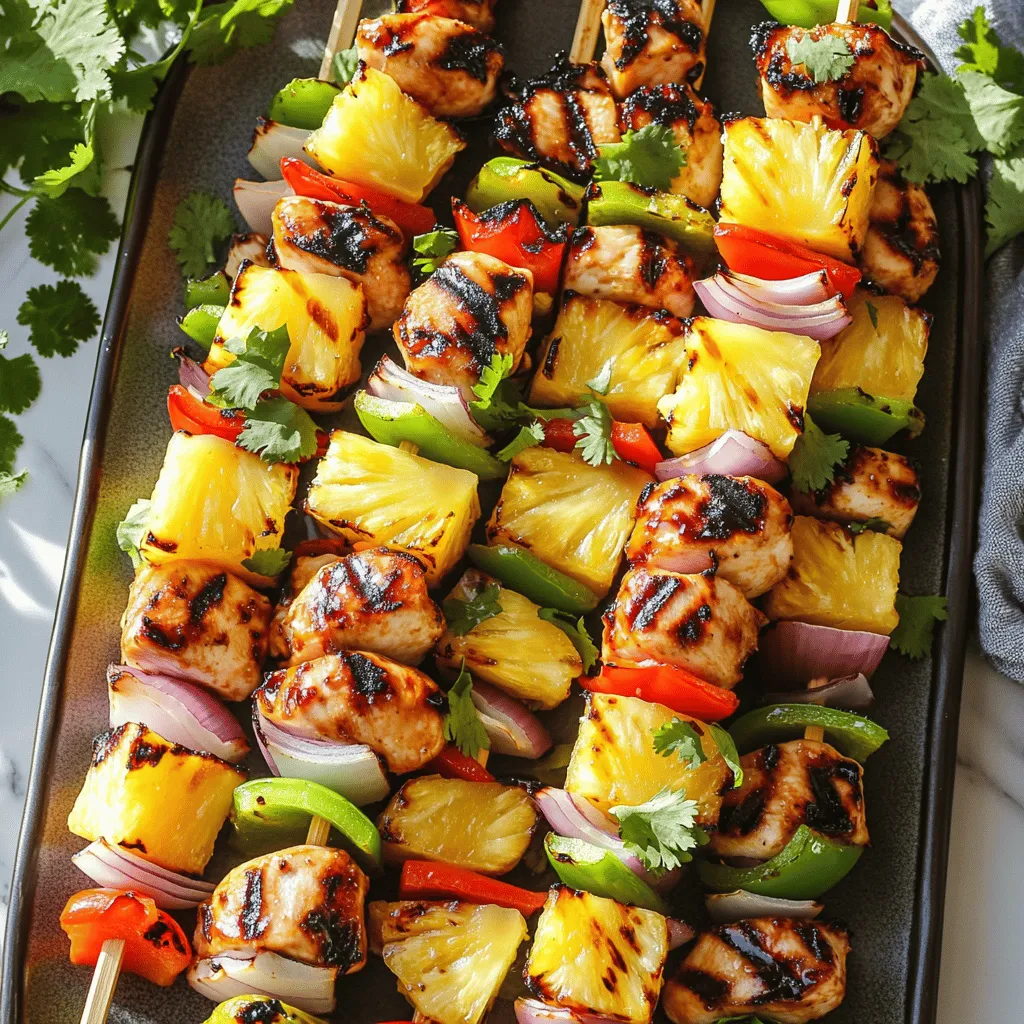
Thread chicken, pineapple, bell peppers, and onion onto the skewers. Mix the colors and flavors for a fun look. Each bite should have a bit of everything. Make sure to not pack them too tightly. This helps them cook evenly.
Grilling the Skewers
Preheat the grill to medium-high heat and prepare the grates. A hot grill gives the best sear. Grill skewers for approximately 12-15 minutes, turning occasionally. This helps cook the chicken evenly and gives it nice grill marks. Brush with leftover marinade in the final minutes for added flavor. This keeps the chicken juicy and adds a glaze. Enjoy the aroma as they cook!
Tips & Tricks
Marinating Tips
– Marinate chicken for longer for deeper flavor infusion. A good rule is at least 30 minutes.
– Experiment with different herbs or spices in the marinade. This will add unique tastes to your skewers.
Grilling Tips
– Preheat the grill properly to prevent sticking. A hot grill gives nice grill marks and locks in juices.
– Use a meat thermometer to check the internal temperature (165°F). This ensures your chicken is safe to eat.
Serving Suggestions
– Garnish skewers with fresh herbs and additional pineapple chunks. This makes your dish look vibrant and fresh.
– Serve with a dipping sauce or side salad for a complete meal. A sweet sauce can balance the savory chicken.
Variations
Dietary Adjustments
You can make these skewers fit your diet easily. Want a vegetarian option? Use tofu! It soaks up the marinade well. If you prefer seafood, shrimp is a great choice too. For a healthier version, swap regular soy sauce for low-sodium soy sauce. This change cuts down on salt without losing flavor.
Flavor Variations
Let’s spice things up! Add chili flakes for a spicy kick. This will warm your taste buds and make each bite exciting. You can also switch up the fruits. Try mango for a sweet twist or zucchini for a fresh crunch. Each fruit brings a new flavor profile, making your skewers unique every time.
Presentation Variations
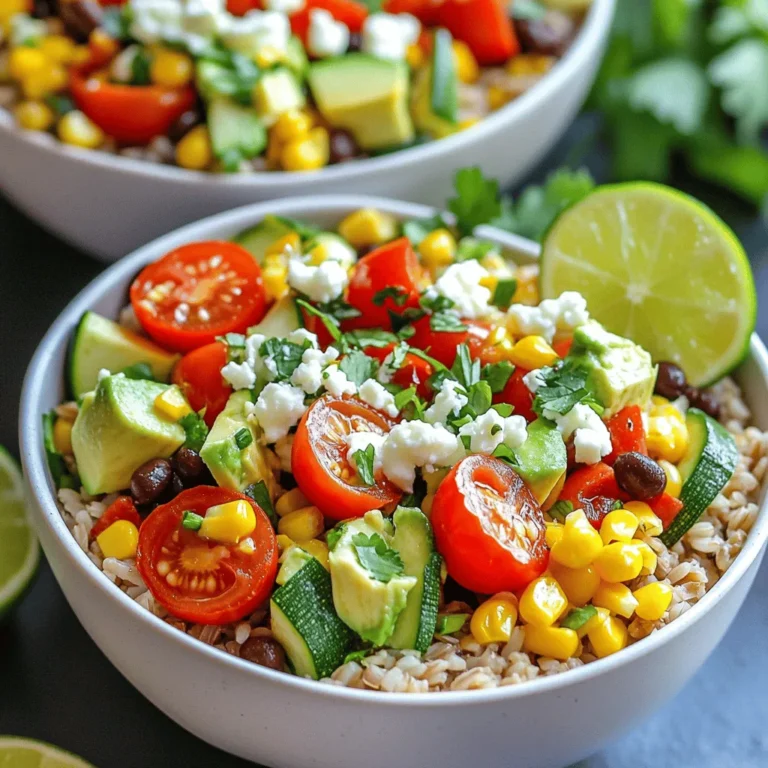
How you serve these skewers matters! Place them over a bed of rice or quinoa. This not only looks good but also adds a nice base to your meal. Use colorful plates to enhance the tropical theme. A bright platter can make your dish pop and impress your guests.
Storage Info
Refrigeration
Store your cooked skewers in an airtight container. They will stay fresh for up to 3 days. This is a great way to enjoy leftovers. You can easily reheat them for a quick meal.
Freezing
You can freeze uncooked marinated chicken and veggies together. Just put them in a freezer-safe bag. They will last for up to 2 months. This makes meal prep simple and quick. When you are ready to cook, just thaw them in the fridge overnight.
Reheating
Reheat your skewers in the oven or on the grill. The oven keeps them warm without drying them out. If you use the grill, it helps to maintain the texture. Just make sure they are heated through. Enjoy the juicy flavors again!
FAQs
How long can I marinate chicken for skewers?
Chicken can be marinated for a minimum of 30 minutes and up to 2 hours for best flavor. This allows the chicken to soak up all the tasty flavors from the marinade. If you have time, longer marinating makes the chicken even more juicy and flavorful.
Can I make Grilled Pineapple Chicken Skewers in the oven?
Yes, cook the skewers on a baking sheet at 400°F for 15-20 minutes. This method works well if you can’t grill outside. Just make sure to turn the skewers halfway through for even cooking.
What is the best way to cut vegetables for skewers?
Cut vegetables into uniform 1-inch pieces for even cooking. This helps all the veggies cook at the same rate. If some pieces are bigger, they may not cook through.
Can I make these skewers ahead of time?
Yes, assemble them ahead and store them in the refrigerator until ready to grill. You can prep them earlier in the day and just pop them on the grill when you’re ready for dinner.
What should I serve with Grilled Pineapple Chicken Skewers?
These skewers pair well with rice, salad, or grilled vegetables. The fresh flavors match nicely with a light side. If you want a complete meal, add some dipping sauce for extra taste.
In this post, we covered how to make delightful Grilled Pineapple Chicken Skewers. We discussed essential ingredients, from chicken and pineapple to the marinade, and outlined easy cooking steps. I also shared tips for grilling, serving suggestions, and storage info.
With these insights, you can create a tasty meal that impresses anyone. Enjoy experimenting with flavors and variations to make it your own!

![- 8 ounces fettuccine or spaghetti - 1 pound boneless, skinless chicken breast - 2 cups cremini or button mushrooms - 3 cloves garlic - 1 medium onion - 1 cup heavy cream - 1 tablespoon extra virgin olive oil - 1 teaspoon dried thyme - 1/2 cup freshly grated Parmesan cheese When you gather these ingredients, you're on your way to a delicious meal. The fettuccine or spaghetti forms the base of the dish. I love using fresh chicken breast; it cooks quickly and stays juicy. The mushrooms add a rich flavor that pairs perfectly with the cream sauce. For the additional ingredients, garlic and onion bring depth. They form the aromatic base of your sauce. The heavy cream is key for that creamy finish that makes this dish so comforting. Don't forget the seasonings! Extra virgin olive oil helps cook the chicken and gives a lovely flavor. Dried thyme adds a nice herbal note, while the Parmesan cheese makes everything taste even better. This dish is not just tasty; it’s simple and quick. You can find the full recipe to guide you step by step. Enjoy the process of cooking and savor your savory chicken and mushroom pasta! To start, bring a large pot of salted water to a rolling boil. Add 8 ounces of fettuccine or spaghetti. Cook the pasta according to the package directions until it is al dente. This usually takes about 8-10 minutes. When the pasta is ready, drain it but save about 1 cup of the pasta water. This water is important for later. It helps make the sauce creamy and smooth. While the pasta cooks, heat 1 tablespoon of extra virgin olive oil in a large skillet over medium heat. Add 1 pound of diced boneless, skinless chicken breast to the skillet. Cook the chicken for about 6-8 minutes, stirring occasionally. You want it golden brown and fully cooked. Season the chicken with salt and freshly ground black pepper. This will boost the flavor. Once done, take the chicken out and set it aside on a plate. In the same skillet, add 1 medium onion, finely chopped, and 3 cloves of minced garlic. Sauté these for about 3 minutes. You want the onion to turn translucent and fragrant. Next, add 2 cups of sliced cremini or button mushrooms to the skillet. Cook the mushrooms for about 5 minutes, stirring now and then. They should soften and release their moisture. Now, sprinkle 1 teaspoon of dried thyme and 1 teaspoon of Italian seasoning blend over the mushrooms. Stir to mix it well. Pour in 1 cup of heavy cream and bring the mixture to a gentle simmer. Let it thicken for about 3-5 minutes, stirring often. Finally, return the cooked chicken to the skillet. Mix it well with the sauce. If the sauce is too thick, gradually add some reserved pasta water until you reach your desired consistency. Now, add the drained pasta to the skillet. Toss everything together until the pasta is well coated with the sauce. Stir in 1/2 cup of freshly grated Parmesan cheese until it melts and creates a rich, creamy texture. Taste and adjust the seasoning with more salt or pepper if needed. For more detail, check the [Full Recipe]. Enjoy creating this delightful dish! To make your chicken and mushroom pasta really shine, consider adding a dash of lemon juice or zest. It brightens up the dish. Fresh herbs like basil or oregano also add great flavor. You can use a splash of white wine while cooking the chicken. This adds depth and richness. For cooking techniques, try searing the chicken on high heat. This gives it a nice golden crust. When cooking mushrooms, don't crowd the pan. This helps them brown nicely. To thicken your sauce, let it simmer longer. Stir it often to avoid burning. You can also add a bit of grated cheese. This helps create a creamy texture. If your sauce is too thick, use reserved pasta water. Slowly add it in, mixing well. This water has starch that helps the sauce stick to the pasta. For plating, use a large bowl or individual plates. Twirl the pasta with a fork for a neat look. Top each serving with a sprinkle of fresh parsley. This adds color and a fresh taste. To elevate your dish, add more grated Parmesan on top. A light sprinkle of cracked black pepper adds a nice touch. Enjoy your beautiful and tasty meal! {{image_4}} You can change the protein in this dish to fit your taste. If you want to try other meats, consider using shrimp or turkey. Both blend well with the creamy sauce and mushrooms. If you're looking for vegetarian options, tofu or chickpeas work great. They add protein and soak up the flavors. If you have dietary restrictions, you can swap the chicken for plant-based alternatives. Many brands offer delicious meatless chicken that mimics the texture and taste. This makes it easy for everyone to enjoy this dish. Switching up the type of pasta can give your meal a fresh twist. You can use penne, rigatoni, or even whole wheat pasta. Each choice brings its own flavor and texture. If you need gluten-free options, look for pasta made from rice, corn, or lentils. These options are tasty and keep the dish light. If you're looking for dairy-free options, substitute heavy cream with coconut milk or cashew cream. Both will provide a rich and creamy texture. You can also add veggies to boost flavor. Spinach, broccoli, or bell peppers can enhance the dish. Just sauté them with the onions and garlic for added taste. For the full recipe, check out Heavenly Chicken & Mushroom Fettuccine. To keep chicken and mushroom pasta fresh, store it in an airtight container. Always let it cool first before sealing. Place the container in the fridge. It should last for 3 to 4 days. Use glass or BPA-free plastic containers for the best results. To freeze chicken and mushroom pasta, follow these steps: 1. Allow the dish to cool completely. 2. Place it in a freezer-safe container or heavy-duty freezer bag. 3. Remove as much air as possible before sealing. 4. Label the container with the date. It can stay frozen for up to 2 months. When ready to eat, thaw it in the fridge overnight. To reheat your pasta, use these methods: - Stovetop: Heat in a skillet over medium heat. Add a splash of water or broth to prevent sticking. - Microwave: Place in a microwave-safe bowl. Cover with a damp paper towel and heat in 1-minute intervals. Avoid overcooking by checking often. Stir to ensure even heating. Enjoy your meal! For the full recipe, check out Heavenly Chicken & Mushroom Fettuccine. Chicken and mushroom pasta lasts about 3 to 4 days in the fridge. Store it in an airtight container. This keeps the pasta fresh and safe to eat. Make sure to cool it to room temperature before putting it in the fridge. This helps prevent bacteria growth. Yes, you can make chicken and mushroom pasta ahead of time. Cook the dish and let it cool completely. Then, store it in the fridge. When you are ready to eat, reheat it on low heat. Add a splash of cream or pasta water to keep it creamy. Side dishes that pair well include: - Garlic bread - A fresh green salad - Steamed vegetables - Roasted asparagus These options add variety and color to your meal. Yes, chicken and mushroom pasta is great for meal prep. You can store individual portions in containers. This makes it easy to grab a meal on busy days. Just remember to keep the pasta sauce separate if you want to avoid soggy noodles. You can use dried mushrooms if fresh ones are not available. Just soak them in warm water for about 20 to 30 minutes. Drain and chop them before adding to the dish. This way, you still get rich mushroom flavor in your pasta. For the best results, use a mix of dried and fresh mushrooms if you can. In this post, we covered how to make a tasty Chicken and Mushroom Pasta. You learned about key ingredients like chicken, mushrooms, and pasta. We walked through each step, from cooking the pasta to making a creamy sauce. You now have tips to boost flavor and present your dish well. Remember, you can adapt this recipe with different proteins or sauces. Keep it fresh by following our storage tips. Enjoy cooking and sharing this delicious meal!](https://goldendishy.com/wp-content/uploads/2025/06/be10f885-e993-4582-ae05-a82ade9d612d-768x768.webp)