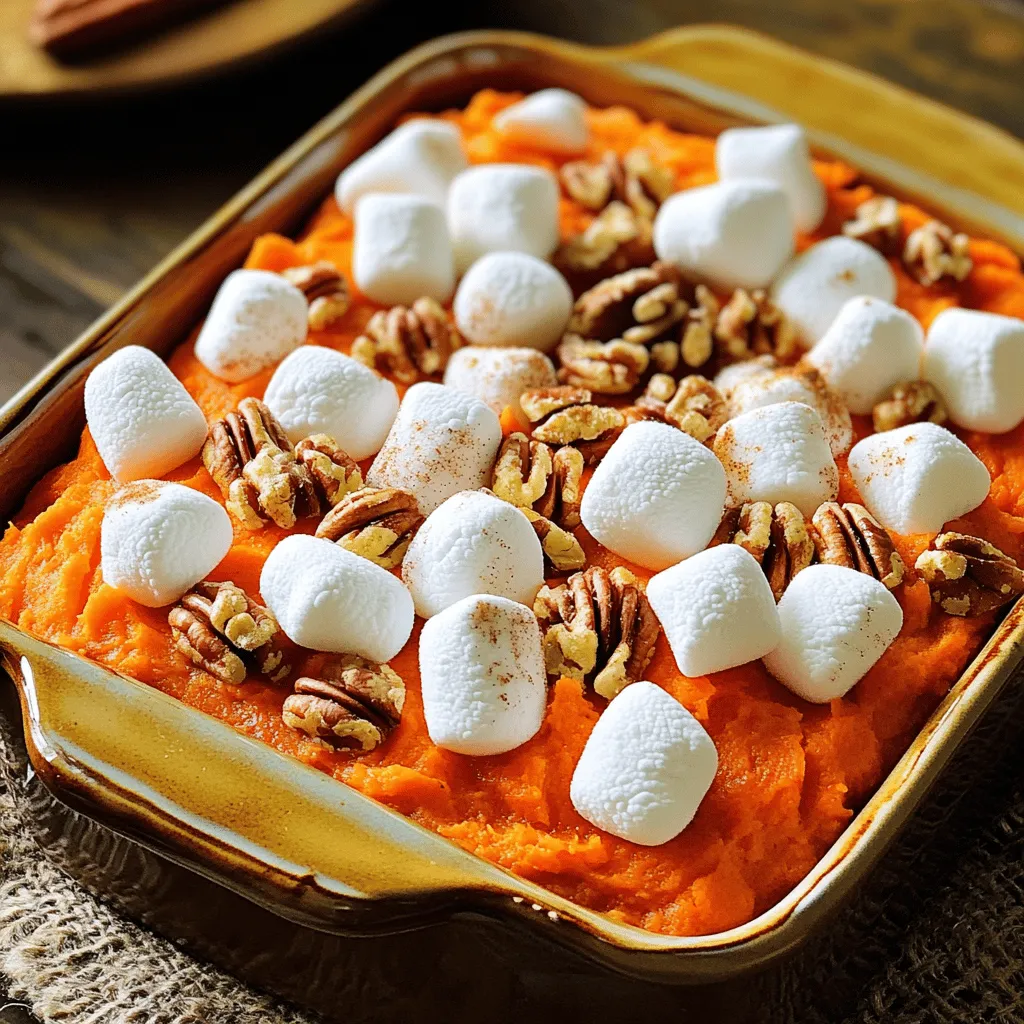
Sweet Potato Casserole with Marshmallows Delight
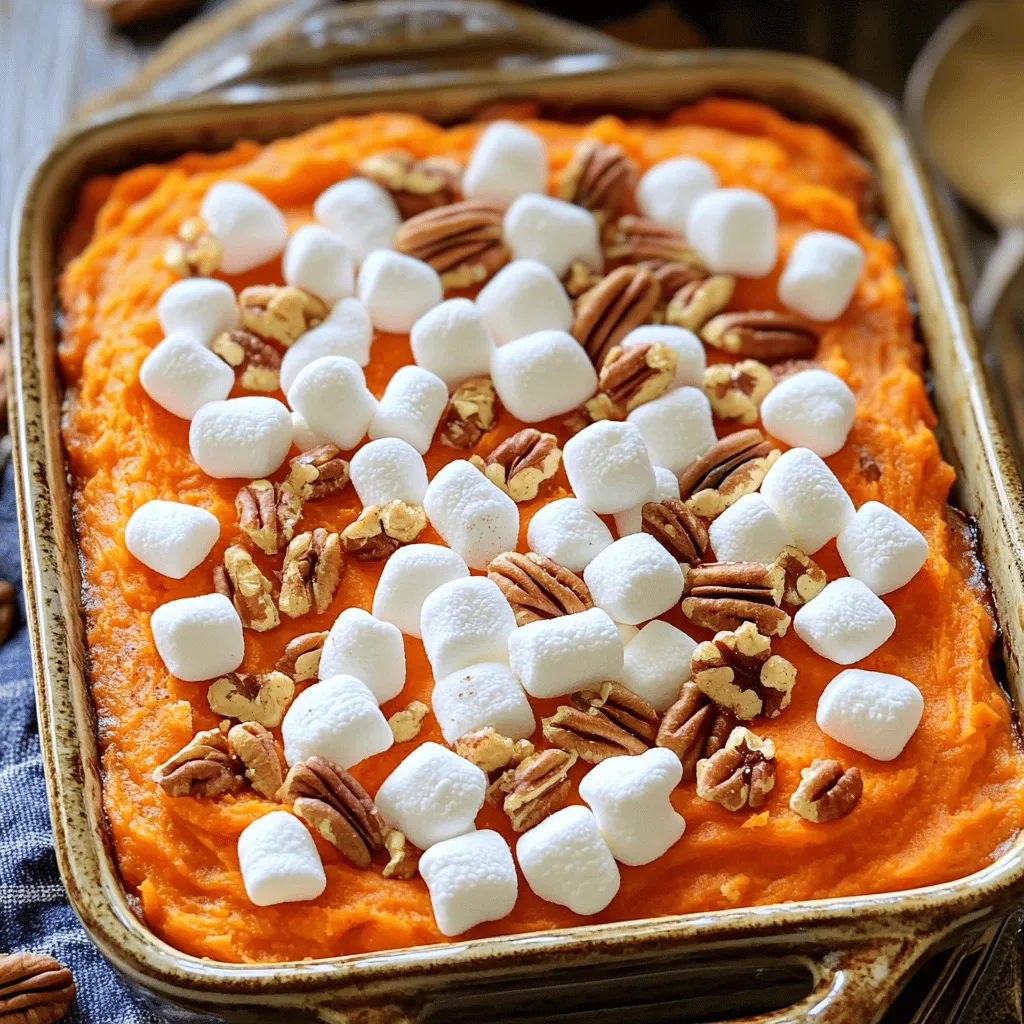
Are you ready to take your holiday table to the next level? Sweet potato casserole with marshmallows is a classic side dish that everyone loves! Whether you’re a novice cook or a seasoned chef, I’ll guide you through each step. From creamy sweet potatoes to that delicious, toasted marshmallow topping, you’ll learn how to make this dish shine. Let’s dive into the sweet goodness together!
Ingredients
Main Ingredients
– 4 medium sweet potatoes, peeled and cut into 1-inch cubes
– 1/2 cup brown sugar, packed
– 1/4 cup unsalted butter, melted and slightly cooled
– 1/2 cup whole milk
Sweet potatoes are the star of this dish. They bring a natural sweetness and creamy texture. I choose medium sweet potatoes for even cooking and a nice balance of flavor.
Brown sugar adds a rich sweetness. It complements the sweet potatoes well. The unsalted butter helps create a smooth, velvety base. Whole milk makes the filling creamy and rich.
Seasonings and Flavorings
– 1/2 teaspoon ground cinnamon
– 1/4 teaspoon ground nutmeg
– 1/4 teaspoon sea salt
– 1 teaspoon pure vanilla extract
The seasonings elevate the dish. Ground cinnamon and nutmeg add warmth and depth. Sea salt balances the sweetness, bringing out the flavors. Pure vanilla extract adds a lovely aroma and taste.
Optional Add-ins
– 1 cup mini marshmallows
– 1/2 cup chopped pecans
Mini marshmallows are a must for that gooey topping. They melt beautifully and caramelize to create a sugary crust. Chopped pecans add a nice crunch and nutty flavor. You can mix them in or sprinkle them on top.
Step-by-Step Instructions
Preparing the Sweet Potatoes
1. Start by boiling water in a large pot. Add salt for flavor.
2. Cut four medium sweet potatoes into 1-inch cubes.
3. Carefully add the sweet potatoes to the boiling water.
4. Cook for 15-20 minutes or until they are tender.
5. Drain the sweet potatoes and let them cool slightly.
6. Transfer the sweet potatoes to a mixing bowl.
7. Use a potato masher or fork to mash them until smooth and creamy.
Combining Ingredients
1. Add the following to your mashed sweet potatoes:
– 1/2 cup packed brown sugar
– 1/4 cup melted unsalted butter
– 1/2 cup whole milk
– 1/2 teaspoon ground cinnamon
– 1/4 teaspoon ground nutmeg
– 1/4 teaspoon sea salt
– 1 teaspoon pure vanilla extract
2. Stir everything together until well combined. Aim for a smooth mixture with no lumps.
Baking the Casserole
1. Preheat your oven to 350°F (175°C).
2. Lightly grease a 9×13 inch baking dish with cooking spray or butter.
3. Pour the sweet potato mixture into the baking dish. Spread it evenly.
4. Generously sprinkle 1 cup of mini marshmallows over the top.
5. If you like, add 1/2 cup of chopped pecans for a nice crunch.
6. Bake for 25-30 minutes. Look for golden brown marshmallows on top.
7. Remove the casserole from the oven. Let it cool for about 5 minutes before serving.
Tips & Tricks
Perfecting the Dish
To make your sweet potato casserole just right, focus on sweetness. Use less brown sugar if you prefer a less sweet dish. For a richer taste, consider adding a touch of maple syrup. This gives a nice balance to the sweet potatoes.
For a creamy texture, mash your sweet potatoes well. You want them smooth, with no lumps. Adding whole milk helps, but you can use cream for extra richness. If you want to lighten it up, use almond milk instead.
Presentation Enhancements
How you serve matters! A simple garnish can make your dish pop. Try a light dusting of cinnamon on top. This adds color and a hint of spice. You can also add whole pecans for a rustic look.
Serve the casserole warm from the baking dish. This makes it feel cozy and inviting. Pair it with roasted turkey or green beans for a full meal. The blend of flavors will delight your guests.
Time-Saving Tips
Want to save time? Use pre-cooked sweet potatoes or canned alternatives. This cuts down on cooking time. Just mash and mix with your other ingredients.
For holidays, prep ahead! You can make the casserole the night before. Store it in the fridge and bake it the next day. This helps you enjoy time with family while the dish cooks.
Variations
Flavor Variations
You can make sweet potato casserole even better! Adding spices like ginger or cloves gives it a warm kick. These spices blend well with sweet potatoes and make each bite exciting.
Using maple syrup instead of brown sugar is another option. It adds a rich, natural sweetness. The syrup enhances the overall flavor and makes the dish feel special.
Dietary Alternatives
If you need dairy-free or vegan options, swap the milk and butter for plant-based versions. Almond milk or coconut milk works great. For butter, use vegan butter or coconut oil. This way, everyone can enjoy the casserole.
Making it gluten-free is easy too. Most ingredients are naturally gluten-free. Just check labels for any hidden gluten. This makes the dish safe for those with gluten sensitivities.
Unique Ingredients
You can also get creative with unique ingredients. Adding fruits like apples or cranberries adds a nice twist. They bring a sweet and tart flavor that brightens the dish.
For extra crunch and flavor, add different nuts or seeds. Chopped pecans or walnuts work well. They add texture and a nutty taste that complements the sweet potatoes nicely.
Storage Info
Refrigeration Tips
To store leftovers, let the casserole cool first. Transfer it to an airtight container. You can also cover the dish tightly with plastic wrap. Make sure no air gets in. This keeps your casserole fresh and tasty.
Freezing the Casserole
You can freeze the casserole before or after baking. If freezing before, prepare it as normal but skip baking. Wrap it well in plastic wrap and foil. If you want to freeze it after baking, let it cool first. Then, cover it in the same way. To thaw, move it to the fridge overnight. Reheat in the oven at 350°F until warm. This keeps the flavors intact.
Shelf Life
The casserole lasts about 3-5 days in the fridge. If frozen, it can last up to 3 months. Just remember to check for any off smells or weird textures before eating. Following these tips will help keep your sweet potato casserole with marshmallows delightful!
FAQs
How long does it take to bake sweet potato casserole with marshmallows?
Baking sweet potato casserole with marshmallows takes about 25-30 minutes at 350°F (175°C). This time ensures that the marshmallows puff up and turn golden brown, adding a delicious topping to your sweet potatoes.
Can you make this casserole ahead of time?
Yes, you can prepare the casserole ahead of time. Cook the sweet potatoes and mix them with the other ingredients. Place the mixture in your baking dish but do not add the marshmallows yet. Cover it and store it in the fridge. When you are ready, add the marshmallows and bake as directed.
What can I substitute for marshmallows?
If you want a different topping, consider using crushed graham crackers for a s’mores vibe. You can also use a mix of chopped nuts and a drizzle of maple syrup. These alternatives give a unique twist while keeping the dish sweet and crunchy.
Is this casserole suitable for a gluten-free diet?
Yes, this casserole is gluten-free. It uses sweet potatoes, which are naturally gluten-free. Just ensure that any added ingredients, like marshmallows, are also gluten-free. Always check labels to be sure.
In this blog post, we explored how to make a delicious sweet potato casserole. We discussed the key ingredients, like sweet potatoes and spices, that create a flavorful dish. You learned the steps to prepare, combine, and bake the casserole to perfection. Tips were shared for making it creamier and more appealing. Remember, variations and storage options can keep this dish fresh and exciting. With these insights, you can enjoy and share this classic recipe with friends and family. Happy cooking!

![To make Brown Butter Peach Muffins, gather these simple ingredients: - 1 cup unsalted butter - 1 ½ cups all-purpose flour - 1 teaspoon baking powder - ½ teaspoon baking soda - ½ teaspoon salt - 1 cup brown sugar, packed - 2 large eggs - 1 teaspoon vanilla extract - 1 cup ripe peaches, diced (fresh or canned, drained) - ½ teaspoon ground cinnamon - ½ cup chopped walnuts or pecans (optional) You can tweak this recipe based on your taste. Here are some ideas: - Fruits: Swap peaches for diced apples or blueberries. - Nuts: Use almonds or leave them out for nut-free muffins. - Sweeteners: Try coconut sugar instead of brown sugar for a different flavor. - Dairy-Free: Replace butter with coconut oil or vegan butter. Each muffin has about: - Calories: 220 - Fat: 10g - Carbohydrates: 30g - Protein: 3g - Fiber: 1g These muffins are a tasty treat! They are soft and flavorful, perfect for breakfast or snacks. If you want a detailed recipe, check the Full Recipe. Start by preheating your oven to 350°F (175°C). This temperature ensures even baking. While the oven warms up, prepare your muffin tin. You can use paper liners or grease each cup with cooking spray. This step helps the muffins release easily. Next, take a medium saucepan and melt the unsalted butter over medium heat. Stir often. Keep cooking until the butter turns a deep golden brown. This should take about 5-7 minutes. You’ll know it’s ready when you smell a nutty aroma. Once browned, remove the pan from the heat and let the butter cool for a bit. In a large mixing bowl, whisk together the following dry ingredients: - 1 ½ cups all-purpose flour - 1 teaspoon baking powder - ½ teaspoon baking soda - ½ teaspoon salt - ½ teaspoon ground cinnamon Make sure they are well blended. This mix gives the muffins their structure and flavor. In another bowl, combine the brown sugar and the cooled browned butter. Mix them until they blend well. Then, add in 2 large eggs, one at a time. Make sure each egg mixes in fully before adding the next. Finally, stir in 1 teaspoon of vanilla extract. This mix adds sweetness and depth. Now, slowly add your dry ingredients to the wet mixture. Gently stir until everything is just combined. Be careful not to overmix. This keeps the muffins light and fluffy. Using a spoon or cookie scoop, fill each muffin cup with the batter. Aim for about ¾ full. This allows space for the muffins to rise while baking. Place the muffin tin in your preheated oven. Bake for 18-22 minutes. Check for doneness by inserting a toothpick into the center of a muffin. If it comes out clean, your muffins are ready! Once done, let them cool in the tin for about 5 minutes. After that, transfer them to a wire rack to cool completely. For the Full Recipe, check the main article. To make your muffins light and fluffy, you need to focus on a few key steps. First, do not overmix your batter. Overmixing makes muffins dense. Stir the wet and dry ingredients until just combined. Second, make sure your baking powder and baking soda are fresh. Old leavening agents won't give your muffins the rise they need. Third, use room temperature eggs. This helps the batter mix evenly and rise well. Sometimes muffins don’t turn out as planned. Here are some quick fixes: - Muffins are too dense: This often happens from overmixing or too much flour. Measure your flour correctly, using a spoon to fill your measuring cup. - Muffins are too dry: This may be due to overbaking. Keep an eye on your muffins. Remove them when a toothpick comes out with a few moist crumbs, not clean. - Muffins do not rise: Check your leavening agents. Make sure they are fresh, or your muffins won’t rise well. Brown butter peach muffins are delicious on their own. For a special touch, serve them warm with whipped cream or ice cream. You can pair them with a drizzle of honey or a sprinkle of cinnamon sugar for added flavor. These muffins also go well with a cup of coffee or a glass of cold milk. For a light meal, enjoy them with fresh fruit or a yogurt parfait. For the full recipe, check the section above. {{image_4}} You can switch out the peaches for other fruits. Try diced apples for a crunchy twist. Ripe bananas add a sweet flavor. Berries like blueberries or raspberries work well too. Just remember to adjust the sugar based on the fruit's sweetness. For example, berries might need less sugar than peaches. Adding spices can boost your muffins' flavor. Ground cinnamon is a classic choice. You can also try nutmeg for warmth or ginger for a spicy kick. Vanilla extract adds richness, but almond extract gives a lovely twist. Start with half a teaspoon and adjust to your taste. If you need gluten-free muffins, swap all-purpose flour for a gluten-free blend. Make sure it’s a 1:1 ratio for best results. Some blends work well, but check for added ingredients. Adding a bit of xanthan gum can help bind the muffins together too. Enjoy your gluten-free treats without missing out on flavor! For the full recipe, you can refer to [Full Recipe]. To keep your brown butter peach muffins fresh, store them properly. Place them in an airtight container. This helps keep them moist and soft. You can leave them at room temperature for up to three days. If you have more muffins than you can eat, consider freezing some. For long-term storage, freezing is a great option. First, let the muffins cool completely. Wrap each muffin in plastic wrap. Then, place the wrapped muffins in a freezer-safe bag. This protects them from freezer burn. You can freeze the muffins for up to three months. When you're ready to eat one, just thaw it at room temperature. To enjoy your muffins warm, reheating is key. Preheat your oven to 350°F (175°C). Place the muffins on a baking sheet. Heat them for about 5-10 minutes. This will make them taste fresh again. You can also microwave a single muffin for about 15-20 seconds. Enjoy your warm treat! For the full recipe, check out the details above. You can check if your muffins are done by using a toothpick. Insert it into the center of a muffin. If it comes out clean, your muffins are ready. If it has wet batter on it, bake them a little longer. Also, the muffins should be golden brown on top. They will spring back slightly when touched. Yes, you can use frozen peaches in this recipe. Make sure to thaw them and drain any excess juice. This will help keep your muffins from being too wet. Chopping the peaches into smaller pieces works best. The flavor will still be great, and you can enjoy these muffins any time of year. If you don't have brown sugar, you can use white sugar. To mimic the flavor, mix in a bit of molasses. Use 1 cup of white sugar and add 1 tablespoon of molasses. This will give you a similar taste and moisture. You can also try coconut sugar as a healthier option. To make these muffins vegan, you can replace the eggs. Use 1/4 cup of unsweetened applesauce or a flax egg. To make a flax egg, mix 1 tablespoon of ground flaxseed with 2.5 tablespoons of water. Let it sit for a few minutes until it thickens. You can also use plant-based butter instead of regular butter. For the milk, almond or oat milk works well. Enjoy your vegan Brown Butter Peach Muffins! In this post, I covered the key ingredients for great muffins, along with optional swaps. I shared clear steps for making them from start to finish. Tips for fluffy texture and serving ideas were also included. You can even explore variations for added flavor or dietary needs. Remember, baking is fun! With the right techniques and ingredients, you can create tasty treats. Enjoy your muffin-making journey!](https://goldendishy.com/wp-content/uploads/2025/06/50b67b19-d2d9-4992-8745-9e9518e1dce5-768x768.webp)