
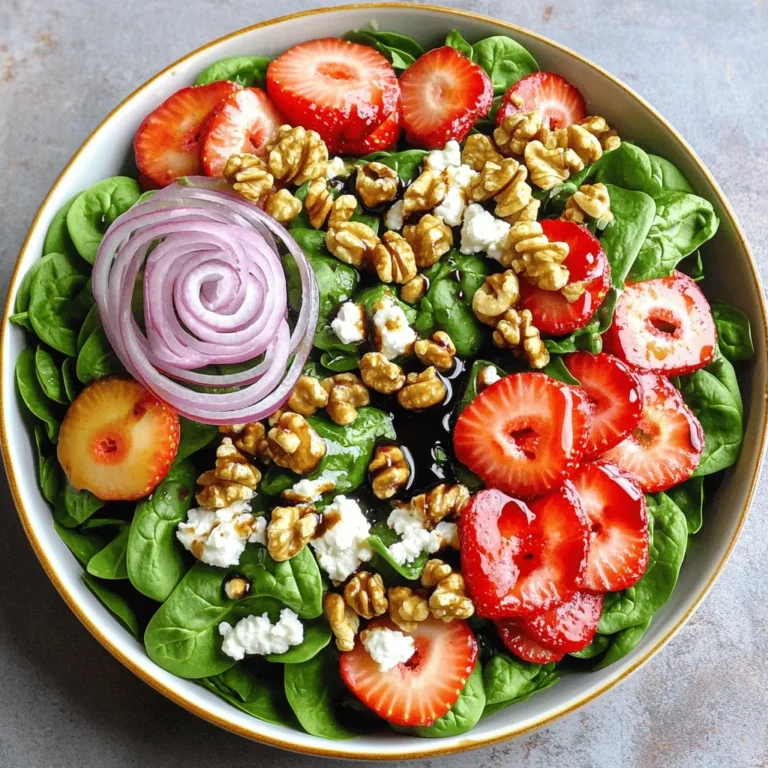
Easy Greek Salad Fresh and Flavorful Delight
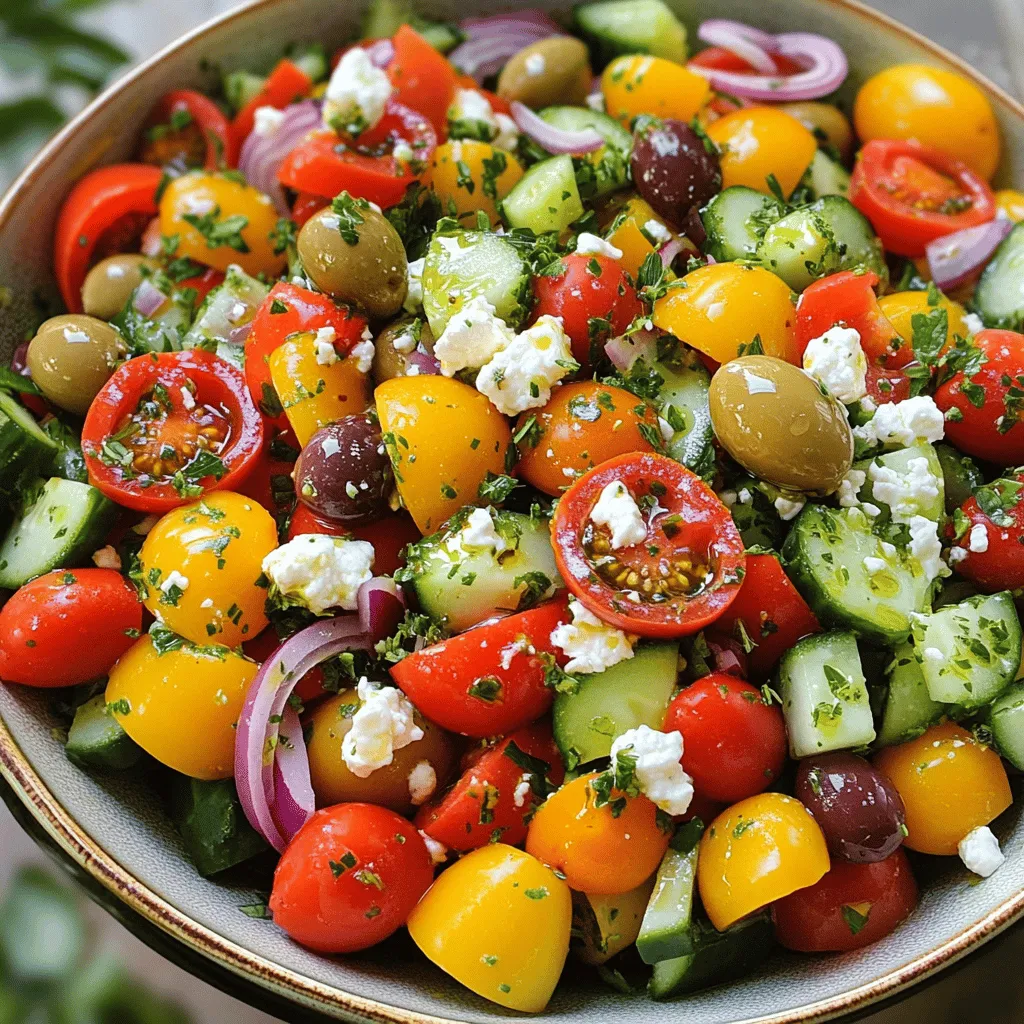
Looking for a fresh and flavorful dish? You’ll love this Easy Greek Salad! Packed with vibrant veggies, briny olives, and creamy feta, it’s a simple treat for any meal. I’ll guide you through each step, from selecting top-notch ingredients to creating a zesty dressing that brings everything together. Get ready to impress your taste buds with a Mediterranean delight that’s both healthy and delicious!
Ingredients
Creating an easy Greek salad is all about fresh ingredients. Here’s what you need:
Fresh Produce
– 2 cups cherry tomatoes, halved
– 1 medium cucumber, diced
– 1 bell pepper (red or yellow), chopped into bite-sized pieces
– 1/2 medium red onion, thinly sliced
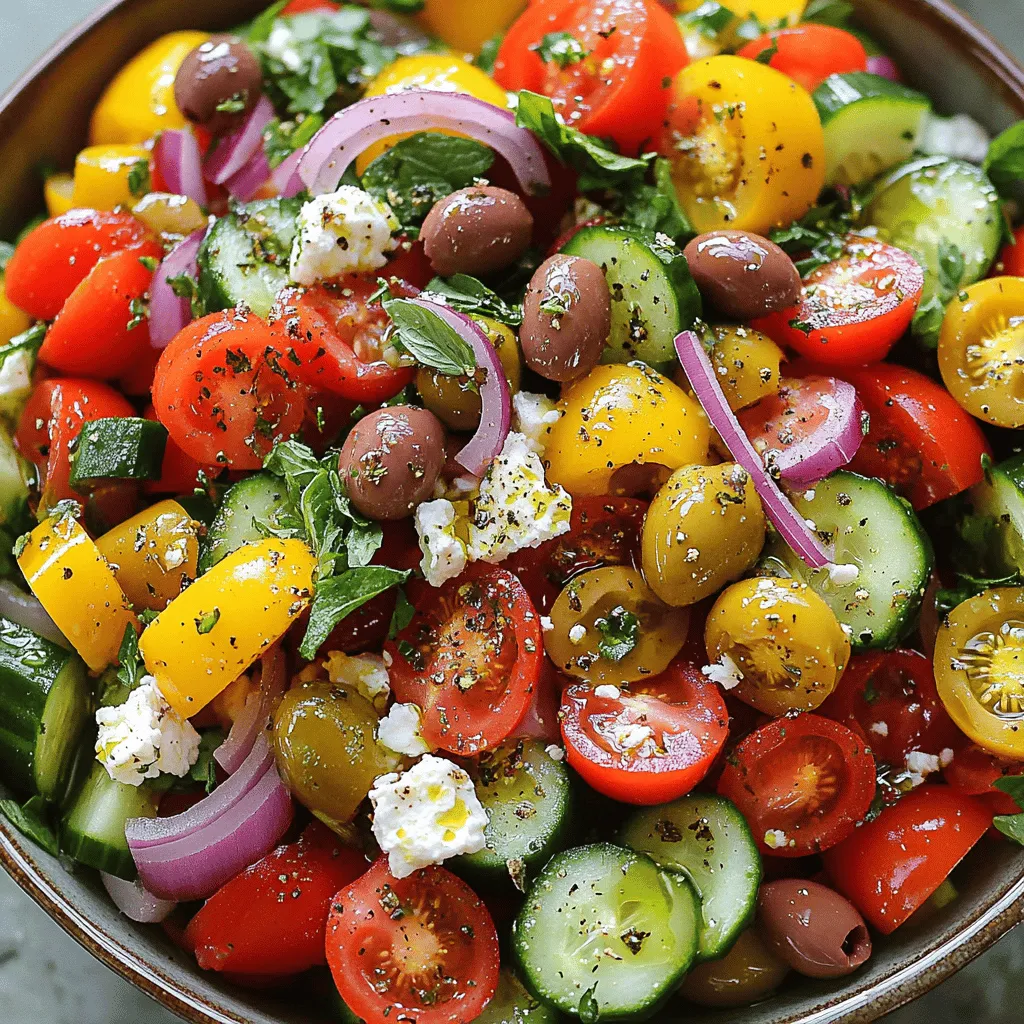
Fresh produce is the heart of this salad. Cherry tomatoes add sweetness and color. Cucumbers bring a nice crunch. Bell peppers add a sweet flavor, and red onion gives it a bit of bite.
Cheese and Olives
– 1 cup Kalamata olives, pitted and halved
– 1 cup feta cheese, crumbled into small pieces
Kalamata olives have a rich taste. They add saltiness to the salad. Feta cheese is creamy and tangy, making the salad even better.
Dressing Components
– 1/4 cup extra virgin olive oil
– 2 tablespoons red wine vinegar (or apple cider vinegar for a milder flavor)
– 1 teaspoon dried oregano
– Salt and black pepper, to taste
The dressing brings all the flavors together. Extra virgin olive oil is smooth and rich. Red wine vinegar adds a nice zing. Dried oregano gives it an earthy touch. Don’t forget to season with salt and pepper.It’s simple to make and packed with flavor!
Step-by-Step Instructions
Preparing the Vegetables
Start by gathering your fresh ingredients. You will need cherry tomatoes, cucumber, bell pepper, and red onion.
1. In a large salad bowl, combine the halved cherry tomatoes and diced cucumber.
2. Next, add the chopped bell pepper and thinly sliced red onion.
3. Gently mix everything together to ensure even distribution.
The colors will be bright and inviting, setting the stage for a tasty salad.
Making the Dressing
Next, let’s create a tasty dressing. This dressing will bring out the flavors of the salad.
1. In a small mixing bowl, whisk together the extra virgin olive oil and red wine vinegar.
2. Add the dried oregano, salt, and black pepper.
3. Keep whisking until the dressing becomes creamy and well blended.
This step is key! A well-emulsified dressing will coat the salad perfectly.
Assembling the Salad
Now, it’s time to bring everything together.
1. Drizzle the dressing over the salad mixture. Use tongs or a large spoon to toss everything gently.
2. Make sure the vegetables and feta cheese are evenly coated.
3. Let the salad sit for about 10 minutes at room temperature. This resting time allows the flavors to meld beautifully.
Right before serving, add a garnish of fresh parsley or mint leaves for that extra touch. Enjoy your Easy Greek Salad!
Tips & Tricks
Enhancing Flavor
To make your Easy Greek Salad shine, let it rest for a bit. After you mix all the ingredients, set the salad aside for about ten minutes. This short time allows the flavors to blend perfectly. You will notice a big taste boost!
Presentation Tips
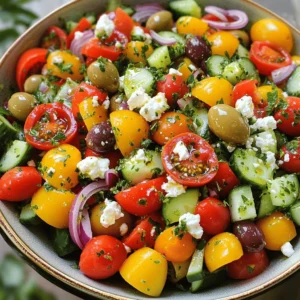
Serving the salad on a colorful platter makes it pop. Use a large dish to show off the vibrant colors. Drizzle a little extra olive oil on top for shine. You can also add more feta and fresh herbs for a lovely finish. This makes your salad look as good as it tastes!
Ingredient Quality
Using fresh, high-quality ingredients is key. Choose ripe cherry tomatoes and crunchy cucumbers. Fresh feta cheese and Kalamata olives will make a huge difference. When your ingredients are the best, your salad will be too. Remember, great taste starts with great quality!
Variations
Ingredient Substitutions
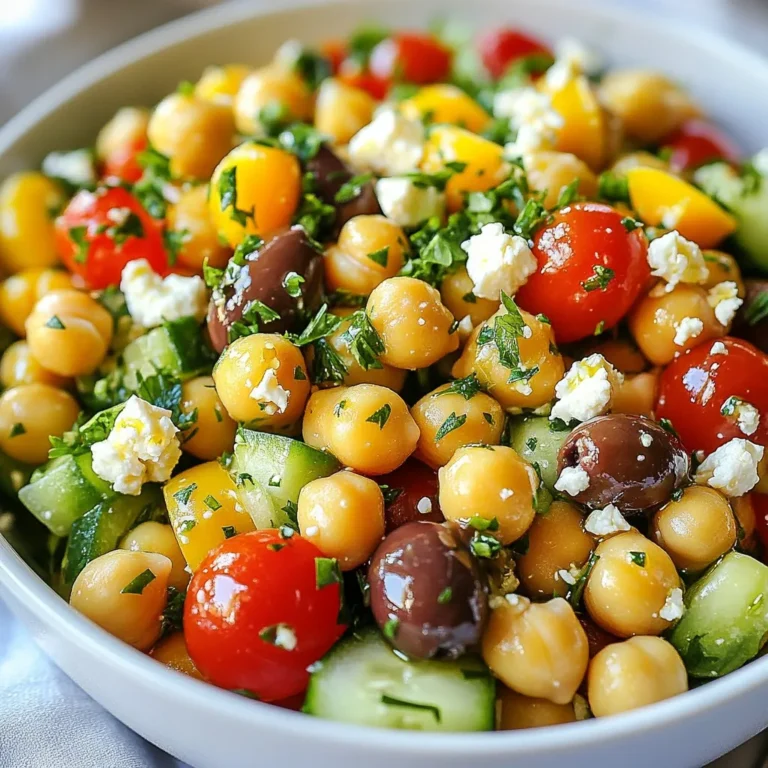
You can change the olives and cheese in the salad. If you don’t like Kalamata olives, use green olives. They add a different flavor but still taste great. For cheese, try using goat cheese instead of feta. Goat cheese gives a creamy touch and a nice tang. You can also skip the cheese if you want a lighter salad.
Seasonal Ingredients
Seasonal veggies make the salad fresh and exciting. In summer, add diced zucchini or ripe avocado. In fall, try roasted butternut squash for a warm flavor. Using what’s in season means better taste and nutrition. Plus, it keeps your salad unique every time you make it.
Flavor Add-Ins
You can add herbs and spices for a fun twist. Fresh basil or dill brightens the dish. If you like heat, try a pinch of red pepper flakes. For a citrusy kick, add lemon zest to the dressing. These small changes can take your salad from good to amazing!
Storage Info
Refrigeration Tips
To store your Greek salad, place it in an airtight container. This keeps it fresh and tasty. If you have leftover dressing, keep it separate. This way, your salad won’t get soggy. Use the salad within three days for the best flavor.
Shelf Life
Greek salad stays fresh for about three days in the fridge. After that, the veggies may lose their crunch. The olives and feta can last a bit longer, but the salad is best enjoyed fresh.
Reheating Advice
You don’t need to reheat Greek salad. It tastes best cold. If you want to enjoy it warm, try adding the salad to a skillet. Heat it gently for a minute. This way, you can warm the flavors without cooking the veggies. For the best experience, serve it fresh from the fridge or at room temperature. Enjoy your Mediterranean Bliss Greek Salad with your favorite dishes!
FAQs
What is the best way to serve Greek salad?
You can serve Greek salad on a large, colorful platter. I love using a bright dish to make the colors pop. Drizzle a bit of extra olive oil on top. Sprinkle more feta cheese and herbs for a lovely finish. This makes the salad inviting and beautiful. You can also serve it in individual bowls for a fun touch.
Can I make Greek salad ahead of time?
Yes, you can prepare Greek salad ahead of time. Just keep some tips in mind. Chop your veggies and mix them, but wait to add olives and feta. This keeps them fresh and flavorful. Prepare the dressing separately. Mix it in just before serving. Letting the salad sit for about 10 minutes before serving helps the flavors combine nicely.
Is Greek salad healthy?
Greek salad is quite healthy! It has many fresh veggies, and they are low in calories. The olive oil provides healthy fats, and feta cheese adds protein. Kalamata olives offer a good source of antioxidants. Overall, it is a great choice for a light meal or side. Enjoy this Mediterranean dish without guilt.
This blog post showed how to make a fresh Greek salad. We discussed key ingredients like veggies, cheese, and olives. You learned how to prepare the salad and make a tasty dressing. Tips for flavor and serving made your dish shine. You can even customize it to fit your taste and season. Remember to store leftovers properly for the best flavor later. Enjoy your salad, knowing it’s both healthy and delicious!

![- 1 pound fresh okra - 2 tablespoons extra virgin olive oil - 1 teaspoon garlic powder - 1 teaspoon smoked paprika - 1/2 teaspoon ground cumin - 1/2 teaspoon salt - 1/4 teaspoon freshly ground black pepper - 1/4 teaspoon cayenne pepper (optional) - 2 tablespoons freshly grated Parmesan cheese (optional) Gathering the right ingredients is key to making crispy garlic okra chips. Fresh okra offers a unique taste and great texture. When you pick out okra, look for bright green pods that are firm and smooth. The olive oil serves as the base for your spices. It helps to crisp the okra and adds a rich flavor. Garlic powder brings a punch of taste without any hassle. Smoked paprika adds depth and a slight smokiness, which pairs well with the okra. Ground cumin gives the chips an earthy note. Salt and pepper enhance all the flavors, while cayenne pepper adds a spicy kick if you want it. Finally, Parmesan cheese can add richness, making the chips even more delicious. - Calories per serving: About 120 calories - Key vitamins and minerals: High in vitamins A and C, magnesium, and fiber - Health benefits of okra: Okra is low in calories and packed with nutrients. It supports digestion, boosts heart health, and provides antioxidants. Eating crispy garlic okra chips is not just tasty; it's also good for you. Enjoy this snack guilt-free while getting your nutrition. For the full recipe, check out the [Full Recipe] section! 1. Preheat your oven to 425°F (220°C). This step helps the okra get crispy. 2. Line a large baking sheet with parchment paper. This prevents sticking and makes cleanup easy. 3. Trim the ends of the okra pods, cutting off just the stem. 4. Cut the okra into halves or thirds. Aim for even sizes so they cook well. 1. In a large bowl, mix the extra virgin olive oil, garlic powder, smoked paprika, ground cumin, salt, black pepper, and optional cayenne pepper. Stir until you have a smooth paste. 2. Add the cut okra to the bowl. Toss gently but well. Make sure each piece gets coated with the paste. 1. Spread the okra in a single layer on the baking sheet. Don’t overcrowd the pan. This will keep them crispy. 2. Bake in the preheated oven for 20-25 minutes. Flip the chips halfway through to brown them evenly. 3. If you want to add Parmesan cheese, sprinkle it on during the last 5 minutes. This makes a tasty cheesy crust. 4. Once golden brown and crispy, take the baking sheet out of the oven. Let the okra cool slightly before serving for the best crunch. You can find the full recipe above to guide you through this process. To make crispy garlic okra chips, cut the okra evenly. This helps all pieces cook the same. Aim for pieces that are about the same size. When they are even, they will brown nicely. Also, avoid overcrowding the baking sheet. If you put too many pieces on one pan, they will steam instead of crisp. Spread them out and use two sheets if needed. Using fresh ingredients makes a big difference. Fresh okra has a better taste and texture. Also, feel free to adjust the spices. If you love garlic, add more garlic powder. For a kick, increase the cayenne pepper. Taste the mixture as you go. This way, you can make the flavor just right for you. Pair these chips with dips for extra flavor. A creamy ranch or spicy aioli works well. You can also serve them with salsa for a fresh twist. For presentation, use a bright bowl. Garnish with parsley or lime slices for a pop of color. This makes your dish look even more appetizing. Enjoy your crispy garlic okra chips as a fun snack or side dish. Check out the Full Recipe for more details! {{image_4}} You can easily change the taste of your okra chips. For spicy garlic okra chips, add cayenne pepper or chili powder. This will give them a nice kick. You might also try mixing in some smoked paprika for a deeper flavor. If you prefer fresh herbs, add chopped rosemary or thyme. These herb-infused options brighten the dish and add a lovely aroma. If you’re looking for vegan alternatives, skip the cheese. The chips will still taste great without it. You can also use nutritional yeast for a cheesy flavor. For gluten-free options, you’re in luck! This recipe is naturally gluten-free. Just ensure that any additional spices used are also gluten-free. Crispy okra chips are not just for snacking. Use them in salads for extra crunch. They can also be a fun topping on soups. Try mixing them into a grain bowl for added flavor. You can even crush them and use them as a crispy coating for chicken or fish. The possibilities are endless! Check out the Full Recipe for more details on how to make these tasty snacks. To keep your crispy garlic okra chips fresh, store them in airtight containers. This method helps keep moisture out and maintains that delightful crunch. When stored properly, they can last for about 3-5 days at room temperature. For best results, place them in a cool, dark spot in your kitchen. If you live in a warm climate or want to make them last longer, consider storing them in the refrigerator. This will help retain their flavor and texture for about a week. Just remember to let them cool completely before sealing them up. Want to enjoy okra chips later? You can freeze them! First, let the chips cool fully. Then, place them in a single layer on a baking sheet and pop them in the freezer for a few hours. Once frozen, transfer them to a freezer-safe bag. This way, you can enjoy them anytime. When you’re ready to eat your frozen okra chips, don’t thaw them. Just bake them straight from the freezer at 425°F (220°C) for about 10-15 minutes. This will help them regain their crispy texture. For the best flavor, eat your crispy garlic okra chips within the first couple of days. They taste freshest right after baking. If you notice any signs of spoilage, like an off smell or a soft texture, it’s best to toss them. Keeping an eye on your snacks ensures you always enjoy them at their best! To make Crispy Garlic Okra Chips, start with fresh okra. Preheat your oven to 425°F. Wash and dry your okra. Cut the okra into halves or thirds. In a bowl, mix olive oil, garlic powder, smoked paprika, cumin, salt, black pepper, and optional cayenne pepper. Toss the cut okra in this mix until well coated. Spread the okra on a baking sheet. Bake for 20-25 minutes, flipping halfway. Enjoy a tasty snack! For the full recipe, check the section above. Yes, you can use frozen okra, but it may change the texture. Frozen okra tends to be softer after cooking. This means your chips may not be as crisp. If you use frozen okra, thaw it first and pat it dry. This helps reduce moisture. For best results, fresh okra gives the best crunch. You can find pre-made garlic okra chips at many grocery stores. Look in the snack aisle or natural food sections. Brands like Southern Style and Veggie Chips offer tasty options. You can also check online retailers like Amazon or health-focused sites. Always read labels for the best flavor and quality. To add spice to your chips, try these tips: - Add more cayenne pepper for heat. - Mix in chili powder or red pepper flakes. - Use spicy seasoning blends like Cajun or taco seasoning. - Experiment with fresh jalapeños for a bold twist. These changes will give your chips a fiery kick! This blog covered the fun and tasty world of crispy okra. You learned about the ingredients, from fresh okra to spices, and how they bring flavor. The step-by-step guide made cooking easy and clear. Our tips will help you achieve the best crunch and taste. You can even try different flavors and modify the recipe to fit your diet. Remember to store your okra properly for the best taste. Now, it's time to enjoy your crispy okra chips, whether as a snack or a side dish!](https://goldendishy.com/wp-content/uploads/2025/07/49c08959-fe34-4929-8f55-872212e9bd7e-768x768.webp)