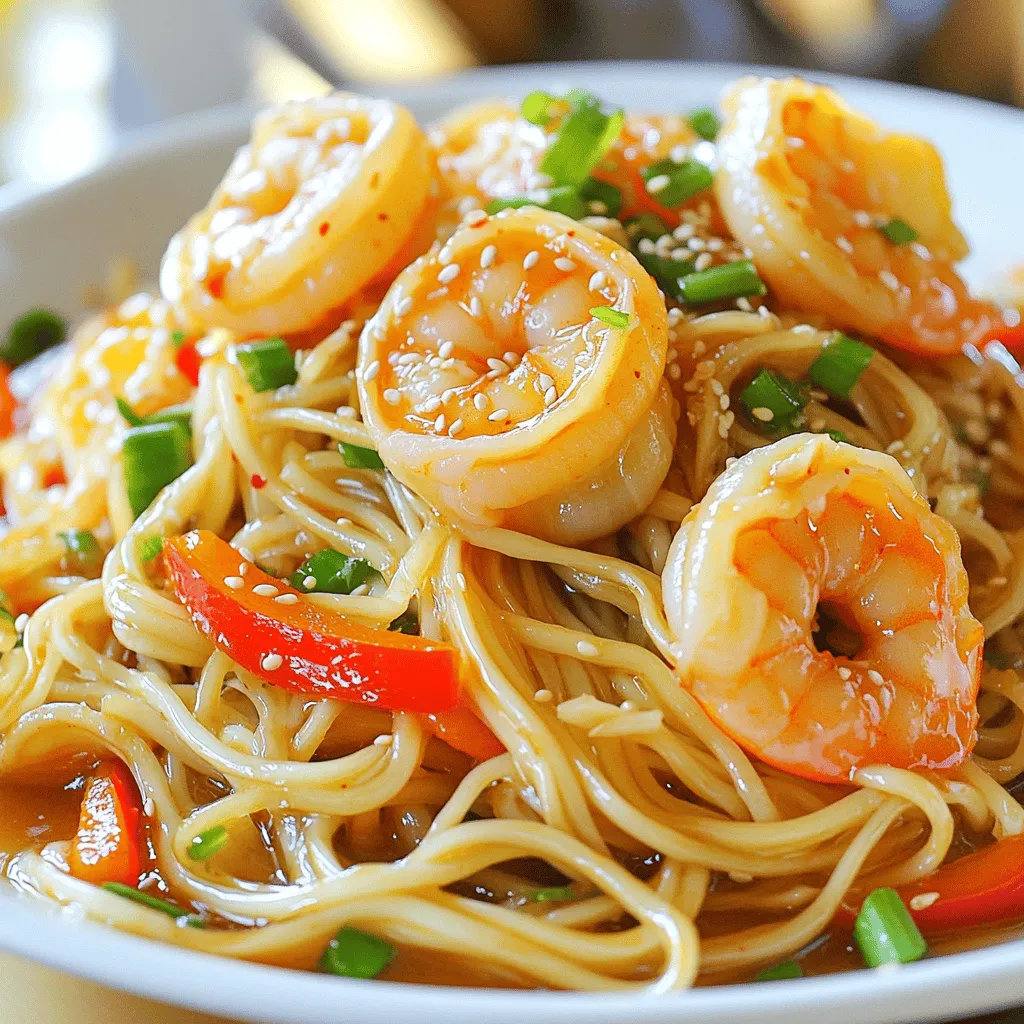
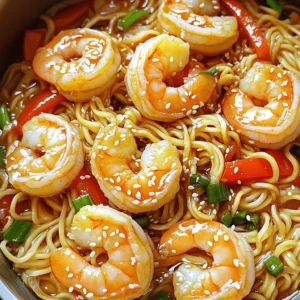
Spicy Garlic Noodles with Shrimp Flavorful Delight
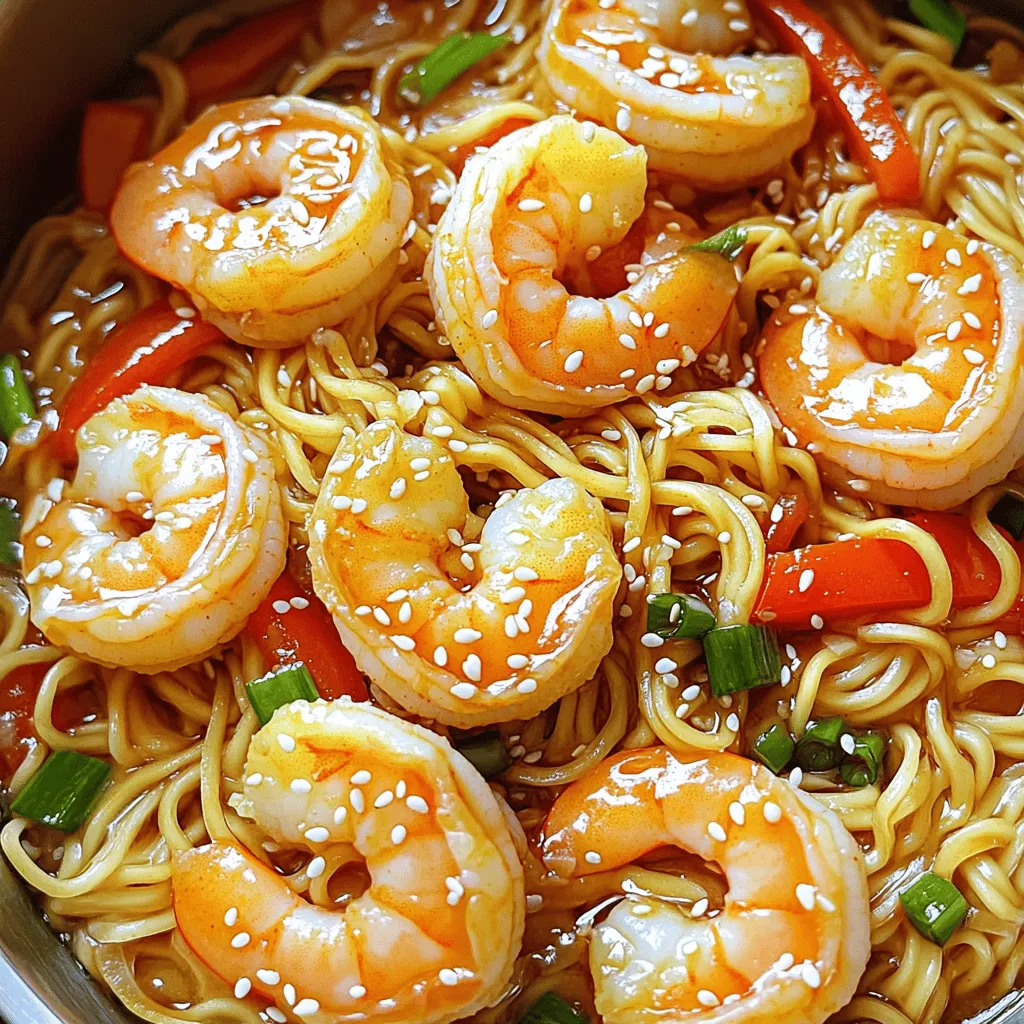
Get ready to tantalize your taste buds with my Spicy Garlic Noodles with Shrimp! This dish packs bold flavors in every bite and is easy to make right at home.
I’ll walk you through the fresh ingredients you need, how to cook them, and tips for perfect results. You won’t just create a meal; you’ll bring a flavorful delight to your table that everyone will love!
Ingredients
To make Spicy Garlic Noodles with Shrimp, you need simple yet fresh ingredients. Each one adds to the dish’s great taste. Here’s what you will need:
– 8 oz. fresh egg noodles
– 1 lb. large shrimp, peeled and deveined
– 4 cloves garlic, minced
– 2 tablespoons soy sauce
– 1 tablespoon sriracha (adjust to your spice preference)
– 1 tablespoon honey
– 2 tablespoons sesame oil
– 1 tablespoon vegetable oil
– 1 red bell pepper, julienned
– 2 scallions, chopped (reserve green parts for garnish)
– Salt and pepper to taste
– 1 tablespoon sesame seeds (optional)
These ingredients create a wonderful blend of flavors. Fresh egg noodles give the dish a nice bite. Large shrimp adds protein and sweetness. Garlic brings a strong aroma, while sriracha adds that spicy kick. Honey balances the heat, and sesame oil gives a rich flavor.
I love adding red bell pepper for a pop of color and crunch. Scallions not only add flavor but also brighten the dish. Lastly, sesame seeds are a great optional garnish for texture.
Step-by-Step Instructions
Preparation and Cooking Process
1. Cooking the Noodles: Fill a large pot with water and add salt. Bring it to a boil. Add 8 oz. of fresh egg noodles. Cook the noodles for about 3-4 minutes. They should be tender. Drain them and set aside in a mixing bowl.
2. Sautéing the Garlic: Heat 1 tablespoon of vegetable oil in a large frying pan over medium-high heat. Once the oil is hot, add 4 minced garlic cloves. Sauté the garlic for about 30 seconds. Stir it well so it does not burn.
3. Cooking the Shrimp: Add 1 lb. of peeled and deveined shrimp to the pan. Season the shrimp with salt and pepper. Cook them for 2-3 minutes. They will turn pink and opaque. Stir occasionally for even cooking.
4. Adding Vegetables: Toss in 1 julienned red bell pepper. Cook for an extra 1-2 minutes. The pepper should soften but still be crunchy.
5. Preparing the Sauce: In a small bowl, mix 2 tablespoons of soy sauce, 1 tablespoon of sriracha, 1 tablespoon of honey, and 2 tablespoons of sesame oil. Whisk them together until well blended. This sauce will add great flavor.
6. Combining Noodles and Sauce: Lower the heat to medium. Add the cooked egg noodles to the pan. Pour the sauce over the noodles and shrimp. Gently toss everything together for about 2-3 minutes. Make sure the noodles are fully coated in the sauce.
7. Garnishing and Serving the Dish: Remove the pan from heat. Transfer the Spicy Garlic Noodles with Shrimp to serving plates. Sprinkle with chopped scallions and sesame seeds, if you like. Serve immediately to enjoy the best flavor.
Tips & Tricks
Cooking Tips for Best Flavor
How to avoid overcooking shrimp
To keep shrimp tender, cook them for 2-3 minutes. They should turn pink and opaque. Remove them from heat as soon as they reach this stage. Overcooked shrimp can become rubbery, so stay alert!
Tips for perfect noodle texture
Use fresh egg noodles for the best taste. Cook them in boiling salted water for 3-4 minutes until tender. Drain and toss them in a bit of oil to prevent sticking. This simple step ensures they stay separate and flavorful.
Adjusting spice levels
Sriracha adds heat, but you can change the amount to fit your taste. Start with one tablespoon, then add more if you want extra spice. You can also balance spice with honey for a sweeter flavor.
Serving Suggestions
Best accompaniments for Spicy Garlic Noodles
Pair these noodles with a light salad to balance the heat. A crunchy cucumber salad or a simple side of steamed broccoli works well. You can also serve grilled vegetables for extra flavor.
Wine or beverage pairing options
A chilled white wine, like Sauvignon Blanc, complements the dish nicely. Its crispness balances the spice. If you prefer non-alcoholic drinks, try iced green tea or a refreshing lemonade. These drinks can enhance your meal experience.
Variations
Customizing Your Noodles
You can easily change this dish to fit your taste. Let’s explore how to customize your spicy garlic noodles.
– Substituting different proteins: You can swap shrimp for chicken, beef, or tofu. Each choice adds a unique flavor. If you use chicken, cook it until golden brown first. For beef, choose thin strips and cook them quickly. Tofu can be pan-fried for a crispy texture.
– Using alternate vegetables: Feel free to mix in your favorite vegetables. Broccoli, snap peas, or carrots work well. Just chop them into bite-sized pieces. Cook these veggies with the garlic for a fresh taste.
– Changing the sauce ingredients: You can also tweak the sauce. If you want less heat, reduce the sriracha. For a sweeter touch, add more honey. Try adding lime juice for a zesty flavor. You can even use coconut aminos instead of soy sauce for a gluten-free option.
These tips help you enjoy spicy garlic noodles just the way you like them.
Storage Info
Storing Leftovers
To keep your Spicy Garlic Noodles with Shrimp fresh, follow these steps for proper storage:
– Best practices for refrigeration: Place leftovers in an airtight container. This helps keep moisture in and prevents drying out. Store in the fridge and eat within three days for the best taste.
– Freezing options and tips: You can freeze your noodles if needed. Make sure they cool completely before packing. Use freezer-safe bags or containers, and remove as much air as possible. They can stay frozen for up to two months. Thaw in the fridge overnight before reheating.
– Reheating instructions: For reheating, use a microwave or a skillet. If using a microwave, cover the bowl to keep moisture in. Heat in short bursts, stirring in between. If using a skillet, add a splash of water and cover to steam the noodles back to life. This keeps them from getting too dry.
By following these tips, you can enjoy your Spicy Garlic Noodles with Shrimp even after the first serving.
FAQs
Common Questions about Spicy Garlic Noodles with Shrimp
How can I make this recipe vegetarian?
To make this dish vegetarian, swap the shrimp for tofu or mushrooms. Use firm tofu for a good texture. You can also add more veggies like broccoli or snap peas. This keeps the dish hearty and satisfying.
Can I use other types of noodles?
Yes, you can use other noodles! Rice noodles or whole wheat noodles work well. If you prefer gluten-free, try zucchini noodles or shirataki noodles. Just adjust the cooking time based on the noodle type to ensure they cook well.
What is the best way to spice up the dish?
To add more heat, increase the sriracha in the sauce. You can also add red pepper flakes or fresh chili peppers. For a different flavor, try adding ginger or lime juice. These will enhance the dish and make it even more exciting.
In this post, we explored how to make Spicy Garlic Noodles with Shrimp. We covered the key ingredients, detailed preparation steps, and offered useful tips. You can customize your dish with different proteins or vegetables. Remember to store leftovers properly for the best taste. Now, you have all the tools to enjoy this delicious meal. Dive into the kitchen and give it a try! Your taste buds will thank you.
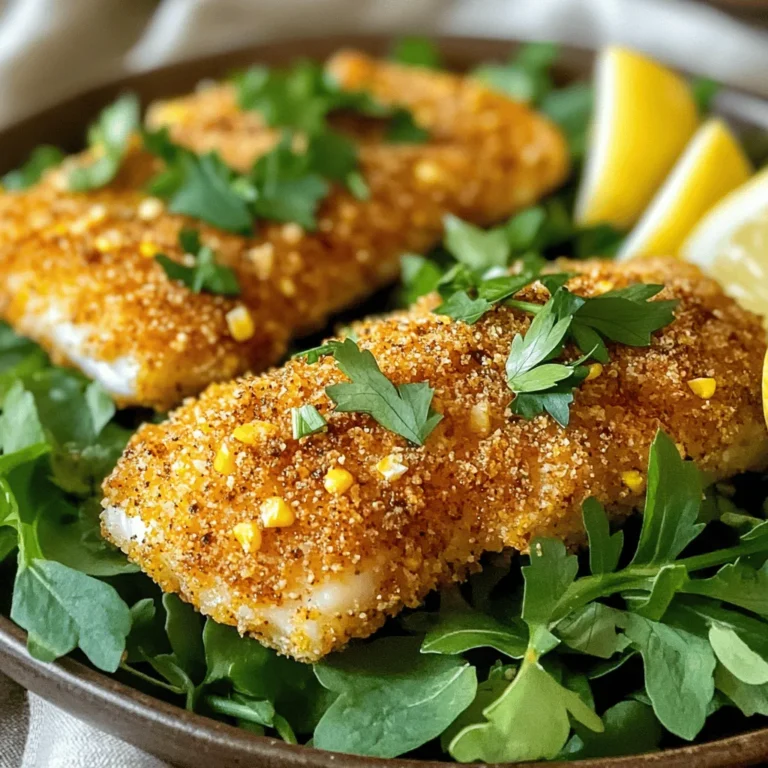
![To make Ranch Chicken and Rice Casserole, gather these items: - 1 lb (450g) boneless, skinless chicken breasts, cut into bite-sized pieces - 1 cup uncooked white rice (e.g., jasmine or basmati) - 2 cups low-sodium chicken broth - 1 cup creamy ranch dressing - 1 cup frozen mixed vegetables (a colorful blend of peas, carrots, and corn) - 1 cup shredded sharp cheddar cheese - 1 teaspoon onion powder - 1 teaspoon garlic powder - Salt and freshly ground black pepper to taste - Fresh parsley, chopped (for garnish, optional) Garnishes add beauty and taste to your dish. Here are a few: - Fresh parsley, chopped - Extra shredded cheddar cheese - A drizzle of ranch dressing These add color and a fresh taste to the casserole. You can mix and match based on what you like! Sometimes, you may need to swap out ingredients. Here are some ideas: - Chicken: Use turkey breast or cooked rotisserie chicken for a quicker option. - Rice: Brown rice or quinoa can work well. Just adjust the cooking time. - Vegetables: Feel free to use any frozen veggies you have, like broccoli or bell peppers. - Dressing: If you prefer, swap ranch dressing for other creamy dressings like blue cheese or Caesar. With these swaps, you can make the dish fit your taste or what you have on hand. First, preheat your oven to 375°F (190°C). This step is key for even cooking. A hot oven helps the chicken cook well and the cheese melt perfectly. In a large bowl, add the diced chicken, uncooked rice, chicken broth, and creamy ranch dressing. Then, sprinkle in the onion powder and garlic powder. Use a spatula to mix everything well. Make sure the chicken and rice are coated with the ranch dressing. Add salt and pepper to taste. Next, fold in the frozen mixed vegetables. This gives your casserole color and nutrition. Make sure the veggies are spread throughout the mixture. Pour your chicken and rice mixture into a greased 9x13-inch baking dish. Spread it out evenly for best results. Cover the dish tightly with aluminum foil. This traps moisture and helps the dish cook well. Bake in the preheated oven for 25 minutes. After 25 minutes, remove the foil carefully. Watch out for steam! Now, sprinkle the shredded cheddar cheese on top. Return the dish to the oven, uncovered, for another 15-20 minutes. You will know it’s ready when the chicken is cooked through, and the cheese is melted and bubbly. Once done, take it out and let it cool for about 5 minutes. This resting time helps the flavors settle. If you like, add freshly chopped parsley for a nice touch before serving. To make perfect rice, rinse it first. This removes extra starch. Use a 1:2 ratio of rice to broth. This keeps the rice moist. Cook it covered for even heat. If you want extra flavor, add herbs to the broth. You can mix in extras to change the taste. Try adding diced bell peppers for crunch. Use different frozen veggies like broccoli or green beans. You can also swap ranch dressing for a spicy sauce. This gives it a kick. For a cheesy twist, add cream cheese with the ranch. One mistake is not covering the dish while baking. This can dry out the rice. Another error is using too much liquid. Stick to the right amounts in the recipe. Don’t skip the resting time after baking. This helps the flavors blend well. Always taste before serving. Adjust salt and pepper as needed. For a full recipe with all these tips, check out the [Full Recipe]. {{image_4}} You can make a tasty vegetarian version of this dish. Start by swapping the chicken for a mix of beans or lentils. Use 2 cups of cooked black beans or chickpeas instead. Then, keep all the other ingredients the same. The ranch dressing adds great flavor, and the veggies provide crunch. This version is hearty and filling, perfect for a meatless meal. If you love heat, try a spicy twist on the classic recipe. Add diced jalapeños or a pinch of cayenne pepper to the mix. You can also use spicy ranch dressing in place of the regular one. This gives the dish a nice kick. Top it off with pepper jack cheese instead of cheddar for extra spice. Your taste buds will thank you! For a one-pan meal, mix everything in a large oven-safe skillet. This saves on clean-up time. Just add the rice and broth to the skillet along with the chicken and veggies. Cover and bake as you normally would. The flavors blend well, and you still get that creamy goodness from the ranch dressing. This method makes dinner even easier and quicker. You can find the full recipe linked above, allowing you to create these delicious variations! You can keep leftover Ranch Chicken and Rice Casserole in the fridge. Place it in an airtight container. It will stay fresh for up to three days. Make sure the casserole is cool before sealing it. This helps prevent moisture from building up. If you want to save some for later, freezing is easy. Use a freezer-safe container or heavy-duty freezer bag. Store the casserole in portions for easy meals. It will keep well for up to three months. To freeze, let it cool completely first. Label the container with the date to track freshness. When you’re ready to enjoy your casserole again, you can reheat it in different ways. The oven gives the best results. Preheat it to 350°F (175°C). Bake the casserole for about 20-30 minutes, covered with foil. This keeps it moist. You can also use a microwave. Heat in short bursts, stirring in between to ensure even warming. Always check that the chicken is heated all the way through. For extra flavor, add a little ranch dressing before serving. To adjust the recipe for fewer servings, simply halve the ingredients. Use ½ lb of chicken and ½ cup of rice. Also, cut the broth and dressing in half. This way, you keep the same flavors. Make sure to check the baking time. Smaller portions may cook faster, so keep an eye on them. Yes, you can use brown rice. However, brown rice takes longer to cook. It may need more liquid too. I recommend cooking it for a few minutes before adding it to the casserole. This helps it soften. Follow the same steps, but adjust the cooking time. Ranch Chicken and Rice Casserole goes well with many sides. Here are a few tasty options: - Simple green salad with a light dressing - Steamed broccoli or green beans for a crunchy bite - Garlic bread for a cozy touch - Roasted vegetables for extra flavor and color These sides add balance and make your meal complete. Enjoy the casserole with your favorite sides! For the full recipe, check out the link above. In this blog post, we covered the key steps to make a delicious Ranch Chicken and Rice Casserole. We explored the ingredients, sharing options for garnishes and substitutions. The step-by-step instructions guide you from preheating the oven to baking. I also shared tips to perfect your dish and variations for added flavor. Finally, we discussed how to store leftovers for later enjoyment. Follow these tips, and you’ll create a tasty meal that everyone will love!](https://goldendishy.com/wp-content/uploads/2025/06/349f3b9c-e648-45ce-b7ed-2f76b31339ac-768x768.webp)