34. Moroccan Chickpea Stew Hearty and Flavorful Dish
. Enjoy your cooking! Choosing the right chickpeas You can use canned chickpeas for ease. Just make sure to drain and rinse them well. This removes extra salt and makes them taste fresher. If you prefer, soak dried chickpeas overnight. This gives a firmer texture. Cook them until soft before adding to your stew. Spice adjustments and substitutions Spices are key to Moroccan flavors. If you want more kick, add cayenne pepper. For a different taste, swap smoked paprika for regular paprika. You can also try turmeric for a vibrant color and health boost. Feel free to adjust the salt and pepper to your liking. Cooking time adjustments for texture Cooking time affects the stew's texture. For softer vegetables, simmer longer. If you like a crunch, reduce the cooking time. Always check the stew as it cooks. This way, you can get the perfect blend of soft chickpeas and tender veggies. For the full recipe, check the details above. {{image_4}} To make Moroccan chickpea stew your own, you can swap some ingredients. Here are a few ideas: - Adding other vegetables: Sweet potatoes lend a nice sweetness. You can also try adding kale for a nutritious boost. - Using different beans or legumes: Kidney beans or lentils can replace chickpeas if you want a change. - Modifying spices to suit taste preferences: If you love heat, consider adding cayenne pepper. Or, reduce spice for a milder flavor. These swaps keep the stew fresh and exciting while fitting your taste. Pairing this warm stew with the right sides enhances the meal. Here are some great options: - Recommended sides: Crusty bread or warm pita is perfect for scooping. You can also serve it with fluffy rice for a hearty meal. - Pairing with beverages: A light-bodied red wine or herbal tea complements the flavors well. For a refreshing choice, try mint lemonade. These suggestions add to the experience, making each bite even more enjoyable. To keep your Moroccan Chickpea Stew fresh, follow these steps: - Refrigeration tips: Place the stew in an airtight container. It will last in the fridge for up to 4 days. Ensure it cools down before sealing the container to avoid condensation. - Freezing instructions: If you want to freeze it, use freezer-safe containers. The stew can stay good for 3 months in the freezer. Just leave some space at the top, as it may expand when frozen. When it's time to enjoy your stew again, reheating is key. - Best methods for reheating the stew: The best way is on the stove. Pour the stew into a pot and heat it over medium heat. Stir it often to ensure even heating. You can also use the microwave. Heat in a microwave-safe bowl, covering it loosely. Heat in short bursts and stir between to prevent hot spots. - Avoiding loss of texture and flavor: To keep the stew's texture, add a splash of vegetable broth or water during reheating. This helps maintain moisture. Always taste and adjust seasoning after reheating, as flavors can mellow. For the full recipe, you can refer to the earlier section. Can I make this stew in a slow cooker? Yes, you can! Start by sautéing the onion and garlic in a pan. Then, transfer them to your slow cooker. Add all the other ingredients, except the spinach and lemon. Cook on low for about 6-8 hours or high for 3-4 hours. Add spinach before serving. How can I make it spicier? To add heat, use fresh chili peppers or red pepper flakes. You can also add a dash of cayenne pepper. Start with a small amount and adjust to your taste. Is it possible to make this stew ahead of time? Absolutely! This stew tastes even better the next day. Make it ahead and store it in the fridge for up to three days. Reheat before serving to enjoy the rich flavors. Can I substitute fresh herbs for dried? Yes, you can! Use three times more fresh herbs than dried. So, if a recipe calls for one teaspoon of dried, use three teaspoons of fresh. Fresh herbs will add a vibrant flavor. What is the nutritional information for Moroccan Chickpea Stew? This stew is packed with nutrients! A serving typically contains about 250 calories, 10 grams of protein, and 8 grams of fiber. It’s a great source of vitamins from the veggies and chickpeas. For the full recipe, check out the detailed steps above. This article covered a tasty Moroccan Chickpea Stew. I shared the main ingredients, cooking steps, and helpful tips to perfect your dish. You can swap ingredients or adjust spices for your liking. Remember to store and reheat leftovers properly. This stew is not just healthy; it’s also fun to make. Enjoy sharing it with family and friends. Embrace exploring flavors and making this dish your own. Cooking can be easy and enjoyable.](https://goldendishy.com/wp-content/uploads/2025/06/4667d82b-b7b2-4094-8ffc-7c6a096b6e6d.webp)
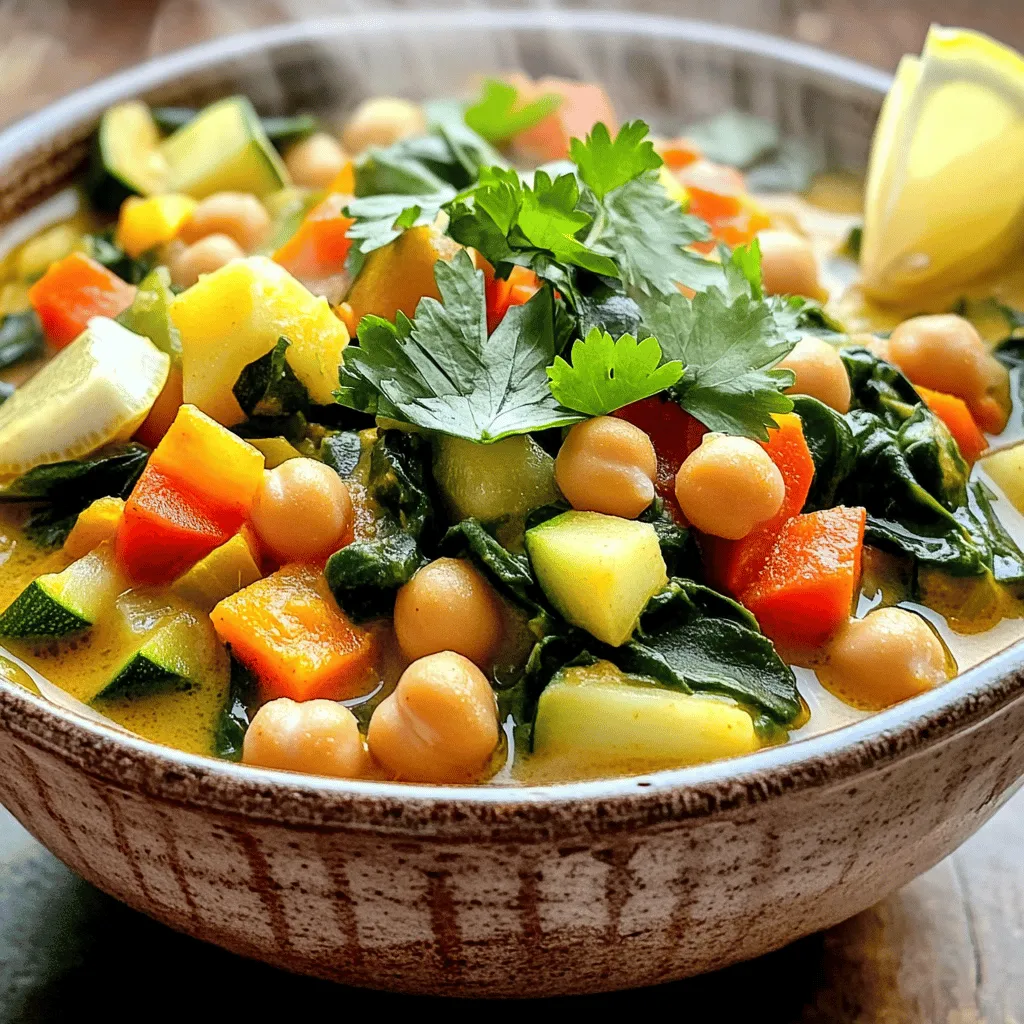
If you crave a warm, hearty dish that bursts with flavor, Moroccan Chickpea Stew is for you! In this recipe, you’ll blend simple ingredients like chickpeas and fresh veggies with bold spices. It’s easy to make, satisfying, and perfect any night of the week. Join me as we explore all the steps, tips, and tasty variations to take this stew to the next level. You won’t want to miss it!
Ingredients
Here’s what you need to make Moroccan chickpea stew. Each ingredient adds to the flavor and heartiness of the dish.
– 1 can (15 oz) chickpeas, thoroughly drained and rinsed
– 1 large onion, finely chopped
– 3 cloves garlic, minced
– 2 medium carrots, peeled and diced
– 1 red bell pepper, diced into small pieces
– 1 medium zucchini, diced
– 1 can (14 oz) of diced tomatoes, with juices
– 2 cups low-sodium vegetable broth
– 2 tablespoons extra virgin olive oil
– 1 teaspoon ground cumin
– 1 teaspoon ground coriander
– 1 teaspoon smoked paprika
– 1/2 teaspoon ground cinnamon
– Salt and freshly ground black pepper, to taste
– 1 cup fresh baby spinach, washed and dried
– Fresh cilantro or parsley, finely chopped, for garnish
– Lemon wedges, for serving
Gather these ingredients before you start cooking. Each one plays a key role in making this stew warm and rich.
Step-by-Step Instructions
Detailed Cooking Steps
1. Start by heating a spacious pot. Pour in the olive oil and let it shimmer over medium heat. This step warms the oil and preps it for the onion.
2. Next, add the chopped onion to the pot. Stir it for about five minutes until it gets soft and translucent. This brings out its natural sweetness.
3. Now, it’s garlic time! Toss in the minced garlic and cook it for one more minute. Stir frequently to wake up its aroma.
4. It’s time to add the diced carrots, red bell pepper, and zucchini. Sauté these veggies for five to seven minutes. You want them soft and just starting to caramelize. This adds great depth to the stew.
5. After that, sprinkle in the spices: cumin, coriander, smoked paprika, and cinnamon. Add salt and black pepper too. Stir everything well and let it cook for another two minutes. The spices will coat the veggies and fill your kitchen with a wonderful scent.
6. Next, pour in the diced tomatoes along with their juices, and the vegetable broth. Increase the heat a bit to bring it to a gentle boil. Once it boils, lower the heat again and let it simmer for about 15 minutes. This melds all the flavors together.
7. Now, stir in the drained chickpeas. Let the stew simmer for another 10 minutes. This step allows the chickpeas to warm up and soak in the flavors.
8. Just before serving, fold in the fresh spinach. Let it wilt for about one to two minutes. This adds a nice pop of color and nutrition.
9. Taste the stew and adjust the seasoning with more salt or pepper if needed. This final step ensures the flavor is just right.
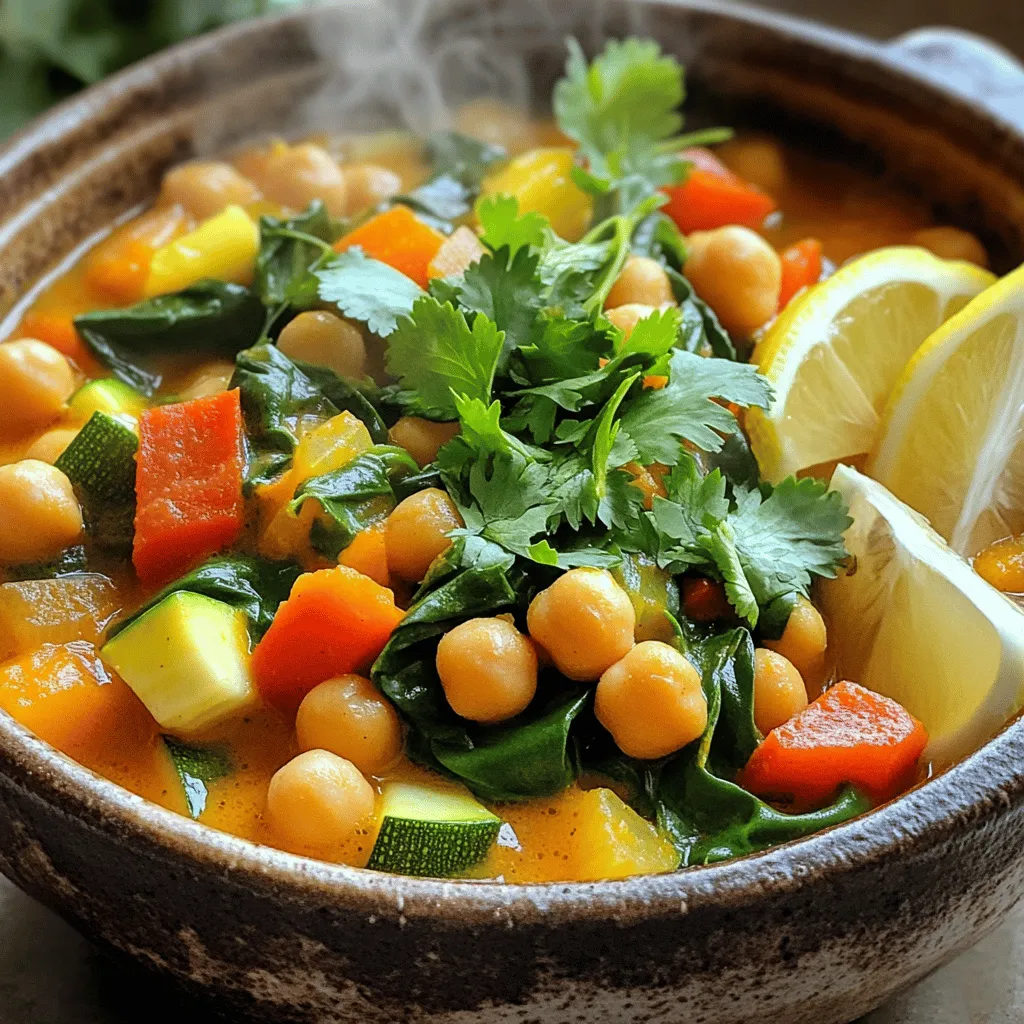
10. Serve your stew hot in deep bowls. Garnish with fresh cilantro or parsley. Don’t forget to offer lemon wedges on the side for that bright, zesty finish.
This Moroccan chickpea stew is a warm hug in a bowl.Enjoy your cooking!
Tips & Tricks
Perfecting the Stew
Choosing the right chickpeas
You can use canned chickpeas for ease. Just make sure to drain and rinse them well. This removes extra salt and makes them taste fresher. If you prefer, soak dried chickpeas overnight. This gives a firmer texture. Cook them until soft before adding to your stew.
Spice adjustments and substitutions
Spices are key to Moroccan flavors. If you want more kick, add cayenne pepper. For a different taste, swap smoked paprika for regular paprika. You can also try turmeric for a vibrant color and health boost. Feel free to adjust the salt and pepper to your liking.
Cooking time adjustments for texture
Cooking time affects the stew’s texture. For softer vegetables, simmer longer. If you like a crunch, reduce the cooking time. Always check the stew as it cooks. This way, you can get the perfect blend of soft chickpeas and tender veggies.

Variations
Ingredient Swaps
To make Moroccan chickpea stew your own, you can swap some ingredients. Here are a few ideas:
– Adding other vegetables: Sweet potatoes lend a nice sweetness. You can also try adding kale for a nutritious boost.
– Using different beans or legumes: Kidney beans or lentils can replace chickpeas if you want a change.
– Modifying spices to suit taste preferences: If you love heat, consider adding cayenne pepper. Or, reduce spice for a milder flavor.
These swaps keep the stew fresh and exciting while fitting your taste.
Serving Suggestions
Pairing this warm stew with the right sides enhances the meal. Here are some great options:
– Recommended sides: Crusty bread or warm pita is perfect for scooping. You can also serve it with fluffy rice for a hearty meal.
– Pairing with beverages: A light-bodied red wine or herbal tea complements the flavors well. For a refreshing choice, try mint lemonade.
These suggestions add to the experience, making each bite even more enjoyable.
Storage Info
Storing Leftovers
To keep your Moroccan Chickpea Stew fresh, follow these steps:
– Refrigeration tips: Place the stew in an airtight container. It will last in the fridge for up to 4 days. Ensure it cools down before sealing the container to avoid condensation.
– Freezing instructions: If you want to freeze it, use freezer-safe containers. The stew can stay good for 3 months in the freezer. Just leave some space at the top, as it may expand when frozen.
Reheating Instructions
When it’s time to enjoy your stew again, reheating is key.
– Best methods for reheating the stew: The best way is on the stove. Pour the stew into a pot and heat it over medium heat. Stir it often to ensure even heating. You can also use the microwave. Heat in a microwave-safe bowl, covering it loosely. Heat in short bursts and stir between to prevent hot spots.
– Avoiding loss of texture and flavor: To keep the stew’s texture, add a splash of vegetable broth or water during reheating. This helps maintain moisture. Always taste and adjust seasoning after reheating, as flavors can mellow.
FAQs
Common Questions
Can I make this stew in a slow cooker?
Yes, you can! Start by sautéing the onion and garlic in a pan. Then, transfer them to your slow cooker. Add all the other ingredients, except the spinach and lemon. Cook on low for about 6-8 hours or high for 3-4 hours. Add spinach before serving.
How can I make it spicier?
To add heat, use fresh chili peppers or red pepper flakes. You can also add a dash of cayenne pepper. Start with a small amount and adjust to your taste.
Is it possible to make this stew ahead of time?
Absolutely! This stew tastes even better the next day. Make it ahead and store it in the fridge for up to three days. Reheat before serving to enjoy the rich flavors.
Can I substitute fresh herbs for dried?
Yes, you can! Use three times more fresh herbs than dried. So, if a recipe calls for one teaspoon of dried, use three teaspoons of fresh. Fresh herbs will add a vibrant flavor.
What is the nutritional information for Moroccan Chickpea Stew?
This stew is packed with nutrients! A serving typically contains about 250 calories, 10 grams of protein, and 8 grams of fiber. It’s a great source of vitamins from the veggies and chickpeas.
This article covered a tasty Moroccan Chickpea Stew. I shared the main ingredients, cooking steps, and helpful tips to perfect your dish. You can swap ingredients or adjust spices for your liking. Remember to store and reheat leftovers properly. This stew is not just healthy; it’s also fun to make. Enjoy sharing it with family and friends. Embrace exploring flavors and making this dish your own. Cooking can be easy and enjoyable.
. Enjoy your cooking! Choosing the right chickpeas You can use canned chickpeas for ease. Just make sure to drain and rinse them well. This removes extra salt and makes them taste fresher. If you prefer, soak dried chickpeas overnight. This gives a firmer texture. Cook them until soft before adding to your stew. Spice adjustments and substitutions Spices are key to Moroccan flavors. If you want more kick, add cayenne pepper. For a different taste, swap smoked paprika for regular paprika. You can also try turmeric for a vibrant color and health boost. Feel free to adjust the salt and pepper to your liking. Cooking time adjustments for texture Cooking time affects the stew's texture. For softer vegetables, simmer longer. If you like a crunch, reduce the cooking time. Always check the stew as it cooks. This way, you can get the perfect blend of soft chickpeas and tender veggies. For the full recipe, check the details above. {{image_4}} To make Moroccan chickpea stew your own, you can swap some ingredients. Here are a few ideas: - Adding other vegetables: Sweet potatoes lend a nice sweetness. You can also try adding kale for a nutritious boost. - Using different beans or legumes: Kidney beans or lentils can replace chickpeas if you want a change. - Modifying spices to suit taste preferences: If you love heat, consider adding cayenne pepper. Or, reduce spice for a milder flavor. These swaps keep the stew fresh and exciting while fitting your taste. Pairing this warm stew with the right sides enhances the meal. Here are some great options: - Recommended sides: Crusty bread or warm pita is perfect for scooping. You can also serve it with fluffy rice for a hearty meal. - Pairing with beverages: A light-bodied red wine or herbal tea complements the flavors well. For a refreshing choice, try mint lemonade. These suggestions add to the experience, making each bite even more enjoyable. To keep your Moroccan Chickpea Stew fresh, follow these steps: - Refrigeration tips: Place the stew in an airtight container. It will last in the fridge for up to 4 days. Ensure it cools down before sealing the container to avoid condensation. - Freezing instructions: If you want to freeze it, use freezer-safe containers. The stew can stay good for 3 months in the freezer. Just leave some space at the top, as it may expand when frozen. When it's time to enjoy your stew again, reheating is key. - Best methods for reheating the stew: The best way is on the stove. Pour the stew into a pot and heat it over medium heat. Stir it often to ensure even heating. You can also use the microwave. Heat in a microwave-safe bowl, covering it loosely. Heat in short bursts and stir between to prevent hot spots. - Avoiding loss of texture and flavor: To keep the stew's texture, add a splash of vegetable broth or water during reheating. This helps maintain moisture. Always taste and adjust seasoning after reheating, as flavors can mellow. For the full recipe, you can refer to the earlier section. Can I make this stew in a slow cooker? Yes, you can! Start by sautéing the onion and garlic in a pan. Then, transfer them to your slow cooker. Add all the other ingredients, except the spinach and lemon. Cook on low for about 6-8 hours or high for 3-4 hours. Add spinach before serving. How can I make it spicier? To add heat, use fresh chili peppers or red pepper flakes. You can also add a dash of cayenne pepper. Start with a small amount and adjust to your taste. Is it possible to make this stew ahead of time? Absolutely! This stew tastes even better the next day. Make it ahead and store it in the fridge for up to three days. Reheat before serving to enjoy the rich flavors. Can I substitute fresh herbs for dried? Yes, you can! Use three times more fresh herbs than dried. So, if a recipe calls for one teaspoon of dried, use three teaspoons of fresh. Fresh herbs will add a vibrant flavor. What is the nutritional information for Moroccan Chickpea Stew? This stew is packed with nutrients! A serving typically contains about 250 calories, 10 grams of protein, and 8 grams of fiber. It’s a great source of vitamins from the veggies and chickpeas. For the full recipe, check out the detailed steps above. This article covered a tasty Moroccan Chickpea Stew. I shared the main ingredients, cooking steps, and helpful tips to perfect your dish. You can swap ingredients or adjust spices for your liking. Remember to store and reheat leftovers properly. This stew is not just healthy; it’s also fun to make. Enjoy sharing it with family and friends. Embrace exploring flavors and making this dish your own. Cooking can be easy and enjoyable.](https://goldendishy.com/wp-content/uploads/2025/06/4667d82b-b7b2-4094-8ffc-7c6a096b6e6d-300x300.webp)

![- 2 boneless, skinless chicken breasts - 1 cup buttermilk - 1 cup all-purpose flour - 1 teaspoon baking powder - 1 teaspoon smoked paprika - 1/2 teaspoon garlic powder - 1/2 teaspoon cayenne pepper - Salt and freshly ground black pepper, to taste - 4 ready-made waffles (or homemade) - 2 tablespoons honey - Maple syrup, for drizzling - Fresh parsley, chopped, for garnish In this easy chicken and waffles recipe, you start with two boneless, skinless chicken breasts. Soak them in one cup of buttermilk. This step makes the chicken juicy and tender. Next, prepare the breading mix. You need one cup of all-purpose flour, one teaspoon of baking powder, one teaspoon of smoked paprika, half a teaspoon of garlic powder, and half a teaspoon of cayenne pepper. Don’t forget to add salt and pepper to taste. For the waffles, you can use four ready-made waffles or make your own. To finish, you will need two tablespoons of honey and maple syrup for drizzling. Chop some fresh parsley for garnish. This dish combines sweet and savory flavors, making it a favorite for many. Check out the Full Recipe to see how to put it all together. - Immerse chicken in buttermilk. - Cover and refrigerate. Start by taking two boneless, skinless chicken breasts. Place them in a bowl and pour in one cup of buttermilk. Make sure the chicken is fully coated. Cover the bowl with plastic wrap and set it in the fridge. Let it sit for at least one hour, or overnight for the best flavor. The buttermilk helps tenderize the chicken and adds a nice tang. - Combine flour and spices. - Mix to create a uniform dry mixture. Next, grab a shallow dish. In it, combine one cup of all-purpose flour with one teaspoon of baking powder, one teaspoon of smoked paprika, half a teaspoon of garlic powder, and half a teaspoon of cayenne pepper. Add salt and black pepper to taste. Mix well until everything is even. This blend will give your chicken a delicious crust. - Dredge marinated chicken in flour mixture. - Shake off excess flour. After marinating, take the chicken out of the fridge. Let the extra buttermilk drip off. Now, dredge each piece in the flour mixture. Make sure to coat both sides well. Once coated, shake off any excess flour. This step is key for achieving a crispy texture. - Heat oil in a skillet. - Fry chicken until golden-brown. In a large skillet, heat about half an inch of oil over medium-high heat. Wait until the oil is shimmering. Carefully place the coated chicken breasts into the skillet. Fry each piece for about 5-7 minutes on each side. They should turn a beautiful golden-brown color. Check the internal temperature; it should reach 165°F. Once cooked, transfer the chicken to a plate lined with paper towels to soak up excess oil. - Toast waffles according to instructions. While the chicken fries, it’s time to warm the waffles. You can use ready-made waffles or make your own if you prefer. Just toast them according to the package instructions until they are crispy and heated through. This will balance the hot chicken nicely. - Layer waffle and chicken. - Drizzle with honey and maple syrup. To assemble, take a warm waffle and place it on a serving plate. Top it with a piece of the golden fried chicken. Now, for the fun part! Drizzle honey generously over the chicken. Then, add a touch of maple syrup according to your taste. This sweet and savory combo makes every bite a delight. - Ensure oil is hot before frying. Hot oil makes the chicken crispy. - Don’t overcrowd the skillet. This helps keep the oil hot and even. - Stack chicken slightly off-center. This adds height and looks appealing. - Garnish with parsley and drizzle syrup. It gives color and extra flavor. - Consider brining chicken overnight. This makes it juicier and more flavorful. - Experiment with different spices. Try herbs or blends for new tastes. For a detailed guide, check out the Full Recipe. {{image_4}} You can switch things up with grilled chicken instead of fried. Grilled chicken has a nice smoky flavor. Plus, it's a lighter option. I love using chicken thighs for this dish. They are more juicy and tender than breasts. Thighs also add great flavor to the meal. For the waffles, try adding flavors like cinnamon or vanilla. These will give your dish a fun twist. You can also make mini waffles. They are perfect for a bite-sized treat. Kids love them, and they are easy to share. If you want to change the sweet element, try agave syrup instead of honey. It’s a nice alternative for a sweeter touch. You can also use a fruit compote. Fresh berries or peaches work great and add a fruity burst. These options make your chicken and waffles even more special. For the full recipe, check out the ingredients and steps above! After you savor your chicken and waffles, store any leftovers in an airtight container. This keeps the food fresh and safe. The dish is best consumed within 2 days. If you wait too long, the taste and texture will suffer. You can freeze the cooked chicken and waffles for later. Be sure to store them separately. This way, the waffles do not get soggy. When you are ready to eat, reheat the chicken and waffles in the oven for best results. This helps keep everything crispy and tasty. When it's time to enjoy leftovers, use an oven or air fryer to reheat the chicken. This method preserves the crispy coating. Avoid using a microwave, as it can make the chicken chewy and wet. Keeping the texture nice is key to enjoying your meal again. To make homemade waffles, start with a simple batter. Mix together: - 1 cup all-purpose flour - 1 tablespoon sugar - 1 teaspoon baking powder - 1/2 teaspoon salt - 1 cup milk - 1 large egg - 2 tablespoons melted butter Combine all the dry ingredients in one bowl. In another bowl, whisk the wet ingredients. Mix them together until just combined. Cook in a preheated waffle maker for about 5 minutes until golden brown. You can also use my [Full Recipe] for a quick option with ready-made waffles. Yes! You can explore using turkey or even tofu for a vegetarian option. Turkey breast works well as a leaner choice. For tofu, press it to remove excess moisture, then marinate like the chicken. This adds great flavor and keeps it moist. To get crispy chicken, keep the oil hot. Heat it to about 350°F before frying. This helps form a crust. Don't overcrowd the skillet; fry in batches if needed. Cook until golden brown, about 5-7 minutes per side. Yes, meal prepping is easy! You can marinate the chicken in advance. Also, cook and freeze the chicken separately from the waffles. Store in airtight containers. This meal stays tasty for up to two days in the fridge. You can spice up your chicken with different seasonings. Try adding more cayenne pepper or smoked paprika for heat. Top your waffles with fresh fruit or whipped cream. Maple syrup adds sweetness, but feel free to experiment! For sides, think about fresh fruit or a light salad. Sliced strawberries or mixed berries add a nice touch. A simple green salad can balance the dish’s richness. You can also serve it with sweet potato fries for a fun twist. You learned how to make a tasty chicken and waffles dish. We covered marinating chicken, preparing breading, and frying until golden-brown. You also saw tips for storage and variations. Don't be afraid to try different spices or use grilled chicken. This dish is fun and delicious. Enjoy making it and sharing with friends!](https://goldendishy.com/wp-content/uploads/2025/06/c6fcab88-53c4-4cda-8439-7edbb7c77c72-768x768.webp)
![To make your delicious crispy zucchini tacos, you'll need a few fresh ingredients. Here’s what you should gather: - 2 medium zucchinis, sliced into thin rounds - 1 cup cornmeal and seasonings: chili powder, garlic powder, onion powder, ground cumin - Fresh toppings: shredded lettuce, diced tomatoes, avocado slices, sour cream or Greek yogurt - Tortilla options: soft corn or flour These ingredients work together to create a tasty and fun meal. The zucchini brings a nice crunch, while the cornmeal adds flavor. Don’t forget the toppings! They add freshness and creaminess. If you want the full recipe, check out the Full Recipe for all the details. Set your oven to 425°F (220°C). This high heat will help make the zucchini crispy. Line a large baking sheet with parchment paper. This step prevents the zucchini from sticking and makes cleanup easy. In a medium mixing bowl, combine 1 cup of cornmeal with spices. Add 1 tablespoon of chili powder, 1 teaspoon of garlic powder, 1 teaspoon of onion powder, and 1/2 teaspoon of ground cumin. Season this mix with salt and freshly cracked black pepper. Mix well until everything is blended. This coating gives the zucchini great flavor and crunch. Take your zucchini rounds and dip them into the cornmeal mixture. Make sure both sides are coated evenly. Arrange the coated zucchini on the baking sheet in a single layer. Avoid overlapping the rounds to ensure they cook evenly. Place the baking sheet in the preheated oven and bake for 20-25 minutes. Halfway through, flip the zucchini rounds for an even golden brown color. Enjoy the crispy goodness as you prepare your tacos! For the complete recipe, see the [Full Recipe]. To get the best crispy texture, the coating needs to be even. Make sure you coat each zucchini round well. This way, every bite has flavor. Use a good amount of cornmeal mix on both sides. When you bake, flip the zucchini halfway. This helps them brown nicely and stay crisp. Warm tortillas before you fill them. You can heat them in a skillet over medium heat. Just a minute on each side makes them soft. You can also wrap them in foil and pop them in the oven. Give them a few minutes so they get warm and pliable. For a colorful dish, use a bright platter. Layer your crispy zucchini tacos with fresh toppings. Add shredded lettuce, diced tomatoes, and avocado slices. Finish with a dollop of sour cream or Greek yogurt. Serve with lime wedges for extra zest. A sprinkle of fresh cilantro adds a lovely touch. Use these tips to make your tacos not just tasty, but also beautiful! {{image_4}} You can easily make your crispy zucchini tacos vegan. For a creamy topping, replace sour cream with cashew cream or dairy-free yogurt. Both options give a rich flavor. You can also use mashed avocado as a spread. It adds creaminess and healthy fats. For toppings, use fresh veggies like radishes or sliced jalapeños for a spicy kick. These swaps keep your meal tasty and plant-based. To boost the flavor of your zucchini coating, try adding more spices. Smoked paprika can add a nice depth. You might also enjoy a pinch of cayenne for heat. Fresh herbs like cilantro or parsley can brighten the dish. Mix them into your cornmeal for an extra layer of flavor. Don't hesitate to experiment! The right spices can take your tacos to the next level. Zucchini is great, but many other veggies work well too. You can use sliced eggplant or summer squash for a similar texture. Carrots add a sweet crunch, while bell peppers bring color and flavor. For a different twist, try sweet potatoes. Just cut them into thin slices and bake. Each veggie offers a unique taste, so have fun mixing it up! You’ll find your favorite combinations. For the complete experience, check out the [Full Recipe]. To keep your crispy zucchini tacos fresh, use an airtight container. Place any leftover tacos in the container. You can store them in the fridge for up to three days. This method helps keep them from getting soggy. If you have extra zucchini rounds, store them separately. This way, they stay crispy longer. When you're ready to enjoy your leftovers, reheating correctly is key. The best way to revive that crunch is in the oven. Preheat your oven to 375°F (190°C). Place the tacos on a baking sheet. Heat them for about 10-15 minutes. This method ensures your tacos stay crispy. You can also use an air fryer for faster results. Just heat them for 5-7 minutes at 350°F (175°C). You can freeze crispy zucchini tacos, but it's best to freeze the zucchini rounds separately. After baking, let them cool completely. Then, place them in a single layer on a baking sheet and freeze for a few hours. Once frozen, transfer them to a freezer bag. This prevents sticking. You can store them in the freezer for up to three months. When ready to eat, bake them straight from the freezer. This keeps them crunchy and delicious. For the full recipe, check the detailed instructions above. To make crispy zucchini tacos, follow these steps: 1. Preheat your oven to 425°F (220°C). 2. Prepare a baking sheet with parchment paper. 3. Mix cornmeal and spices in a bowl. 4. Dip zucchini rounds in the cornmeal mix. 5. Arrange the coated zucchini on the baking sheet. 6. Bake for 20-25 minutes, flipping halfway. 7. Warm your tortillas in a skillet or oven. 8. Assemble tacos with zucchini, lettuce, tomatoes, avocado, and sour cream. This simple process makes crispy zucchini tacos that are full of flavor. The baking gives the zucchini a nice crunch while keeping the inside tender. You can find the full recipe above. You can use either corn or flour tortillas for zucchini tacos. - Corn Tortillas: - They are gluten-free. - They have a distinct flavor that pairs well with the zucchini. - Flour Tortillas: - They are soft and chewy. - They hold up well with toppings and fillings. Both options are great, so choose based on your taste! I often prefer corn tortillas for their authentic flavor. Yes, you can prepare some parts ahead of time. - Zucchini Rounds: You can coat and bake the zucchini earlier in the day. Store them in an airtight container. - Tortillas: Warm them just before serving to keep them soft. - Toppings: Dice your tomatoes and slice your avocado in advance, but keep them in the fridge. This way, you can quickly assemble the tacos when you're ready to eat. Enjoy your meal without the rush! This blog post covered how to make crispy zucchini tacos. You learned about the ingredients, instructions, and tips for perfecting texture. I also shared variations for dietary needs and options to store leftovers. Crispy zucchini tacos are fun, easy to make, and delicious. You can enjoy them during any meal. Experiment with the toppings to make each taco special. Enjoy your cooking!](https://goldendishy.com/wp-content/uploads/2025/06/dad710f9-4001-4f00-9608-4b60580076cc-768x768.webp)


