Zesty Quinoa Black Bean Salad Flavorful and Nutritious

Looking for a tasty and healthy dish? Try my Zesty Quinoa Black Bean Salad! This salad is packed with flavor and nutrients, making it the perfect meal for any day. You can mix and match ingredients to suit your taste. In this post, I’ll walk you through the simple steps to create this vibrant dish, share helpful tips, and explore fun variations. Let’s get started on this delicious journey!
Ingredients
Main Ingredients List
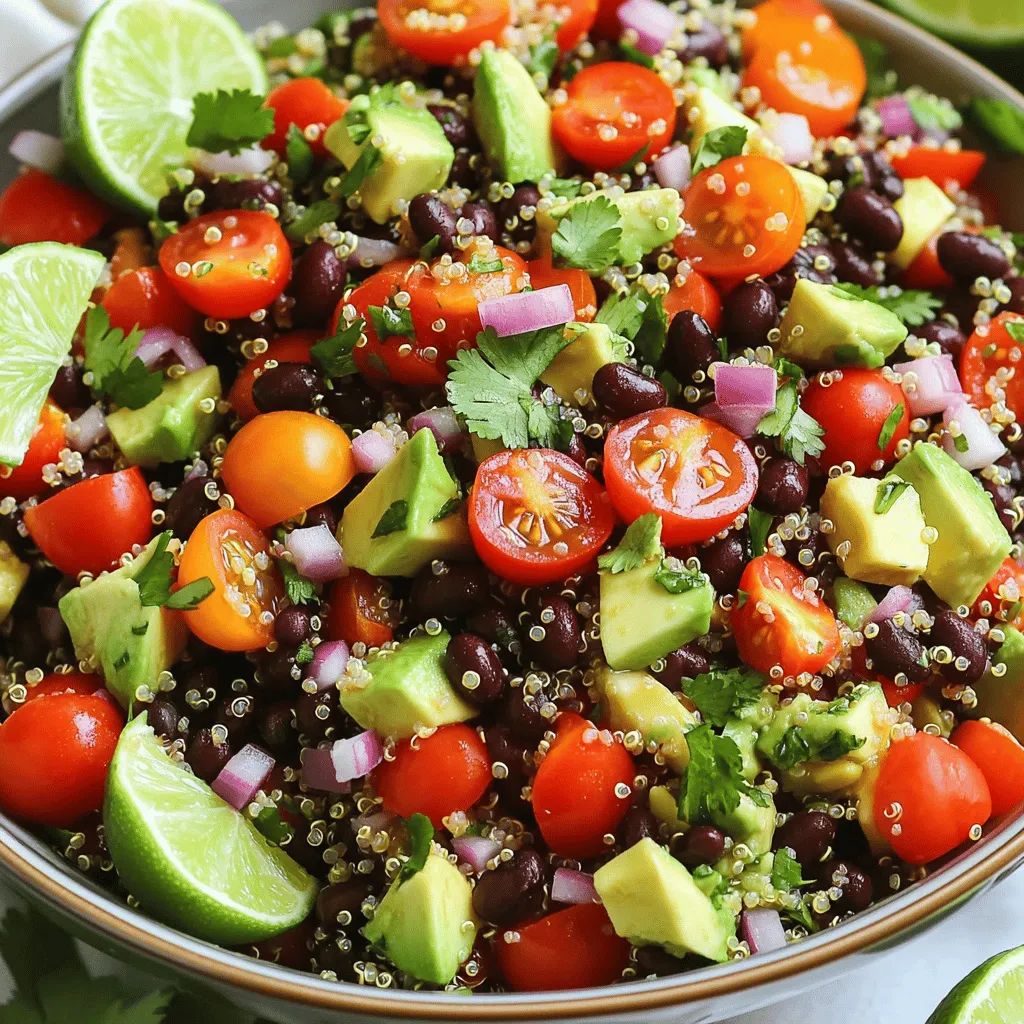
This zesty quinoa black bean salad uses fresh, vibrant ingredients. Here’s what you need:
– 1 cup quinoa, thoroughly rinsed
– 2 cups vegetable broth (or water)
– 1 (15 oz) can black beans, drained and thoroughly rinsed
– 1 cup cherry tomatoes, halved
– 1 red bell pepper, diced into bite-sized pieces
– 1/4 cup red onion, finely chopped
– 1 ripe avocado, diced
– 1/4 cup fresh cilantro, finely chopped
– Juice of 1 lime (about 2 tablespoons)
– 2 tablespoons extra virgin olive oil
– 1 teaspoon ground cumin
– 1/2 teaspoon garlic powder
– Salt and freshly ground black pepper to taste
Optional Add-ins
Feel free to personalize your salad with these tasty options:
– Corn for a sweet crunch
– Jalapeños for some heat
– Feta cheese for a salty bite
– Chopped nuts for extra texture
Health Benefits of Ingredients
Each ingredient brings its own health perks:
– Quinoa is packed with protein and fiber. It helps keep you full.
– Black beans add more protein and are rich in iron. They support muscle health.
– Cherry tomatoes provide vitamins A and C, boosting your immune system.
– Red bell pepper is high in antioxidants and great for skin health.
– Avocado offers healthy fats, promoting heart health and satiety.
– Cilantro has detoxifying properties and adds fresh flavor.
– Lime juice helps with digestion and adds zing to the dish.
Using these ingredients creates a colorful dish that nourishes your body and delights your taste buds.Enjoy making this salad!
Step-by-Step Instructions
Cooking the Quinoa
First, grab a medium saucepan. Pour in 2 cups of vegetable broth or water. Heat it on medium-high until it boils. Add 1 cup of rinsed quinoa to the boiling broth. Stir it briefly. Then lower the heat to low. Cover the saucepan and let it simmer for 15 minutes. After 15 minutes, all the liquid should be absorbed. Remove the saucepan from heat but keep it covered. Let it sit for another 5 minutes. This step helps steam the quinoa. Finally, fluff it gently with a fork and set aside to cool slightly.
Preparing the Dressing
While the quinoa cooks, let’s whip up the dressing! In a small bowl, mix the juice of 1 lime, which is about 2 tablespoons, with 2 tablespoons of extra virgin olive oil. Add 1 teaspoon of ground cumin and 1/2 teaspoon of garlic powder. Season it with salt and freshly ground black pepper to taste. Whisk everything together until well blended. This dressing brings a zesty punch to your salad.
Combining Ingredients
In a large mixing bowl, combine the black beans, halved cherry tomatoes, diced red bell pepper, finely chopped red onion, and diced avocado. Gently mix these ingredients together. Be careful not to squish the avocado! Once the quinoa has cooled to just warm, add it to the bowl. Drizzle the dressing over the salad mix. Toss everything gently to coat the ingredients in the dressing. Finally, fold in 1/4 cup of finely chopped cilantro. Taste and adjust the seasoning as needed. Let the salad sit for about 10 minutes. This allows the flavors to blend beautifully before you serve it.
Tips & Tricks
Perfecting Quinoa Texture
To get the best texture for your quinoa, rinse it well. Rinsing removes bitter saponins. Use a fine mesh strainer for this task. I like to cook quinoa in vegetable broth. This adds flavor and depth. After it cooks, let it steam off the heat for five minutes. This step makes the quinoa fluffy and light.
Flavor Enhancements
You can boost the flavor of this salad easily. Try adding a pinch of cayenne pepper for heat. A splash of apple cider vinegar gives a nice zing. Fresh herbs like parsley or dill can also add a fresh twist. If you want creaminess, mix in some Greek yogurt. This adds a nice touch without overpowering the dish.
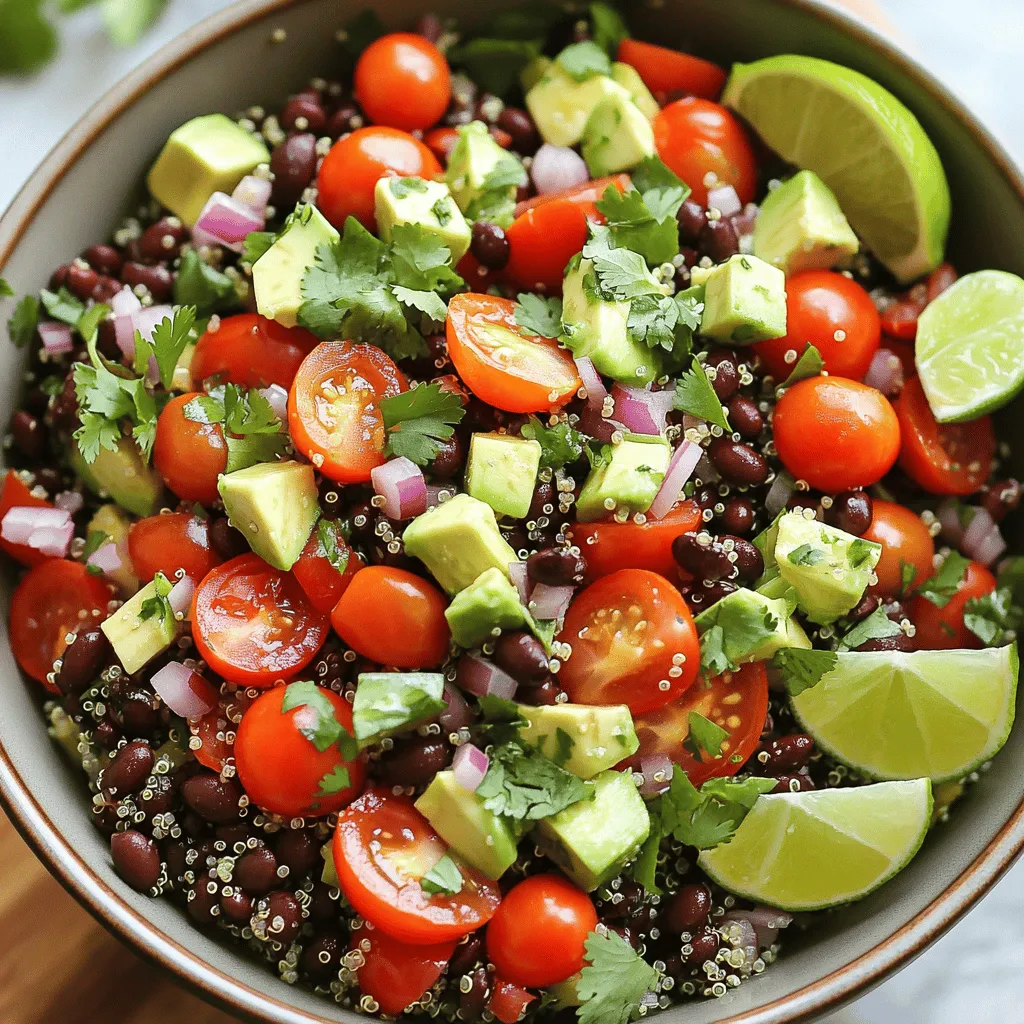
Serving Suggestions
When serving, make it look pretty. Use a colorful bowl to show off the salad. Garnish with extra cilantro and lime wedges. This adds a pop of color and freshness. You can serve it alone or with grilled chicken. It pairs well with tacos or as a side dish.

Variations
Protein Additions
You can boost the protein in your zesty quinoa black bean salad in many ways. Here are some tasty ideas:
– Grilled Chicken: Add diced grilled chicken for a hearty touch.
– Shrimp: Toss in sautéed shrimp for a seafood twist.
– Tofu: Cube and pan-fry tofu to keep it vegan while adding protein.
– Tempeh: Crumble tempeh into the salad for a nutty flavor.
These protein options make the salad more filling and satisfying.
Vegan Adaptations
The zesty quinoa black bean salad is already vegan-friendly. However, you can make it even more exciting with these additions:
– Nuts and Seeds: Sprinkle in sunflower seeds or pumpkin seeds for crunch.
– Nut Cheese: Use cashew cheese for a creamy texture without dairy.
– Plant-Based Dressing: Swap the olive oil with a nut-based dressing for a unique flavor.
These choices keep the dish fresh and vibrant while staying true to vegan values.
Seasonal Ingredient Swaps
You can change the salad based on what’s in season. Here are some easy swaps:
– Spring: Replace cherry tomatoes with fresh peas or asparagus.
– Summer: Use ripe peaches or corn for a sweet touch.
– Fall: Add roasted butternut squash for warmth and depth.
– Winter: Toss in shredded Brussels sprouts for a crunchy bite.
These swaps keep the salad lively and ensure you use fresh, local produce.
Storage Info
Refrigeration Guidelines
After making zesty quinoa black bean salad, store it in an airtight container. This keeps the salad fresh. Place it in the fridge within two hours of making it. The cold temperature helps maintain its flavor and texture. Enjoy it within three to five days for the best taste.
Freezing Tips
You can freeze this salad, but some ingredients may change in texture. To freeze, put the salad in a freezer-safe container. Leave some space at the top. This allows for expansion as it freezes. When ready to eat, thaw it in the fridge overnight. You may want to add fresh avocado and cilantro after thawing.
Shelf Life Recommendations
Zesty quinoa black bean salad stays tasty for a few days. If you notice any changes in smell or color, it’s best to throw it out. Always check for freshness before eating. Following these storage tips helps you enjoy this nutritious dish longer.
FAQs
How to make zesty quinoa black bean salad?
To make zesty quinoa black bean salad, start by cooking the quinoa. Use one cup of quinoa and two cups of vegetable broth. Bring the broth to a boil, then add the quinoa. Cook it on low heat for about 15 minutes. Let it sit for five minutes after cooking to fluff it up. In a large bowl, mix black beans, cherry tomatoes, red bell pepper, red onion, and avocado. Prepare the dressing with lime juice, olive oil, cumin, garlic powder, salt, and pepper. Combine everything and fold in cilantro. Let it rest for ten minutes to blend the flavors.
Can I use other beans?
Yes, you can use other beans. Chickpeas, kidney beans, or pinto beans work well. Just make sure they are cooked or canned and drained. Each type of bean adds its own taste and texture. This makes the salad unique. Feel free to mix and match your favorite beans for variety.
How do I make this salad spicier?
To spice up the salad, add fresh jalapeños or diced green chilies. You can also sprinkle in some cayenne pepper or red pepper flakes. If you want a zesty kick, try adding hot sauce or salsa to the dressing. Adjust the spice to suit your taste. Enjoy experimenting with different heat levels!
What can I serve with this salad?
Zesty quinoa black bean salad pairs nicely with grilled chicken or fish. You can also serve it alongside tacos or burritos for a complete meal. For a lighter option, enjoy it with tortilla chips or on a bed of lettuce. This salad is great for lunch or dinner and works well at potlucks too!
This blog post explored how to make a tasty quinoa black bean salad. We covered main ingredients, optional add-ins, and their health benefits. I shared easy cooking steps, tips for perfecting texture, and flavor boosts. You learned about variations and storage methods.
Quinoa salad is versatile and healthy. You can enjoy it in many ways. Now, it’s time to get cooking!


![- Bell peppers and their colors: You can use four large bell peppers. Choose any color you like: red, yellow, green, or orange. Each adds its own taste and look to the dish. - Protein options: For the filling, you can select either ground turkey or beef. Both options will give you a hearty and satisfying meal. - Base ingredients: You will need one cup of cooked rice. You can use either white or brown rice. Additionally, add one cup of black beans, rinsed and drained, and one cup of corn. You can choose fresh, frozen, or canned corn. - Flavor enhancers: To boost the flavor, use one cup of salsa. You can pick your favorite brand or make it homemade. Also, add one tablespoon of taco seasoning. You can use store-bought or make your own. - Toppings: For the top of the peppers, use one cup of shredded cheddar cheese. This cheese gives a nice gooey texture. You can add extra cheese for a more decadent touch. Fresh cilantro is a great garnish, adding color and a bit of fresh flavor. You can find the full recipe in the earlier sections of this article. Happy cooking! Preheat the oven to 375°F (190°C). This helps cook the peppers evenly. While it heats, grab a baking dish. Set it aside for the stuffed peppers. Prepare the bell peppers by slicing the tops off. Remove the seeds and membranes, which can taste bitter. Brush each pepper with olive oil. This adds flavor and helps them roast nicely. Place the peppers upright in the baking dish. Cook the meat in a large skillet over medium heat. Add 1 pound of ground turkey or beef. Break it apart with a spatula as it cooks. Make sure it browns well. Once cooked, drain any excess fat. This keeps the filling lean and tasty. Next, add rice, black beans, corn, salsa, and seasoning to the skillet. Use 1 cup of cooked rice, 1 cup of rinsed black beans, and 1 cup of corn. Pour in 1 cup of salsa and 1 tablespoon of taco seasoning. Sprinkle some salt and pepper too. Mix everything well. Simmer the mixture for about 5 minutes. This lets the flavors meld together, making the filling more delicious. Stir it occasionally to avoid sticking. Now, mix in half of the shredded cheddar cheese. This makes the filling creamy and rich. Remove the skillet from heat. Stuff the peppers by spooning the mixture into each one. Press down gently to pack it in well. This ensures every bite is full of flavor. Top with more cheese by sprinkling the remaining cheddar over each filled pepper. It will melt and brown nicely while baking. Bake the peppers by covering the baking dish with aluminum foil. Place it in the oven for 25-30 minutes. In the last 10 minutes, remove the foil. This helps the cheese bubble and turn golden. Once done, cool the peppers for a few minutes before serving. The filling will be very hot. If you like, garnish with fresh cilantro for extra flavor. Enjoy your taco stuffed bell peppers! Remember, you can find the full recipe above for all the details. How to choose fresh bell peppers: Pick bell peppers that are firm and shiny. Look for smooth skin with no blemishes. A good pepper feels heavy for its size. Colors like red, yellow, and orange are sweeter. Green peppers are a bit more bitter. All colors work well in this dish. Ensuring optimal cooking temperature and timing: Set your oven to 375°F (190°C) before you start cooking. This temperature helps the peppers cook evenly. Bake them for 25-30 minutes. In the last 10 minutes, uncover the dish to let the cheese brown. Suggestions for additional spices or ingredients: Add cumin or chili powder for an extra kick. You can also mix in diced tomatoes or jalapeños for more flavor. If you love heat, try adding some hot sauce to the filling. Offering a vegetarian option: For a vegetarian version, swap the meat for lentils or extra beans. You can use quinoa instead of rice for a healthy twist. This way, everyone can enjoy taco stuffed bell peppers! Plating ideas for presentation: Serve the peppers on a colorful platter. You can place them upright for a fun look. Add a dollop of sour cream on the side. Fresh cilantro on top adds a pop of green. Recommended side dishes for a complete meal: Pair your stuffed peppers with a fresh salad or tortilla chips. A side of guacamole or salsa also works great. These sides make the meal more fun and filling. For the full details, check out the Full Recipe! {{image_4}} You can mix up the protein in taco stuffed bell peppers. If you want a meatless option, try using black beans or lentils. They add great flavor and protein. For a twist, you can also use ground chicken or pork. When it comes to cheese, feel free to get creative. While cheddar is classic, you might try Monterey Jack or pepper jack for extra spice. You can also use cream cheese for a creamier filling. For salsa, any kind works! Chunky salsa adds texture, while smooth salsa blends in. You can even make your own with fresh tomatoes, onions, and peppers. Grilling adds a smoky flavor. Wrap the stuffed peppers in foil and place them on the grill. Cook for about 15 to 20 minutes until tender. You can also use a slow cooker. Place the stuffed peppers in the slow cooker with a bit of sauce. Cook on low for 4 to 6 hours for a hands-off approach. If you need a quick meal, the microwave is your friend. Just place the stuffed peppers in a microwave-safe dish. Cover with a lid or plastic wrap. Heat for about 5 to 7 minutes, checking for doneness. Using seasonal veggies makes your dish brighter. In summer, add fresh zucchini or corn. In fall, consider adding diced sweet potatoes or pumpkin. These add flavor and nutrition. For holidays, you can theme your peppers. For Halloween, use orange peppers and stuff them with spicy fillings. For Christmas, use red and green peppers and add festive spices. It’s a fun way to celebrate! For the full recipe, check out [Full Recipe]. To store leftovers, place the stuffed peppers in an airtight container. This keeps them fresh and tasty. You can keep them in the fridge for up to three days. Make sure they cool down first to avoid steam build-up. If you want to save some for later, freezing is a great option. Wrap each stuffed pepper tightly in plastic wrap. Then, place them in a freezer-safe bag. They can last for up to three months in the freezer. When you’re ready to eat, thaw them overnight in the fridge. To reheat, bake at 350°F (175°C) for about 25 minutes, or until heated through. For easy meal prep, you can cook a big batch in advance. Make the filling and stuff the peppers ahead of time. Store them in the fridge for two days before baking. This way, you can have a quick meal ready on busy nights. You can also use different colors of bell peppers for fun and variety. What can I substitute for rice in the recipe? You can use quinoa or cauliflower rice instead of regular rice. Quinoa adds protein and fiber. Cauliflower rice keeps it low-carb. Both options work well and keep the dish tasty. How do I know when the peppers are fully cooked? The peppers should be tender but not mushy. You can poke them with a fork. If they give easily but hold their shape, they are ready. The cheese should be melted and bubbly on top too! Caloric content and portion sizes Each stuffed pepper is about 300 calories. This includes the filling and toppings. If you use ground turkey, it may be lower in calories. Adjust the portion size based on your hunger. Health benefits of ingredients used Bell peppers are rich in vitamins A and C. They help boost your immune system. Black beans provide protein and fiber, promoting good digestion. Corn adds vitamins and a sweet crunch. What drinks pair well with taco stuffed bell peppers? A refreshing drink like lemonade or iced tea works great. For adults, a light beer or margarita adds fun. Choose drinks that balance the spice of the peppers. Can taco stuffed bell peppers be made in advance for gatherings? Yes! You can prepare the stuffed peppers ahead of time. Just store them in the fridge. Bake them when your guests arrive. They will taste fresh and hot from the oven! For the full recipe, check the earlier section. Taco stuffed bell peppers are fun and easy to make. We covered the key ingredients, steps, and helpful tips for a great dish. You learned how to mix flavors and pack ingredients for maximum yum. With ideas for storage and meal prep, you’re ready to enjoy these peppers anytime. Get creative with variations to keep things fresh. Whether for a family dinner or a gathering, these peppers can impress. Happy cooking!](https://goldendishy.com/wp-content/uploads/2025/06/e36cd186-0c48-4bd5-9184-2d07a9c06671-768x768.webp)
![- 2 cups cooked jasmine rice - 1 cup cooked chicken breast, diced - 1 cup mixed vegetables - 3 tablespoons soy sauce - 2 tablespoons sesame oil - Salt and freshly ground black pepper - 2 large beaten eggs - 3 green onions, finely chopped - Garlic Gathering the right ingredients is key to making easy chicken fried rice. Start with 2 cups of cooked jasmine rice; leftover rice works best. It helps keep the grains from sticking together. Next, you need 1 cup of cooked chicken breast, diced into small pieces. You can use rotisserie chicken for speed. Add 1 cup of mixed vegetables. Frozen peas and carrots work great. They heat up quickly and add color. For flavor, use 3 tablespoons of soy sauce. This gives the rice a savory kick. 2 tablespoons of sesame oil will add a nutty taste. Don't forget to season with salt and freshly ground black pepper to your liking. If you want to enhance the dish, consider adding 2 large beaten eggs. They add richness and protein. 3 green onions, finely chopped, add a fresh taste. Lastly, garlic can bring an aromatic depth to your fried rice. These ingredients create a simple yet tasty meal. For the full recipe, check out the link above. How to pre-cook jasmine rice To cook jasmine rice, use a 1:1.5 rice-to-water ratio. Rinse the rice first. Then, add it to boiling water. Cover and simmer for 15 minutes. Let it cool afterward. Using day-old rice gives the best texture in fried rice. How to dice chicken breast Start with a cooked chicken breast. Place it on a cutting board. Cut it in half lengthwise, then slice it into small, bite-sized pieces. Aim for even sizes to ensure even cooking. Tips for measuring vegetables When measuring mixed vegetables, use a cup. Fill it with your choice of peas, carrots, and corn. Make sure to level it off with a knife for accuracy. Fresh or frozen veggies work well, but thaw frozen ones first. Heating the skillet and oils Grab a large skillet or wok. Heat it on medium-high. Add vegetable oil until it shimmers but does not smoke. This oil helps fry the ingredients evenly. Sautéing garlic and eggs Add minced garlic to the hot oil. Stir for about 30 seconds until fragrant. Push the garlic aside. Pour in beaten eggs next. Scramble the eggs gently until fully cooked. Then, mix them with the garlic. Combining ingredients systematically Next, add the diced chicken to the skillet. Stir for about 2 minutes until heated through. Now, toss in the mixed vegetables. Stir-fry for another 2-3 minutes until tender yet crisp. Add the jasmine rice next. Break apart any clumps gently as you stir. Incorporating soy sauce and sesame oil Drizzle soy sauce and sesame oil over the rice mix. Stir well to evenly coat all ingredients. This step adds flavor and richness to the dish. Garnishing and presentation tips Add chopped green onions last. Season with salt and black pepper to taste. For a nice touch, serve in a large bowl or on plates. Garnish with more green onions and sesame seeds. Serving size and suggestions This recipe serves about four people. Pair it with lime wedges for a zesty kick. Enjoy your savory chicken fried rice! For the complete recipe, check out the [Full Recipe]. - Importance of using day-old rice: Day-old rice is drier and firmer. This helps prevent clumping when cooking. Fresh rice can be too sticky and mushy. It’s best to cook the rice a day before and store it in the fridge. - Tips for achieving perfect egg texture: Beat the eggs well before cooking. Pour them into the pan and let them sit for a second. Stir gently to form soft curds. Don’t overcook the eggs; they should be fluffy and tender. - Stir-fry techniques for even cooking: Keep the heat high and work quickly. Use a large skillet or wok to ensure space for all ingredients. Stir constantly to avoid burning. This helps everything cook evenly and stay crisp. - Adding spice: How to adjust heat levels: Start with a small amount of red pepper flakes or chili sauce. You can always add more, but you can’t take it away. Taste as you go to find your perfect heat level. - Incorporating fresh herbs: Fresh herbs like cilantro or basil can brighten the dish. Add them at the end for the best flavor. Chopped green onions also add a fresh taste and a nice crunch. - Using alternative sauces or marinades: Try adding oyster sauce or hoisin sauce for a twist. These can add a deeper flavor to your fried rice. Experiment to find what you enjoy most. - Best frying pan or wok for this recipe: A non-stick skillet or a wok works best. This helps prevent sticking and makes stirring easier. Look for one that is large enough to hold all your ingredients. - Recommended utensils for mixing: Use a sturdy spatula or wooden spoon. This will help you mix everything without damaging your pan. A thin spatula is great for scraping the sides. - Importance of a good spatula: A good spatula helps in flipping and mixing your ingredients. It should have a flat edge for easy scooping and stirring. This simple tool can make a big difference in your cooking process. Enjoy crafting your Easy Chicken Fried Rice with these tips and tricks! For the complete recipe, check out the Full Recipe section above. {{image_4}} You can easily adapt this chicken fried rice recipe to fit different diets. For a gluten-free option, replace soy sauce with tamari. This keeps the flavor but removes gluten. If you want a vegetarian version, swap chicken for tofu. Tofu absorbs flavors well, making it tasty and filling. For a low-carb choice, use cauliflower rice instead of jasmine rice. It offers a light texture while still giving you that satisfying fried rice feel. You can also change the flavor of your fried rice with simple tweaks. For an Asian twist, add hoisin sauce. This adds a sweet and savory taste that will excite your palate. If you want a Mexican flair, sprinkle in some taco seasonings. This gives the rice a spicy kick that is fun to try. For a Mediterranean touch, toss in olives and feta cheese. These ingredients bring a whole new level of taste to your dish. There are many ways to boost your chicken fried rice. You can add extra protein, like shrimp, pork, or beef. This makes the meal heartier and more satisfying. Another option is to enhance nutrition by adding more vegetables. You can include bell peppers, broccoli, or snap peas for extra crunch and color. Lastly, think about creative add-ins. Nuts, spices, or a splash of dressing can elevate the dish and make it your own. For the full recipe, check out the earlier section. To keep your chicken fried rice fresh, place it in a container with a tight lid. This helps prevent moisture loss and keeps flavors intact. Make sure the rice cools down to room temperature before sealing the container. Store it in the fridge for up to four days. Use glass or plastic containers that are microwave safe. These options make reheating easy. Avoid using metal containers as they can get too hot in the microwave. You can reheat chicken fried rice on the stovetop or in the microwave. For stovetop reheating, add a splash of water or oil in a skillet. Heat it over medium heat while stirring. This method keeps the rice from drying out. If using the microwave, place the rice in a bowl and cover it with a damp paper towel. This helps steam the rice and keeps it moist. Heat in short bursts, stirring in between, until warmed through. To freeze chicken fried rice, allow it to cool completely. Then, divide it into portions and place each in a freezer-safe bag. Remove as much air as possible before sealing. Label the bags with the date and use them within three months for best taste. For thawing, you can leave the rice in the fridge overnight. If you’re in a hurry, you can use the microwave. Just set it to defrost mode and stir frequently until thawed. How long can I store leftover fried rice? You can store fried rice in an airtight container for up to four days in the fridge. Make sure it cools down before sealing. Reheat over medium heat for best results. Can I use uncooked rice for this recipe? No, you should not use uncooked rice. Cooked rice absorbs flavors and keeps the dish from being too hard. Use day-old rice for the best texture. What if I don’t have sesame oil? If you lack sesame oil, you can use olive oil or any neutral oil instead. It won't have the same nutty taste, but it will still be good. How to make this dish vegan? To make vegan fried rice, replace chicken with tofu and skip the eggs. Use extra veggies for texture and flavor. Adjust soy sauce to taste. What vegetables work best in fried rice? Mixed vegetables like peas, carrots, and corn are great. You can also add bell peppers, broccoli, or snap peas for variety. Choose what you like best! Can I make this recipe ahead of time? Yes, you can prep the veggies and chicken ahead of time. Just store them separately in the fridge. Cook the rice fresh for the best taste. What is the best way to cook chicken for fried rice? Cook chicken breast in a skillet until golden brown. Dice it into small pieces for even cooking. Use cooked chicken for easier preparation. How do I prevent the rice from becoming mushy? To avoid mushy rice, make sure to use day-old rice. Fresh rice holds too much water. If using fresh, spread it out to cool. Why use day-old rice? Day-old rice dries out slightly, making it perfect for frying. It also helps to keep the grains separate. This ensures a better texture for your fried rice. This blog post covered how to make chicken fried rice. We looked at key ingredients, cooking steps, and helpful tips. You learned about variations to suit different diets and flavor profiles. Storing and reheating options were also explained for your convenience. In closing, chicken fried rice is simple and customizable. You can create a dish that fits your taste and needs. Enjoy making this tasty meal!](https://goldendishy.com/wp-content/uploads/2025/06/daf8b8b3-55d6-4d68-b799-ba1a17e73868-768x768.webp)


