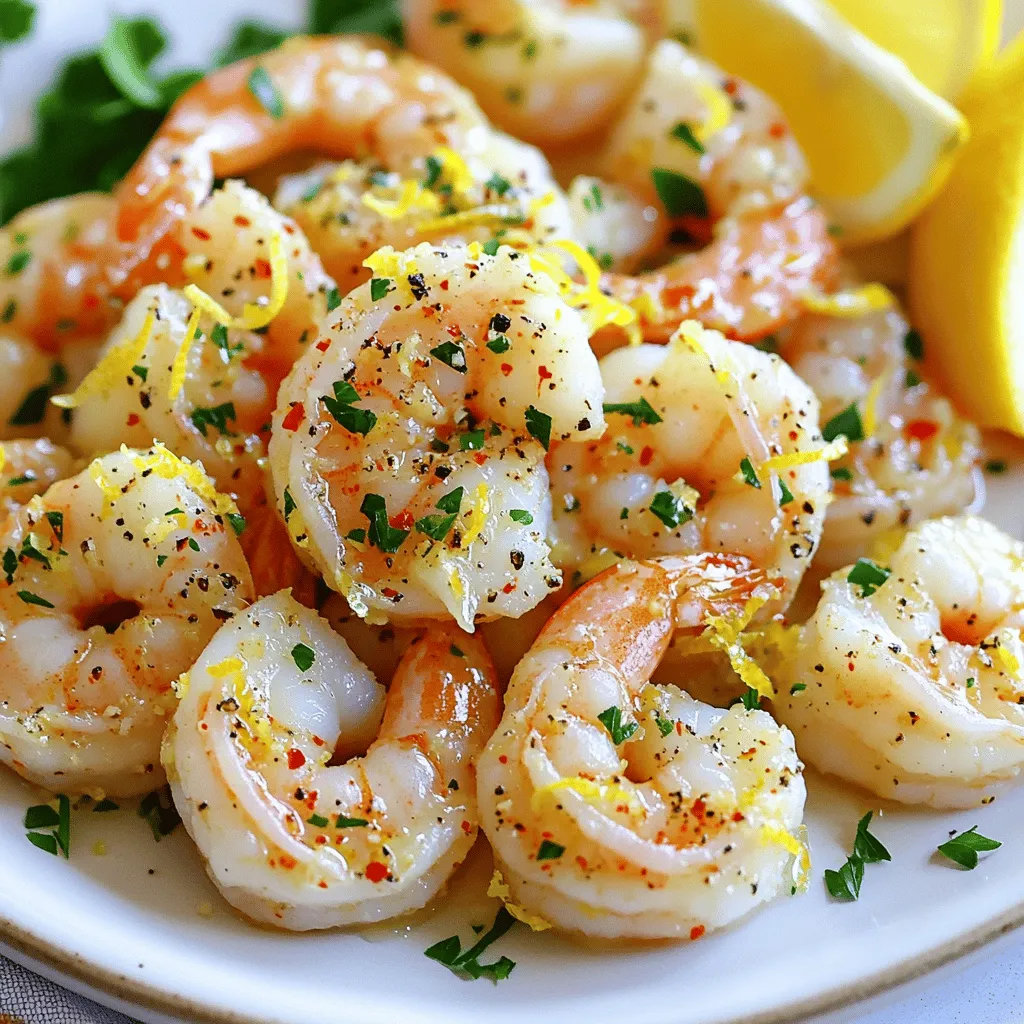
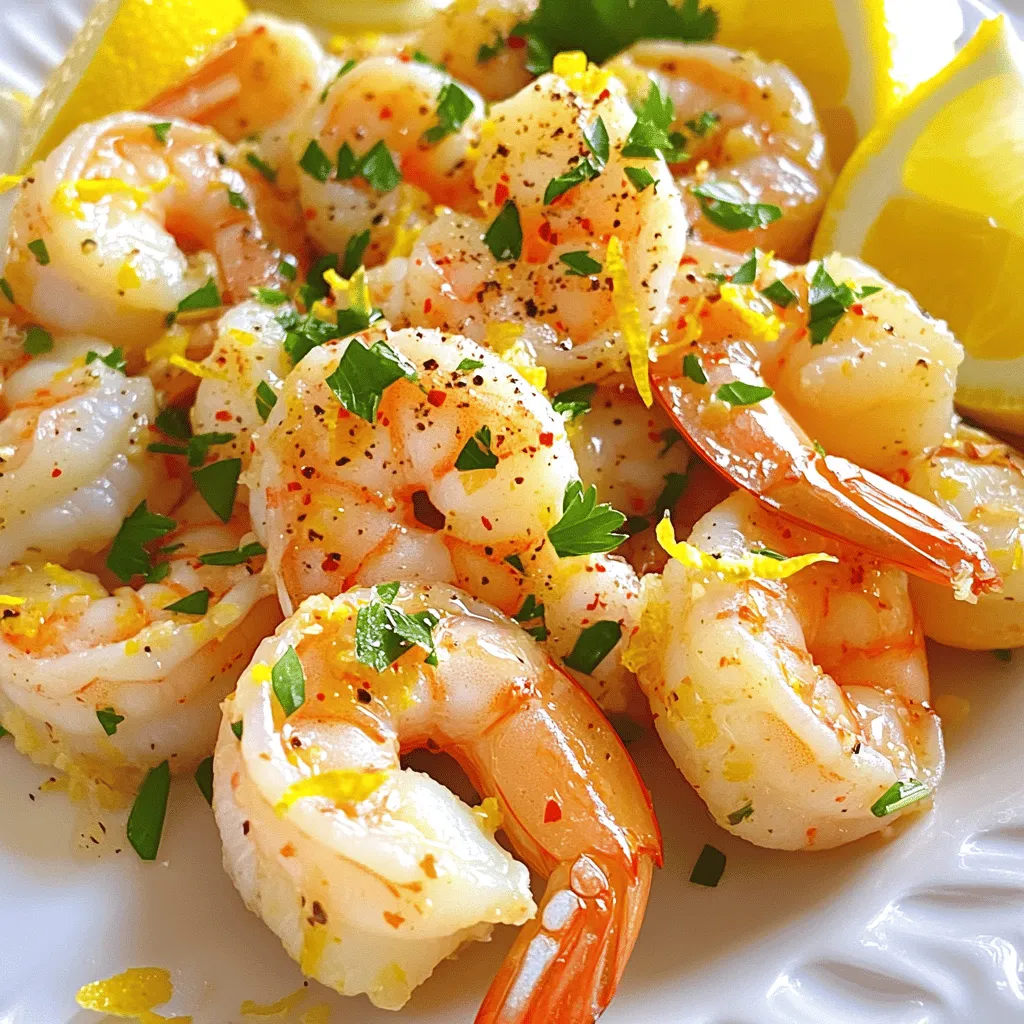
Looking for a quick and tasty meal? You’re in the right spot! My Zesty Lemon Garlic Shrimp is a delicious dish that’s simple to make. With bright lemon flavor, rich garlic, and juicy shrimp, you’ll love this recipe. I’ll share the key ingredients, step-by-step instructions, and expert tips to make it perfect every time. Let’s dive into this zesty delight and get cooking!
Ingredients
Main Ingredients for Zesty Lemon Garlic Shrimp
To make this dish, you need just a few key ingredients. Each one plays a big role in building flavor. Here’s what you will need:
– 1 pound large shrimp, peeled and deveined
– 4 cloves garlic, finely minced
– 1 lemon, zested and juiced
– 2 tablespoons extra virgin olive oil
– 1 teaspoon smoked paprika for a deeper flavor
– ½ teaspoon red pepper flakes (optional for spice)
– Sea salt and freshly ground black pepper, to taste
These ingredients create a bright and zesty flavor that will make your taste buds sing. The shrimp is the star, and the garlic adds a nice kick. The lemon zest and juice bring a fresh, tangy taste.
Optional Ingredients to Enhance Flavor
If you want to take your dish up a notch, consider adding some optional ingredients. These can deepen the flavor or add a bit of heat:
– ½ teaspoon of onion powder for a savory touch
– A splash of white wine for richness
– Fresh herbs like basil or cilantro for extra freshness
These options can help you customize the dish to your liking. Feel free to mix and match based on what you have at home.
Suggested Garnishes
Garnishing not only adds visual appeal but also enhances taste. Here are some great ideas for garnishing your shrimp:
– 2 tablespoons fresh parsley, chopped
– Lemon wedges, for serving
Chopped parsley gives your dish a lovely green color. It also adds a fresh flavor that pairs well with the shrimp. Lemon wedges let your guests add extra tang if they desire.
Step-by-Step Instructions
Preparation Steps for Shrimp
Start with fresh shrimp. Use one pound of large shrimp. Make sure they are peeled and deveined. In a medium bowl, place the shrimp. Add four minced garlic cloves. Zest one lemon and add that too. Squeeze the lemon juice into the bowl. Pour in two tablespoons of extra virgin olive oil. Sprinkle in one teaspoon of smoked paprika. If you want some heat, add half a teaspoon of red pepper flakes. Season well with sea salt and black pepper. Mix it all up so each shrimp is coated. Cover the bowl and let it sit in the fridge for 15 to 30 minutes. This step helps the shrimp soak up those zesty flavors.
Cooking Instructions for Perfect Shrimp
Heat a large skillet over medium-high heat. Once hot, carefully add the marinated shrimp in a single layer. Do not overcrowd the pan; cook in batches if needed. Cook the shrimp for about 2 to 3 minutes on each side. Look for that vibrant pink color. The shrimp should be opaque when done. Remove the skillet from heat. Immediately sprinkle fresh chopped parsley on top. This adds a nice touch of color.
Presentation Suggestions for Serving
For a stunning presentation, serve the shrimp on a large platter. You can also use individual plates for a more personal touch. Lay the shrimp on a bed of mixed greens. This adds freshness and color to your plate. Serve with extra lemon wedges on the side. They give a nice tangy kick for those who love it. For a complete meal, pair with fluffy quinoa salad. This adds texture and keeps the dish balanced. Don’t forget to enjoy your beautiful creation!
Tips & Tricks
How to Achieve the Best Flavor
To get the best flavor, use fresh ingredients. Fresh shrimp, garlic, and lemons make a big difference. The zesty lemon juice and zest add brightness. Smoked paprika brings depth and warmth. Simply mix these ingredients well. Let the shrimp marinate for at least 15 minutes. This time allows the flavors to meld and intensify.
Cooking Techniques for Juicy Shrimp
Cook shrimp in a hot skillet for the best results. A high heat gives them a nice sear. Don’t overcrowd the skillet; this leads to steaming instead of sautéing. Cook shrimp for 2-3 minutes on each side. They should turn pink and opaque. Remove them from heat as soon as they are done. Overcooked shrimp become tough and chewy.
Common Mistakes to Avoid
One common mistake is not marinating long enough. Short marinating times mean less flavor. Another mistake is cooking shrimp in batches that are too large. This causes them to cook unevenly. Lastly, avoid using shrimp that smell off or have a slimy texture. Fresh shrimp should smell like the ocean and feel firm. Following these tips helps create a flavorful dish. Enjoy your Zesty Lemon Garlic Shrimp!
Variations
Spicy Zesty Lemon Garlic Shrimp
For those who love heat, add more red pepper flakes. Start with one teaspoon. This will give your dish a spicy kick. You can also add sliced jalapeños for extra flavor. If you want a deeper flavor, try using chili oil instead of olive oil. This adds a smoky touch to the shrimp. Serve it with a side of rice to balance the heat.
Creamy Lemon Garlic Shrimp Recipe
If you prefer a creamy version, you can add heavy cream or coconut milk. After cooking the shrimp, stir in one cup of cream. This will create a rich sauce. You can also add a bit of Parmesan cheese for a cheesy twist. Serve it over pasta or rice for a filling meal. The creaminess pairs well with the zesty lemon flavor.
Vegetarian Alternatives Using Tofu or Veggies
Not a fan of shrimp? No problem! You can swap shrimp for firm tofu. Cut the tofu into cubes and marinate it just like the shrimp. Cook it until golden brown for a tasty dish. You can also use veggies like bell peppers, zucchini, or asparagus. Just sauté them in the same marinade. These options keep the zesty flavor alive. Enjoy your meal with a fresh salad or grain side.
Storage Info
How to Store Leftover Zesty Lemon Garlic Shrimp
To keep leftover Zesty Lemon Garlic Shrimp fresh, place it in an airtight container. Let the shrimp cool to room temperature first. If you store it while hot, moisture builds up. This can make the shrimp soggy. Store the container in the fridge. It should last for up to three days.
Freezing and Reheating Tips
You can freeze Zesty Lemon Garlic Shrimp if you want to save some for later. Place the cooled shrimp in a freezer-safe bag. Squeeze out as much air as possible before sealing. This helps prevent freezer burn. When you want to enjoy it again, thaw it overnight in the fridge. Reheat the shrimp gently in a skillet over low heat. This keeps it juicy and tender.
Best Practices for Keeping Shrimp Fresh
To keep shrimp fresh, always buy it from a trusted source. Look for shrimp with a mild scent and a firm texture. Store it in the coldest part of your fridge if you plan to use it soon. Use it within one to two days for the best taste. If you buy it frozen, check the packaging for the best-by date. Always thaw shrimp in the fridge, not at room temperature. Proper storage helps you enjoy that zesty flavor for longer!
FAQs
What type of shrimp is best for this recipe?
For Zesty Lemon Garlic Shrimp, large shrimp work best. They have a nice texture and cook evenly. Look for shrimp that are peeled and deveined. Fresh shrimp is ideal, but frozen works too. Just thaw them in cold water before use.
Can I make Zesty Lemon Garlic Shrimp ahead of time?
Yes, you can prep this dish ahead. Marinate the shrimp and store them in the fridge for up to 30 minutes. If you want to make it earlier, marinate the shrimp and freeze them. Just remember to thaw before cooking. The flavor will still be great!
How can I make this dish gluten-free?
This recipe is already gluten-free! The ingredients do not contain gluten. Just be sure to use gluten-free brands of any added sauces or spices. Enjoy this dish without worry if you have gluten sensitivities.
This blog post took you through the key ingredients for Zesty Lemon Garlic Shrimp. We talked about cooking steps, tips for juicy shrimp, and ways to make it unique. Remember, you can add spicy or creamy twists to fit your taste. With the right storage, leftovers can still be tasty. Explore this dish with the confidence that you can impress anyone at your table. Keep cooking and enjoy your delicious creations!


