Vegetarian Stuffed Peppers Flavorful and Easy Recipe

Are you looking for a dish that’s both tasty and easy to make? Look no further! This vegetarian stuffed peppers recipe packs great flavor and nutrients. You’ll learn how to prepare the perfect quinoa filling and bake those vibrant peppers until tender. Whether you’re a seasoned cook or just starting out, this guide will cover everything you need. Let’s dive into making a meal that will impress your friends and family!
Ingredients
Main Ingredients for Vegetarian Stuffed Peppers
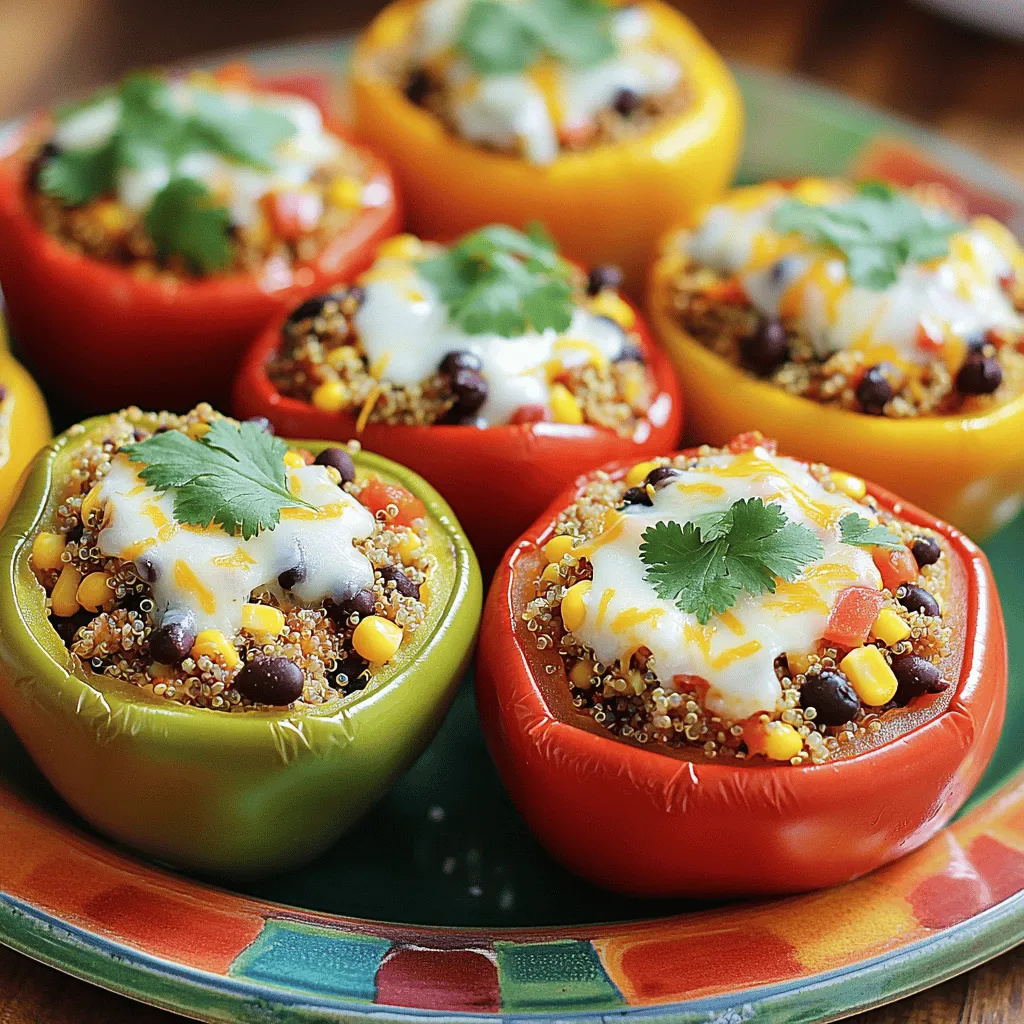
To make my colorful stuffed peppers, you need:
– 4 large bell peppers (mix colors for fun)
– 1 cup quinoa, rinsed well
– 2 cups vegetable broth
– 1 cup canned black beans, rinsed
– 1 cup sweet corn (fresh or frozen)
– 1 medium onion, diced small
– 2 cloves garlic, minced
– 1 teaspoon ground cumin
– 1 teaspoon chili powder
– 1 teaspoon smoked paprika
– Salt and pepper, to taste
– 1 cup diced tomatoes (fresh or canned)
– 1/2 cup shredded cheese (cheddar or vegan)
– Fresh cilantro, for garnish
– 1 tablespoon olive oil
These ingredients create a tasty mix. The quinoa gives a nice texture, while the peppers add crunch and color.
Cooking Essentials
You’ll want some basic tools for this recipe:
– A medium pot for cooking the quinoa
– A large mixing bowl for combining ingredients
– A baking dish to hold your stuffed peppers
– A knife and cutting board for prep
– Measuring cups and spoons for accuracy
These items help make the cooking process smooth and easy.
Substitutions and Alternatives
If you need options, consider these swaps:
– Brown rice or couscous instead of quinoa
– Any beans like pinto or kidney beans
– Use zucchini or mushrooms instead of some veggies
– For a vegan dish, skip the cheese or use a dairy-free version
These alternatives keep the recipe flexible. You can make it fit your tastes or what you have on hand.
Step-by-Step Instructions
Preheating the Oven
First, you need to preheat your oven to 375°F (190°C). This step warms the oven and helps cook your stuffed peppers evenly. If you skip this, your peppers may not cook well.
Cooking the Quinoa Filling
In a medium pot, heat 1 tablespoon of olive oil over medium heat. Add 1 diced onion and sauté for about 5 minutes until it’s soft. Then, stir in 2 minced garlic cloves for 1 more minute. Next, add 1 cup of rinsed quinoa and 2 cups of vegetable broth. Sprinkle in 1 teaspoon ground cumin, 1 teaspoon chili powder, and 1 teaspoon smoked paprika. Season with salt and pepper. Bring this to a boil, then reduce the heat and cover. Let it simmer for 15 minutes until the quinoa is fluffy and all the broth is absorbed.
Preparing the Bell Peppers
While the quinoa cools, prepare your bell peppers. Cut the tops off of 4 large bell peppers and remove the seeds and membranes. You can use a knife to make this easier. If you choose different colors, your dish will look more vibrant and tasty.
Assembling and Baking the Peppers
Now it’s time to fill the peppers. In a large bowl, mix the cooked quinoa with 1 cup of canned black beans, 1 cup of corn, and 1 cup of diced tomatoes. Gently fold the mixture to combine everything. Stuff each bell pepper with the filling, pressing slightly so they are packed well. Place the stuffed peppers upright in a baking dish. If any peppers wobble, trim a slice off the bottom. Sprinkle 1/2 cup of shredded cheese on top of each pepper. Cover the dish with aluminum foil and bake for 25-30 minutes. After 30 minutes, remove the foil and bake for another 10 minutes until the cheese is golden and bubbly. Let them cool for a few minutes, then garnish with fresh cilantro before serving. Enjoy your flavorful vegetarian stuffed peppers!
Tips & Tricks
Cooking Tips for Perfectly Stuffed Peppers
To make your stuffed peppers tasty, choose firm peppers. Look for ones without blemishes. Cut the tops off gently to avoid tearing. This keeps the filling secure. When cooking quinoa, rinse it well to remove bitterness. Use vegetable broth instead of water for more flavor. Don’t skip the spices! They add depth and warmth.
Making Ahead: Prep and Cook Strategies
You can prep your stuffed peppers a day before. Cook the quinoa filling and store it in the fridge. Cut and clean the peppers, too. When you’re ready, stuff and bake them. This saves time and effort. If you want to freeze them, do so before baking. Just thaw and bake when ready to eat.
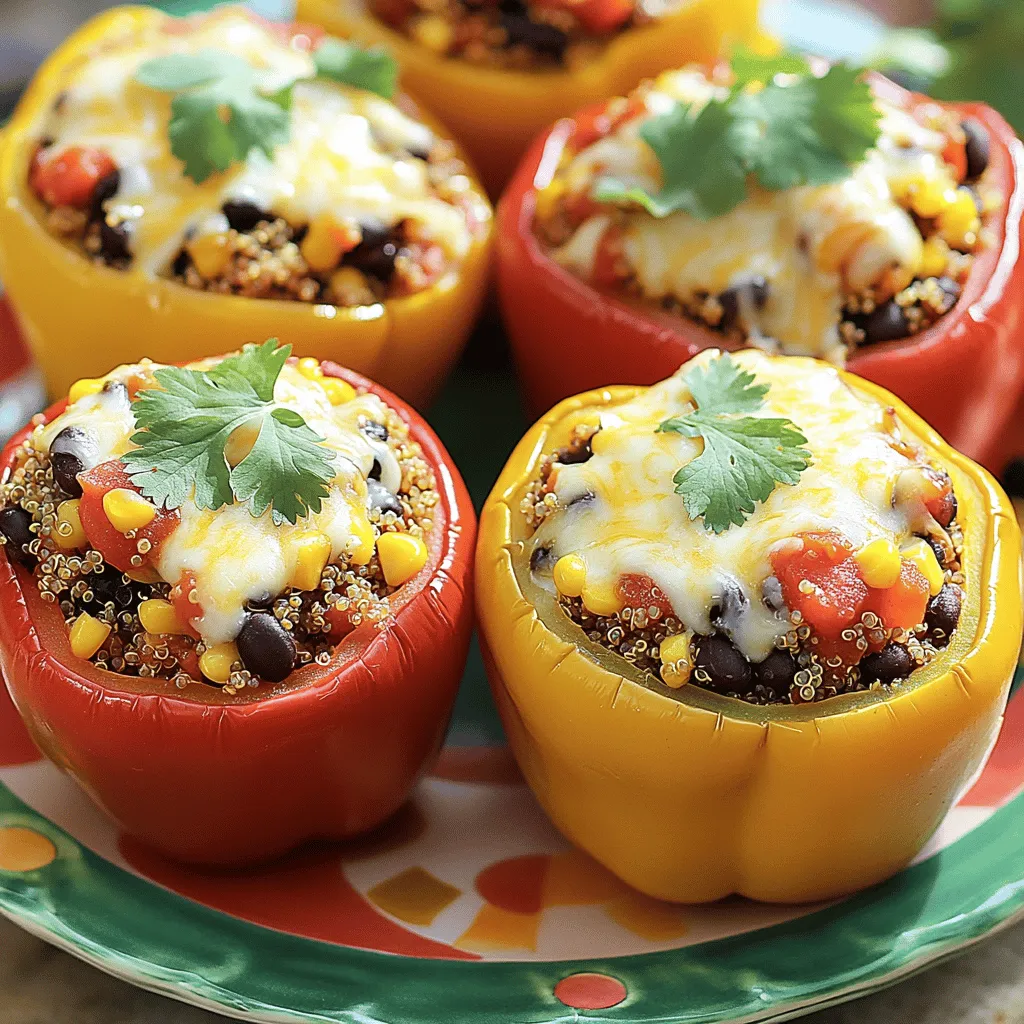
Presentation Tips for Serving
Make your dish pop with color! Arrange the stuffed peppers on a bright plate. Garnish them with fresh cilantro. A drizzle of lime juice adds a nice touch. Pair them with avocado for creaminess. You can also serve a side salad to balance the meal. A great presentation makes the meal feel special!

Variations
Flavor Variations for Stuffed Peppers
You can change the flavor of your stuffed peppers easily. Try adding different herbs or spices. For a Mediterranean twist, add feta cheese and olives. If you prefer spicy food, mix in jalapeños or hot sauce. You can also use curry powder for an Indian flavor. Each option brings a new taste to your dish.
Ingredient Swaps for Different Diets
If you follow a certain diet, you can swap ingredients. For a gluten-free option, use rice instead of quinoa. For a low-carb meal, try cauliflower rice. You can also use lentils instead of black beans for added protein. If you are vegan, skip the cheese or use a plant-based option. These swaps keep the dish tasty and fun.
Serving Suggestions and Sides
To serve stuffed peppers, consider adding sides. A fresh green salad pairs well and adds crunch. You can also serve with creamy avocado slices for richness. For a hearty meal, pair with a side of rice or quinoa. These sides enhance the dish and make it more filling. Get creative and mix flavors that you enjoy!
Storage Info
Storing Leftovers
After enjoying your vibrant quinoa-stuffed bell peppers, you may have some leftovers. Store these in an airtight container. Let them cool first before sealing. They last well in the fridge for about 3 to 5 days. If you want to keep them longer, consider freezing.
Reheating Instructions
To reheat, you can use the oven or microwave. For the oven, preheat to 350°F (175°C). Place the stuffed peppers in a baking dish, cover with foil, and heat for 15-20 minutes. If using a microwave, heat on medium power for about 3-5 minutes. Check to ensure they are heated through.
Freezing Tips for Future Meals
Freezing stuffed peppers is a great way to save time. First, allow them to cool completely. Wrap each pepper tightly in plastic wrap or foil. Place them in a freezer-safe bag. They can stay in the freezer for up to 3 months. When you’re ready, thaw them in the fridge overnight before reheating. Enjoy your meal anytime!
FAQs
How do I make vegetarian stuffed peppers without quinoa?
You can easily swap quinoa with rice or lentils. Just cook them first. You can also use couscous or bulgur for a different texture. Choose a grain that cooks well and absorbs flavors.
Can I use different vegetables for stuffing?
Absolutely! You can use mushrooms, zucchini, or spinach. These add great flavors and nutrients. Just chop them finely and mix them with your other stuffing ingredients.
How long do stuffed peppers last in the fridge?
Stuffed peppers stay fresh for about 3 to 5 days in the fridge. Make sure to store them in an airtight container. This keeps them from drying out.
What are some health benefits of vegetarian stuffed peppers?
Vegetarian stuffed peppers are packed with nutrients. They offer fiber from the beans and veggies. They also provide vitamins and minerals from the peppers and other ingredients. This dish is low in fat and high in protein.Enjoy making them!
In this blog post, we explored how to make vegetarian stuffed peppers. We covered key ingredients, cooking methods, and tips for the best results. You learned how to prep, cook, and store these tasty dishes. Remember, these peppers are flexible; you can swap ingredients to suit any diet. Use the ideas shared to make your meals fun and colorful. Enjoy your delicious stuffed peppers, and don’t hesitate to experiment with flavors!


. - Heat your skillet over medium heat. - Add the unsalted butter and let it melt. - Once melted, watch for it to bubble gently. - Next, add the minced garlic. - Sauté the garlic for about one minute. - Stir often until it smells great and turns lightly golden. - Now, add the peeled and deveined shrimp to the skillet. - Season the shrimp with salt and pepper. - If you like spice, sprinkle in some red pepper flakes. - Cook the shrimp for 2-3 minutes on one side. - Flip the shrimp to cook the other side evenly. - Add the lemon zest and juice as they cook. - Keep cooking until the shrimp are opaque. - Remove the skillet from the heat. - Stir in the chopped parsley for a fresh taste. - Serve the shrimp over warm pasta or fluffy rice. - Drizzle the leftover lemon-garlic butter sauce on top for extra flavor. - For a lovely presentation, you can garnish with lemon wedges. For more details, check the Full Recipe. - Achieving the perfect shrimp texture: To get tender shrimp, avoid overcooking. Cook them just until they turn pink. This usually takes about 2-3 minutes per side. - Best practices for sautéing garlic: Start with a hot skillet and melted butter. Add minced garlic and stir for about 1 minute. Keep an eye on it so it doesn’t burn; burnt garlic tastes bitter. - Presentation ideas for a beautiful dish: Serve the shrimp in shallow bowls to make it look elegant. Add a sprinkle of parsley on top for color. Include lemon wedges on the side for a fresh touch. - Pairing options with side dishes: Lemon garlic butter shrimp goes well with cooked pasta or fluffy rice. You can also serve it with a side salad for a light meal. - Additional herbs or spices to try: Consider adding fresh basil or thyme for extra flavor. These herbs pair well with lemon and shrimp. - Adjusting spice levels with red pepper flakes: If you like heat, add more red pepper flakes. Start with a teaspoon and adjust to your taste. This will make your dish more exciting! For more details, check the Full Recipe. {{image_4}} You can change the seafood in this recipe. Try scallops or even crab. These swaps add new tastes while keeping the dish simple. If you want a healthier fat, swap butter for olive oil. Olive oil works well and gives a light, fresh flavor. To mix things up, add other citrus flavors. Lime or orange juice can brighten the dish. You can also infuse the recipe with herbs. Try basil or thyme for a different twist. These herbs can make the dish feel more seasonal. If you need a gluten-free option, serve the shrimp over quinoa or zucchini noodles. Both are great gluten-free choices. For a low-calorie meal, cut back on the butter. You can use less or replace it with vegetable broth. This keeps the dish tasty but lighter. After enjoying your lemon garlic butter shrimp, store any leftovers in the fridge. Use an airtight container to keep them fresh. These shrimp will stay good for about 2-3 days. Always check for freshness before eating. To freeze lemon garlic butter shrimp, let them cool completely first. Place them in a freezer-safe bag, removing as much air as possible. They can last for about 2 months in the freezer. When you're ready to eat, thaw the shrimp in the fridge overnight. Reheat them gently in a skillet over low heat. This keeps them tender and tasty. Always ensure your shrimp is safe to eat after storage. Check for any off smells or changes in color. If the shrimp look slimy or smell bad, it’s best to discard them. Trust your senses to keep your meals safe and enjoyable. Cook shrimp for 4-6 minutes. They cook quickly. In a hot skillet, shrimp turn pink when done. Avoid overcooking; it makes them tough. Yes, you can use frozen shrimp. Thaw them first for best results. Place them in cold water for about 15 minutes. This way, they cook evenly and taste fresh. I love serving lemon garlic butter shrimp with: - Cooked pasta - Fluffy rice - Fresh salad - Garlic bread These sides balance the rich flavors well. Check for color and texture. Cooked shrimp turn pink and opaque. They should feel firm but not hard. When in doubt, cut one open. It should be white inside, not translucent. You’ve learned how to make lemon garlic butter shrimp. We covered essential ingredients, easy steps, tips for cooking, and variations to try. Remember to adjust flavors to your taste and pair with your favorite sides. Store leftovers safely for later enjoyment. Cooking shrimp can be simple and satisfying. Enjoy every bite, and don't hesitate to experiment. Whether for a cozy night in or impressing guests, this dish shines every time. Let your kitchen be a place of fun and flavor!](https://goldendishy.com/wp-content/uploads/2025/06/8ad1771e-7d26-4dd4-879b-9e464bbb0647-768x768.webp)
![To make vegan creamy pesto pasta, gather these fresh and simple ingredients. - 12 oz pasta (penne, spaghetti, or your favorite variety) - 2 cups fresh basil leaves, tightly packed - 1/2 cup raw cashews (soaked in water for at least 2 hours) - 1/4 cup nutritional yeast (for a cheesy flavor) - 3 cloves garlic, minced - 1/4 cup extra virgin olive oil - 1 tablespoon fresh lemon juice - Sea salt and freshly ground black pepper, to taste - 1 cup cherry tomatoes, halved (for topping) - Extra fresh basil leaves (for garnish) Each ingredient plays a vital role. The pasta is the base, while basil brings freshness. Cashews create a rich, creamy texture. Nutritional yeast adds a cheesy taste, perfect for vegan dishes. Garlic gives depth, while olive oil provides smoothness. Lemon juice brightens the flavors. Salt and pepper enhance everything. Cherry tomatoes add color and sweetness. Extra basil leaves make the dish look beautiful. For the full recipe, check out the link to ensure a delicious meal! First, fill a large pot with water and add a generous amount of salt. Bring the water to a rapid boil. This step is key; the salt helps flavor the pasta. Once boiling, add 12 ounces of your favorite pasta, like penne or spaghetti. Cook according to the package instructions. You want the pasta to be al dente, which means it should be tender but still firm to bite. Usually, this takes about 8 to 12 minutes. When the pasta is ready, drain it well and set it aside. Next, it’s time to make the vegan pesto. Grab your blender or food processor. Add 2 cups of fresh basil leaves, 1/2 cup of soaked raw cashews, and 1/4 cup of nutritional yeast. Also, include 3 cloves of minced garlic and 1 tablespoon of fresh lemon juice. Season with a pinch of sea salt and freshly ground black pepper. Blend this mixture until it becomes smooth and creamy. If it doesn't blend well, scrape down the sides of the blender and blend again until you get a silky texture. Now, combine the drained pasta with the creamy pesto sauce. Use a large mixing bowl for this. Pour the pesto over the pasta. With a pair of tongs or a spatula, toss everything together. Ensure that each piece of pasta gets coated with the vibrant pesto. If the sauce looks too thick, add a little water, one teaspoon at a time, until it reaches the desired consistency. Don't forget to taste! Adjust the seasoning with more salt, pepper, or lemon juice if needed. Finally, gently fold in 1 cup of halved cherry tomatoes for a fresh burst of flavor. Serve this delicious dish warm, garnished with extra basil leaves. Enjoy your vegan creamy pesto pasta! For the complete recipe, check the [Full Recipe]. Soaked cashews are the secret to a smooth and creamy sauce. They soften and blend well, making the pesto rich. Soak them in water for at least two hours before use. This step is key for a silky texture. If your pesto is too thick, don’t worry. Just add water! Start with a teaspoon at a time. Blend until you reach your desired creaminess. This helps the sauce hug the pasta perfectly. Don’t stop at just basil! You can spice it up with some red pepper flakes for heat. A pinch of black pepper adds depth. Try adding a bit of garlic powder for more flavor. Lemon juice adds freshness, but balance is key. If it’s too tangy, add a pinch of sugar or more cashews. This helps round out the flavors and brings the dish to life. Pair this pasta with roasted vegetables for a colorful plate. A side salad adds crunch and freshness. For a drink, consider a light white wine, like Sauvignon Blanc. As for portion sizes, aim for about one and a half cups per person. This ensures everyone leaves satisfied. Enjoy this dish warm for the best flavor experience! {{image_4}} You can change nuts or seeds in your pesto. Try using almonds or sunflower seeds. Each option brings a unique taste. For those avoiding gluten, select gluten-free pasta. Options like brown rice or chickpea pasta work well. Both choices give a nice texture and flavor. To mix up the flavor, add different herbs like parsley or spinach. These herbs bring extra freshness to your dish. You can also incorporate various vegan cheeses. Options like cashew cheese or nutritional yeast can enhance the creamy taste. This helps create layers of flavor in your pesto. Make your dish fresh by using seasonal veggies. For example, zucchini or asparagus can add crunch and color. You can also try different tomatoes. Roasted tomatoes can bring a sweet touch, while cherry tomatoes add a pop of freshness. Finish with garnishes like pine nuts or extra basil for a lovely look. For the complete recipe, check the Full Recipe. After enjoying your vegan creamy pesto pasta, store any leftovers in an airtight container. This keeps the pasta fresh and tasty. Place it in the fridge right away. The best storage time is up to 3 days. Beyond that, the pasta may lose its flavor and texture. To reheat your pasta, the best method is using a stovetop. Heat a pan over medium heat. Add a splash of water or olive oil to keep it moist. Stir gently to warm it up. When reheating, avoid high heat, as this can dry out the sauce. You want to keep that creamy goodness intact. Enjoy your delicious meal again! To make vegan creamy pesto pasta, follow these simple steps: 1. Cook the Pasta: Bring salted water to a boil. Add 12 oz of your pasta and cook until tender. This usually takes about 8-12 minutes. Drain and set aside. 2. Prepare the Pesto: In a blender, add 2 cups of fresh basil leaves, 1/2 cup of soaked raw cashews, and 3 minced garlic cloves. Pour in 1/4 cup of nutritional yeast and 1 tablespoon of lemon juice. Add a pinch of sea salt and black pepper. Blend until smooth. 3. Emulsify with Olive Oil: While blending, slowly add 1/4 cup of extra virgin olive oil. Keep blending until creamy. If it’s too thick, add water, one teaspoon at a time. 4. Combine Pasta and Pesto: In a large bowl, mix the drained pasta with your creamy pesto. Toss gently to coat the pasta well. 5. Final Touches: Taste the mix and adjust the seasoning. Fold in 1 cup of halved cherry tomatoes for a fresh touch. 6. Serve: Serve warm with extra basil leaves on top. Enjoy your delicious vegan creamy pesto pasta! Yes, you can freeze vegan creamy pesto pasta. Here are some tips to keep it tasty: - Cool Before Freezing: Let the pasta cool down before packing it. - Use Airtight Containers: Store the pasta in airtight containers or freezer bags. - Leave Space: Leave some room in the container for the pasta to expand. - Label and Date: Always label your containers with the date. Use within 2-3 months for best quality. When ready to eat, thaw in the fridge overnight. Reheat gently on the stove or in the microwave. Add a splash of water if it seems dry. If you don’t have nutritional yeast, try these alternatives: - Grated Vegan Cheese: Use a dairy-free cheese for a similar flavor. - Ground Flaxseed: This can add a nutty taste, though it won't mimic the cheese flavor. - T nutritional yeast: You can use this if you want a similar profile. - Parmesan Substitute: Some brands offer vegan parmesan that works well in pesto. Each substitute will change the flavor a bit, so adjust to your taste! This blog post covered how to make vegan creamy pesto pasta. You learned about ingredients, cooking pasta, and blending the pesto. We explored tips for smooth texture and flavor. I shared variations to keep things fresh, plus storage and reheating advice. In the end, making this dish is quick and fun. Enjoy experimenting with flavors and textures. This pasta will please vegans and non-vegans alike!](https://goldendishy.com/wp-content/uploads/2025/07/928f57b2-1357-48f3-b20e-4d7b01e4c937-768x768.webp)

![- 1 can (15 oz) black beans, drained and rinsed - 1/2 cup cooked quinoa, cooled - 1/2 cup breadcrumbs (gluten-free option available) - 1 small red onion, finely diced - 2 cloves garlic, minced - 1 small jalapeño, minced (seeds removed for less heat) - 1 tablespoon chili powder - 1 teaspoon ground cumin - 1/2 teaspoon smoked paprika - Sea salt and black pepper, to taste - 2 tablespoons fresh cilantro, finely chopped - 1 large egg (or for a vegan option, mix 1 tablespoon ground flaxseed with 2.5 tablespoons water) - Olive oil for frying To make these spicy black bean burgers, choose fresh ingredients when you can. Fresh veggies add great flavor and crunch. However, pantry staples like canned black beans and quinoa work well too. When picking black beans, look for those with a firm texture. Check the can for any damage. Good beans should have a clean label with no added preservatives. For a gluten-free option, look for gluten-free breadcrumbs at your store. They are easy to find and useful in many dishes. You can also use oats or crushed corn chips if needed. This recipe is not just tasty but also easy to prepare. It allows you to explore new flavors while making a healthy meal. For the full recipe, check the instructions provided above. 1. Mashing black beans for ideal texture: Start with a large bowl. Use a fork or potato masher to mash the black beans. Aim for a mix of smooth and chunky. This gives your burger a great texture. 2. Mixing all ingredients thoroughly: After mashing, add the cooked quinoa, breadcrumbs, diced onion, minced garlic, chopped jalapeño, chili powder, cumin, smoked paprika, salt, pepper, and cilantro. Mix everything well. You want each bite to have a burst of flavor. 3. Tips for shaping patties consistently: To shape patties, wet your hands slightly. This helps the mixture stick less. Form about four to six patties, depending on your size preference. Make them even in thickness for even cooking. 1. Heating the skillet correctly: Pour a good drizzle of olive oil into a non-stick skillet. Heat it on medium. Wait until the oil shimmers before adding patties. This step is key for crispiness. 2. Cooking times for achieving crispy patties: Cook each patty for 5 to 6 minutes. Check for a golden brown color before flipping. This ensures a nice crust forms. 3. How to avoid breakage while flipping: Use a spatula to gently lift each patty. Flip them carefully to keep them intact. If they feel too soft, let them cook a bit longer. To get the right texture, add ingredients in the right order. Start with the black beans. Mash them well, but leave some chunks. This gives your burger a nice bite. Next, mix in the quinoa and breadcrumbs. These help bind your burger. If you want a firmer burger, add more breadcrumbs. For a softer burger, reduce them. Use olive oil for frying. It adds great flavor and helps the patties crisp up nicely. Spice up your burgers with extra spices. Consider adding cayenne for heat or oregano for earthiness. You can make a homemade spicy mayo. Mix mayo with hot sauce and lime juice. This makes a great dip too! Pair your burgers with tasty sides. Sweet potato fries or a fresh salad work well. These add color and flavor to your meal. For the full recipe, check out [Full Recipe]. {{image_4}} You can easily change this recipe to suit your taste. Here are a few ideas: - Different Beans or Grains: If you want a twist, try using kidney beans or chickpeas. You can also swap quinoa for brown rice or oats. Each option brings a unique flavor and texture. - Adding Cheese: For a creamy touch, mix in some cheese. Cheddar or pepper jack adds great flavor. If you prefer a vegan option, use vegan cheese or nutritional yeast. Both will give a cheesy taste without dairy. - Adjusting Spice Levels: Want it milder? Skip the jalapeño or use less chili powder. If you love heat, double the spices or add hot sauce. Make it just right for you. Take your spicy black bean burgers to the next level with these fun ideas: - Unique Toppings: Try avocado slices, pickled onions, or spicy slaw. Fresh herbs like cilantro or basil add a bright touch too. Experiment and find your favorite combo! - Suggested Sides: Pair your burgers with sweet potato fries, a crisp salad, or coleslaw. These sides add crunch and flavor to your meal. - Creative Presentation: Stack your burger high with colorful veggies. Serve it on a wooden board for a rustic look. Use fun plates to make your dish pop. Your guests will love it! For the full recipe, check out the [Full Recipe]. After enjoying your spicy black bean burgers, store leftovers in the fridge. Place cooked patties in an airtight container. They stay fresh for about three to four days. For uncooked patties, wrap them tightly in plastic wrap or place them in a freezer-safe bag. This way, you can freeze them for up to three months. To reheat, heat a skillet over medium heat. Add a little olive oil and cook the patties for about five minutes on each side. This will keep them crispy. You can also use an oven. Preheat it to 350°F (175°C) and bake for about 10-15 minutes. Cooked spicy black bean burgers last for up to four days in the fridge. If you freeze them, they can last for about three months. Look for signs of spoilage, like an off smell or a change in color. If the burgers feel slimy or dry, it's best to throw them away. Always trust your senses to keep your food safe! Can I make these burgers ahead of time? Yes, you can make these spicy black bean burgers ahead of time. Shape the patties and store them in the fridge for up to a day. This saves time on busy nights. You can also freeze them for up to three months. Just make sure to separate them with parchment paper. Are spicy black bean burgers gluten-free? Yes, they can be gluten-free! Use gluten-free breadcrumbs instead of regular ones. Many brands offer tasty options that work well in this recipe. Always check the label for hidden gluten. What can I use as a binder if I can’t use eggs? If you can’t use eggs, try a flax egg. Mix 1 tablespoon of ground flaxseed with 2.5 tablespoons of water. Let it sit for about five minutes until it thickens. This works great to hold the burger together. How can I make these burgers spicier? To add more heat, include extra jalapeños or use a spicier pepper like serrano. You can also add hot sauce or cayenne pepper to the mixture. Experiment to find your perfect spice level! Can I cook these on a grill instead? Absolutely! Grilling adds a nice smoky flavor. Preheat your grill and lightly oil the grates. Cook the patties for about 5-6 minutes on each side, just like in a skillet. What are the best buns to use for black bean burgers? I recommend whole wheat or brioche buns for great flavor. Lettuce wraps are an option too for a low-carb meal. Choose what fits your taste and diet best! Tips for meal prepping these burgers for the week. Make a large batch of patties and store them in the fridge or freezer. You can reheat them quickly for lunch or dinner. Pair with fresh toppings for a nice meal. Having these ready to go makes weeknight cooking easier! You learned how to make delicious black bean burgers. We covered key ingredients, step-by-step instructions, and great tips. Remember to choose fresh ingredients for the best flavor. Mix your beans well to get the right texture. Don’t forget to try different variations and toppings to suit your taste. Proper storage will help you enjoy leftovers later. With these tips, you can impress anyone at your next meal. Enjoy creating your perfect black bean burger!](https://goldendishy.com/wp-content/uploads/2025/06/68a5a06a-1097-44cf-8076-380ecc54e2d9-768x768.webp)
![To make honey lemon roasted salmon, you need a few simple items: - 4 salmon fillets (6 oz each) - 1/4 cup honey - 2 tablespoons freshly squeezed lemon juice - Zest of 1 lemon (about 1 teaspoon) - 2 tablespoons extra virgin olive oil - 3 cloves garlic, finely minced - Salt and black pepper to taste These ingredients work well together. The honey adds sweetness, while the lemon gives a bright flavor. The olive oil helps keep the salmon moist. Garlic brings a nice kick to the dish. You can add some optional garnishes to make your dish look even better. Consider these: - Fresh dill sprigs for a pop of color and taste - Extra lemon wedges for serving These garnishes add freshness and make the dish more appealing. They also enhance the flavors. If you don't have all the ingredients, don't worry! You can swap some things out: - Use maple syrup instead of honey for a different sweet flavor. - Lime juice can replace lemon juice for a zesty twist. - If you lack fresh garlic, garlic powder works in a pinch. These swaps can still give you a tasty meal. Feel free to get creative! For the full recipe, check the detailed steps. To start, preheat your oven to 400°F (200°C). This gives the salmon a nice roast. In a bowl, mix honey, lemon juice, lemon zest, olive oil, and minced garlic. Whisk it well until smooth. Next, take your salmon fillets and season both sides with salt and black pepper. This will boost the flavor. Place the fillets skin-side down on a baking sheet lined with parchment paper. This step makes cleanup easy. Now, use a brush or spoon to spread the honey lemon mix over the salmon fillets. Make sure to coat them well for great taste. Now, place the baking sheet in the oven. Roast the salmon for 12-15 minutes. It’s done when the flesh looks opaque and flakes easily with a fork. This means it's tender and juicy. After roasting, take the salmon out of the oven. Let it rest for a few minutes. This keeps it warm and moist. When serving, lay the salmon on a white platter. Drizzle any leftover honey lemon mixture from the baking sheet on top. For a nice touch, add lemon wedges around the salmon. If you like, you can garnish with fresh dill sprigs. This adds color and flavor. You can find the full recipe and more tips at [Full Recipe]. Enjoy your meal! To get perfectly roasted salmon, start with fresh fillets. Fresh fish tastes better. Always preheat your oven to 400°F (200°C). This helps the salmon cook evenly. Make sure to line your baking sheet with parchment paper. This keeps the salmon from sticking. For a nice glaze, brush the honey lemon mixture on thick. This adds more flavor and caramelizes well. Roast for 12 to 15 minutes. The salmon is done when it flakes easily with a fork. One common mistake is overcooking the salmon. This makes it dry and tough. Always check it a few minutes before the time is up. Another mistake is not seasoning enough. Salt and pepper bring out the salmon's natural taste. Skipping the marinade is also a no-go. The honey and lemon mix adds great flavor. Lastly, don’t skip resting the salmon after cooking. This keeps it juicy and tender. Marinating is key to enhancing flavor. You can use the honey lemon mix as a marinade. Let the salmon sit in the mixture for 30 minutes before cooking. This allows the fish to soak up all the flavors. Feel free to add herbs like thyme or rosemary. These herbs pair well with salmon. You can also try different citrus juices for a twist. Orange or lime can add a nice touch. For more ideas, check out the Full Recipe. {{image_4}} Grilling salmon gives it a lovely smoky flavor. Start with the same honey lemon mix. Marinate the salmon in this blend for about 30 minutes. Preheat your grill to medium-high heat. Cook each side for about 5-7 minutes. Look for grill marks and a nice char. This method adds depth to the dish. Fresh herbs can brighten your meal. Add herbs like thyme or parsley to the honey lemon mix. These herbs work well with the salmon's rich flavor. Simply brush the mixture over the salmon fillets before cooking. It gives each bite a fresh taste. You can also sprinkle herbs on top after cooking for added color and flavor. Want a faster option? Pan-searing is quick and easy. Heat a bit of olive oil in a skillet over medium heat. Season the salmon with the honey lemon mix. Place the fillets skin-side down in the hot skillet. Cook for about 4-5 minutes per side. This method gives you a crispy skin and juicy inside. It's a great way to enjoy salmon on a busy night. For more cooking ideas, check out the Full Recipe. After cooking your honey lemon roasted salmon, let it cool down. Place the leftover salmon in an airtight container. This keeps it fresh. Store it in the fridge for up to three days. If you want to enjoy it later, do not wait too long. The sooner you store it, the better it tastes when you reheat. You can freeze honey lemon salmon if you have extra. Wrap each piece tightly in plastic wrap. Then, place them in a freezer-safe bag. Squeeze out the air before sealing. Label the bag with the date. You can freeze it for up to three months. When you're ready to eat it, thaw it overnight in the fridge. To reheat salmon, the oven works best. Preheat the oven to 275°F (135°C). Place the salmon on a baking sheet. Cover it with foil to prevent drying. Heat for about 15 minutes or until warm. You can also use a microwave. Put it on a plate and cover it with a microwave-safe lid. Heat for 30 seconds at a time until warm. Enjoy your meal again! For the full recipe, check back to our earlier section. You can tell salmon is done when it looks opaque. The flesh should flake easily with a fork. Use a meat thermometer if you want to be sure. The internal temp should reach 145°F (63°C). If you cut into the fish, it should look moist and tender. Overcooked salmon can be dry, so check it closely. Yes, you can use frozen salmon for honey lemon roasted salmon. Just make sure to thaw it first. Place the salmon in the fridge overnight or run it under cold water. Once thawed, pat it dry with a paper towel. Then, follow the recipe as usual. Cooking from frozen may require a few extra minutes. Honey lemon roasted salmon pairs well with many sides. Here are some ideas: - Steamed broccoli - Roasted asparagus - Quinoa salad - Garlic mashed potatoes - Lemon rice - Mixed greens with vinaigrette These sides add color and nutrition to your meal. You can mix and match based on your taste. Enjoy trying out different combinations! For the full recipe, check out the section above. This blog post covered how to make honey lemon roasted salmon. We explored key ingredients, including essential and optional items. I shared step-by-step cooking instructions and tips to avoid mistakes. You also learned about variations and how to store salmon. Try these methods to create simple and tasty meals. With practice, you'll impress yourself and others with your cooking skills. Enjoy your journey to making delicious honey lemon salmon!](https://goldendishy.com/wp-content/uploads/2025/07/988a6f99-fc0c-4e25-b6bc-fd8b1dc60d33-768x768.webp)