Vegetarian Enchilada Casserole Flavorful and Easy Meal

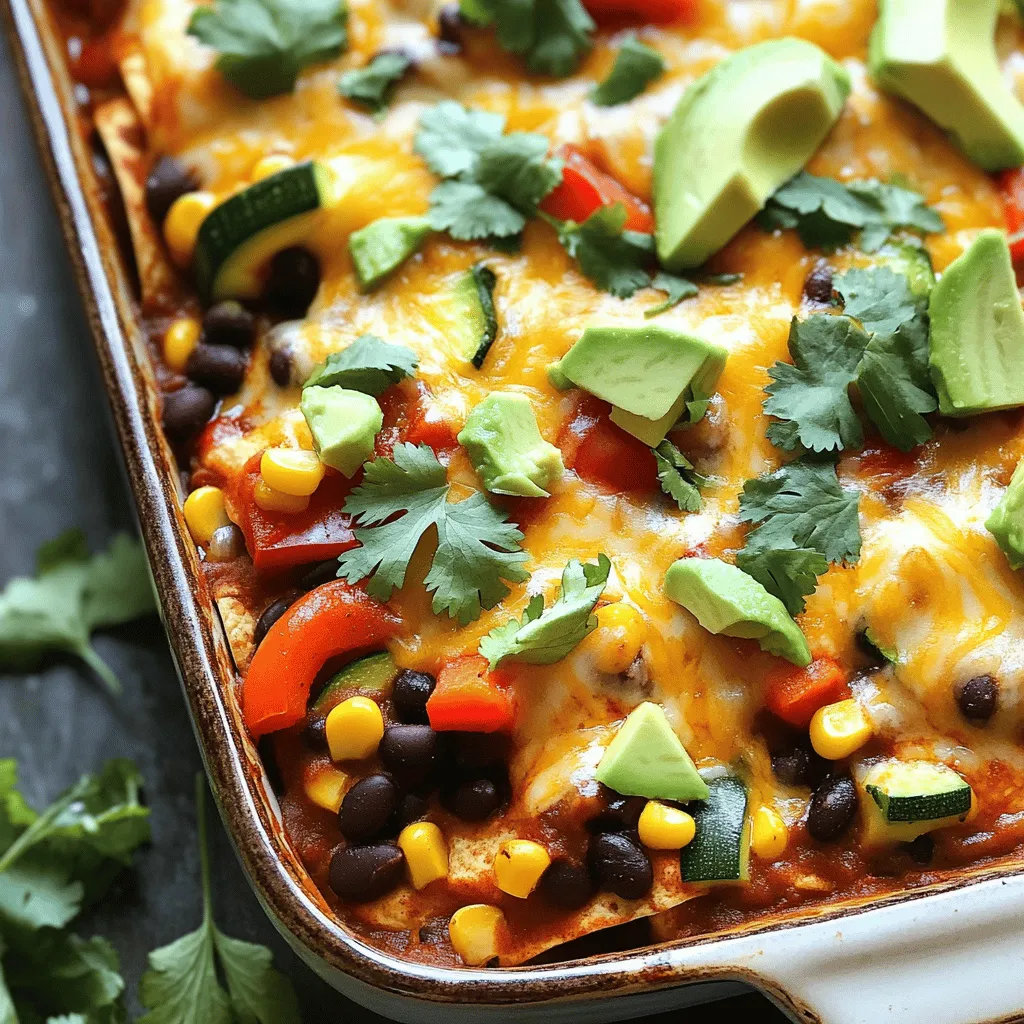
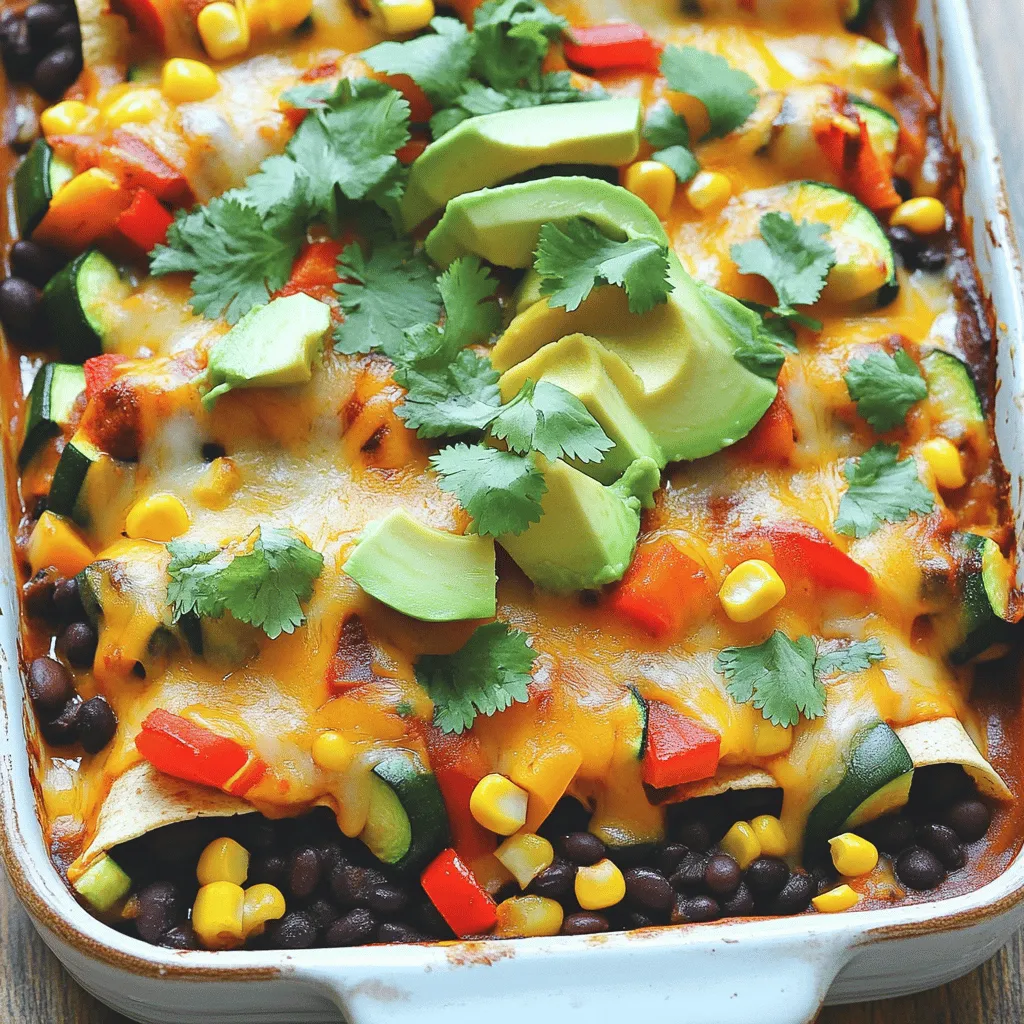
Are you ready to spice up your dinner routine with a delicious Vegetarian Enchilada Casserole? This easy meal is loaded with flavor and packed with nutrients. You’ll love how simple it is to make, from layer after tasty layer of black beans, corn, and fresh veggies, all topped with gooey cheese. In this post, I’ll guide you through every step to create this crowd-pleaser that’s perfect for busy weeknights. Let’s dig in!
Ingredients
To make a delicious vegetarian enchilada casserole, you need the right mix of fresh ingredients. Here’s a detailed list:
– 2 cups black beans, rinsed and drained
– 1 cup corn kernels (fresh or frozen)
– 1 bell pepper, diced (choose your favorite color)
– 1 small zucchini, diced
– 1 small red onion, finely chopped
– 2 cloves garlic, minced
– 1 teaspoon ground cumin
– 1 teaspoon smoked paprika
– 1 tablespoon olive oil
– 12 corn tortillas
– 2 cups enchilada sauce (store-bought or homemade)
– 1 ½ cups shredded Mexican cheese blend (or your preferred dairy-free cheese)
– Fresh cilantro, for garnish
– Avocado slices, for serving (optional)
– Sour cream or Greek yogurt, for serving (optional)
Each ingredient plays a key role in flavor and texture. Black beans add protein and creaminess. Corn brings sweetness and crunch. The bell pepper and zucchini add color and freshness. Onions and garlic create a savory base. The spices, ground cumin and smoked paprika, give the dish depth. Olive oil helps sauté the veggies and enhances the flavors.
Corn tortillas serve as the foundation, soaking up all the delicious sauce. Enchilada sauce ties everything together with a rich, tangy taste. Cheese melts on top, adding gooey goodness. Finally, garnishes like cilantro and avocado elevate the dish, offering freshness and creaminess.
Step-by-Step Instructions
Preparation
1. Preheating the oven: Start by preheating your oven to 375°F (190°C). This helps the casserole bake evenly and reach the right texture.
2. Sautéing the aromatics: In a large skillet, heat one tablespoon of olive oil over medium heat. Add the finely chopped red onion and minced garlic. Cook these for about 2-3 minutes until they become soft and clear. This step brings out their flavors and aromas.
Building the Casserole
1. Layering with tortillas: Grab a 9×13 inch baking dish. Spread a thin layer of enchilada sauce on the bottom. Lay three corn tortillas on top of the sauce. Overlap them slightly for full coverage.
2. Adding vegetable and bean mixture: Now, take half of your sautéed vegetable mix. Spread it over the tortillas. Sprinkle one-third of the shredded cheese on top. Repeat this layering with more sauce, tortillas, and the remaining vegetable mix. Finish with another layer of tortillas and the last of the sauce and cheese.
Baking the Casserole
1. Initial baking with foil: Cover your baking dish tightly with aluminum foil. Place it in the preheated oven and bake for 20 minutes. This helps steam the veggies and melt the cheese.
2. Final bake without foil for cheese browning: After 20 minutes, carefully take off the foil. Continue baking for an extra 10-15 minutes. The cheese should bubble and turn a lovely golden brown.
After baking, let the casserole cool for a few minutes before slicing. Enjoy your tasty vegetarian enchilada casserole!
Tips & Tricks
Perfecting the Casserole
Layering is key to the flavor of your casserole. Start with enchilada sauce to moisten the tortillas. Each layer should have beans, vegetables, and cheese. This method creates a great taste and texture.
Ovens can heat differently, so check your casserole often. If your oven runs hot, reduce the baking time. If it runs cool, you may need to bake it longer. Keep an eye on the cheese; it should bubble and turn golden brown.
Ingredient Substitutions
You can switch up the beans and veggies based on what you have. Black beans work well, but pinto or kidney beans are great too. For veggies, try spinach, mushrooms, or even sweet potatoes.
When it comes to cheese, you have options. If you prefer dairy-free, use a plant-based cheese blend. Just ensure it melts well for that perfect finish.

Variations
Customizing Your Dish
You can make your vegetarian enchilada casserole unique with some simple changes. If you like heat, try a spicy vegetarian enchilada casserole. Add diced jalapeños or a splash of hot sauce to the veggie mix. This gives your dish a nice kick!
For a taco-flavored enchilada casserole, you can use taco seasoning instead of cumin and smoked paprika. This adds a new flavor twist. You can also mix in some diced tomatoes or black olives for extra taste and texture.
Meal Prep Ideas
Meal prepping is a smart way to save time. Here are some tips for busy weeknights. You can make your casserole a day ahead. Just follow the steps, but do not bake it. Cover it well and store it in the fridge. When ready, bake it as per the instructions.
If you want to freeze the casserole, assemble it and wrap it tightly in foil. It can stay in the freezer for up to three months. When you want to eat it, thaw it overnight in the fridge. Then, bake it as usual.
Enjoy these ideas and get creative with your vegetarian enchilada casserole!
Storage Info
Proper Storage Techniques
To keep your vegetarian enchilada casserole fresh, choose airtight containers. Glass or plastic containers work well. Make sure they can hold the casserole without crowding. For best results, let the casserole cool down before storing.
Store leftovers in the fridge for up to four days. If you want to keep it longer, consider freezing. Wrap the casserole tightly in plastic wrap and then in foil. This will prevent freezer burn and keep it tasty.
Reheating Instructions
You can reheat your casserole in two ways: microwave or oven.
For the microwave, place a portion on a microwave-safe plate. Cover it with a damp paper towel to keep moisture. Heat it for about 2-3 minutes, checking if it’s warm throughout.
For the oven, preheat it to 350°F (175°C). Place the casserole in a baking dish and cover it with foil. Bake for about 15-20 minutes. This method keeps the cheese nice and melty.
If you want the top crispy, remove the foil for the last 5 minutes. Enjoy your meal!
FAQs
Common Questions
How to make enchilada sauce from scratch?
To make enchilada sauce at home, combine 2 tablespoons of olive oil with 2 tablespoons of flour in a pot over medium heat. Stir until smooth. Add 2 cups of vegetable broth, 1 can of tomato sauce, and spices like chili powder, cumin, and garlic powder. Simmer for 15 minutes. This sauce adds a fresh taste to your vegetarian enchilada casserole.
Can I use flour tortillas instead of corn?
Yes, you can use flour tortillas. They will add a different texture and flavor. However, corn tortillas are traditional and give a unique taste to the casserole. Choose what you enjoy most!
What to serve with vegetarian enchilada casserole?
This dish pairs well with a fresh salad, guacamole, or Mexican rice. You can also add a dollop of sour cream or Greek yogurt for creaminess. Fresh cilantro on top adds a lovely touch too.
How long can leftovers be stored in the fridge?
Leftovers can last for about 3 to 5 days in the fridge. Store them in an airtight container to keep them fresh. You can also freeze the casserole for up to 3 months. Just make sure to reheat well before serving again!It uses simple ingredients like black beans, corn, and fresh veggies. You’ll need about 30 minutes to prep and 50 minutes to cook. This recipe serves six people.
Comprehensive Recipe Steps
1. Preheat your oven to 375°F (190°C).
2. Heat olive oil in a large skillet over medium heat.
3. Sauté chopped red onion and minced garlic for 2-3 minutes until soft.
4. Add diced bell pepper and zucchini, cooking for 5 minutes.
5. Stir in rinsed black beans, corn, ground cumin, and smoked paprika. Cook for 2-3 minutes more.
6. Spread a thin layer of enchilada sauce in a 9×13 inch baking dish.
7. Layer 3 corn tortillas over the sauce, slightly overlapping.
8. Add half of the vegetable mixture and sprinkle with 1/3 of the cheese.
9. Repeat the layers until all ingredients are used, ending with tortillas.
10. Pour remaining enchilada sauce over the top layer and add the rest of the cheese.
11. Cover the dish tightly with aluminum foil and bake for 20 minutes.
12. Remove the foil and bake for another 10-15 minutes until the cheese bubbles and turns golden.
13. Let it cool for a few minutes, then slice and serve with cilantro, avocado, and sour cream, if desired.Enjoy!
This blog post explored a tasty vegetarian enchilada casserole. We covered key ingredients like black beans, corn, and spices. You learned to prepare the casserole with easy steps, layer flavors, and bake it to perfection. I shared tips for customization and meal prep, ensuring your dish fits your needs. Remember, proper storage and reheating help you enjoy leftovers. With these insights, you can create a delicious meal for any occasion. Happy cooking!


![To make this tasty dish, gather these main items: - 1 large head of cauliflower, cut into bite-sized florets - 5 cloves of garlic, skins left on - 3 tablespoons extra virgin olive oil, divided - 1/4 cup unsweetened almond milk (or your preferred milk) - 2 tablespoons butter (or a vegan alternative) - Salt and freshly ground black pepper, to taste These ingredients form the base of the mash. The cauliflower gives the dish its creamy texture. Roasting the garlic adds a rich flavor. You can change the recipe to suit your taste. Here are some ideas: - Swap almond milk for regular milk or cream for a richer flavor. - Use ghee instead of butter for a unique twist. - Add a pinch of nutmeg for warmth. - Incorporate herbs like thyme or rosemary for added depth. These options let you make the dish your own. Feel free to get creative! Garnishing makes the dish look appealing. Here are some great choices: - Fresh chives, finely chopped, for a pop of color - A drizzle of extra virgin olive oil for richness - A sprinkle of smoked paprika for a touch of spice These garnishes enhance the flavor and presentation. They make your Roasted Garlic Cauliflower Mash shine on the table. For the full recipe, check the earlier section. To start, I preheat my oven to 400°F (200°C). This temperature works best for roasting. Next, I take one large head of cauliflower and cut it into bite-sized florets. I love using fresh cauliflower for the best flavor. On a baking sheet, I place the florets and five unpeeled cloves of garlic. Then, I drizzle two tablespoons of extra virgin olive oil over them. I sprinkle salt and black pepper generously, then toss everything together. It helps the veggies get well-coated. I spread the cauliflower and garlic in a single layer. Now, I roast them for 25 to 30 minutes. Halfway through, I gently toss them to ensure they cook evenly. I look for a nice golden brown color and tender texture when they are done. Once roasted, I let the garlic cool for a few minutes before handling it. After cooling, I squeeze the softened garlic out of its skin. I put it into a large mixing bowl with the roasted cauliflower. Then, I add a quarter cup of unsweetened almond milk, two tablespoons of butter, and the last tablespoon of olive oil. I grab a hand mixer or an immersion blender to blend the mix. I blend until it turns smooth and creamy. If I want a chunkier mash, I blend just until combined. I make sure not to overmix, as it can change the texture. Once blended, I taste the mash. If it needs more flavor, I adjust with extra salt and pepper. I love a well-seasoned mash! Now, I transfer the cauliflower mash to a serving bowl. For a fun finishing touch, I sprinkle freshly chopped chives on top. This adds color and a nice flavor. To make it look fancy, I might drizzle a bit of olive oil on top. This mash is now ready to impress! Enjoy this easy and tasty dish from the [Full Recipe]. To make the best roasted garlic cauliflower mash, follow these tips. First, use a large head of cauliflower. This gives you enough to work with. Cut the florets into even sizes. This helps them cook at the same rate. Roasting adds flavor, so don’t rush it. Allow the cauliflower to become tender and golden. When blending, don’t overmix. A few pulses will give you a nice texture. If you want it creamier, add a splash more milk. Always taste as you go. Adjust salt and pepper to your liking for the best flavor. Having the right tools makes cooking easier. Here’s what I recommend: - Baking sheet for roasting - Large mixing bowl for combining ingredients - Immersion blender or hand mixer for smoothness - Measuring cups and spoons for precise amounts - Knife and cutting board for prep These tools help you work efficiently and make the process enjoyable. Watch out for these common mistakes. First, don’t skip the roasting step. Raw cauliflower will not have the same rich taste. Second, avoid using too much liquid. It can make your mash watery. If you prefer a thicker mash, add less almond milk. Finally, remember to season well. Under-seasoning can leave your mash bland. Always taste your dish before serving. This way, you ensure it is full of flavor. For the full recipe, check the details above. Enjoy making your roasted garlic cauliflower mash! {{image_4}} You can easily make this dish dairy-free. Use almond milk or coconut milk instead of regular milk. For a buttery flavor, swap butter for vegan butter or olive oil. This keeps the mash creamy and rich without dairy. Adding flavors can elevate your mash. Fresh herbs like thyme or rosemary add a lovely touch. You can also sprinkle in garlic powder for extra garlic flavor. If you enjoy cheese, mix in some grated Parmesan for a savory kick. Get creative with how you serve this mash! Use it as a base for grilled chicken or fish. You can also serve it as a side dish with roasted vegetables. Try topping it with sautéed mushrooms or crispy bacon bits for added flavor and texture. After enjoying your roasted garlic cauliflower mash, let it cool. Place it in an airtight container. Store it in the fridge for up to 4 days. This keeps the flavor fresh and the texture nice. If you have more leftovers, freezing is a great option. Put the mash in a freezer-safe bag or container. Make sure to remove excess air. It will last for about 3 months. Label the container with the date so you can keep track. When you're ready to enjoy the mash again, reheat it gently. You can use the microwave or a stovetop. If it seems dry, add a splash of almond milk or butter. Stir it well as you heat it. This keeps it creamy and delicious. Yes, you can make Roasted Garlic Cauliflower Mash ahead of time. Prepare the mash, then let it cool. Store it in an airtight container in the fridge for up to three days. When you’re ready to eat, simply reheat it on the stove or in the microwave. You may need to add a splash of milk to bring back the creamy texture. Yes, cauliflower mash is a low-carb alternative to mashed potatoes. A cup of cooked cauliflower has about 5 grams of carbs, while a cup of mashed potatoes has around 35 grams. This makes cauliflower mash a great choice if you want to cut carbs but still enjoy a creamy side dish. Roasted Garlic Cauliflower Mash pairs well with many dishes. You can serve it with roasted chicken, grilled steak, or pan-seared fish. It also complements sautéed vegetables or a fresh salad. For a hearty meal, try it with a rich mushroom gravy or a savory sauce. The mash's creamy texture and garlic flavor enhance any main dish beautifully. Roasted Garlic Cauliflower Mash is simple and tasty. We covered its key ingredients, from cauliflower to garlic. You can customize it with optional ingredients and garnishes for more flavor. The step-by-step instructions ensure a smooth texture every time. You now have tips to avoid common mistakes. Variations allow for dairy-free or unique flavors. Storing is easy, and leftovers can even be frozen. This mash is a great low-carb option. Try it with your favorite dishes for a perfect side.](https://goldendishy.com/wp-content/uploads/2025/07/e8f9d6da-9905-472e-90b5-76f2ba9b0789-768x768.webp)
![To make a fresh Mediterranean quinoa salad, gather these key ingredients: - 1 cup quinoa, thoroughly rinsed - 2 cups vegetable broth (preferably low-sodium) - 1 bell pepper (either red or yellow), finely diced - 1 medium cucumber, diced into bite-sized pieces - 1 cup cherry tomatoes, halved - 1/4 of a medium red onion, finely chopped - 1/2 cup Kalamata olives, pitted and sliced - 1/2 cup feta cheese, crumbled - 1/4 cup fresh parsley, finely chopped - 1/4 cup extra virgin olive oil - 2 tablespoons freshly squeezed lemon juice - 1 teaspoon dried oregano - Sea salt and freshly cracked black pepper to taste These ingredients blend well together. Each one adds a unique flavor. The quinoa forms the base, while the vegetables add crunch and color. Kalamata olives give it a salty twist, and feta cheese adds creaminess. You can customize your salad with these optional add-ins: - Avocado for creaminess - Grilled chicken for protein - Chickpeas for extra fiber - Spinach or arugula for leafy greens - Sun-dried tomatoes for a tangy kick These add-ins can enhance the salad's taste and texture. Feel free to experiment with what you love! This salad is a healthy choice. It is packed with nutrients. Here’s a quick look at its benefits: - Quinoa: High in protein and fiber - Vegetables: Rich in vitamins and minerals - Olive oil: A source of healthy fats - Feta cheese: Adds calcium and flavor One serving provides a balanced mix of protein, healthy fats, and carbs. Eating this salad can support your health while satisfying your taste buds. For the full recipe, check out Mediterranean Quinoa Salad Delight! To start, rinse 1 cup of quinoa under cold water. This step removes the bitter coating. Next, combine the rinsed quinoa and 2 cups of vegetable broth in a medium saucepan. Bring this mixture to a rolling boil over medium-high heat. Once boiling, reduce the heat to a gentle simmer. Cover the saucepan and let it cook for about 15 minutes. The quinoa is ready when it absorbs all the liquid and becomes fluffy. After cooking, fluff it with a fork and transfer it to a large mixing bowl. Let it cool for a few minutes. While the quinoa cools, prepare the vegetables. Dice 1 bell pepper and 1 medium cucumber. Halve 1 cup of cherry tomatoes. Finely chop 1/4 of a medium red onion, and slice 1/2 cup of Kalamata olives. In the same large bowl with the quinoa, add all these diced vegetables along with 1/2 cup of crumbled feta cheese. Gently stir to mix everything together. For the dressing, take a separate small bowl. Whisk together 1/4 cup of extra virgin olive oil, 2 tablespoons of freshly squeezed lemon juice, and 1 teaspoon of dried oregano. Add sea salt and freshly cracked black pepper to taste. Whisk until the dressing is well combined and emulsified. Pour the dressing over the quinoa and vegetable mixture. Toss everything together until the quinoa and veggies are well coated with the dressing. Finally, fold in 1/4 cup of finely chopped fresh parsley. Be careful not to break the feta or overcrowd the grains. Cover the bowl and let the salad sit at room temperature for at least 30 minutes. This time helps the flavors blend beautifully. For the full recipe, check out the Mediterranean Quinoa Salad Delight. To cook quinoa, rinse it well in cold water. This removes bitterness. Use a ratio of 1 part quinoa to 2 parts vegetable broth. Boil the mixture, then reduce the heat to simmer. Cover and cook for about 15 minutes. When done, fluff it gently with a fork. Let it cool before mixing it with other ingredients. To boost flavors, add fresh herbs like basil or mint. You can also toss in some garlic or lemon zest for a zing. Experiment with different olives or cheese types. Each will give a unique twist. Don't forget to season with salt and pepper to taste. Serve the salad in a large bowl for sharing. For individual servings, use small plates. Garnish with lemon wedges and extra parsley for color. A drizzle of olive oil on top adds shine and flavor. You can also pair it with grilled chicken or fish for a complete meal. Find the full recipe in the article to enjoy a fresh and tasty meal. {{image_4}} You can easily boost the protein in your Mediterranean quinoa salad. Adding cooked chicken gives a hearty touch. Simply grill or roast chicken breasts, then slice them up and mix them in. If you prefer a meatless option, chickpeas work great. Use canned chickpeas for quick prep. Rinse and drain them before adding. While the olive oil and lemon dressing is tasty, you can try other dressings too. A balsamic vinaigrette adds a sweet tang. For a creamy twist, mix Greek yogurt with lemon juice and herbs. This will make the salad richer and even more satisfying. Swap in seasonal veggies for fresh flavor. In the spring, add sweet peas or asparagus. In summer, try zucchini or fresh corn. Autumn brings squash or roasted root vegetables. Winter is great for kale or Brussels sprouts. These swaps keep your salad exciting and varied all year round. Feel free to check the Full Recipe for more details! After enjoying your Mediterranean quinoa salad, store leftovers in the fridge. Place the salad in a bowl and cover it tightly with plastic wrap or a lid. This helps keep the salad fresh and tasty. If you want to save some for later, portion it out into meal prep containers. When storing your salad, use airtight containers. Glass containers work great because they don't stain or retain odors. If you prefer plastic, choose BPA-free containers. Ensure they are deep enough to hold the salad without squishing it. If you have a dressing, keep it separate until you are ready to eat to avoid sogginess. Your Mediterranean quinoa salad will last in the fridge for about 3 to 5 days. If you notice any change in smell or color, it’s best to toss it out. Reheating is not recommended for salads with fresh veggies. Instead, enjoy the salad cold or at room temperature. If you want to warm it up, heat the quinoa-only portion in a microwave for about 30 seconds, but avoid reheating the veggies and feta. For the full recipe, check [Full Recipe]. Quinoa is a tiny seed rich in protein, fiber, and vitamins. It is gluten-free and very nutritious. It helps in building muscles and keeps you full longer. Quinoa contains all nine essential amino acids, making it a complete protein. This is great for vegans and vegetarians. It also has antioxidants that help fight inflammation. Eating quinoa may support heart health and improve digestion. Yes, you can make this salad ahead of time. It tastes even better after sitting for a few hours. Just keep it in the fridge for up to three days. The flavors meld together nicely. If you add the dressing later, it stays fresh longer. Just remember to mix it before serving to spread the flavors. To make this salad vegan, skip the feta cheese. You can use avocado instead for creaminess. You can also add extra olives or nuts for texture. The dressing is already vegan with olive oil and lemon juice. This way, you keep it tasty without any animal products. This salad pairs well with many dishes. You can serve it with grilled chicken or fish for protein. It also goes nicely with roasted vegetables or hummus. For a lighter meal, enjoy it with pita bread. This salad is great as a side or a main dish. The Mediterranean quinoa salad is a tasty and healthy dish. We covered key ingredients, from quinoa and fresh veggies to possible add-ins. I shared easy steps for preparing the salad and tips for cooking quinoa just right. You learned about variations and how to store leftovers properly. Remember, this salad is very flexible; you can change the protein and dressing as you like. Enjoy this dish for its flavor and nutrition. It’s simple, refreshing, and great for any meal!](https://goldendishy.com/wp-content/uploads/2025/06/0bb42d2e-6f0a-4b63-945d-06b8684c6b2f-768x768.webp)
. - Heat your skillet over medium heat. - Add the unsalted butter and let it melt. - Once melted, watch for it to bubble gently. - Next, add the minced garlic. - Sauté the garlic for about one minute. - Stir often until it smells great and turns lightly golden. - Now, add the peeled and deveined shrimp to the skillet. - Season the shrimp with salt and pepper. - If you like spice, sprinkle in some red pepper flakes. - Cook the shrimp for 2-3 minutes on one side. - Flip the shrimp to cook the other side evenly. - Add the lemon zest and juice as they cook. - Keep cooking until the shrimp are opaque. - Remove the skillet from the heat. - Stir in the chopped parsley for a fresh taste. - Serve the shrimp over warm pasta or fluffy rice. - Drizzle the leftover lemon-garlic butter sauce on top for extra flavor. - For a lovely presentation, you can garnish with lemon wedges. For more details, check the Full Recipe. - Achieving the perfect shrimp texture: To get tender shrimp, avoid overcooking. Cook them just until they turn pink. This usually takes about 2-3 minutes per side. - Best practices for sautéing garlic: Start with a hot skillet and melted butter. Add minced garlic and stir for about 1 minute. Keep an eye on it so it doesn’t burn; burnt garlic tastes bitter. - Presentation ideas for a beautiful dish: Serve the shrimp in shallow bowls to make it look elegant. Add a sprinkle of parsley on top for color. Include lemon wedges on the side for a fresh touch. - Pairing options with side dishes: Lemon garlic butter shrimp goes well with cooked pasta or fluffy rice. You can also serve it with a side salad for a light meal. - Additional herbs or spices to try: Consider adding fresh basil or thyme for extra flavor. These herbs pair well with lemon and shrimp. - Adjusting spice levels with red pepper flakes: If you like heat, add more red pepper flakes. Start with a teaspoon and adjust to your taste. This will make your dish more exciting! For more details, check the Full Recipe. {{image_4}} You can change the seafood in this recipe. Try scallops or even crab. These swaps add new tastes while keeping the dish simple. If you want a healthier fat, swap butter for olive oil. Olive oil works well and gives a light, fresh flavor. To mix things up, add other citrus flavors. Lime or orange juice can brighten the dish. You can also infuse the recipe with herbs. Try basil or thyme for a different twist. These herbs can make the dish feel more seasonal. If you need a gluten-free option, serve the shrimp over quinoa or zucchini noodles. Both are great gluten-free choices. For a low-calorie meal, cut back on the butter. You can use less or replace it with vegetable broth. This keeps the dish tasty but lighter. After enjoying your lemon garlic butter shrimp, store any leftovers in the fridge. Use an airtight container to keep them fresh. These shrimp will stay good for about 2-3 days. Always check for freshness before eating. To freeze lemon garlic butter shrimp, let them cool completely first. Place them in a freezer-safe bag, removing as much air as possible. They can last for about 2 months in the freezer. When you're ready to eat, thaw the shrimp in the fridge overnight. Reheat them gently in a skillet over low heat. This keeps them tender and tasty. Always ensure your shrimp is safe to eat after storage. Check for any off smells or changes in color. If the shrimp look slimy or smell bad, it’s best to discard them. Trust your senses to keep your meals safe and enjoyable. Cook shrimp for 4-6 minutes. They cook quickly. In a hot skillet, shrimp turn pink when done. Avoid overcooking; it makes them tough. Yes, you can use frozen shrimp. Thaw them first for best results. Place them in cold water for about 15 minutes. This way, they cook evenly and taste fresh. I love serving lemon garlic butter shrimp with: - Cooked pasta - Fluffy rice - Fresh salad - Garlic bread These sides balance the rich flavors well. Check for color and texture. Cooked shrimp turn pink and opaque. They should feel firm but not hard. When in doubt, cut one open. It should be white inside, not translucent. You’ve learned how to make lemon garlic butter shrimp. We covered essential ingredients, easy steps, tips for cooking, and variations to try. Remember to adjust flavors to your taste and pair with your favorite sides. Store leftovers safely for later enjoyment. Cooking shrimp can be simple and satisfying. Enjoy every bite, and don't hesitate to experiment. Whether for a cozy night in or impressing guests, this dish shines every time. Let your kitchen be a place of fun and flavor!](https://goldendishy.com/wp-content/uploads/2025/06/8ad1771e-7d26-4dd4-879b-9e464bbb0647-768x768.webp)


![- 4 large russet potatoes - 2 cups fresh broccoli florets, steamed to perfection - 1 cup sharp shredded cheddar cheese - 1/2 cup cream cheese, softened at room temperature To make cheesy broccoli stuffed potatoes, you need the right main ingredients. Start with large russet potatoes. These potatoes have thick skins and a fluffy inside. They hold the filling well. Next, grab fresh broccoli florets. Steaming them keeps their bright color and nutrients. For the cheesy goodness, use sharp cheddar cheese. It adds a bold flavor. Cream cheese makes the filling rich and creamy. Mixing these ingredients creates a tasty filling. - 1/4 cup sour cream for creaminess - 2 tablespoons unsalted butter, melted - 1 teaspoon garlic powder for flavor - Salt and freshly cracked black pepper to taste - Fresh chopped chives for an eye-catching garnish Seasonings enhance the flavors of your dish. Sour cream adds a nice creaminess. Melted butter gives richness to the filling. Garlic powder brings a warm, savory taste. Don't forget salt and pepper. They balance all the flavors perfectly. For a lovely garnish, use fresh chives. They add color and a mild onion taste. This combination of seasonings makes your cheesy broccoli stuffed potatoes even more delightful. For the full recipe, check [Full Recipe]. To start, you need to preheat your oven to 400°F (200°C). This helps ensure your potatoes bake evenly. Next, wash and scrub the russet potatoes to remove dirt. Use a fork to prick each potato 6-8 times. This allows steam to escape while baking. Place the potatoes on a baking sheet and bake them for 45-60 minutes. They should feel soft when you poke them with a fork. While your potatoes bake, it’s time to prepare the broccoli. Steam the fresh broccoli florets in a steamer basket over boiling water. This should take about 5-7 minutes. You want the broccoli to be bright green and tender. After steaming, set it aside to cool. In a large bowl, mix the steamed broccoli with shredded cheddar cheese, softened cream cheese, sour cream, melted butter, garlic powder, salt, and pepper. Stir until everything is creamy and well combined. Once your potatoes are done baking, take them out and let them cool for about 5 minutes. Cut each potato in half lengthwise. Scoop out some of the potato flesh, but leave a thin border for strength. Take the scooped potato and mix it into the cheesy broccoli filling. Stir until it is well blended. Now, spoon this mixture back into the potato skins. Make sure to pile it high for a nice look. Place the stuffed potatoes back on the baking sheet and return them to the oven. Bake for 15-20 minutes, or until the tops are golden and bubbly. Once they are ready, let them cool slightly before serving. You can find the full recipe for even more details on how to make this dish! To achieve a creamy consistency in your Cheesy Broccoli Stuffed Potatoes, you need the right balance of ingredients. Here’s how: - Use soft cheeses: Cream cheese and sour cream create a smooth mix. They help blend well with the broccoli. - Don’t overcook the broccoli: Steam it just until tender. Overcooking makes it mushy. - Mix well: Stir the cheese and broccoli together thoroughly. This way, every bite will be creamy. Ensuring the potatoes are fully cooked is crucial for best results. Here’s how to check: - Baking time: Bake russet potatoes for 45-60 minutes. They should feel soft when pierced. - Test for doneness: Use a fork to poke the potatoes. They should yield easily without resistance. You can add extra flavors to make your dish unique. Here are some ideas: - Bacon bits: Add crispy bacon for a salty crunch. It pairs well with broccoli. - Fresh herbs: Chopped chives or parsley can brighten the dish. They add a fresh taste. Adjusting spices can also elevate your stuffed potatoes. Here are some suggestions: - Garlic powder: Add more if you love garlic. It enhances the overall flavor. - Spice it up: A pinch of red pepper flakes gives a nice kick. For more details, check the Full Recipe. {{image_4}} You can switch up the cheese in your Cheesy Broccoli Stuffed Potatoes. Use different blends to create new flavors. For a milder taste, try using mozzarella or Monterey Jack. If you want a stronger flavor, go for Gouda or blue cheese. Mixing cheeses adds a fun twist to this dish! If you need a dairy-free option, try vegan cheese. Many brands offer tasty dairy-free cheese that melts well. You could also use nutritional yeast for a cheesy flavor without dairy. This keeps your dish creamy and delicious. Want to make your stuffed potatoes more filling? Add proteins! You can mix in cooked chicken or turkey. Shredded rotisserie chicken works great and saves time. For a vegetarian option, consider black beans or lentils. They add protein and make the dish hearty. If you love seafood, shrimp or crab can be exciting additions. Cook the seafood first, then fold it into the cheese and broccoli mix. This adds a unique flavor that makes your stuffed potatoes special. To store leftovers safely, let the stuffed potatoes cool to room temperature. Place them in an airtight container. You can keep them in the fridge for up to three days. When reheating, preheat your oven to 350°F (175°C). Place the stuffed potatoes on a baking sheet. Cover them with foil to prevent drying. Heat for about 15-20 minutes, or until they are hot throughout. This method helps keep them creamy and delicious. You can freeze stuffed potatoes for later use. First, let them cool completely after baking. Wrap each potato tightly in plastic wrap. Then, place them in a freezer bag or container. They can last up to three months in the freezer. When you want to enjoy them, take the potatoes out of the freezer. Let them thaw in the fridge overnight. Then, bake them in a preheated oven at 350°F (175°C) for about 30-40 minutes. Make sure they are hot inside before serving. This way, you can savor a tasty meal anytime. For the full recipe, check out the detailed steps included above. Cheesy broccoli stuffed potatoes are baked russet potatoes filled with a creamy mix of broccoli and cheese. The dish is hearty and comforting. You can serve them as a side or a main dish. They are perfect for family dinners or casual get-togethers. Kids and adults love this meal, making it a family favorite. To make these stuffed potatoes healthier, you can reduce calories by using low-fat cheese. You can also swap sour cream for Greek yogurt. This keeps the creaminess but cuts fat. Try using less butter or replacing it with olive oil for a healthier fat option. Fresh herbs can add flavor without extra calories. Yes, you can prepare cheesy broccoli stuffed potatoes ahead of time. After filling the potatoes, cover them and store them in the fridge for up to two days. When you are ready to eat, reheat them in the oven at 350°F (175°C) for about 20-25 minutes. Make sure they are warmed through before serving. In this post, we explored how to make Cheesy Broccoli Stuffed Potatoes. You learned about the key ingredients and the step-by-step process. I also shared tips and variations to make it your own. Remember, you can adjust flavors and textures to fit your taste. These stuffed potatoes are easy to prepare and perfect for any meal. Enjoy making them, and share your creations with friends and family!](https://goldendishy.com/wp-content/uploads/2025/07/b761c5e5-34eb-4a0c-a694-3380b074c9b4-768x768.webp)