Vegetable and Bean Chili Hearty Comfort Food Delight
![When making vegetable and bean chili, gather these items first: - 1 tablespoon olive oil - 1 large onion, finely diced - 3 cloves garlic, minced - 1 bell pepper (red or yellow), chopped into bite-sized pieces - 1 medium carrot, diced into small cubes - 1 medium zucchini, diced - 1 cup corn kernels (fresh or frozen will work) - 1 can (15 oz) black beans, rinsed thoroughly and drained - 1 can (15 oz) kidney beans, rinsed thoroughly and drained - 1 can (15 oz) diced tomatoes with their juices - 2 cups vegetable broth (low sodium recommended) - 2 tablespoons chili powder - 1 teaspoon ground cumin - 1 teaspoon smoked paprika - Salt and pepper to taste - Fresh cilantro, chopped (for garnish) - Avocado slices (for serving, optional) These ingredients create a rich, hearty dish that warms you up. You can change this recipe to fit your taste. Here are some ideas: - Add more beans, like pinto or cannellini beans. - Swap in different vegetables, such as spinach or sweet potatoes. - Mix in some hot peppers for a spicy kick. - Use different herbs, like oregano or thyme, for extra flavor. - Top with cheese or sour cream if you prefer. These options let you make the chili your own! This vegetable and bean chili is not only tasty but also healthy. Here’s a quick breakdown of its nutrition: - Calories: Around 250 per serving - Protein: About 12 grams - Carbohydrates: Roughly 40 grams - Fiber: Nearly 12 grams - Fat: Around 5 grams This chili is high in fiber and protein, making it a satisfying meal. You can enjoy it guilt-free! For the full recipe, check out the [Full Recipe]. First, heat 1 tablespoon of olive oil in a large pot over medium heat. When the oil is hot, add 1 large onion, finely diced. Cook the onion for about 5 minutes. It should turn soft and clear. Next, add 3 minced garlic cloves. Stir the garlic in for 1 to 2 minutes. It should smell great and turn light gold. Now, add in a chopped bell pepper, a diced carrot, and a diced zucchini. Cook these veggies for 5 to 7 minutes. Stir them often as they start to soften and brighten. Then, mix in 1 cup of corn kernels. Let them cook for an extra 3 minutes. This adds sweet flavor and color. Next, add 1 can each of black beans and kidney beans, both rinsed and drained. Then, pour in 1 can of diced tomatoes with their juices and 2 cups of vegetable broth. Sprinkle in 2 tablespoons of chili powder, 1 teaspoon of ground cumin, and 1 teaspoon of smoked paprika. Stir everything together well. Increase the heat until it boils. Once boiling, lower the heat to let it simmer. Keep it uncovered for about 30 minutes. Stir occasionally to avoid sticking. Taste and add salt and pepper as you like. Once thickened, remove it from the heat. Let it sit for a few minutes. This helps the flavors mix well. Now, ladle the chili into bowls. You can top each bowl with freshly chopped cilantro. If you want, add avocado slices for a creamy finish. Check out the Full Recipe for more details! To boost the flavor of your vegetable and bean chili, try these tips: - Use Fresh Herbs: Fresh cilantro or parsley adds a bright taste. - Add Citrus: A squeeze of lime or lemon brightens the dish. - Incorporate Spices: Experiment with chipotle powder for heat or oregano for depth. You can also let the chili sit for a few hours or overnight. This resting time lets the flavors meld and deepen. If your chili is too thick, add more vegetable broth. Start with a half cup and stir well. If it’s too thin, simmer it longer. This helps the liquid reduce and thicken. You can also mash some beans to make the chili creamier. Serve your chili with various toppings. Here are some ideas: - Sliced avocado for creaminess - Shredded cheese for a cheesy touch - Crème fraîche or sour cream for richness - Crispy tortilla chips for crunch Pair your chili with warm bread or cornbread on the side. It’s a great way to soak up every delicious drop. For the full recipe, check out the robust vegetable & bean chili. Enjoy your hearty comfort food delight! {{image_4}} If you want a vegan chili, this recipe is already perfect! All the ingredients are plant-based. For gluten-free versions, check your vegetable broth and spices. Most brands are safe, but read labels to be sure. You can switch to gluten-free grains like quinoa or rice as a side. Feel free to change up the beans or veggies. If you don’t have black beans, use pinto or cannellini beans. You can also mix in lentils for added protein. For vegetables, try adding sweet potatoes, spinach, or even kale. This adds flavor and nutrition to your dish. To make your chili spicy, add more chili powder or diced jalapeños. You can also use hot sauce for an extra kick. If you prefer mild flavors, reduce the chili powder and smoked paprika. This way, everyone can enjoy their bowl of chili. For the full recipe, check out the detailed instructions and ingredient list! To keep your vegetable and bean chili fresh, let it cool first. Once cool, store it in an airtight container. Place the container in the fridge. Your chili will stay good for about 3 to 5 days. If you want to enjoy it later, freezing is a great option. You can freeze your chili for up to 3 months. First, let it cool completely. Then, pour it into a freezer-safe container. Leave some space at the top, as the chili will expand when frozen. Label the container with the date. This way, you will know when to use it. When you are ready to eat, thaw the chili in the fridge overnight. For quick reheating, use the microwave or the stove. If microwaving, heat in short bursts, stirring in between. On the stove, warm it over medium heat until it bubbles. Always check that it is hot all the way through before serving. Enjoy your hearty comfort food delight! For the full recipe, check out the detailed steps above. Yes, you can use canned beans. Canned beans save time and effort. Just rinse them well to remove excess sodium. For this chili, I recommend black beans and kidney beans. They add great texture and flavor. Vegetable bean chili lasts about 4 to 5 days in the fridge. Make sure to store it in an airtight container. The flavors actually improve over time, making it even tastier! You can serve this chili with many sides. Try crispy tortilla chips for crunch. Warm bread or cornbread pairs well too. Add a dollop of sour cream or Greek yogurt for creaminess. Don't forget fresh avocado slices for extra flavor! Check the Full Recipe for more serving ideas. This blog post covered all you need for a great vegetable bean chili. We explored the ingredients, showing how to customize it and understand its nutrition. The step-by-step instructions guide you through cooking, while tips enhance its flavor. Variations help you adapt to different diets. Finally, we discussed storage methods and answered common questions. Cooking a tasty chili doesn't have to be hard. You now have tools to make it your own and enjoy it for days. Happy cooking!](https://goldendishy.com/wp-content/uploads/2025/06/710b1993-2890-4a51-b686-850c3b1d6686.webp)
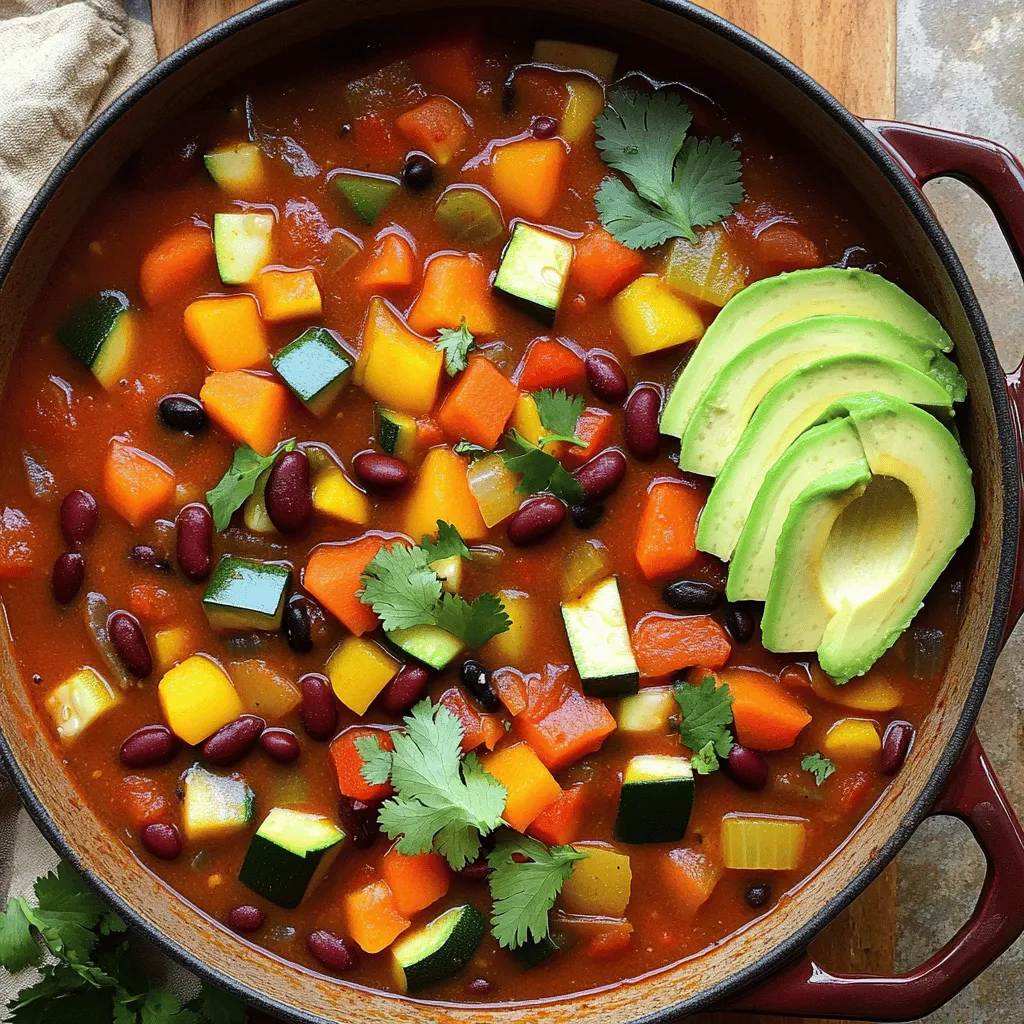
There’s nothing quite like a warm bowl of Vegetable and Bean Chili to lift your spirits. This hearty comfort food is packed with flavors and nutrients, making it perfect for any occasion. In this guide, I’ll walk you through easy steps, ingredient options, and helpful tips to create a delicious chili that satisfies your cravings. Whether you’re a beginner cook or a seasoned chef, this recipe will delight your taste buds. Let’s dig in!
Ingredients
Complete List of Ingredients
When making vegetable and bean chili, gather these items first:
– 1 tablespoon olive oil
– 1 large onion, finely diced
– 3 cloves garlic, minced
– 1 bell pepper (red or yellow), chopped into bite-sized pieces
– 1 medium carrot, diced into small cubes
– 1 medium zucchini, diced
– 1 cup corn kernels (fresh or frozen will work)
– 1 can (15 oz) black beans, rinsed thoroughly and drained
– 1 can (15 oz) kidney beans, rinsed thoroughly and drained
– 1 can (15 oz) diced tomatoes with their juices
– 2 cups vegetable broth (low sodium recommended)
– 2 tablespoons chili powder
– 1 teaspoon ground cumin
– 1 teaspoon smoked paprika
– Salt and pepper to taste
– Fresh cilantro, chopped (for garnish)
– Avocado slices (for serving, optional)
These ingredients create a rich, hearty dish that warms you up.
Optional Ingredients for Customization
You can change this recipe to fit your taste. Here are some ideas:
– Add more beans, like pinto or cannellini beans.
– Swap in different vegetables, such as spinach or sweet potatoes.
– Mix in some hot peppers for a spicy kick.
– Use different herbs, like oregano or thyme, for extra flavor.
– Top with cheese or sour cream if you prefer.
These options let you make the chili your own!
Nutritional Information Breakdown
This vegetable and bean chili is not only tasty but also healthy. Here’s a quick breakdown of its nutrition:
– Calories: Around 250 per serving
– Protein: About 12 grams
– Carbohydrates: Roughly 40 grams
– Fiber: Nearly 12 grams
– Fat: Around 5 grams
This chili is high in fiber and protein, making it a satisfying meal. You can enjoy it guilt-free!
Step-by-Step Instructions
Sauté the Aromatics
First, heat 1 tablespoon of olive oil in a large pot over medium heat. When the oil is hot, add 1 large onion, finely diced. Cook the onion for about 5 minutes. It should turn soft and clear. Next, add 3 minced garlic cloves. Stir the garlic in for 1 to 2 minutes. It should smell great and turn light gold.
Incorporate the Vegetables
Now, add in a chopped bell pepper, a diced carrot, and a diced zucchini. Cook these veggies for 5 to 7 minutes. Stir them often as they start to soften and brighten. Then, mix in 1 cup of corn kernels. Let them cook for an extra 3 minutes. This adds sweet flavor and color.
Simmer and Serve
Next, add 1 can each of black beans and kidney beans, both rinsed and drained. Then, pour in 1 can of diced tomatoes with their juices and 2 cups of vegetable broth. Sprinkle in 2 tablespoons of chili powder, 1 teaspoon of ground cumin, and 1 teaspoon of smoked paprika. Stir everything together well.
Increase the heat until it boils. Once boiling, lower the heat to let it simmer. Keep it uncovered for about 30 minutes. Stir occasionally to avoid sticking. Taste and add salt and pepper as you like. Once thickened, remove it from the heat. Let it sit for a few minutes. This helps the flavors mix well.
Now, ladle the chili into bowls. You can top each bowl with freshly chopped cilantro. If you want, add avocado slices for a creamy finish.
Tips & Tricks
How to Enhance Flavor
To boost the flavor of your vegetable and bean chili, try these tips:
– Use Fresh Herbs: Fresh cilantro or parsley adds a bright taste.
– Add Citrus: A squeeze of lime or lemon brightens the dish.
– Incorporate Spices: Experiment with chipotle powder for heat or oregano for depth.
You can also let the chili sit for a few hours or overnight. This resting time lets the flavors meld and deepen.
Adjusting Thickness of the Chili
If your chili is too thick, add more vegetable broth. Start with a half cup and stir well. If it’s too thin, simmer it longer. This helps the liquid reduce and thicken. You can also mash some beans to make the chili creamier.
Serving Suggestions
Serve your chili with various toppings. Here are some ideas:
– Sliced avocado for creaminess
– Shredded cheese for a cheesy touch
– Crème fraîche or sour cream for richness
– Crispy tortilla chips for crunch
Pair your chili with warm bread or cornbread on the side. It’s a great way to soak up every delicious drop.Enjoy your hearty comfort food delight!

Variations
Vegan and Gluten-Free Options
If you want a vegan chili, this recipe is already perfect! All the ingredients are plant-based. For gluten-free versions, check your vegetable broth and spices. Most brands are safe, but read labels to be sure. You can switch to gluten-free grains like quinoa or rice as a side.
Bean and Vegetable Substitutions
Feel free to change up the beans or veggies. If you don’t have black beans, use pinto or cannellini beans. You can also mix in lentils for added protein. For vegetables, try adding sweet potatoes, spinach, or even kale. This adds flavor and nutrition to your dish.
Extra Spicy or Mild Adaptations
To make your chili spicy, add more chili powder or diced jalapeños. You can also use hot sauce for an extra kick. If you prefer mild flavors, reduce the chili powder and smoked paprika. This way, everyone can enjoy their bowl of chili.
Storage Info
How to Store Leftovers
To keep your vegetable and bean chili fresh, let it cool first. Once cool, store it in an airtight container. Place the container in the fridge. Your chili will stay good for about 3 to 5 days. If you want to enjoy it later, freezing is a great option.
Freezing Instructions
You can freeze your chili for up to 3 months. First, let it cool completely. Then, pour it into a freezer-safe container. Leave some space at the top, as the chili will expand when frozen. Label the container with the date. This way, you will know when to use it.
Reheating Guidelines
When you are ready to eat, thaw the chili in the fridge overnight. For quick reheating, use the microwave or the stove. If microwaving, heat in short bursts, stirring in between. On the stove, warm it over medium heat until it bubbles. Always check that it is hot all the way through before serving. Enjoy your hearty comfort food delight!
FAQs
Can I use canned beans for this recipe?
Yes, you can use canned beans. Canned beans save time and effort. Just rinse them well to remove excess sodium. For this chili, I recommend black beans and kidney beans. They add great texture and flavor.
How long does vegetable bean chili last in the fridge?
Vegetable bean chili lasts about 4 to 5 days in the fridge. Make sure to store it in an airtight container. The flavors actually improve over time, making it even tastier!
What can I serve with vegetable and bean chili?
You can serve this chili with many sides. Try crispy tortilla chips for crunch. Warm bread or cornbread pairs well too. Add a dollop of sour cream or Greek yogurt for creaminess. Don’t forget fresh avocado slices for extra flavor!
This blog post covered all you need for a great vegetable bean chili. We explored the ingredients, showing how to customize it and understand its nutrition. The step-by-step instructions guide you through cooking, while tips enhance its flavor. Variations help you adapt to different diets. Finally, we discussed storage methods and answered common questions.
Cooking a tasty chili doesn’t have to be hard. You now have tools to make it your own and enjoy it for days. Happy cooking!
![When making vegetable and bean chili, gather these items first: - 1 tablespoon olive oil - 1 large onion, finely diced - 3 cloves garlic, minced - 1 bell pepper (red or yellow), chopped into bite-sized pieces - 1 medium carrot, diced into small cubes - 1 medium zucchini, diced - 1 cup corn kernels (fresh or frozen will work) - 1 can (15 oz) black beans, rinsed thoroughly and drained - 1 can (15 oz) kidney beans, rinsed thoroughly and drained - 1 can (15 oz) diced tomatoes with their juices - 2 cups vegetable broth (low sodium recommended) - 2 tablespoons chili powder - 1 teaspoon ground cumin - 1 teaspoon smoked paprika - Salt and pepper to taste - Fresh cilantro, chopped (for garnish) - Avocado slices (for serving, optional) These ingredients create a rich, hearty dish that warms you up. You can change this recipe to fit your taste. Here are some ideas: - Add more beans, like pinto or cannellini beans. - Swap in different vegetables, such as spinach or sweet potatoes. - Mix in some hot peppers for a spicy kick. - Use different herbs, like oregano or thyme, for extra flavor. - Top with cheese or sour cream if you prefer. These options let you make the chili your own! This vegetable and bean chili is not only tasty but also healthy. Here’s a quick breakdown of its nutrition: - Calories: Around 250 per serving - Protein: About 12 grams - Carbohydrates: Roughly 40 grams - Fiber: Nearly 12 grams - Fat: Around 5 grams This chili is high in fiber and protein, making it a satisfying meal. You can enjoy it guilt-free! For the full recipe, check out the [Full Recipe]. First, heat 1 tablespoon of olive oil in a large pot over medium heat. When the oil is hot, add 1 large onion, finely diced. Cook the onion for about 5 minutes. It should turn soft and clear. Next, add 3 minced garlic cloves. Stir the garlic in for 1 to 2 minutes. It should smell great and turn light gold. Now, add in a chopped bell pepper, a diced carrot, and a diced zucchini. Cook these veggies for 5 to 7 minutes. Stir them often as they start to soften and brighten. Then, mix in 1 cup of corn kernels. Let them cook for an extra 3 minutes. This adds sweet flavor and color. Next, add 1 can each of black beans and kidney beans, both rinsed and drained. Then, pour in 1 can of diced tomatoes with their juices and 2 cups of vegetable broth. Sprinkle in 2 tablespoons of chili powder, 1 teaspoon of ground cumin, and 1 teaspoon of smoked paprika. Stir everything together well. Increase the heat until it boils. Once boiling, lower the heat to let it simmer. Keep it uncovered for about 30 minutes. Stir occasionally to avoid sticking. Taste and add salt and pepper as you like. Once thickened, remove it from the heat. Let it sit for a few minutes. This helps the flavors mix well. Now, ladle the chili into bowls. You can top each bowl with freshly chopped cilantro. If you want, add avocado slices for a creamy finish. Check out the Full Recipe for more details! To boost the flavor of your vegetable and bean chili, try these tips: - Use Fresh Herbs: Fresh cilantro or parsley adds a bright taste. - Add Citrus: A squeeze of lime or lemon brightens the dish. - Incorporate Spices: Experiment with chipotle powder for heat or oregano for depth. You can also let the chili sit for a few hours or overnight. This resting time lets the flavors meld and deepen. If your chili is too thick, add more vegetable broth. Start with a half cup and stir well. If it’s too thin, simmer it longer. This helps the liquid reduce and thicken. You can also mash some beans to make the chili creamier. Serve your chili with various toppings. Here are some ideas: - Sliced avocado for creaminess - Shredded cheese for a cheesy touch - Crème fraîche or sour cream for richness - Crispy tortilla chips for crunch Pair your chili with warm bread or cornbread on the side. It’s a great way to soak up every delicious drop. For the full recipe, check out the robust vegetable & bean chili. Enjoy your hearty comfort food delight! {{image_4}} If you want a vegan chili, this recipe is already perfect! All the ingredients are plant-based. For gluten-free versions, check your vegetable broth and spices. Most brands are safe, but read labels to be sure. You can switch to gluten-free grains like quinoa or rice as a side. Feel free to change up the beans or veggies. If you don’t have black beans, use pinto or cannellini beans. You can also mix in lentils for added protein. For vegetables, try adding sweet potatoes, spinach, or even kale. This adds flavor and nutrition to your dish. To make your chili spicy, add more chili powder or diced jalapeños. You can also use hot sauce for an extra kick. If you prefer mild flavors, reduce the chili powder and smoked paprika. This way, everyone can enjoy their bowl of chili. For the full recipe, check out the detailed instructions and ingredient list! To keep your vegetable and bean chili fresh, let it cool first. Once cool, store it in an airtight container. Place the container in the fridge. Your chili will stay good for about 3 to 5 days. If you want to enjoy it later, freezing is a great option. You can freeze your chili for up to 3 months. First, let it cool completely. Then, pour it into a freezer-safe container. Leave some space at the top, as the chili will expand when frozen. Label the container with the date. This way, you will know when to use it. When you are ready to eat, thaw the chili in the fridge overnight. For quick reheating, use the microwave or the stove. If microwaving, heat in short bursts, stirring in between. On the stove, warm it over medium heat until it bubbles. Always check that it is hot all the way through before serving. Enjoy your hearty comfort food delight! For the full recipe, check out the detailed steps above. Yes, you can use canned beans. Canned beans save time and effort. Just rinse them well to remove excess sodium. For this chili, I recommend black beans and kidney beans. They add great texture and flavor. Vegetable bean chili lasts about 4 to 5 days in the fridge. Make sure to store it in an airtight container. The flavors actually improve over time, making it even tastier! You can serve this chili with many sides. Try crispy tortilla chips for crunch. Warm bread or cornbread pairs well too. Add a dollop of sour cream or Greek yogurt for creaminess. Don't forget fresh avocado slices for extra flavor! Check the Full Recipe for more serving ideas. This blog post covered all you need for a great vegetable bean chili. We explored the ingredients, showing how to customize it and understand its nutrition. The step-by-step instructions guide you through cooking, while tips enhance its flavor. Variations help you adapt to different diets. Finally, we discussed storage methods and answered common questions. Cooking a tasty chili doesn't have to be hard. You now have tools to make it your own and enjoy it for days. Happy cooking!](https://goldendishy.com/wp-content/uploads/2025/06/710b1993-2890-4a51-b686-850c3b1d6686-300x300.webp)


![To make Ranch Chicken and Rice Casserole, gather these items: - 1 lb (450g) boneless, skinless chicken breasts, cut into bite-sized pieces - 1 cup uncooked white rice (e.g., jasmine or basmati) - 2 cups low-sodium chicken broth - 1 cup creamy ranch dressing - 1 cup frozen mixed vegetables (a colorful blend of peas, carrots, and corn) - 1 cup shredded sharp cheddar cheese - 1 teaspoon onion powder - 1 teaspoon garlic powder - Salt and freshly ground black pepper to taste - Fresh parsley, chopped (for garnish, optional) Garnishes add beauty and taste to your dish. Here are a few: - Fresh parsley, chopped - Extra shredded cheddar cheese - A drizzle of ranch dressing These add color and a fresh taste to the casserole. You can mix and match based on what you like! Sometimes, you may need to swap out ingredients. Here are some ideas: - Chicken: Use turkey breast or cooked rotisserie chicken for a quicker option. - Rice: Brown rice or quinoa can work well. Just adjust the cooking time. - Vegetables: Feel free to use any frozen veggies you have, like broccoli or bell peppers. - Dressing: If you prefer, swap ranch dressing for other creamy dressings like blue cheese or Caesar. With these swaps, you can make the dish fit your taste or what you have on hand. First, preheat your oven to 375°F (190°C). This step is key for even cooking. A hot oven helps the chicken cook well and the cheese melt perfectly. In a large bowl, add the diced chicken, uncooked rice, chicken broth, and creamy ranch dressing. Then, sprinkle in the onion powder and garlic powder. Use a spatula to mix everything well. Make sure the chicken and rice are coated with the ranch dressing. Add salt and pepper to taste. Next, fold in the frozen mixed vegetables. This gives your casserole color and nutrition. Make sure the veggies are spread throughout the mixture. Pour your chicken and rice mixture into a greased 9x13-inch baking dish. Spread it out evenly for best results. Cover the dish tightly with aluminum foil. This traps moisture and helps the dish cook well. Bake in the preheated oven for 25 minutes. After 25 minutes, remove the foil carefully. Watch out for steam! Now, sprinkle the shredded cheddar cheese on top. Return the dish to the oven, uncovered, for another 15-20 minutes. You will know it’s ready when the chicken is cooked through, and the cheese is melted and bubbly. Once done, take it out and let it cool for about 5 minutes. This resting time helps the flavors settle. If you like, add freshly chopped parsley for a nice touch before serving. To make perfect rice, rinse it first. This removes extra starch. Use a 1:2 ratio of rice to broth. This keeps the rice moist. Cook it covered for even heat. If you want extra flavor, add herbs to the broth. You can mix in extras to change the taste. Try adding diced bell peppers for crunch. Use different frozen veggies like broccoli or green beans. You can also swap ranch dressing for a spicy sauce. This gives it a kick. For a cheesy twist, add cream cheese with the ranch. One mistake is not covering the dish while baking. This can dry out the rice. Another error is using too much liquid. Stick to the right amounts in the recipe. Don’t skip the resting time after baking. This helps the flavors blend well. Always taste before serving. Adjust salt and pepper as needed. For a full recipe with all these tips, check out the [Full Recipe]. {{image_4}} You can make a tasty vegetarian version of this dish. Start by swapping the chicken for a mix of beans or lentils. Use 2 cups of cooked black beans or chickpeas instead. Then, keep all the other ingredients the same. The ranch dressing adds great flavor, and the veggies provide crunch. This version is hearty and filling, perfect for a meatless meal. If you love heat, try a spicy twist on the classic recipe. Add diced jalapeños or a pinch of cayenne pepper to the mix. You can also use spicy ranch dressing in place of the regular one. This gives the dish a nice kick. Top it off with pepper jack cheese instead of cheddar for extra spice. Your taste buds will thank you! For a one-pan meal, mix everything in a large oven-safe skillet. This saves on clean-up time. Just add the rice and broth to the skillet along with the chicken and veggies. Cover and bake as you normally would. The flavors blend well, and you still get that creamy goodness from the ranch dressing. This method makes dinner even easier and quicker. You can find the full recipe linked above, allowing you to create these delicious variations! You can keep leftover Ranch Chicken and Rice Casserole in the fridge. Place it in an airtight container. It will stay fresh for up to three days. Make sure the casserole is cool before sealing it. This helps prevent moisture from building up. If you want to save some for later, freezing is easy. Use a freezer-safe container or heavy-duty freezer bag. Store the casserole in portions for easy meals. It will keep well for up to three months. To freeze, let it cool completely first. Label the container with the date to track freshness. When you’re ready to enjoy your casserole again, you can reheat it in different ways. The oven gives the best results. Preheat it to 350°F (175°C). Bake the casserole for about 20-30 minutes, covered with foil. This keeps it moist. You can also use a microwave. Heat in short bursts, stirring in between to ensure even warming. Always check that the chicken is heated all the way through. For extra flavor, add a little ranch dressing before serving. To adjust the recipe for fewer servings, simply halve the ingredients. Use ½ lb of chicken and ½ cup of rice. Also, cut the broth and dressing in half. This way, you keep the same flavors. Make sure to check the baking time. Smaller portions may cook faster, so keep an eye on them. Yes, you can use brown rice. However, brown rice takes longer to cook. It may need more liquid too. I recommend cooking it for a few minutes before adding it to the casserole. This helps it soften. Follow the same steps, but adjust the cooking time. Ranch Chicken and Rice Casserole goes well with many sides. Here are a few tasty options: - Simple green salad with a light dressing - Steamed broccoli or green beans for a crunchy bite - Garlic bread for a cozy touch - Roasted vegetables for extra flavor and color These sides add balance and make your meal complete. Enjoy the casserole with your favorite sides! For the full recipe, check out the link above. In this blog post, we covered the key steps to make a delicious Ranch Chicken and Rice Casserole. We explored the ingredients, sharing options for garnishes and substitutions. The step-by-step instructions guide you from preheating the oven to baking. I also shared tips to perfect your dish and variations for added flavor. Finally, we discussed how to store leftovers for later enjoyment. Follow these tips, and you’ll create a tasty meal that everyone will love!](https://goldendishy.com/wp-content/uploads/2025/06/349f3b9c-e648-45ce-b7ed-2f76b31339ac-768x768.webp)

![- 1 cup stone-ground grits - 4 cups water or chicken broth - 1 pound shrimp, peeled and deveined The star of this dish is the stone-ground grits. They give a rich and creamy base. Use water or broth for cooking to add more flavor. I recommend chicken broth for a savory kick. For the shrimp, choose fresh or frozen. Just make sure they are peeled and deveined. - 4 slices of smoked gouda cheese - 1 teaspoon smoked paprika - 1/2 teaspoon cayenne pepper (adjust based on your spice preference) Smoked gouda brings a unique taste that pairs well with shrimp. You can also try other cheeses, like cheddar. For spices, smoked paprika adds depth, and cayenne gives a nice kick. Adjust the cayenne to suit your heat preference. - 3 cloves garlic, minced - 1 small yellow onion, finely chopped - 1 red bell pepper, diced - 3 tablespoons unsalted butter, divided - 1 tablespoon olive oil - Salt and black pepper, to taste - 2 green onions, chopped (for garnish) - Fresh parsley, chopped (for garnish) Fresh vegetables like onion, bell pepper, and garlic add great flavor. They also give the dish a lovely texture. Use unsalted butter and olive oil for cooking. Finally, top it all with green onions and parsley for color. These garnishes brighten the dish and add freshness. For the complete recipe, check out the Full Recipe section. 1. In a large pot, bring 4 cups of water or chicken broth to a rolling boil. 2. Slowly whisk in 1 cup of stone-ground grits to avoid lumps. 3. Once mixed, reduce the heat to low. 4. Let the grits simmer, stirring occasionally, until thick and creamy, about 20-25 minutes. 5. If the grits get too thick, stir in more water or broth to reach your desired texture. 1. While the grits cook, heat 1 tablespoon of olive oil and 1 tablespoon of butter in a large skillet over medium heat. 2. Add 1 small yellow onion, 1 red bell pepper, and 3 cloves of minced garlic. 3. Sauté for about 5 minutes until the veggies are tender and fragrant. 4. Next, add 1 pound of shrimp to the skillet. 5. Season with 1 teaspoon of smoked paprika, 1/2 teaspoon of cayenne pepper, and a pinch of salt and black pepper. 6. Cook until the shrimp turn pink and opaque, about 3-4 minutes. 1. Reduce heat to low. Pour in 1/2 cup of heavy cream. 2. Add 4 slices of smoked gouda cheese and stir until melted. 3. Taste and adjust seasoning if needed, then remove from heat. 4. To serve, ladle the creamy grits into bowls. 5. Top each bowl with the shrimp mixture. 6. For a finishing touch, add a pat of remaining butter on top. 7. Garnish with chopped green onions and fresh parsley for color and flavor. For the complete recipe, check the [Full Recipe]. To make grits creamy, you need the right consistency. Start with a good ratio of liquid to grits. If your grits are too thick, add more water or broth. Stir often to keep them smooth and prevent lumps. Use a whisk for the best results. This method helps blend the grits well with the liquid. Cooking shrimp well makes a big difference. Sauté them quickly over medium heat. This keeps them juicy and tender. Adjust the spice level by adding more cayenne if you like heat. For a milder dish, cut back on the cayenne. You can also try adding lemon juice for a bright flavor. A great dish looks as good as it tastes. Garnish your shrimp and grits with chopped green onions and fresh parsley. This adds color and freshness. Serve the dish in rustic bowls to enhance the comfort feel. For extra flair, add a lemon wedge on the side. It gives a nice pop of flavor and makes the meal inviting. {{image_4}} You can switch to cauliflower grits for a lighter option. Cauliflower grits are low in carbs and packed with nutrients. Simply steam or boil cauliflower, then blend until smooth. You can mix in some cheese for flavor. For shrimp, consider using smaller shrimp or even shrimp alternatives. Shrimp can be high in calories, so choose lower-calorie fish or plant-based options. This keeps the dish tasty without the extra calories. Adding different cheeses can take your dish to a new level. Try cheddar for a sharp kick, or parmesan for a nutty flavor. Each cheese brings its own unique taste. You can also spice things up by incorporating different spices. Add garlic powder for depth, or Cajun seasoning for a kick. Experimenting with spices lets you find the flavor you love the most. Cajun-style shrimp and grits are a fun way to mix things up. Use andouille sausage and a spicy blend of seasonings. This adds a bold kick and deep flavor to the dish. Traditional Southern touches can make your meal more authentic. Use local ingredients or add a sprinkle of Old Bay seasoning. This pays homage to the classic Southern roots of this comfort food. To store shrimp and grits, let them cool first. Place leftovers in an airtight container. Keep them in the fridge for up to three days. Make sure to separate the shrimp and grits if you can. This helps keep the texture nice. When you’re ready to enjoy leftovers, use gentle heat. You can microwave them, but add a splash of water or broth. This keeps the grits creamy. Stir often and heat until warm. You can also reheat on the stove over low heat. Just add a little liquid and stir. Yes, you can freeze shrimp and grits! However, the texture may change. To freeze, let the dish cool completely. Then, use a freezer-safe container. Store for up to three months. When you’re ready to eat, thaw in the fridge overnight. Reheat on the stove with a splash of broth or water for best results. I recommend using fresh shrimp if you can find it. Fresh shrimp has a sweet taste and firm texture. If fresh shrimp is not available, frozen shrimp also works. Just ensure it is peeled and deveined. Thaw the shrimp in the fridge overnight for the best results. Yes, you can spice up your shrimp and grits! Add cayenne pepper for heat. You can also mix in hot sauce or diced jalapeños. Start with a little and taste as you go. This way, you control how spicy it gets. You can make shrimp and grits vegetarian easily. Swap shrimp for sautéed mushrooms or roasted cauliflower. Use vegetable broth instead of chicken broth. For creaminess, you can use coconut milk or a plant-based cream. This keeps the dish rich and delicious without the shrimp. For the full recipe, check out the Savory Shrimp & Grits Delight. Shrimp and grits are a dish filled with rich flavors and textures. We explored the main ingredients, like stone-ground grits and shrimp, and how spices and cheeses enhance the taste. I provided step-by-step cooking instructions, tips for creamy grits, and serving ideas. We also looked at healthy variations and how to store leftovers. Now, you can make this dish your own. Try new ingredients or adjust the spices to fit your taste. Enjoy your cooking journey!](https://goldendishy.com/wp-content/uploads/2025/06/edb6efca-056a-45fa-9dae-09e61936659d-768x768.webp)

![To make maple glazed butternut squash, you’ll need the following items: - 1 medium butternut squash, peeled and cut into 1-inch cubes - 3 tablespoons pure maple syrup - 2 tablespoons extra virgin olive oil - 1 teaspoon ground cinnamon - 1/2 teaspoon freshly grated nutmeg - 1/4 teaspoon cayenne pepper (optional, for a kick) - Sea salt and freshly cracked black pepper, to taste - 1/4 cup pecans, roughly chopped (for garnish) - Fresh parsley, finely chopped (for garnish) When cooking, measuring accurately is key. Use dry measuring cups for solid items like squash and nuts. For liquids, use a liquid measuring cup. Always level off dry ingredients with a straight edge. This step ensures you get the right amount for best results. You can swap ingredients based on your needs. If you prefer a sweeter taste, try honey instead of maple syrup. For a nut-free option, skip the pecans or use seeds like pumpkin seeds. Always check for allergies, especially with nuts and spices. To make maple glazed butternut squash, start by gathering your ingredients. You'll need: - 1 medium butternut squash, peeled and cut into 1-inch cubes - 3 tablespoons pure maple syrup - 2 tablespoons extra virgin olive oil - 1 teaspoon ground cinnamon - 1/2 teaspoon freshly grated nutmeg - 1/4 teaspoon cayenne pepper (optional) - Sea salt and freshly cracked black pepper, to taste - 1/4 cup pecans, roughly chopped (for garnish) - Fresh parsley, finely chopped (for garnish) First, preheat your oven to 400°F (200°C). This step is key for good roasting. Next, peel and cube the butternut squash. Place the cubes in a large bowl. Drizzle the olive oil and maple syrup over the squash. Then, sprinkle the ground cinnamon, nutmeg, cayenne, sea salt, and black pepper. Toss gently until all the pieces are well coated. Now, it's time to roast your squash. Line a baking sheet with parchment paper. This helps prevent sticking and makes cleanup easy. Spread the coated squash in a single layer on the sheet. Place the baking sheet in the oven. Roast the squash for 25-30 minutes. About halfway through the cooking time, stir the squash. This ensures all sides caramelize and cook evenly. When the squash is fork-tender and has a nice golden color, it's done. Remove it from the oven and let it cool for 2-3 minutes. To get that perfect caramelization, watch your cooking time closely. Stirring halfway through helps. The key is to spread the squash out evenly. If it's too crowded, it will steam instead of roast. You can also adjust the maple syrup for sweetness. A little extra can help with caramelization. If you like a kick, add the cayenne pepper. It balances the sweet and savory flavors beautifully. Once cooked, transfer the squash to a serving dish. Top with chopped pecans and parsley for a fresh touch. This dish is sure to impress! For the complete recipe, check out the [Full Recipe]. When making maple glazed butternut squash, avoid cutting the squash too small. Smaller pieces cook too fast and can burn. Also, don’t skip the olive oil. It helps the squash caramelize and adds flavor. Overcrowding the baking sheet is another mistake. Leave space between the cubes to ensure even cooking. To boost the flavor, add a splash of balsamic vinegar before roasting. This adds depth to the sweetness. Try different spices, too. A pinch of smoked paprika can give a nice twist. For a savory touch, mix in garlic powder or fresh garlic. These will elevate your dish. Use a sturdy baking sheet lined with parchment paper. This helps with easy cleanup and prevents sticking. A large mixing bowl is great for tossing the squash and spices. If you have one, a vegetable peeler makes peeling the squash quick and easy. For a perfect roast, an oven thermometer ensures your oven is at the right temperature. For the full recipe, refer to the above instructions. {{image_4}} You can make this dish even better by adding other veggies. Try sweet potatoes for a richer flavor. Carrots add sweetness and color, while red onions bring a slight bite. Just cut them into similar sizes as the squash. Toss them in the same maple glaze for a yummy blend. You’ll create a colorful and flavorful dish that everyone will love. Want to change the taste? You can use different spices. Try ginger for a warm kick. If you like it spicy, add more cayenne pepper. You can also use smoked paprika for a smoky flavor. Experiment with herbs like thyme or rosemary. Just remember to keep it balanced, so no single flavor overpowers the dish. This recipe is naturally vegan and gluten-free. You can enjoy it without worry. If you want to add protein, try chickpeas. They pair well with the flavors and add a nice crunch. For those who need low-carb options, skip the maple syrup and use a sugar substitute. It’s easy to adapt this dish to fit your needs. For the full recipe, check out the detailed instructions above. To keep your maple glazed butternut squash fresh, store it in an airtight container. Let the squash cool down after cooking. Then, place it in the fridge. It will stay fresh for about 3 to 5 days. If you want to keep it longer, consider freezing. Reheat your butternut squash in the oven for the best results. Preheat your oven to 350°F (175°C). Spread the squash on a baking sheet. Heat it for about 10-15 minutes or until warm. You can also use the microwave. Place it in a microwave-safe dish and cover it. Heat in short bursts, checking to avoid overcooking. Freezing is a great way to save this dish for later. First, let the squash cool completely. Then, spread it on a baking sheet in a single layer. Freeze it for about 1-2 hours until firm. Once frozen, transfer the squash to a freezer-safe bag or container. It can last for up to 3 months in the freezer. When ready to eat, thaw overnight in the fridge before reheating. For more details, check the Full Recipe. Yes, you can prepare this dish ahead of time. Cook the butternut squash and let it cool. Store it in an airtight container in the fridge. You can make it up to two days in advance. When you're ready to eat, just reheat it in the oven or microwave. This makes it great for meal prep. Maple glazed butternut squash lasts about 3 to 5 days in the fridge. Make sure it’s in a sealed container. Check for any signs of spoilage before eating. If it looks or smells off, it’s best to toss it. Freshness is key for enjoying this tasty dish. You can pair this dish with many foods. It goes well with roasted chicken or turkey. You can also serve it with quinoa or brown rice for a healthy meal. For a vegetarian option, pair it with a bean salad. The sweet and savory flavors work well with many sides. For more details on how to whip up this incredible dish, check out the Full Recipe. This guide walked you through each step of making Maple Glazed Butternut Squash. We covered ingredients, how to prepare, cook, and store your dish. I shared tips to avoid mistakes and ideas for adding your own twist. Remember, the key to perfect caramelization is patience. Enjoy experimenting with flavors and variations. This dish can be a crowd-pleaser and is easy to adapt. I hope you feel ready to try it out. Enjoy your cooking!](https://goldendishy.com/wp-content/uploads/2025/07/e9e7eb41-1a1b-4d7a-9d20-35ffe8b1aa92-768x768.webp)