Looking for a fresh and tasty meal? Teriyaki Chicken Lettuce Wraps are your answer! These wraps are packed with flavor and are simple to make. In this guide, I’ll share the best ingredients and tips for cooking juicy chicken. Plus, I’ll show you how to wrap them like a pro. Whether you’re hosting or just need a quick dinner, these wraps are sure to please. Let’s get started!
Ingredients
Main Ingredients for Teriyaki Chicken Lettuce Wraps
To make teriyaki chicken lettuce wraps, you need a few key ingredients. These create the rich flavors and fresh textures. Here’s what you’ll need:
– 1 lb (450g) boneless, skinless chicken breast, finely diced
– 1 tablespoon canola oil
– 1/2 cup bell pepper, finely chopped (choose red or yellow for sweetness)
– 1/2 cup carrot, grated (for a touch of crunch)
– 3 green onions, beautifully sliced
– 2 cloves garlic, minced (for aromatic depth)
– 1/4 cup low-sodium soy sauce (to control saltiness)
– 2 tablespoons honey (for a hint of natural sweetness)
– 1 tablespoon rice vinegar (to balance flavors)
– 1 teaspoon sesame oil (for a nutty aroma)
– 1 teaspoon fresh ginger, grated (adds a zesty kick)
– 1 head of butter lettuce or iceberg lettuce, with leaves gently separated
These ingredients come together to create a joyful, tasty meal.
Optional Garnishes
Garnishes can elevate your dish. While not required, they add flair and flavor. Here are some great options:
– Sesame seeds (for garnish, optional but recommended)
– Fresh cilantro or parsley, for garnish (optional)
Adding these garnishes can make your wraps look and taste even better.
How to Choose the Best Lettuce
Lettuce is key for wraps. It holds the filling perfectly. Here are tips to choose the best lettuce:
– Look for crisp, fresh leaves. Avoid any wilting or browning.
– Butter lettuce has a soft, pliable texture, perfect for wrapping.
– Iceberg lettuce offers a nice crunch but can be thicker.
Choose what you like best for your teriyaki chicken lettuce wraps.
Step-by-Step Instructions
Preparation Steps
To start, gather your ingredients. You need:
– 1 lb boneless, skinless chicken breast, finely diced
– 1 tablespoon canola oil
– 1/2 cup bell pepper, finely chopped
– 1/2 cup carrot, grated
– 3 green onions, beautifully sliced
– 2 cloves garlic, minced
– 1/4 cup low-sodium soy sauce
– 2 tablespoons honey
– 1 tablespoon rice vinegar
– 1 teaspoon sesame oil
– 1 teaspoon fresh ginger, grated
– 1 head of butter or iceberg lettuce, leaves separated
– Sesame seeds and fresh herbs for garnish
Make sure your chicken is chopped small. This helps it cook evenly. Chop the bell pepper finely for sweetness and color. Grate the carrot for crunch. Slice the green onions thin. Mince the garlic and grate the ginger to release their flavors.
Cooking Process
Heat the canola oil in a large skillet over medium heat. Wait until the oil shimmers. Add the diced chicken and cook it for 5-7 minutes. Stir often until the chicken is brown and fully cooked. Then, add the minced garlic, grated ginger, and chopped bell pepper. Sauté this mixture for 2-3 minutes. The bell pepper should soften and blend with the chicken.
In a small bowl, whisk together the soy sauce, honey, rice vinegar, and sesame oil. When well combined, pour this sauce into the skillet. Now, gently fold in the grated carrots and sliced green onions. Cook for another 2-3 minutes. This helps the sauce coat everything and thicken slightly.
Remove the skillet from heat. Let the teriyaki chicken cool for a few minutes. This resting time allows the flavors to meld beautifully.
Combining Ingredients for Perfect Flavor
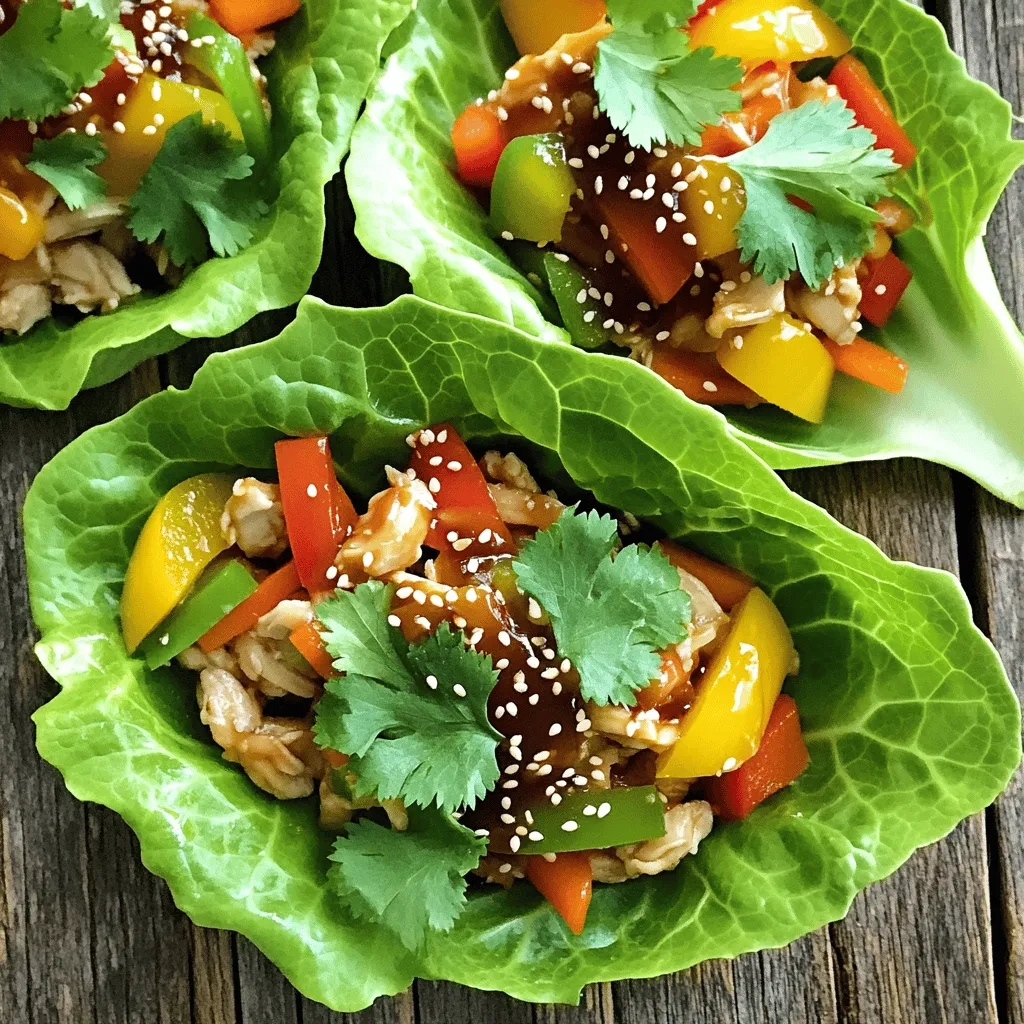
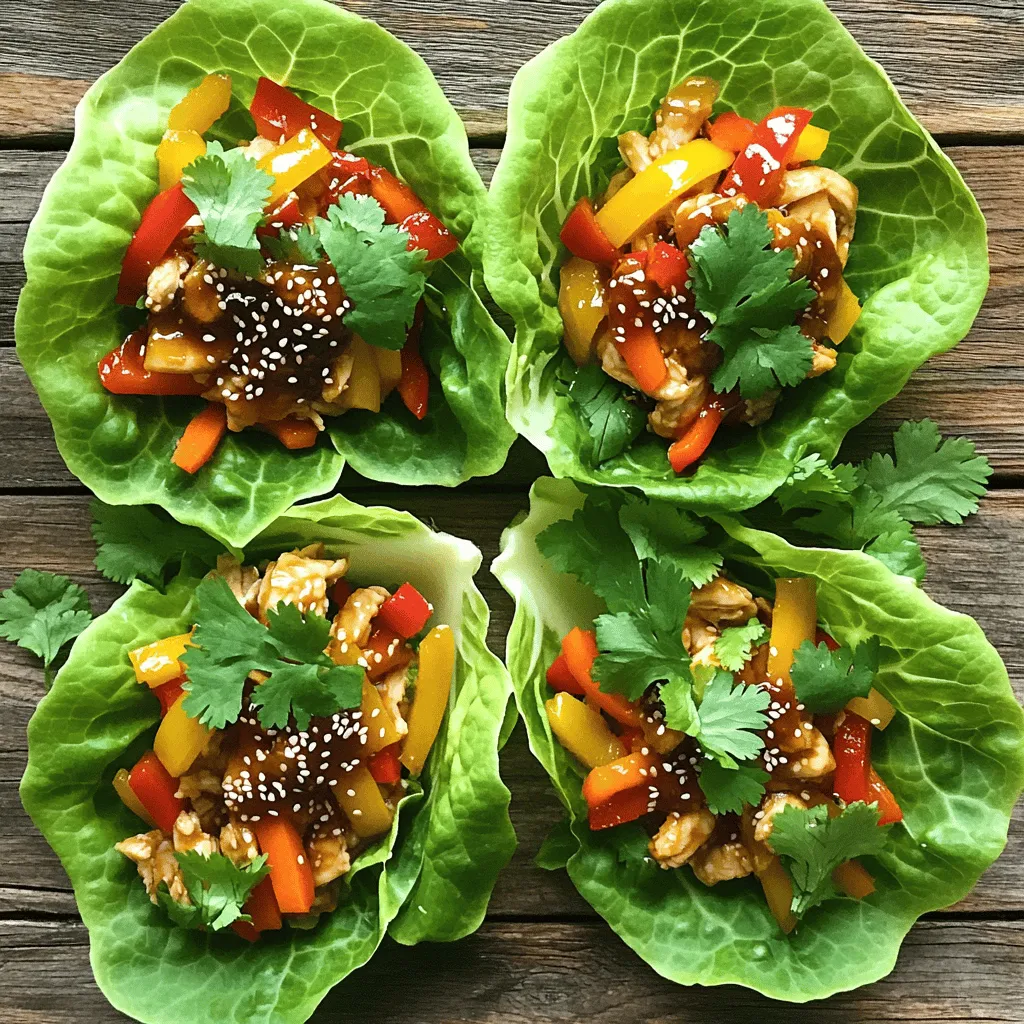
To serve, take a lettuce leaf and place a generous spoonful of the teriyaki chicken mixture in the center. This creates your wrap. For added flavor, sprinkle sesame seeds and fresh herbs on top. Serve the wraps right away. Encourage everyone to wrap them up and enjoy the fresh, vibrant flavors.
Tips & Tricks
Cooking Tips for Juicy Chicken
For juicy chicken, choose fresh chicken breast. Cut it into small, even pieces. This helps it cook evenly. Heat your skillet before adding oil. Use medium heat to avoid burning. Stir the chicken often. This keeps it from sticking and ensures even cooking. Add garlic and ginger early. This builds a great flavor base. Cook until the chicken is completely brown and firm.
Wrapping Techniques for Presentation
To wrap your lettuce, use large, whole leaves. Butter or iceberg lettuce works best. Place a spoonful of chicken in the center. Fold the sides in first, then roll it up. This keeps the filling secure. Make sure the wrap is tight but not too tight. You want it to hold together without falling apart. Arrange your wraps on a platter. Add extra garnishes like sesame seeds for a beautiful look.
How to Customize Your Wraps
You can change the flavor of your wraps easily. Add extra veggies like cucumbers or radishes. They give a nice crunch. For a spicy kick, include sliced jalapeños or sriracha sauce. If you like nuts, add chopped peanuts or cashews. You can also switch the protein. Try ground turkey or tofu for a new taste. Mix and match to find your favorite flavor combo.
Variations
Alternative Proteins to Use
You can switch up the protein in your wraps. If you like beef, use ground beef or diced steak. For a lighter choice, try shrimp or fish, like salmon. If you prefer turkey, ground turkey works well too. Each protein brings its own flavor and texture. Just adjust the cooking time to ensure everything cooks through.
Vegetarian or Vegan Options
To make these wraps vegetarian or vegan, use tofu or tempeh. Both options absorb flavors well. Press and cube the tofu before cooking to remove extra moisture. For a tasty twist, you can use cooked lentils or chickpeas. These options give a hearty bite while keeping your meal plant-based.
Flavor Enhancements and Add-Ins
Add fun flavors to your wraps! You can mix in crushed peanuts or cashews for crunch. Fresh herbs like basil or mint can add a fresh taste. Spice lovers may enjoy a dash of sriracha or chili flakes for heat. You can also add diced pineapple or mango for a sweet twist. These enhancements make your wraps even more exciting!
Storage Info
How to Store Leftover Wraps
After enjoying your teriyaki chicken lettuce wraps, you may have leftovers. To store them, place the wraps in an airtight container. Keep the chicken mixture and lettuce leaves separate. This helps keep the lettuce crisp and fresh. Store in the fridge for up to three days.
Reheating Instructions
When you’re ready to enjoy your leftovers, simply reheat the chicken mixture. Use a skillet over medium heat. Stir until heated through, about 5 minutes. Avoid microwaving the lettuce, as it may become soggy. Assemble the wraps just before eating for the best taste.
Meal Prep Tips for Busy Weeknights
Meal prepping makes weeknight cooking easy. You can prepare the chicken mixture ahead and store it in the fridge.To save time, chop vegetables on the weekend. This way, you have everything ready to go when you need a quick dinner. Enjoy your healthy wraps any night!
FAQs
How do I make the sauce for Teriyaki Chicken Lettuce Wraps?
To make the sauce, start with low-sodium soy sauce for a savory base. Add honey for sweetness and rice vinegar for a tangy kick. Then, mix in sesame oil for a nutty aroma. Combine these in a bowl and whisk until smooth. This sauce balances flavors, making your wraps burst with taste.
Can I make this dish ahead of time?
Yes, you can make this dish ahead of time. Prepare the teriyaki chicken mixture and store it in an airtight container. Keep it in the fridge for up to three days. When ready to eat, reheat the mixture in a skillet over medium heat. Serve it with fresh lettuce leaves for a quick meal.
What are some good side dishes to serve with these wraps?
Pair your lettuce wraps with some light side dishes. Here are a few great options:
– Steamed jasmine rice for a filling side.
– Edamame sprinkled with sea salt for a healthy snack.
– A simple cucumber salad for a refreshing crunch.
– Miso soup for warmth and depth.
These sides complement the flavors of the wraps beautifully.
Teriyaki chicken lettuce wraps are fun and tasty. We covered key ingredients, cooking steps, and tips to make them juicy. You learned how to customize and store your wraps for busy nights. This dish fits many diets with easy variations and great sides. Enjoy trying new flavors and sharing with friends. You now have all the tools to create delicious wraps that anyone can love. Keep experimenting and have fun in the kitchen!


