Strawberry Pretzel Salad Delightful and Easy Dessert

If you’re looking for a fun and tasty dessert, Strawberry Pretzel Salad is perfect for you! This no-bake delight pairs sweet strawberries with a salty pretzel crust, creating a treat everyone will love. I’ll share easy steps and helpful tips to guide you. Whether it’s for a special occasion or a simple family dinner, I’m here to make this dessert a hit! Let’s dive into the deliciousness!
Ingredients
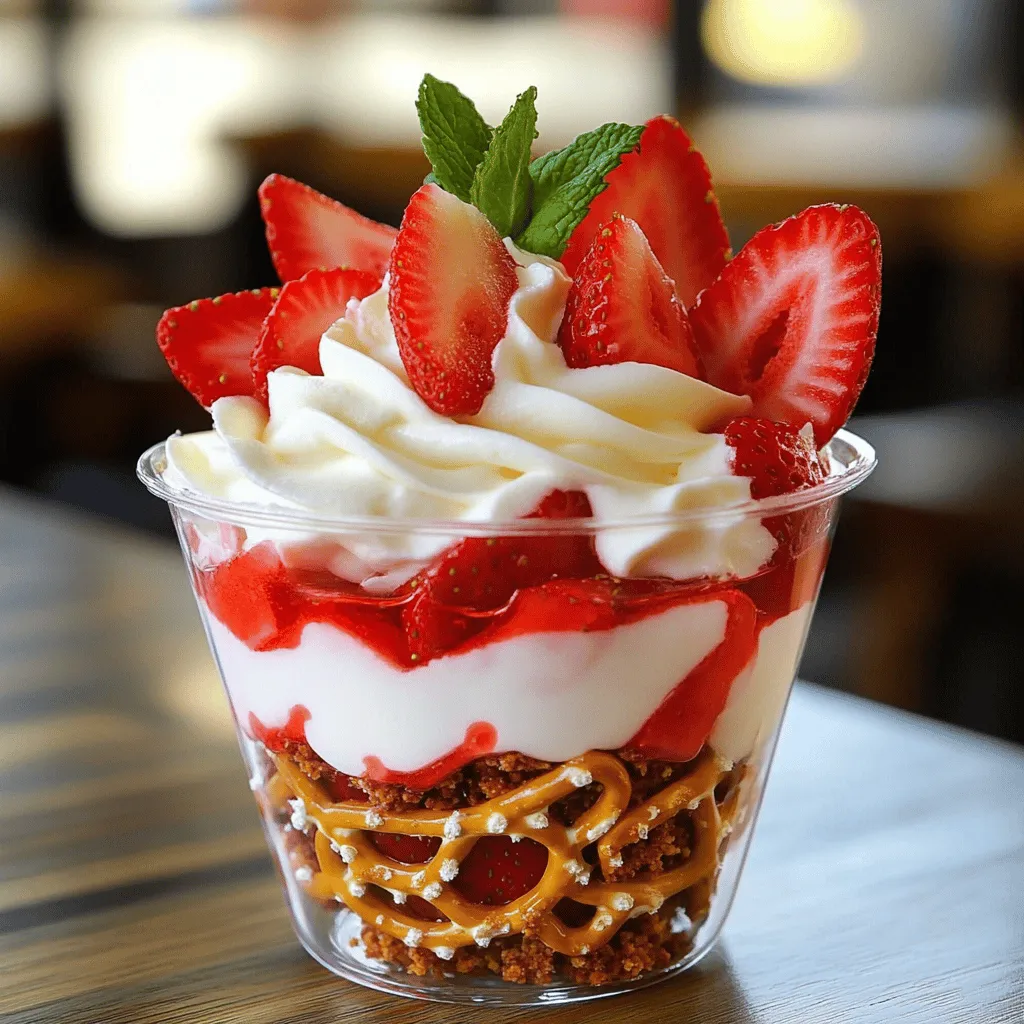
To make Strawberry Pretzel Salad, gather the following ingredients. Each layer adds its own flavor and texture.
Crust Ingredients
– 2 cups crushed pretzels
– 1/2 cup unsalted butter, melted
– 1/4 cup granulated sugar
Cream Cheese Layer Ingredients
– 8 oz cream cheese, softened
– 1 cup powdered sugar
– 1 cup whipped topping (like Cool Whip)
Strawberry Layer Ingredients
– 2 cups fresh strawberries, hulled and sliced
– 1 cup strawberry gelatin powder
– 2 cups boiling water
– 2 cups fresh strawberries, sliced for garnish
This mix of salty pretzels, sweet cream cheese, and fresh strawberries makes a perfect dessert. Each ingredient plays a key role in creating a delightful dish that everyone loves. The crust provides crunch, while the cream cheese layer adds creaminess. The strawberry layer brings sweetness and color. Enjoy making this tasty treat!
Step-by-Step Instructions
Preheat the Oven
First, set your oven to 350°F (175°C). This step gets your oven ready while you prepare the crust.
Prepare the Pretzel Crust
In a mixing bowl, add 2 cups of crushed pretzels, 1/2 cup of melted butter, and 1/4 cup of granulated sugar. Mix these ingredients well. You want every pretzel to be covered in the buttery sugar mixture.
Make the Cream Cheese Mixed Layer
In a new bowl, beat 8 oz of softened cream cheese until it is creamy. Add 1 cup of powdered sugar slowly and mix until smooth. Now, fold in 1 cup of whipped topping gently. This will make a light and fluffy layer.
Combine the Strawberry Layer
In a large bowl, dissolve 1 cup of strawberry gelatin powder in 2 cups of boiling water. Stir it well until the gelatin dissolves completely. Let this mixture cool a bit. Then, gently fold in 2 cups of sliced strawberries. You want them to stay whole for a nice look.
Now, pour the strawberry mixture over the cream cheese layer in the baking dish. Use a spatula to smooth it out evenly. Refrigerate the dish for at least 4 hours. This will set the layers and make it firm.
Tips & Tricks
Tips for Perfecting the Crust
To make the crust just right, use fresh pretzels. Crush them to a fine texture. This gives a nice crunch. Mix the crushed pretzels with melted butter and sugar. Make sure it is well-combined. Press the mixture firmly into the pan. This helps it hold together when baked. Bake it for ten minutes. Let it cool completely before adding layers.
How to Achieve a Creamy Filling
For a creamy filling, start with softened cream cheese. Use an electric mixer for the best results. Beat it until smooth and fluffy. Gradually add powdered sugar. This gives it sweetness without graininess. Finally, fold in whipped topping gently. This keeps the filling light and airy. Make sure to spread it evenly over the cooled crust.
Suggestions for Layering
Layering is key for great texture. Spread the cream cheese layer first. Let it set before adding the strawberry mixture. When making the strawberry layer, dissolve gelatin in boiling water well. Cool it slightly before adding fresh strawberries. This keeps the fruit whole and colorful. Pour the strawberry mix carefully over the cream cheese layer. Chill it to help all layers set.

Variations
Substituting Ingredients
You can change some of the ingredients in Strawberry Pretzel Salad. Here are some ideas:
– Use gluten-free pretzels for a gluten-free crust.
– Swap cream cheese for Greek yogurt for a lighter option.
– Try using honey instead of granulated sugar for a natural sweetener.
These swaps make the dish fit more diets.
Flavor Variations
Want to mix things up? Here are some fun ideas:
– Use mixed berries like blueberries and raspberries. Just swap the strawberries for equal amounts of these berries.
– Try peach or mango gelatin for a tropical twist.
– Add a splash of lemon juice to the cream cheese for a zesty kick.
These flavor variations keep the dessert exciting and fresh.
Healthier Options
If you’re looking for a healthier dessert, consider these tips:
– Use low-fat cream cheese to reduce calories.
– Replace whipped topping with homemade whipped cream.
– Add extra fruit for more nutrients and fiber.
These options let you enjoy the treat guilt-free while keeping it tasty.
Storage Info
Best Ways to Store Strawberry Pretzel Salad
To keep your Strawberry Pretzel Salad fresh, store it in an airtight container. This helps prevent any unwanted smells from mixing with your dessert. If you have leftovers, cover the dish tightly with plastic wrap. Make sure the cream cheese layer is well-protected to avoid drying out.
How Long Can It Be Refrigerated?
You can keep your Strawberry Pretzel Salad in the fridge for about 3 to 5 days. The key is to ensure it is well-covered. This way, the flavors stay fresh, and the dessert remains tasty. If you notice any changes in texture or smell, it’s best to toss it out.
Freezing Instructions
Freezing Strawberry Pretzel Salad is not the best option. The texture of the cream cheese layer can change when frozen. If you must freeze it, cut it into squares and wrap each piece tightly. Use plastic wrap followed by aluminum foil. When ready to serve, thaw in the fridge overnight. The quality may not be the same, but it will still taste good.
FAQs
What Can I Use Instead of Cream Cheese?
If you want to swap cream cheese, use Greek yogurt. It adds a tangy flavor. Cottage cheese is another good choice. Blend it until smooth for a creamy texture. You can also try vegan cream cheese for a dairy-free option. Each choice gives a unique taste and texture.
Can I Make This Recipe Ahead of Time?
Yes, you can make this dessert ahead of time. It actually tastes better after chilling overnight. Just prepare the layers as directed. Then, cover the dish well with plastic wrap. Store it in the fridge until you are ready to serve. This helps the flavors blend perfectly.
What Are Some Serving Suggestions?
Serve the Strawberry Pretzel Salad chilled for the best taste. Cut it into squares and place them on dessert plates. Add a slice of fresh strawberry on top for color. You can also sprinkle chopped mint leaves for a fresh touch.
In this post, we covered how to make a delicious Strawberry Pretzel Salad. We listed all the ingredients, shared easy steps, and shared tips for a perfect dish. You can try different flavors or make healthier swaps to suit your taste. Remember to store it properly to keep it fresh. With these tips, you’ll create a treat that everyone will want. Enjoy your delicious dessert, and have fun sharing it with friends and family. Happy cooking!


![To make easy lemon bars, you need a few simple ingredients. Here’s what you’ll need: - 1 cup all-purpose flour - 1/2 cup powdered sugar (plus extra for dusting) - 1/4 teaspoon salt - 1/2 cup unsalted butter, melted - 2 large eggs - 1 cup granulated sugar - 1/4 cup freshly squeezed lemon juice - Zest of 1 fresh lemon - 1/2 teaspoon baking powder Each ingredient plays a key role in the flavor and texture. The flour gives structure, while the butter adds richness. The eggs help bind everything together. The lemon juice and zest bring that bright, zesty flavor. Using fresh lemon juice makes a big difference. It adds a vibrant taste that bottled juice can’t match. The powdered sugar gives the bars a sweet finish. Make sure to have some extra on hand for dusting. Gather these ingredients before you start. This will make the cooking process smooth and easy. For the full recipe, check out the complete guide to making these delicious lemon bars. 1. Preheat your oven to 350°F (175°C). This is important for even baking. 2. In a medium bowl, mix the flour, powdered sugar, and salt. Use a whisk to combine them well. 3. Pour the melted butter into the bowl. Mix it with a fork until it looks like clumpy dough. 4. Press this dough firmly into the bottom of an 8x8 inch baking dish. This will be your crust. 1. In a separate bowl, whisk together the eggs and granulated sugar. Beat them until smooth and slightly frothy. This takes about 1-2 minutes. 2. Next, add the lemon juice, lemon zest, and baking powder to the egg mixture. Stir until everything is mixed well. 1. Bake the crust in the preheated oven for about 15 minutes. It should turn a light golden brown. 2. Carefully pour the lemon filling over the hot crust. Return the dish to the oven. 3. Bake for an additional 20-25 minutes. The filling should be set and lightly browned when done. 4. Once baked, remove the dish from the oven and let it cool for at least 15 minutes. This helps the bars set up. 5. Transfer the bars to a wire rack to cool completely. Once cool, dust with powdered sugar and cut into squares. For the full recipe, check out the detailed instructions. Enjoy your refreshing lemon bars! - Use room temperature ingredients. This helps the batter mix well. - Fresh lemon juice boosts the taste. It brings out the bright, zesty flavor. When you use room temperature eggs and butter, they mix better. This helps create a smooth filling. Fresh lemon juice is key for a strong lemon flavor. Bottled juice can taste flat. - Dust your bars with powdered sugar. This adds a nice touch and looks pretty. - Garnish with lemon slices and mint leaves. They make your bars pop and look inviting. Once your lemon bars cool, dust them with sugar. Then, place lemon slices on top. Add a few mint leaves for color. This makes your dessert not just tasty but also beautiful. For the full recipe, check out the details above. {{image_4}} You can make these lemon bars even more exciting. One way is to add berries. Fresh blueberries or raspberries pair well with lemon. They add a pop of color and taste. Just fold in one cup of your chosen berries after mixing the lemon filling. Another fun idea is to infuse the bars with herbs. Basil or rosemary works great. Chop a few leaves finely and mix them in with the lemon juice. This adds a unique twist that surprises the taste buds. If you need gluten-free bars, don't worry! You can swap the all-purpose flour for a gluten-free blend. Look for a mix that includes rice flour and starches. This keeps the texture light and tasty. For those who follow a vegan diet, you can replace the eggs. Use flax eggs instead. To make one flax egg, mix one tablespoon of flaxseed meal with two and a half tablespoons of water. Let it sit for about five minutes until it gets thick. This works well in the lemon filling to keep it creamy. Check the [Full Recipe] for the main steps to create these delightful lemon bars. To keep your lemon bars fresh, store them in the refrigerator. - Wrap them well: Use plastic wrap or an airtight container. - Keep them chilled: This helps maintain their texture and flavor. If you want to save some for later, you can freeze lemon bars. - Cool completely: Let them cool fully before freezing. - Cut into squares: This makes it easy to grab one later. - Wrap in plastic: Use freezer-safe wrap to prevent freezer burn. - Place in a container: Use an airtight container for extra protection. Lemon bars stay fresh in the fridge for about one week. - Check for freshness: Look for any signs of mold or off smells. If they have been in the fridge too long, they may go bad. - Signs of spoilage: If they look discolored or smell sour, it’s time to toss them. - Texture changes: A slimy texture means they’re no longer good. Storing them right helps you enjoy their bright flavor longer! For the complete recipe, check out the Full Recipe. To make your lemon bars less tart, adjust the sugar and lemon juice. You can add more sugar to balance the tartness of the lemon juice. Try adding an extra 1/4 cup of sugar to the filling. If you want, you can also reduce the lemon juice. Use about 3 tablespoons instead of 1/4 cup. This way, you keep the lemon flavor while making it sweeter. You can use bottled lemon juice, but fresh is better. Bottled juice often lacks the bright flavor of fresh lemons. Fresh lemon juice also has a more vibrant acidity. This difference makes your bars taste much better. If you must use bottled juice, try to find one with no added sugar or preservatives. To cut lemon bars into neat squares, use a sharp knife. First, let the bars cool completely. This helps them set and makes cutting easier. Dip your knife in warm water before each cut. Wipe the knife clean between cuts for a smoother edge. For even squares, use a ruler or a guide to measure before cutting. These tips will help your bars look great on any plate. You learned how to make easy lemon bars from scratch. We covered essential ingredients, step-by-step instructions, and helpful tips for perfect results. Don’t forget to try variations, like adding fruits or herbs. Proper storage keeps your bars fresh longer. Enjoy your sweet and tangy treat! The fun lies in making them your own. Experiment. Share your creations with friends and family. Happy baking!](https://goldendishy.com/wp-content/uploads/2025/07/78212822-f759-45eb-b990-dd8ea93e2cb8-768x768.webp)


![- Fresh strawberries - Vanilla sponge cake - Heavy whipping cream - Granulated sugar - Powdered sugar - Lemon juice - Fresh mint leaves - Alternative decoration options The main ingredients in this trifle are fresh strawberries, vanilla sponge cake, and heavy whipping cream. You will want ripe strawberries for the best taste. They add a sweet and juicy flavor. The vanilla sponge cake gives the trifle its light and fluffy base. You can use store-bought or homemade cake—whichever you prefer! For the cream, we use heavy whipping cream. It whips up nicely to form soft peaks. This cream adds richness and makes the trifle feel special. Next, we have some additional ingredients. Granulated sugar helps sweeten the strawberries. It helps bring out their natural juice. Powdered sugar sweetens the whipped cream while keeping it smooth. Lemon juice adds a nice touch of tartness and brightens the flavors. For garnishes, fresh mint leaves add a pop of color and freshness. You can also use extra strawberry slices for decoration. If you want to get creative, consider adding chocolate shavings or crushed cookies on top. These small touches can enhance the trifle's look and taste. For the full recipe, check out the details above! To start, we need to macerate the strawberries. This means we will make them sweeter and juicier. - Ingredients: - 4 cups fresh strawberries, hulled and sliced - 1/4 cup granulated sugar - 1 tablespoon lemon juice In a medium bowl, combine the sliced strawberries, sugar, and lemon juice. Toss them gently to coat. This step helps the strawberries release their juices. Let this sit for 15 to 20 minutes. You will see them get juicy and sweet. Next, let's prepare the whipped cream. This will add a light and fluffy layer to our trifle. - Ingredients: - 2 cups heavy whipping cream - 1/4 cup powdered sugar - 1 teaspoon vanilla extract In a large bowl, mix the heavy whipping cream, powdered sugar, and vanilla extract. Using an electric mixer, beat this mixture on medium-high speed. Keep mixing until soft peaks form, which takes about 3 to 5 minutes. Be careful not to over-whip. We want it to stay light and fluffy. Now comes the fun part: assembling the trifle! This is where our layers come together. 1. Start by placing a layer of sponge cake cubes at the bottom of your trifle bowl. Spread them evenly. 2. Next, add a generous layer of macerated strawberries on top of the sponge cake. Make sure to include those sweet juices. 3. Follow with a layer of the freshly whipped cream. Repeat the layering process with sponge cake, strawberries, and whipped cream until you reach the desired height. Usually, two to three layers work well. For the top layer, add a smooth layer of whipped cream. Decorate with fresh strawberry slices and a sprig of mint. Cover with plastic wrap and chill in the fridge for at least 2 hours. This chilling time makes the flavors blend well. And there you have it! Your Strawberry Shortcake Trifle is ready to impress. For the complete recipe, check out the Full Recipe. To make your trifle shine, pay close attention to the whipped cream. Avoid over-whipping it. Ideal whipped cream is light and fluffy. If you whip it too long, it can become grainy. Watch it closely as you mix. Next, ensure your sponge cake absorbs flavors. Let the cake soak up the strawberry juice. This step is key for a moist and tasty dessert. Layer each ingredient gently, so the flavors meld well together. Choose clear glass bowls or cups for serving. This choice highlights the beautiful layers. You can see the juicy strawberries and fluffy cream through the glass. It adds a nice touch to your table. For garnish, use fresh mint leaves. A sprig on top creates a pop of color. You can also add extra strawberry slices to the top. This makes your trifle look even more appealing. Chill your trifle for at least 2 hours. This time allows the flavors to mix well. The cake absorbs the strawberry juices, enriching the taste. When ready to serve, take it out of the fridge. Use a large spoon to scoop out servings. This method keeps the layers intact and makes each bite delightful. {{image_4}} You can mix things up with different fruits. Other berries like blueberries or raspberries work great. Their tartness adds a nice twist. You can also add complementary fruits like bananas. Bananas bring a creamy texture that pairs well with the other layers. Do you want to try something new with the cake? You can use flavored cakes. Chocolate or lemon cakes add a fun taste. If you need gluten-free options, there are many gluten-free cakes available. You can use sponge cake made from almond flour or coconut flour. These options keep the dessert light and fluffy. Not a fan of whipped cream? You can substitute it with yogurt. Greek yogurt gives a nice tang and is a bit healthier. If you're looking for dairy-free options, try coconut cream. It’s rich and creamy, making it a great choice for this trifle. Feel free to explore these variations to make the Strawberry Shortcake Trifle your own. For a full recipe, check out the [Full Recipe]. After making your strawberry shortcake trifle, store it in the fridge. Cover it with plastic wrap or a lid. This keeps it fresh and prevents it from absorbing other smells. It stays fresh for up to three days. The flavors will meld and deepen over time, making it even tastier. You can freeze your trifle for later enjoyment. However, it’s best to freeze layers separately. Wrap the sponge cake and strawberries tightly in plastic wrap. Place the whipped cream in an airtight container. This helps keep the taste and texture. When ready to serve, move the layers to the fridge to thaw overnight. Once thawed, layer them again for a fresh look. You can get creative with leftover trifle. Try blending the leftover cake and cream into a milkshake. You can also make parfaits with yogurt and fruit. If you have sponge cake left, warm it in the oven. This brings back some of its soft texture, making it perfect for new desserts. Use these ideas to enjoy your trifle in new and fun ways! The trifle needs to chill for at least 2 hours. This allows the flavors to mix well. Chilling also helps the sponge cake soak up the strawberry juices. For the best taste, I recommend leaving it in the fridge longer if you can. The longer it chills, the better it gets. Yes, you can make this dessert a day in advance. Just assemble the trifle and chill it. This way, you save time on the day of serving. If you prepare it early, the flavors will deepen and blend even more. Just make sure to cover it well to keep it fresh. If you want a lighter version, you can use whipped topping. You can also try Greek yogurt for a creamy texture. Another option is coconut cream for a dairy-free choice. These substitutes may change the flavor, but they can work well in a pinch. This dessert recipe shines through simple, fresh ingredients and easy steps. We explored how to prepare fresh strawberries, make light whipped cream, and assemble a delicious trifle. With tips on texture, presentation, and storage, you can create impressive layers in no time. Remember, variations are endless—try different fruits or cakes. Enjoy your trifle today and impress your friends with your skills. Happy layering!](https://goldendishy.com/wp-content/uploads/2025/07/6bc930bf-8069-41ce-85f7-a06b19a5b93e-768x768.webp)