Sriracha Honey Glazed Salmon Bold and Flavorful Meal
![For this recipe, you need key ingredients to make the salmon shine. Here’s what to gather: - 4 salmon fillets (approximately 6 oz each) - 2 tablespoons Sriracha sauce - 3 tablespoons honey - 1 tablespoon soy sauce - 2 cloves garlic, finely minced - 1 tablespoon fresh ginger, finely grated - 2 tablespoons olive oil - Salt and freshly ground black pepper, to taste These main ingredients create a sweet and spicy glaze that makes the salmon pop. Seasoning is crucial in cooking. It helps to enhance the natural flavors of the fish. Use these simple items: - Salt - Freshly ground black pepper Make sure to season both sides of the salmon. This step adds depth to every bite. Garnishes make your dish look great and add extra flavor. For this salmon recipe, you will need: - 1 tablespoon sesame seeds - 2 green onions, thinly sliced Sprinkling these on top gives the meal a beautiful finish. The sesame seeds add crunch, while green onions bring freshness. To see the full details for cooking, check the [Full Recipe]. To make the glaze, grab a medium bowl. Combine 2 tablespoons of Sriracha sauce, 3 tablespoons of honey, and 1 tablespoon of soy sauce. Add 2 minced garlic cloves and 1 tablespoon of freshly grated ginger. Whisk these together until the mixture is smooth. This sweet and spicy glaze will add the perfect flavor to your salmon. Set this aside for later use. Next, take 4 salmon fillets and dry them with a paper towel. This step helps the skin get crispy. Now, sprinkle salt and pepper on both sides of each fillet. Make sure to cover every inch. This simple seasoning enhances the natural taste of the fish. Now, heat 2 tablespoons of olive oil in a large skillet over medium-high heat. Once the oil shimmers, carefully place the salmon fillets in the skillet, skin-side down. Sear them for about 4-5 minutes until the skin turns golden and crispy. Once that happens, gently flip the fillets over. Lower the heat to medium and pour the glaze over the salmon. Cook for another 4-5 minutes, basting the salmon occasionally with the glaze. When it is cooked through and caramelized, remove the fillets from the skillet. Enjoy every bite of this flavorful salmon dish! For the full recipe, check out the details above! To get that perfect crispy skin, start with dry salmon. Use a paper towel to pat it well. This removes extra moisture, which helps the skin crisp nicely. Heat your skillet until it shimmers before adding the salmon. Place the fillets skin-side down and don’t move them for the first few minutes. This helps create a nice golden crust. Sear for about 4-5 minutes, then flip gently to finish cooking. If you like a milder glaze, reduce the Sriracha amount. Start with 1 tablespoon instead of 2. You can also add extra honey to balance the heat. For spice lovers, add more Sriracha or a pinch of cayenne pepper. Taste the glaze before pouring it on the salmon. This way, you can adjust it to your liking. Using the right tools makes cooking easier. Here’s what I recommend: - Large skillet for searing - Mixing bowl for the glaze - Whisk for blending ingredients - Paper towels for drying salmon - Spatula for flipping fillets These tools help you create a delicious Sriracha honey glazed salmon from the [Full Recipe]. {{image_4}} You can switch up the Sriracha honey glaze if you want. Try a sweet soy glaze instead. Mix soy sauce, brown sugar, and ginger for a tasty alternative. You can also use teriyaki sauce for a different flavor. It adds a rich, savory taste that pairs well with salmon. Another option is a citrus glaze. Mix orange juice and honey for a bright, zesty twist. While salmon shines in this recipe, other fish work too. Try using trout, which has a similar flavor and texture. Mahi-mahi also holds up well to grilling and glazing. Cod is another great option, as it absorbs flavors nicely. Each fish brings its own unique taste, so feel free to experiment. Toppings can elevate your dish further. Try adding sliced avocados for creaminess. Chopped cilantro or parsley adds a fresh touch. You can also sprinkle crushed peanuts or cashews for crunch. For a spicy kick, add sliced jalapeños. These toppings can make your meal even more fun and flavorful. Enjoy customizing your Sriracha honey glazed salmon with these ideas! Store your leftover salmon in an airtight container. Make sure to let it cool first. Place a piece of parchment paper between layers if stacking. This keeps the fish from sticking together. Refrigerate the salmon for up to three days. If you plan to keep it longer, freezing is a better option. To reheat, use the oven for the best taste. Preheat to 350°F (175°C). Place the salmon on a baking sheet and cover it with foil. Heat for about 10 to 15 minutes. This keeps the salmon moist and tasty. You can also use the microwave. Heat it in short bursts of 30 seconds. Check often to avoid overcooking. If you want to freeze your salmon, do it right after cooking. Wrap each piece tightly in plastic wrap. Then, place them in a freezer bag. Remove as much air as you can before sealing. You can freeze it for up to three months. When ready to eat, thaw it in the fridge overnight before reheating. For more ideas, check out the Full Recipe. You can tell if the salmon is cooked when it flakes easily with a fork. The flesh should be opaque and no longer translucent. A good rule is to cook it for about 4-5 minutes per side, depending on thickness. Use a food thermometer if you want to be precise. The internal temperature should reach 145°F (63°C). Cooking it just right keeps it moist and tasty. Yes, you can prepare the glaze ahead of time. Just store it in the fridge in an airtight container. This makes cooking easier later. However, I recommend cooking the salmon fresh. This keeps it juicy and full of flavor. If you must, you can cook the salmon and store it in the fridge for up to 2 days. For a full meal, pair the salmon with fluffy jasmine rice or quinoa. Steamed broccoli or snap peas add color and crunch. You can also serve it with a fresh salad for a light touch. If you want something more filling, try roasted potatoes or sweet potatoes. These sides balance the bold flavors of the salmon well. Check out the Full Recipe for more details! This blog post shared key details about making Sriracha Honey Glazed Salmon. You learned what ingredients to use, including seasoning and garnishes. I outlined simple steps to prepare the glaze, season the fish, and achieve that perfect sear. Plus, you found helpful tips for crispy skin and spice adjustments. I also covered variations for sauces and fish, along with storage options for leftovers. Savor this dish and share it with others. Enjoy your cooking!](https://goldendishy.com/wp-content/uploads/2025/07/1e0cb0f2-d69e-43b4-ab0e-316143d411f1.webp)
Ready to spice up your dinner? In this post, I’ll show you how to make Sriracha Honey Glazed Salmon, a bold and flavorful meal that’s sure to impress. With just a few simple ingredients and easy steps, you can create a dish packed with taste. Whether you’re cooking for family or entertaining friends, this salmon recipe will be a hit. Let’s dive in and get cooking!
Ingredients
Main ingredients for Sriracha Honey Glazed Salmon
For this recipe, you need key ingredients to make the salmon shine. Here’s what to gather:
– 4 salmon fillets (approximately 6 oz each)
– 2 tablespoons Sriracha sauce
– 3 tablespoons honey
– 1 tablespoon soy sauce
– 2 cloves garlic, finely minced
– 1 tablespoon fresh ginger, finely grated
– 2 tablespoons olive oil
– Salt and freshly ground black pepper, to taste
These main ingredients create a sweet and spicy glaze that makes the salmon pop.
Seasoning essentials
Seasoning is crucial in cooking. It helps to enhance the natural flavors of the fish. Use these simple items:
– Salt
– Freshly ground black pepper
Make sure to season both sides of the salmon. This step adds depth to every bite.
Garnishes for presentation
Garnishes make your dish look great and add extra flavor. For this salmon recipe, you will need:
– 1 tablespoon sesame seeds
– 2 green onions, thinly sliced
Sprinkling these on top gives the meal a beautiful finish. The sesame seeds add crunch, while green onions bring freshness.
Step-by-Step Instructions
Preparing the glaze
To make the glaze, grab a medium bowl. Combine 2 tablespoons of Sriracha sauce, 3 tablespoons of honey, and 1 tablespoon of soy sauce. Add 2 minced garlic cloves and 1 tablespoon of freshly grated ginger. Whisk these together until the mixture is smooth. This sweet and spicy glaze will add the perfect flavor to your salmon. Set this aside for later use.
Seasoning the salmon fillets
Next, take 4 salmon fillets and dry them with a paper towel. This step helps the skin get crispy. Now, sprinkle salt and pepper on both sides of each fillet. Make sure to cover every inch. This simple seasoning enhances the natural taste of the fish.
Searing and glazing the salmon
Now, heat 2 tablespoons of olive oil in a large skillet over medium-high heat. Once the oil shimmers, carefully place the salmon fillets in the skillet, skin-side down. Sear them for about 4-5 minutes until the skin turns golden and crispy. Once that happens, gently flip the fillets over. Lower the heat to medium and pour the glaze over the salmon. Cook for another 4-5 minutes, basting the salmon occasionally with the glaze. When it is cooked through and caramelized, remove the fillets from the skillet. Enjoy every bite of this flavorful salmon dish!
Tips & Tricks
How to achieve crispy skin
To get that perfect crispy skin, start with dry salmon. Use a paper towel to pat it well. This removes extra moisture, which helps the skin crisp nicely. Heat your skillet until it shimmers before adding the salmon. Place the fillets skin-side down and don’t move them for the first few minutes. This helps create a nice golden crust. Sear for about 4-5 minutes, then flip gently to finish cooking.
Adjusting spice levels
If you like a milder glaze, reduce the Sriracha amount. Start with 1 tablespoon instead of 2. You can also add extra honey to balance the heat. For spice lovers, add more Sriracha or a pinch of cayenne pepper. Taste the glaze before pouring it on the salmon. This way, you can adjust it to your liking.
Recommended cooking tools
Using the right tools makes cooking easier.

Variations
Alternative sauces and glazes
You can switch up the Sriracha honey glaze if you want. Try a sweet soy glaze instead. Mix soy sauce, brown sugar, and ginger for a tasty alternative. You can also use teriyaki sauce for a different flavor. It adds a rich, savory taste that pairs well with salmon. Another option is a citrus glaze. Mix orange juice and honey for a bright, zesty twist.
Different types of fish to use
While salmon shines in this recipe, other fish work too. Try using trout, which has a similar flavor and texture. Mahi-mahi also holds up well to grilling and glazing. Cod is another great option, as it absorbs flavors nicely. Each fish brings its own unique taste, so feel free to experiment.
Suggestions for additional toppings
Toppings can elevate your dish further. Try adding sliced avocados for creaminess. Chopped cilantro or parsley adds a fresh touch. You can also sprinkle crushed peanuts or cashews for crunch. For a spicy kick, add sliced jalapeños. These toppings can make your meal even more fun and flavorful. Enjoy customizing your Sriracha honey glazed salmon with these ideas!
Storage Info
How to store leftover salmon
Store your leftover salmon in an airtight container. Make sure to let it cool first. Place a piece of parchment paper between layers if stacking. This keeps the fish from sticking together. Refrigerate the salmon for up to three days. If you plan to keep it longer, freezing is a better option.
Reheating tips for optimal flavor
To reheat, use the oven for the best taste. Preheat to 350°F (175°C). Place the salmon on a baking sheet and cover it with foil. Heat for about 10 to 15 minutes. This keeps the salmon moist and tasty. You can also use the microwave. Heat it in short bursts of 30 seconds. Check often to avoid overcooking.
Freezing options and guidelines
If you want to freeze your salmon, do it right after cooking. Wrap each piece tightly in plastic wrap. Then, place them in a freezer bag. Remove as much air as you can before sealing. You can freeze it for up to three months. When ready to eat, thaw it in the fridge overnight before reheating.
FAQs
How do I know when the salmon is cooked?
You can tell if the salmon is cooked when it flakes easily with a fork. The flesh should be opaque and no longer translucent. A good rule is to cook it for about 4-5 minutes per side, depending on thickness. Use a food thermometer if you want to be precise. The internal temperature should reach 145°F (63°C). Cooking it just right keeps it moist and tasty.
Can I make this dish ahead of time?
Yes, you can prepare the glaze ahead of time. Just store it in the fridge in an airtight container. This makes cooking easier later. However, I recommend cooking the salmon fresh. This keeps it juicy and full of flavor. If you must, you can cook the salmon and store it in the fridge for up to 2 days.
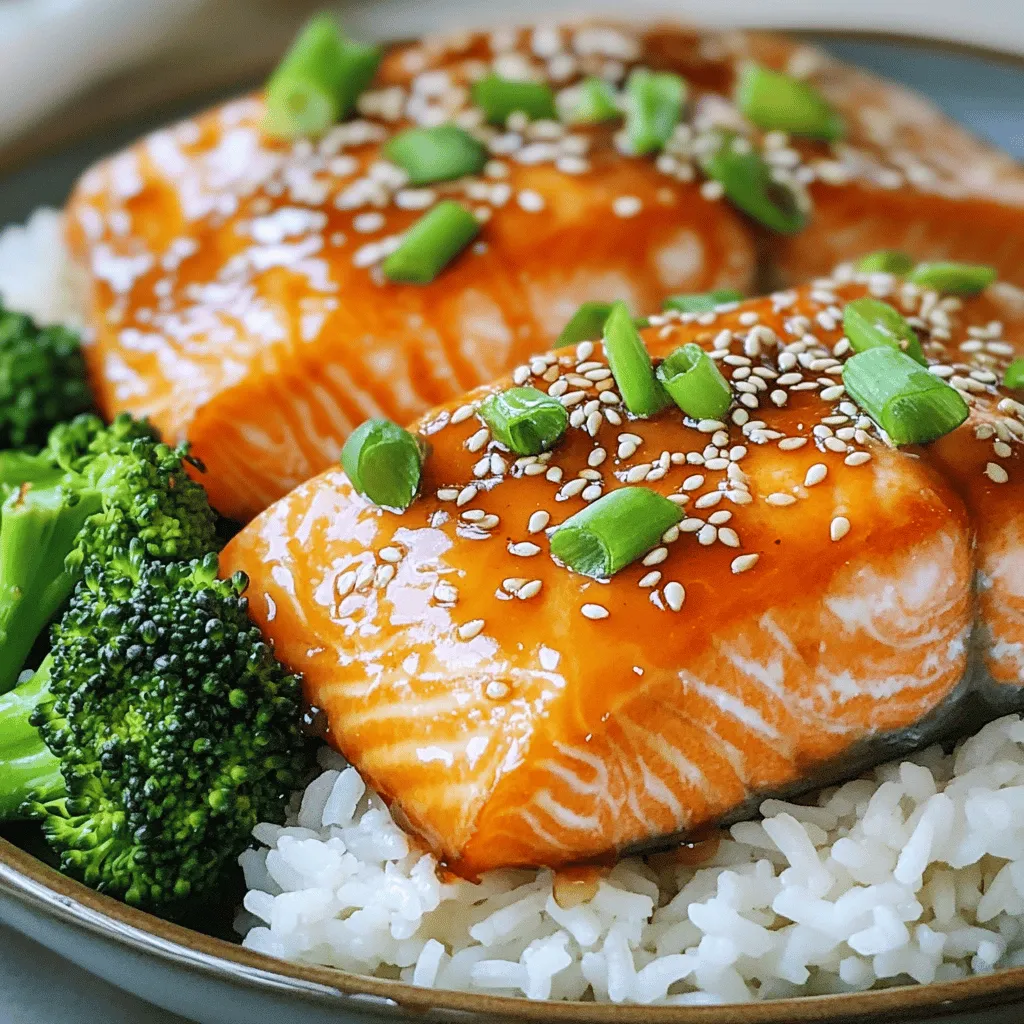
What are the best side dishes to serve with Sriracha Honey Glazed Salmon?
For a full meal, pair the salmon with fluffy jasmine rice or quinoa. Steamed broccoli or snap peas add color and crunch. You can also serve it with a fresh salad for a light touch. If you want something more filling, try roasted potatoes or sweet potatoes. These sides balance the bold flavors of the salmon well.
This blog post shared key details about making Sriracha Honey Glazed Salmon. You learned what ingredients to use, including seasoning and garnishes. I outlined simple steps to prepare the glaze, season the fish, and achieve that perfect sear. Plus, you found helpful tips for crispy skin and spice adjustments. I also covered variations for sauces and fish, along with storage options for leftovers.
Savor this dish and share it with others. Enjoy your cooking!
![For this recipe, you need key ingredients to make the salmon shine. Here’s what to gather: - 4 salmon fillets (approximately 6 oz each) - 2 tablespoons Sriracha sauce - 3 tablespoons honey - 1 tablespoon soy sauce - 2 cloves garlic, finely minced - 1 tablespoon fresh ginger, finely grated - 2 tablespoons olive oil - Salt and freshly ground black pepper, to taste These main ingredients create a sweet and spicy glaze that makes the salmon pop. Seasoning is crucial in cooking. It helps to enhance the natural flavors of the fish. Use these simple items: - Salt - Freshly ground black pepper Make sure to season both sides of the salmon. This step adds depth to every bite. Garnishes make your dish look great and add extra flavor. For this salmon recipe, you will need: - 1 tablespoon sesame seeds - 2 green onions, thinly sliced Sprinkling these on top gives the meal a beautiful finish. The sesame seeds add crunch, while green onions bring freshness. To see the full details for cooking, check the [Full Recipe]. To make the glaze, grab a medium bowl. Combine 2 tablespoons of Sriracha sauce, 3 tablespoons of honey, and 1 tablespoon of soy sauce. Add 2 minced garlic cloves and 1 tablespoon of freshly grated ginger. Whisk these together until the mixture is smooth. This sweet and spicy glaze will add the perfect flavor to your salmon. Set this aside for later use. Next, take 4 salmon fillets and dry them with a paper towel. This step helps the skin get crispy. Now, sprinkle salt and pepper on both sides of each fillet. Make sure to cover every inch. This simple seasoning enhances the natural taste of the fish. Now, heat 2 tablespoons of olive oil in a large skillet over medium-high heat. Once the oil shimmers, carefully place the salmon fillets in the skillet, skin-side down. Sear them for about 4-5 minutes until the skin turns golden and crispy. Once that happens, gently flip the fillets over. Lower the heat to medium and pour the glaze over the salmon. Cook for another 4-5 minutes, basting the salmon occasionally with the glaze. When it is cooked through and caramelized, remove the fillets from the skillet. Enjoy every bite of this flavorful salmon dish! For the full recipe, check out the details above! To get that perfect crispy skin, start with dry salmon. Use a paper towel to pat it well. This removes extra moisture, which helps the skin crisp nicely. Heat your skillet until it shimmers before adding the salmon. Place the fillets skin-side down and don’t move them for the first few minutes. This helps create a nice golden crust. Sear for about 4-5 minutes, then flip gently to finish cooking. If you like a milder glaze, reduce the Sriracha amount. Start with 1 tablespoon instead of 2. You can also add extra honey to balance the heat. For spice lovers, add more Sriracha or a pinch of cayenne pepper. Taste the glaze before pouring it on the salmon. This way, you can adjust it to your liking. Using the right tools makes cooking easier. Here’s what I recommend: - Large skillet for searing - Mixing bowl for the glaze - Whisk for blending ingredients - Paper towels for drying salmon - Spatula for flipping fillets These tools help you create a delicious Sriracha honey glazed salmon from the [Full Recipe]. {{image_4}} You can switch up the Sriracha honey glaze if you want. Try a sweet soy glaze instead. Mix soy sauce, brown sugar, and ginger for a tasty alternative. You can also use teriyaki sauce for a different flavor. It adds a rich, savory taste that pairs well with salmon. Another option is a citrus glaze. Mix orange juice and honey for a bright, zesty twist. While salmon shines in this recipe, other fish work too. Try using trout, which has a similar flavor and texture. Mahi-mahi also holds up well to grilling and glazing. Cod is another great option, as it absorbs flavors nicely. Each fish brings its own unique taste, so feel free to experiment. Toppings can elevate your dish further. Try adding sliced avocados for creaminess. Chopped cilantro or parsley adds a fresh touch. You can also sprinkle crushed peanuts or cashews for crunch. For a spicy kick, add sliced jalapeños. These toppings can make your meal even more fun and flavorful. Enjoy customizing your Sriracha honey glazed salmon with these ideas! Store your leftover salmon in an airtight container. Make sure to let it cool first. Place a piece of parchment paper between layers if stacking. This keeps the fish from sticking together. Refrigerate the salmon for up to three days. If you plan to keep it longer, freezing is a better option. To reheat, use the oven for the best taste. Preheat to 350°F (175°C). Place the salmon on a baking sheet and cover it with foil. Heat for about 10 to 15 minutes. This keeps the salmon moist and tasty. You can also use the microwave. Heat it in short bursts of 30 seconds. Check often to avoid overcooking. If you want to freeze your salmon, do it right after cooking. Wrap each piece tightly in plastic wrap. Then, place them in a freezer bag. Remove as much air as you can before sealing. You can freeze it for up to three months. When ready to eat, thaw it in the fridge overnight before reheating. For more ideas, check out the Full Recipe. You can tell if the salmon is cooked when it flakes easily with a fork. The flesh should be opaque and no longer translucent. A good rule is to cook it for about 4-5 minutes per side, depending on thickness. Use a food thermometer if you want to be precise. The internal temperature should reach 145°F (63°C). Cooking it just right keeps it moist and tasty. Yes, you can prepare the glaze ahead of time. Just store it in the fridge in an airtight container. This makes cooking easier later. However, I recommend cooking the salmon fresh. This keeps it juicy and full of flavor. If you must, you can cook the salmon and store it in the fridge for up to 2 days. For a full meal, pair the salmon with fluffy jasmine rice or quinoa. Steamed broccoli or snap peas add color and crunch. You can also serve it with a fresh salad for a light touch. If you want something more filling, try roasted potatoes or sweet potatoes. These sides balance the bold flavors of the salmon well. Check out the Full Recipe for more details! This blog post shared key details about making Sriracha Honey Glazed Salmon. You learned what ingredients to use, including seasoning and garnishes. I outlined simple steps to prepare the glaze, season the fish, and achieve that perfect sear. Plus, you found helpful tips for crispy skin and spice adjustments. I also covered variations for sauces and fish, along with storage options for leftovers. Savor this dish and share it with others. Enjoy your cooking!](https://goldendishy.com/wp-content/uploads/2025/07/1e0cb0f2-d69e-43b4-ab0e-316143d411f1-300x300.webp)

![- 4 salmon fillets (approximately 6 oz each) - 3 tablespoons miso paste (white or yellow) - 2 tablespoons honey - 1 tablespoon soy sauce (or tamari for gluten-free) - 1 tablespoon rice vinegar - 1 tablespoon sesame oil - 2 cloves garlic, minced - 1 teaspoon freshly grated ginger - Green onions, thinly sliced (for garnish) - Sesame seeds (for garnish) This list has everything you need for a tasty miso glazed salmon. The salmon fillets are the star of the show. Miso paste adds a rich flavor. Honey gives it a touch of sweetness. Soy sauce or tamari brings in saltiness. Rice vinegar adds a bit of tang. Sesame oil gives a nice nutty taste. Garlic and ginger add warmth and depth. Don't forget the green onions and sesame seeds! They make the dish look great and add a bit of crunch. You can find the full recipe to see how to combine these ingredients into a delicious meal. To start, gather your ingredients. In a mixing bowl, combine the miso paste, honey, soy sauce, rice vinegar, sesame oil, minced garlic, and grated ginger. Use a whisk to blend the ingredients. Mix until smooth and creamy. This glaze adds a sweet and savory flavor to the salmon. Next, place the salmon fillets in a shallow dish or a sealable bag. Pour the miso glaze over the salmon. Make sure each piece is well-coated. Cover the dish or seal the bag and marinate the salmon in the fridge. For best results, allow it to marinate for at least 30 minutes. If you have time, two hours gives a richer flavor. Now, preheat your oven to 400°F (200°C). Line a baking sheet with parchment paper to prevent sticking. After marinating, take the salmon out of the glaze. Let any excess glaze drip off, then place the fillets skin-side down on the sheet. Bake the salmon for 12 to 15 minutes. The fish is done when it turns opaque and flakes easily with a fork. You can find the complete instructions in the [Full Recipe]. You can boost the taste of miso glazed salmon by adding fresh herbs. Try using cilantro or basil for a fresh kick. You can also add spices like chili flakes for heat or black sesame seeds for extra crunch. These small tweaks can take your dish to a whole new level. For the best flavor, I suggest marinating the salmon for at least 30 minutes. If you have time, let it sit for up to 2 hours. This longer marinating lets the flavors soak in deeply. Just remember not to marinate too long, as the acid in the marinade can make the fish mushy. While baking the salmon is great, you can also broil or grill it. Broiling gives a nice char and caramelization, making it even tastier. If you grill, keep the heat medium to avoid burning the glaze. Whichever method you choose, keep an eye on the salmon. It cooks fast! {{image_4}} You can switch the salmon for other fish, like cod or trout. Both work well with miso glaze. Chicken is another great option. You can use chicken breasts or thighs. The cooking time will change, so check for doneness. For plant-based choices, try tofu or tempeh. Both absorb flavors well. Marinate them just like you do with salmon. Bake them until golden brown and firm. You can adjust the taste of the miso glaze. If you like it sweeter, add more honey. For a saltier flavor, increase the soy sauce. You can also try adding a splash of citrus juice. Lime or lemon will brighten the dish. Feel free to add other ingredients too. A spoonful of sriracha gives a spicy kick. You can also mix in chopped herbs like cilantro or basil for freshness. To make a full meal, serve the salmon with sides. Steamed vegetables like broccoli or green beans add color and nutrition. Jasmine rice or quinoa pairs well too. You can also add a simple salad for crunch. For a fun twist, serve the salmon on a bed of noodles. Drizzle some leftover glaze for extra flavor. Check out the Full Recipe for more tips on creating a balanced plate. To store leftover miso glazed salmon, let it cool first. Place it in an airtight container. Make sure to cover it well so it stays fresh. It can last in the fridge for up to three days. If your salmon has a strong smell, it’s best to throw it away. To freeze the salmon, wrap each piece tightly in plastic wrap. Then, place them in a freezer-safe bag. This method helps prevent freezer burn. Miso glazed salmon can be frozen for up to three months. When you’re ready to eat it, move it to the fridge for a night to thaw. For reheating, use an oven or a stovetop. If using the oven, preheat it to 350°F (175°C). Place the salmon on a baking sheet. Heat it for about 10 minutes. This method keeps it moist. If you prefer the stovetop, heat a pan over low heat. Add a splash of water to keep the fish from drying out. Cook for a few minutes until warmed through. You should marinate the salmon for at least 30 minutes. This gives the flavors time to soak in. For a richer taste, I recommend marinating for up to 2 hours. The longer the fish sits in the marinade, the better the flavor will be. Yes, you can use different types of miso. White miso is sweeter and milder. Yellow miso is a bit stronger but still smooth. Red miso is more intense and salty. Each type brings a unique flavor to the salmon. Experiment with what you like best! I love serving Miso Glazed Salmon with steamed rice. Jasmine or brown rice works great. You can also add some roasted veggies or a fresh salad. These sides balance the rich glaze. They make your plate colorful and fun! Check out the Full Recipe for more ideas. This blog post showed how to make miso-glazed salmon. You learned about the key ingredients, preparation, and cooking steps. I shared tips to enhance flavor and offered variations if you want to try something new. Proper storage can keep leftovers tasty for later. Remember, cooking should be fun! Experiment with flavors and enjoy your meal. With these insights and tips, you will create a dish that’s both delicious and satisfying. Happy cooking!](https://goldendishy.com/wp-content/uploads/2025/07/7f43d765-f0ef-46f9-86e2-eabd5628ba72-768x768.webp)


![- 1 pre-made pie crust - 2 medium zucchinis, grated - 2 cups fresh spinach, chopped - 1 small onion, finely chopped - 3 large eggs - 1 cup milk I love using a pre-made pie crust for this quiche. It saves time and effort. The zucchinis bring a fresh taste, while the spinach adds color and nutrients. Eggs and milk create a rich, creamy texture that binds everything together. - 1 teaspoon garlic powder - Salt and pepper to taste - 1 tablespoon olive oil Garlic powder gives this dish a warm flavor. I always add salt and pepper to enhance the taste. Olive oil is perfect for cooking the veggies and adds a nice depth of flavor. - 1 cup shredded mozzarella cheese - 1/2 cup grated Parmesan cheese Cheese is key for a tasty quiche. Mozzarella melts beautifully, while Parmesan adds a sharp, salty kick. Together, they create a delightful flavor mix that elevates your dish. Don't forget to check the full recipe for complete details! First, heat olive oil in a skillet over medium heat. Add the finely chopped onion. Sauté it for about 3-4 minutes until it turns soft and clear. Next, add the grated zucchini and chopped spinach. Stir often and cook for about 5 minutes. The veggies should become tender, and any extra water will cook off. I love adding garlic powder, salt, and pepper to boost the flavor. After cooking, take it off the heat and let it cool for a moment. In a large bowl, whisk together the eggs and milk until they blend smoothly. This is where the magic begins! Next, add in the shredded mozzarella and grated Parmesan cheese. Fold them in gently. This mixture will bring richness to your quiche. It’s important that the cheese mixes well but still keeps some texture. Now, pour the vegetable and egg mixture into the prepared pie crust. Spread it out evenly to help it cook well. Place the quiche in your preheated oven. Bake for 30-35 minutes. You’ll know it’s ready when the edges turn golden brown and a toothpick inserted in the center comes out clean. Let it cool for about 10 minutes before slicing. This resting time helps enhance the flavors. You can find the full recipe in the previous section for all these steps! To get the best texture for your quiche, you must control moisture. Zucchini has a lot of water, which can make your quiche soggy. To fix this, grate the zucchini and lightly salt it. Let it sit for 10 minutes, then squeeze out the excess liquid. This step is key to a firm quiche. The cooking time can vary based on your oven. I find that checking it a few minutes early helps. If the edges look golden and a toothpick comes out clean, it's ready! For more flavor, consider adding fresh herbs like thyme or basil. A pinch of red pepper flakes can add a nice kick. You can also play with spices, like paprika or onion powder. Each of these can change the taste in a fun way. Cheese is another way to boost flavor. While mozzarella and Parmesan are great, try using feta or goat cheese for a tangy twist. These types add both creaminess and a bit of zest to the dish. When serving your zucchini spinach quiche, aim for a bright plate. A colorful plate makes a dish look more appealing. Add fresh basil or parsley on top for an eye-catching touch. You can also serve it with a light salad drizzled with citrus vinaigrette. This adds freshness and balance. For a photo-worthy presentation, slice the quiche into neat pieces. Arrange them in a circle on the plate. This simple trick makes your dish look polished and ready for sharing. Don't forget to snap a picture before you dig in! For the complete recipe, check out the [Full Recipe]. {{image_4}} You can switch up the veggies in your quiche. Broccoli, bell peppers, or mushrooms work great. Each veggie brings its own taste and texture. You can also try seasonal additions. In spring, add asparagus, and in fall, use roasted squash. This keeps your quiche fresh and exciting. If you need a gluten-free quiche, use a gluten-free crust. Many stores sell these now, or you can make your own. If you make your crust, use almond flour or coconut flour for a nice texture. You may need to adjust the liquid in the filling. This helps keep the quiche moist and tasty. Making mini quiches is fun and easy. You can use a muffin tin for individual servings. Just pour the mixture into each cup and fill them about three-quarters full. Bake for about 20-25 minutes. Keep an eye on them to avoid burning. These mini quiches are perfect for snacks or brunch. You can even freeze them for later! Check out the Full Recipe for more details. To keep your quiche fresh, store it in an airtight container. This helps keep moisture out. It stays fresh in the fridge for up to three days. If you plan to eat it later, cover it tightly with plastic wrap or foil. You can freeze your quiche before or after baking. If freezing before baking, wrap it well. This way, you can bake it fresh later. For freezing after baking, let it cool completely first. Store it in an airtight container. It can last up to three months in the freezer. When ready to eat, thaw it in the fridge overnight. For the best taste, reheat your quiche in the oven. Set it to 350°F (175°C) and heat for about 15-20 minutes. This keeps the crust crispy. You can also use a microwave for quick heating. However, the crust may not stay as crunchy. Heat slices for about 1-2 minutes. Always check that it's hot in the middle before serving. You can tell the quiche is done by looking for a few key signs. The edges should be golden brown, and the center should be firm. If you gently shake the quiche, it should not jiggle. Another great way to check is with a toothpick. Insert it into the center of the quiche. If it comes out clean, your quiche is ready to enjoy. Yes, you can use frozen spinach in this recipe. However, it’s important to make a few adjustments. First, thaw the spinach completely and drain any excess water. This helps prevent the quiche from becoming too watery. You may also want to chop the spinach further after thawing. This ensures even distribution in your quiche. Zucchini spinach quiche pairs well with many side dishes. A simple green salad with a light vinaigrette works great. You can also serve it with roasted vegetables for added flavor. If you want something heartier, serve it alongside a bowl of creamy tomato soup. This combination makes for a balanced and tasty meal. This blog post covers how to make a tasty zucchini and spinach quiche. You learned about the main ingredients, like pre-made crust and eggs, plus the best seasonings. I shared step-by-step instructions for preparing and baking. You also got tips for perfecting texture and ideas for variations. Making this dish can be easy and fun. Enjoy experimenting with flavors and ingredients. Whether you serve it for breakfast or dinner, this quiche will impress. Get cooking and enjoy your delicious creation!](https://goldendishy.com/wp-content/uploads/2025/06/2284a9f2-dfec-450d-ba9a-23981f99d5f6-768x768.webp)
![- 1 cup Arborio rice - 1 cup mixed mushrooms (button and shiitake, thinly sliced) - 1/2 cup heavy cream - 1/2 cup grated Parmesan cheese Arborio rice is the star here. It’s starchy and creamy as it cooks. Mixed mushrooms bring rich flavors. I love using both button and shiitake for the best taste. Heavy cream makes the risotto smooth and rich. The Parmesan cheese adds a salty kick that elevates the dish. - 1 small onion, finely chopped - 2 cloves garlic, minced - 2 tablespoons extra-virgin olive oil - 1 tablespoon unsalted butter Onion and garlic are key for flavor. They create a lovely base when sautéed. Olive oil and butter work together to add depth. The oil keeps the butter from burning, making the perfect blend. - Salt and freshly ground black pepper to taste - Fresh parsley, chopped for garnish Salt and pepper are must-haves for seasoning. They bring out all the flavors in the dish. Fresh parsley adds color and a hint of freshness on top. It makes the risotto look beautiful and bright. For the full recipe, check out our Mushroom Medley Creamy Risotto. Each ingredient plays a role in making this dish a creamy delight. Start by heating the vegetable broth in a medium saucepan. Warm it over medium heat until it’s hot but not boiling. This is key! Keeping the broth warm helps the rice cook evenly. If the broth is cold, it can shock the rice and ruin the dish. In a large skillet, add the olive oil and butter. Heat this over medium heat. Once hot, add the finely chopped onion. Sauté for about 3 to 4 minutes. You want the onion to soften and turn translucent. Next, add the minced garlic and sliced mushrooms. Cook for 5 to 6 minutes. Stir occasionally until the mushrooms are golden brown. They should be soft and have released some moisture. This step builds a rich flavor base. Now, it’s time to toast the rice. Add the Arborio rice to the skillet. Stir well to coat the grains with the mushroom mix. Cook for an additional 2 to 3 minutes. You’ll see the rice edges becoming slightly translucent. This toasting enhances the flavor. Next, start adding the warm broth one ladleful at a time. Stir constantly. Let the rice absorb the liquid before adding more. This gradual addition is crucial. It helps the rice become creamy. Continue this process for about 18 to 20 minutes. The rice should be tender but still al dente. Once it reaches this creamy state, stir in the heavy cream and grated Parmesan cheese. Mix well to combine. Season with salt and black pepper to taste. For the full recipe, you can refer to the detailed steps above. Enjoy your creamy mushroom risotto! To make your risotto creamy, you must stir constantly. This action helps release starch from the rice. The starch is what gives risotto its rich texture. If you stop stirring, the rice can clump, and the dish won’t be as smooth. Choose the right type of broth for the best flavor. Vegetable broth works well, but chicken broth adds depth. Always keep your broth warm while you cook. Cold broth can shock the rice and slow down cooking. Adding white wine brings a nice depth to the dish. Use a dry white wine like Sauvignon Blanc. This adds acidity and balances the richness of the cream. For mushrooms, mix button and shiitake. Button mushrooms are mild and creamy, while shiitake adds an earthy taste. You can also try portobello or cremini for a bolder flavor. When plating, use shallow bowls for a nice look. Pile the risotto high and use a spoon to create a small well in the center. This makes it feel gourmet. Pair your risotto with a crisp green salad or some roasted vegetables. A glass of white wine, like Chardonnay, complements the flavors well. For an extra touch, garnish with more Parmesan and a drizzle of olive oil. This will enhance both the taste and the appearance of your dish. {{image_4}} You can change the type of mushrooms in your risotto. Each type adds its own taste. Try using portobello or oyster mushrooms for a different flavor. Seasonal vegetables also work well. Asparagus or peas can add freshness and color to your dish. If you want a vegan risotto, skip the heavy cream and cheese. Use coconut cream and nutritional yeast for a rich flavor. For lactose-free options, choose lactose-free cheese and cream. These swaps keep the dish creamy and delicious. You can also make this risotto gluten-free. Arborio rice is naturally gluten-free, so you’re already set. Just ensure your broth is gluten-free, too. Adding protein can make your risotto heartier. You can mix in chicken, shrimp, or tofu. Cook the protein separately and stir it in near the end. This keeps flavors balanced and ensures everything is cooked perfectly. Chicken adds a savory touch, while shrimp gives a nice seafood flair. Tofu is a great choice for a plant-based meal. Each option enhances your creamy mushroom risotto and makes it more filling. For more details on the recipe, check the Full Recipe link. To keep creamy mushroom risotto fresh, store it in a proper container. Use an airtight container to prevent moisture loss. Make sure the risotto cools to room temperature before sealing. Creamy mushroom risotto lasts up to three days in the fridge if stored correctly. When reheating risotto, the best methods are on the stovetop or in the microwave. For stovetop reheating, add a splash of broth to help revive the creaminess. Stir gently over low heat until warm. In the microwave, cover the dish with a damp paper towel. Heat in short bursts, stirring in between to keep it creamy. To freeze risotto, let it cool completely first. Then, place it in a freezer-safe container or bag. Remove as much air as possible to prevent freezer burn. Creamy mushroom risotto can stay frozen for up to two months. When ready to eat, thaw it overnight in the fridge. Reheat as mentioned above, ensuring it stays creamy and delicious. Cooking creamy mushroom risotto takes about 30 minutes. You will spend 10 minutes prepping and 20 minutes cooking. Keep the broth warm while you cook. Stir the rice often and add broth slowly. This method helps the rice absorb the liquid and become creamy. Yes, you can make mushroom risotto ahead of time. Cook it as usual, but stop before adding cream and cheese. Cool it down quickly and store it in the fridge. When you're ready to serve, reheat it on low heat. Add cream and cheese while stirring to restore creaminess. Creamy mushroom risotto pairs well with many sides. You can serve it with a simple green salad. Grilled vegetables also make a good match. For a special touch, enjoy it with a glass of white wine. A crisp Sauvignon Blanc complements the flavors nicely. For the full recipe, check out the Mushroom Medley Creamy Risotto [Full Recipe]. Creamy mushroom risotto blends rich ingredients like Arborio rice and mushrooms. We explored cooking techniques, from sautéing aromatics to achieving the perfect creaminess. You can impress with various flavor adjustments, dietary options, and easy storage tips. In summary, this dish can fit any taste. Try it out and make it your own! Enjoy the satisfaction of mastering risotto. You’ll impress your family and friends with this delicious meal.](https://goldendishy.com/wp-content/uploads/2025/06/13e7d433-e608-428e-b029-b03d5bef7a63-768x768.webp)