Spicy Honey Garlic Wings Savory and Flavorful Treat

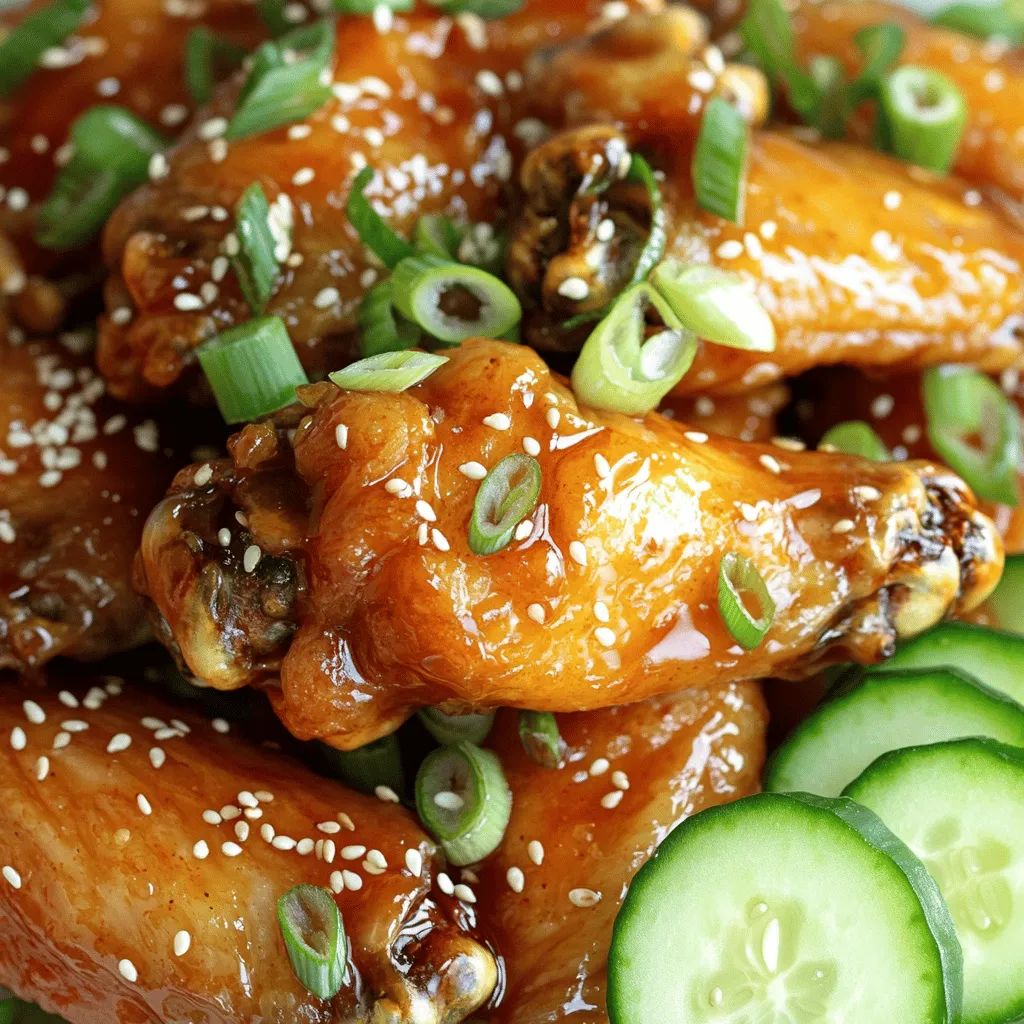
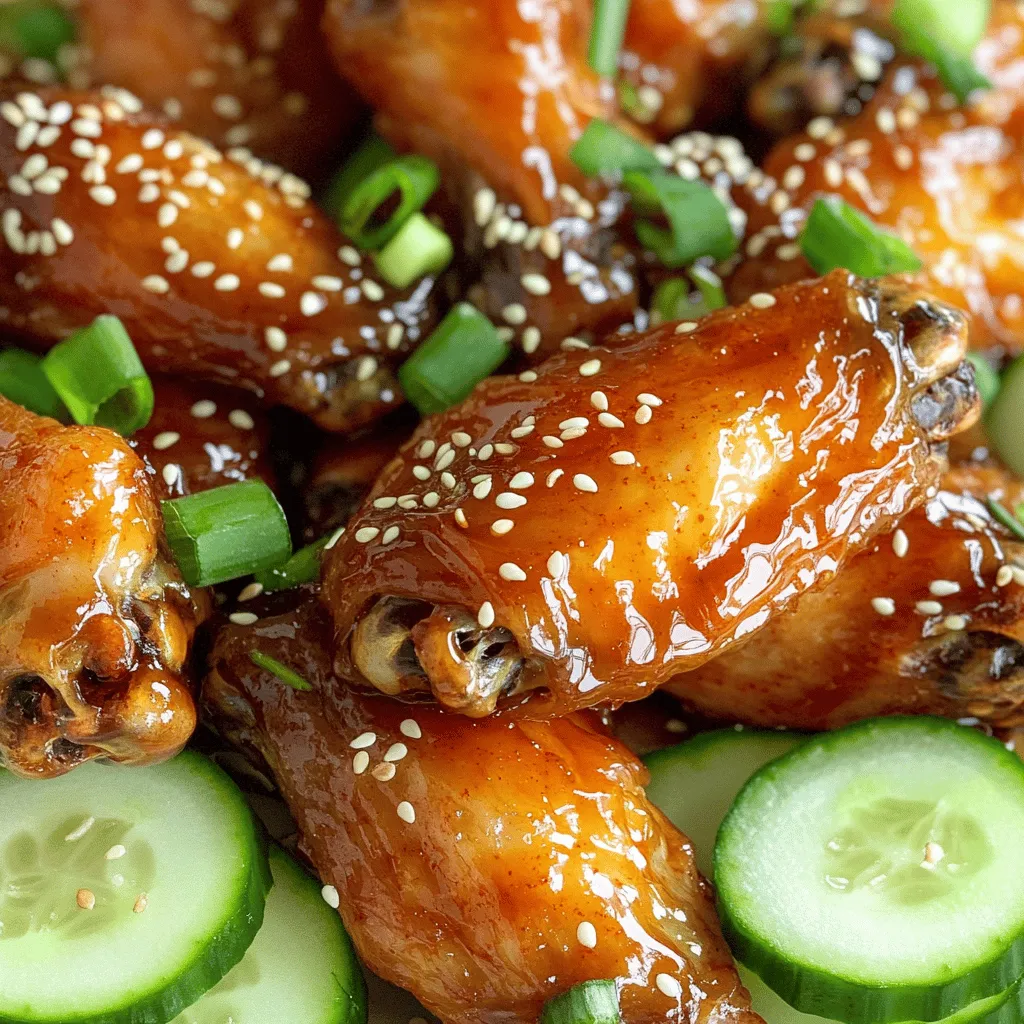
Get ready to spice up your game day with my Spicy Honey Garlic Wings! These wings burst with flavor, balancing sweet and spicy to create a treat that satisfies every craving. Whether you’re hosting friends or just want a tasty meal, this recipe will impress. I’ll guide you through simple steps, ingredient swaps, and tips for perfect wings every time. Dive in, and let’s make your next dish unforgettable!
Ingredients
Main Ingredients for Spicy Honey Garlic Wings
To make these tasty wings, you’ll need a few key items. Here’s what to gather:
– 2 pounds chicken wings
– 1/4 cup honey
– 1/4 cup low-sodium soy sauce
– 4 cloves garlic, finely minced
– 1 tablespoon sriracha (adjust for desired heat level)
– 1 teaspoon freshly grated ginger
– 1 tablespoon rice vinegar
– 1 tablespoon sesame oil
– Salt and black pepper to taste
These ingredients create the perfect blend of sweet and spicy flavors.
Optional Garnishes
Garnishes can elevate your dish. Here are some fun options:
– Toasted sesame seeds
– Chopped green onions
Adding these garnishes not only enhances the look but also adds texture and flavor.
Ingredient Substitutions
Don’t have everything? No worries! Here are some easy swaps:
– Use maple syrup instead of honey for a different sweetness.
– If you’re out of soy sauce, try tamari or coconut aminos.
– For a milder kick, use less sriracha or substitute with mild chili sauce.
These substitutions can still keep the essence of spicy honey garlic wings, making them just as delicious.
Step-by-Step Instructions
Preparation of Chicken Wings
To start, preheat your oven to 400°F (200°C). This step is very important for crispy wings. Next, take your chicken wings and pat them dry with paper towels. Removing moisture is key. Place the dry wings in a large bowl. Season them with salt and black pepper. Toss lightly to coat each wing evenly.
Making the Honey Garlic Sauce
Now, let’s make the sauce. In a medium bowl, mix together the honey, low-sodium soy sauce, minced garlic, sriracha, freshly grated ginger, rice vinegar, and sesame oil. Whisk these ingredients until they blend well. This sauce will give your wings a sweet and spicy kick.
Baking and Serving the Wings
Pour the honey garlic sauce over the chicken wings. Use tongs or your hands to toss them gently. Make sure every wing is coated in that tasty sauce. Next, line a baking sheet with parchment paper to prevent sticking. Lay the wings in a single layer. Avoid overcrowding for even cooking.
Place the baking sheet in the oven and bake for 30-35 minutes. Halfway through, turn the wings so they cook evenly. They should come out crispy and golden. For a stickier finish, save a bit of the sauce. Brush this on the wings during the last 5 minutes of baking.
Once done, remove the wings from the oven. Let them rest for a few minutes. Transfer them to a serving platter. Top with toasted sesame seeds and chopped green onions for color and flavor.
Tips & Tricks
Achieving Crispy Wings
To get those wings nice and crispy, start by drying them well. Use paper towels to remove moisture. This step is key. If the wings are wet, they will steam instead of crisp up. Next, season with salt and pepper before baking. Space the wings on the baking sheet. If they touch, they won’t get crispy. Bake them at 400°F for 30-35 minutes. Flip them halfway to cook evenly.
Customizing Spice Levels
You can easily adjust the heat in your wings. Start with one tablespoon of sriracha for mild heat. If you like it spicy, add more sriracha. Another option is to blend in red pepper flakes for extra kick. You can also make a separate spicy dip if you want. This lets everyone control their own spice level while enjoying the wings.
Enhancing Flavor with Marinades
Marinating the wings boosts their flavor. Mix honey, soy sauce, and garlic for a great base. You can add ginger for warmth and rice vinegar for tang. Let the wings soak in this mixture for at least 30 minutes. For even more flavor, marinate them overnight. This step allows the flavors to penetrate deeply. For a fun twist, try adding citrus zest or fresh herbs to the marinade.

Variations
Alternative Sauces and Glazes
You can change the flavor of your spicy honey garlic wings easily. Try using different sauces. For a sweet twist, swap honey for maple syrup. If you love heat, add more sriracha or use a spicy chili sauce. For a tangy kick, include some lime juice or tamarind paste in the mix. You can even try a teriyaki glaze for a fun twist. Each sauce gives a unique taste and makes your wings special.
Cooking Methods (Air Fryer, Grill, etc.)
Cooking methods can change the texture of your wings. The air fryer is fantastic for crispy wings. It cooks them fast and uses less oil. Just toss the wings in the sauce and place them in the air fryer basket. Cook at 380°F for about 25 minutes. If you prefer grilling, it’s a great option too. Grill the wings over medium heat for about 20 minutes, turning often. This method gives them a smoky flavor everyone loves.
Different Types of Wings (Buffalo, BBQ, etc.)
You can explore many types of wings. Buffalo wings are spicy and tangy, perfect for those who love heat. BBQ wings have a sweet and smoky flavor, great for fans of a milder taste. You could also try Asian-style wings with soy sauce and sesame oil. Each variation can change how you enjoy your meal. It’s fun to mix and match flavors.
Storage Info
Best Practices for Storing Leftovers
To keep your spicy honey garlic wings fresh, store them right. First, let the wings cool to room temperature. Then, place them in an airtight container. Make sure to separate layers with parchment paper. This helps prevent sticking. Store the container in the fridge. These wings will stay tasty for up to four days.
Reheating Tips for Crispy Wings
Reheating your wings properly keeps them crispy. Preheat your oven to 375°F (190°C). Lay the wings on a baking sheet. Make sure they are in a single layer. Bake them for about 10-15 minutes. Check them often to avoid drying out. This method makes the skin crisp again.
Freezing Instructions
If you want to save wings for later, freezing works well. Place cooled wings in a freezer-safe bag. Remove as much air as possible before sealing. Label the bag with the date. You can freeze them for up to three months. When ready to eat, thaw in the fridge overnight. Then, reheat as mentioned above for the best results.
FAQs
How to adjust the spice level in Spicy Honey Garlic Wings?
You can change the heat by adjusting the sriracha. Add more for extra spice. If you prefer milder wings, reduce the sriracha or use a sweet chili sauce instead. I like to start with one tablespoon of sriracha and taste the sauce. You can always add more heat later. This way, you keep control over the flavor.
Can I use chicken drumsticks instead of wings?
Yes, chicken drumsticks work great! They may need a bit more time to cook. Drumsticks have more meat, which some people love. Just ensure they reach an internal temperature of 165°F (74°C). This keeps them safe to eat. Follow the same steps as the wings for coating and baking.
What are the best sides to serve with Spicy Honey Garlic Wings?
Pairing sides with wings enhances your meal. Here are some tasty options:
– Crispy fries: They provide a nice crunch.
– Coleslaw: The coolness balances the spice.
– Veggie sticks: Carrots and celery add freshness.
– Rice: Fluffy rice soaks up the sauce well.
– Dips: Ranch or blue cheese dips cool down the heat.
These sides make your meal more enjoyable and complete.
In this blog post, we covered the key ingredients for spicy honey garlic wings and offered great tips for preparation. I shared step-by-step instructions for making delicious sauce, baking the wings, and achieving that crispy texture. We explored variations in cooking methods and sauces, plus storage tips to enjoy leftovers later.
Now, embrace your creativity and make these wings your own. Enjoy your tasty creation and share it with friends!


![For a delightful Easy Cucumber Slaw, you need simple, fresh ingredients. Here’s what you will gather: - Cucumbers - Carrot - Red bell pepper - Green onions - Fresh cilantro - Dressing components: - Rice vinegar - Honey or maple syrup - Sesame oil - Soy sauce - Seasoning: - Salt - Pepper - Sesame seeds This vibrant mix of veggies adds color and crunch. The dressing ties everything together with its sweet and tangy flavor. Each ingredient plays a role in making this slaw both refreshing and satisfying. You can find the full recipe for preparation details. Enjoy making this easy side dish that complements any meal! To start, gather your fresh veggies. You need 2 large cucumbers, 1 medium carrot, 1 red bell pepper, and 3 green onions. First, slice the cucumbers into thin rounds. Next, julienne the carrot into thin strips. Then, slice the red bell pepper into strips. Finally, chop the green onions into small pieces. Place all the veggies in a large mixing bowl. Next, let’s make the dressing. In a small bowl, combine 1/4 cup of rice vinegar, 1 tablespoon of honey or maple syrup, 1 tablespoon of sesame oil, and 1 teaspoon of soy sauce. Whisk this mixture until it is smooth and well combined. This dressing will add a delightful flavor to your slaw. Now it’s time to put everything together. Pour the dressing over the mixed vegetables in the large bowl. Toss gently to coat all the veggies evenly. Add 1/4 cup of freshly chopped cilantro and season with salt and freshly cracked pepper to taste. Mix it all again with gentle motions. Let the slaw sit for at least 10 minutes. This resting time helps the flavors blend nicely. Just before serving, sprinkle sesame seeds on top for extra crunch. Enjoy your Easy Cucumber Slaw! For the full recipe, please check the link. Letting the slaw sit is key. After you mix the veggies and dressing, rest it for at least 10 minutes. This time helps the flavors blend. The cucumbers soften just a bit, making every bite tasty. The longer you wait, the better the slaw tastes. You can even let it sit for up to 30 minutes if you want a stronger flavor. Presentation makes a big difference. Serve the slaw in a bright, shallow bowl. This way, the colors of the veggies shine. Add a few sprigs of cilantro on top. This adds extra green and freshness. You can also serve the slaw with a side of lime wedges. This gives guests a chance to add a zesty kick. Want to boost the taste? Consider adding lime juice. Just a squeeze before serving brightens the whole dish. You could also add sliced jalapeños for some heat. If you like crunch, try adding chopped nuts like peanuts or cashews. For a sweet twist, mix in some diced mango or pineapple. These small changes can make your Easy Cucumber Slaw unique and exciting. {{image_4}} You can mix in many other vegetables for added crunch and flavor. Try adding shredded cabbage for a nice texture. Radishes also bring a peppery bite that pairs well with cucumbers. You might enjoy diced tomatoes, which can add some juiciness. You can swap in green bell peppers for a milder taste. Even thinly sliced snap peas can add a fun pop! Feel free to experiment based on what you have at home. The dressing can change the whole vibe of the slaw. For a creamier option, mix in some Greek yogurt or mayo. You can also try a zesty citrus dressing with lime or lemon juice. If you want a spicy kick, add some chili paste or Sriracha. A sesame peanut dressing can give a rich, nutty flavor. By changing the dressings, you can create a new dish each time! If you're vegan, simply use maple syrup instead of honey. This slaw is already gluten-free if you choose gluten-free soy sauce. You can also leave out the soy sauce for a fresh taste. If you want a low-carb version, try using spiralized zucchini instead of cucumbers. These options make this slaw friendly for many diets, so everyone can enjoy it! To keep your Easy Cucumber Slaw fresh, store it in an airtight container. This keeps moisture out and prevents sogginess. If you have leftover slaw, ensure it cools to room temperature first. Once cooled, seal it tightly and place it in the fridge. I recommend eating it within three days for the best taste. For the best quality, consume the slaw within three days. After that, the cucumbers can become too soft. If you notice any signs of spoilage, like an off smell or sliminess, it’s best to throw it away. The quicker you eat it, the fresher it will taste. You don’t need to reheat cucumber slaw. It’s best enjoyed cold. If you want to freshen it up after storage, add a little more dressing or a splash of vinegar. This will revive the flavors and keep it crisp. Enjoy it straight from the fridge for a refreshing bite! For the full recipe, check out the [Full Recipe]. For the best slaw, I recommend using English cucumbers. They are long and slender, with thin skin and few seeds. Their taste is mild and crisp, which makes them perfect for salads. You can also use Persian cucumbers. They are smaller, crunchy, and sweet. Avoid regular garden cucumbers, as they can be bitter and watery. The right cucumber gives your slaw a fresh flavor. Yes, you can prep your cucumber slaw the night before. Just cut the cucumbers and other veggies, and store them in an airtight container. Keep the dressing separate until you are ready to serve. Mixing them right before serving keeps the veggies crisp and fresh. This way, you save time and still get great taste. Cucumber slaw can last about 2 to 3 days in the fridge. To keep it fresh, store it in an airtight container. As time passes, the cucumbers may release water. If that happens, just drain the excess liquid before serving. Always check for any off smells or changes before eating. Enjoy your slaw while it’s still at its best! This blog post covered the key ingredients and steps to make a fresh cucumber slaw. I shared tips for storage, serving, and variations that keep it tasty. Remember that resting the slaw boosts its flavor. Whether you use different veggies or dressings, make it your own. Storing leftovers properly helps maintain freshness. Enjoy your slaw as a side dish or snack. It’s easy, fun, and delicious! Happy cooking!](https://goldendishy.com/wp-content/uploads/2025/07/45f43f4c-bd14-4cdb-930e-3d5f55452c18-768x768.webp)
![To make Zucchini Ricotta Fritters, gather these simple ingredients: - 2 medium zucchinis, grated - 1 cup ricotta cheese - 1/2 cup all-purpose flour - 2 large eggs, beaten - 1/4 cup grated Parmesan cheese - 2 green onions, finely chopped - 1/2 teaspoon garlic powder - Salt and pepper, to taste - Olive oil, for frying - Fresh basil or parsley, for garnish These ingredients work together to create crispy, tasty fritters that everyone will love. The fresh zucchini adds moisture and flavor, while the ricotta cheese gives a creamy texture. Using grated Parmesan cheese enhances the savory taste of the fritters. Make sure to squeeze out as much moisture from the zucchini as you can. This step is key to ensure your fritters do not get soggy. You can use a clean kitchen towel for this. Want to dive deeper into making these fritters? Check out the Full Recipe for all the steps! Start by grating the zucchinis. You can use a box grater or a food processor. After grating, place the zucchini in a clean kitchen towel. Gather the towel around the zucchini and twist it. This will help squeeze out the extra moisture. Removing moisture is key. It keeps the fritters from becoming soggy. In a large bowl, combine the drained zucchini, ricotta cheese, flour, and beaten eggs. Add grated Parmesan, chopped green onions, garlic powder, salt, and pepper. Use a sturdy spoon to mix everything. The batter should be slightly chunky, not too smooth. This texture helps the fritters hold their shape when cooking. Heat a non-stick skillet over medium heat and add a few tablespoons of olive oil. Let the oil heat until it shimmers. Once hot, drop spoonfuls of batter into the skillet. Gently flatten each fritter with a spoon. Cook them for about 3-4 minutes on each side. They should turn golden brown and crispy. Don't overcrowd the skillet. If needed, cook in batches. After cooking, place the fritters on a plate lined with paper towels. This will absorb any excess oil. Serve warm with chopped basil or parsley for a fresh touch. To make your fritters crispy, start by removing moisture. Zucchini has a lot of water. When you grate it, you must squeeze it in a towel. This helps the fritters stay firm. Next, heat your oil until it shimmers. A hot skillet cooks the fritters quickly and keeps them crispy. If the oil is not hot enough, they can soak up too much oil and become soggy. Herbs and spices can elevate your fritters. I love adding fresh basil or parsley for brightness. You can also try a pinch of red pepper flakes for heat. For dips, a tangy yogurt sauce pairs well. You can also serve them with a tasty marinara. These additions make each bite even better. Avoid overcrowding your skillet. Too many fritters at once can lower the heat. This can lead to uneven cooking. Instead, cook them in small batches. Keep the cooked fritters warm by placing them on a plate in a low oven. This way, they stay warm and crisp until you serve them. {{image_4}} You can change the taste of your fritters easily. Try adding different cheeses like feta or mozzarella. You can also mix in finely chopped veggies such as bell peppers or spinach. Fresh herbs like dill or thyme add a nice touch too. These small changes can create a whole new snack experience. If you need a gluten-free version, use almond flour or coconut flour instead of all-purpose flour. Both options work well and will keep your fritters light and crispy. Just be sure to adjust the amount used, as these flours can absorb moisture differently. For a vegan twist, replace the ricotta with a plant-based cheese. Flaxseed meal can work well as an egg substitute. Just mix one tablespoon of flaxseed with three tablespoons of water and let it sit for a few minutes. If you want low-carb fritters, swap the flour for grated cauliflower. This keeps the fritters tasty while cutting down on carbs. For the full recipe, check out the [Full Recipe]. To keep your zucchini ricotta fritters fresh, you should refrigerate them. Place the leftover fritters in an airtight container. This helps prevent them from drying out. Make sure to layer them with paper towels to absorb extra moisture. You can store them for up to three days in the fridge. If you want to save some for later, freezing is a great option. First, let the fritters cool completely. Then, place them in a single layer on a baking sheet. Freeze them for about one hour. This step helps them keep their shape. After they are frozen, transfer them to a freezer bag. Label the bag with the date. They can stay good for up to two months. When you’re ready to eat your frozen fritters, reheat them in the oven. Preheat the oven to 375°F (190°C). Place the fritters on a baking sheet and bake for about 15-20 minutes. This method will help them regain their crispy texture. Enjoy your tasty snack! For the full recipe, check out the detailed instructions above. Yes, you can bake them! Place the fritters on a baking sheet lined with parchment paper. Brush them lightly with olive oil. Bake at 400°F for about 20-25 minutes. Flip them halfway through to get both sides crispy. To reheat, use an oven or an air fryer. Preheat the oven to 350°F. Place the fritters on a baking sheet and bake for about 10 minutes. This will keep them crispy. You can make the batter ahead of time! Store it in the fridge for up to 24 hours. Just remember to mix it again before cooking. The moisture from the zucchini can settle. Fritters are done when they are golden brown and crispy on both sides. You can also gently press them. If they feel firm and do not sink, they are ready. Yes, they are great for meal prep! You can cook them and store in the fridge for up to 3 days. They make a tasty snack or meal addition. For more details, check the Full Recipe. Zucchini ricotta fritters are a simple and tasty snack. You can enjoy them any time of the day. Here’s how to make them: - 2 medium zucchinis, grated - 1 cup ricotta cheese - 1/2 cup all-purpose flour - 2 large eggs, beaten - 1/4 cup grated Parmesan cheese - 2 green onions, finely chopped - 1/2 teaspoon garlic powder - Salt and pepper, to taste - Olive oil, for frying - Fresh basil or parsley, for garnish To start, I recommend grating the zucchinis. Use a box grater or food processor to make it quick. After grating, take a clean kitchen towel. Place the zucchini in the middle and twist the towel. This helps squeeze out extra moisture. It’s important to do this step to keep your fritters crispy. Next, grab a large mixing bowl. Add the drained zucchini, ricotta cheese, flour, beaten eggs, Parmesan, green onions, garlic powder, and some salt and pepper. Mix everything well with a spatula. The batter should feel a bit chunky. Now, heat a non-stick skillet over medium heat. Drizzle in some olive oil to coat the bottom. Let the oil heat until it looks shiny. This ensures a nice fry for your fritters. Once the oil is hot, drop spoonfuls of the batter into the skillet. Use the back of a spoon to flatten each fritter a bit. This helps them cook evenly. Fry for about 3-4 minutes on each side. You want them golden brown and crispy. Don’t overcrowd the skillet; work in batches if needed. When done, transfer the fritters to a plate lined with paper towels. This will soak up any extra oil. Serve them warm, topped with fresh basil or parsley. These toppings add a lovely touch to your dish. For the full recipe, check out the detailed instructions above. Enjoy making these tasty treats! In this blog post, we covered how to make Zucchini Ricotta Fritters from start to finish. We shared a list of simple ingredients and provided step-by-step cooking instructions. You learned tips to ensure crispiness and explored tasty variations. Storing and reheating tips were also discussed to help keep your fritters fresh. Overall, these fritters are easy to make and delicious. They offer a healthy twist for any meal. Enjoy experimenting with different flavors and variations!](https://goldendishy.com/wp-content/uploads/2025/06/35e9f5a9-d1bf-47b3-b252-98dbfdd31548-768x768.webp)


