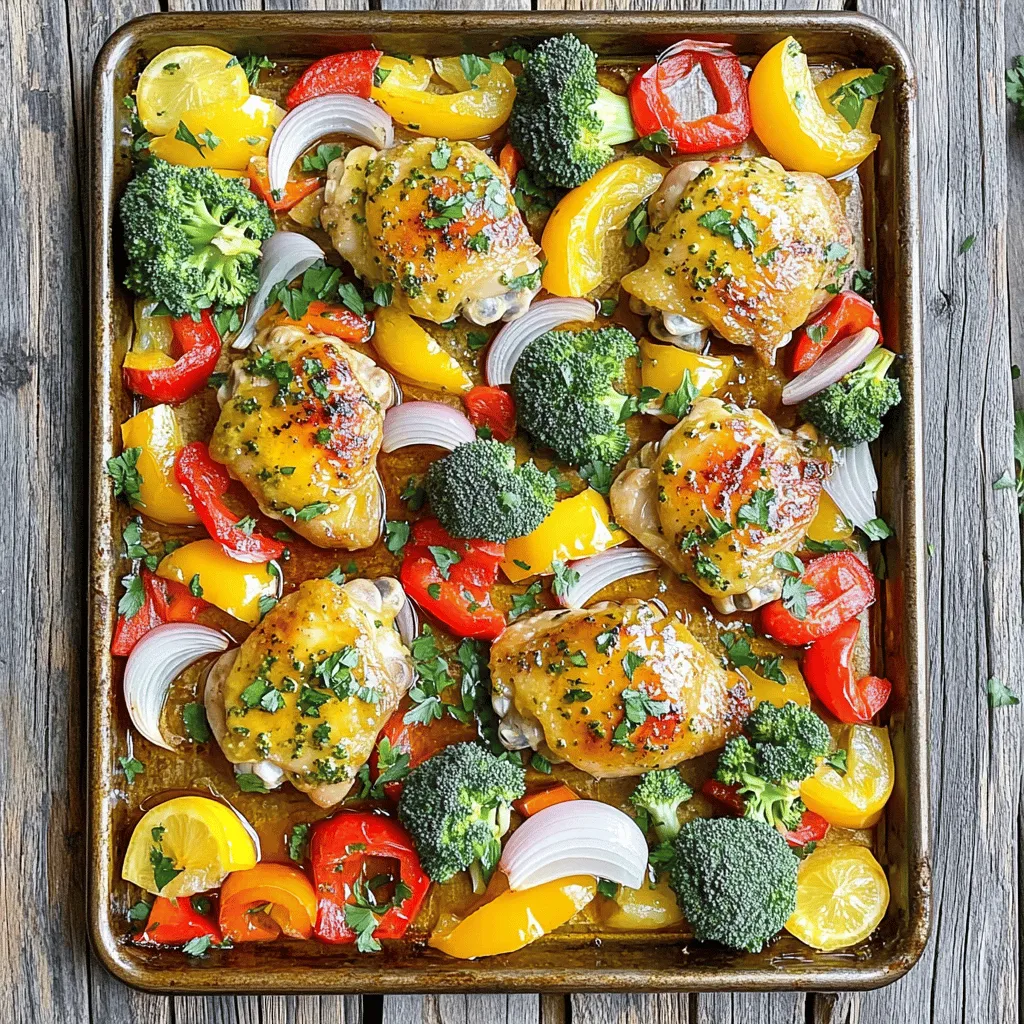
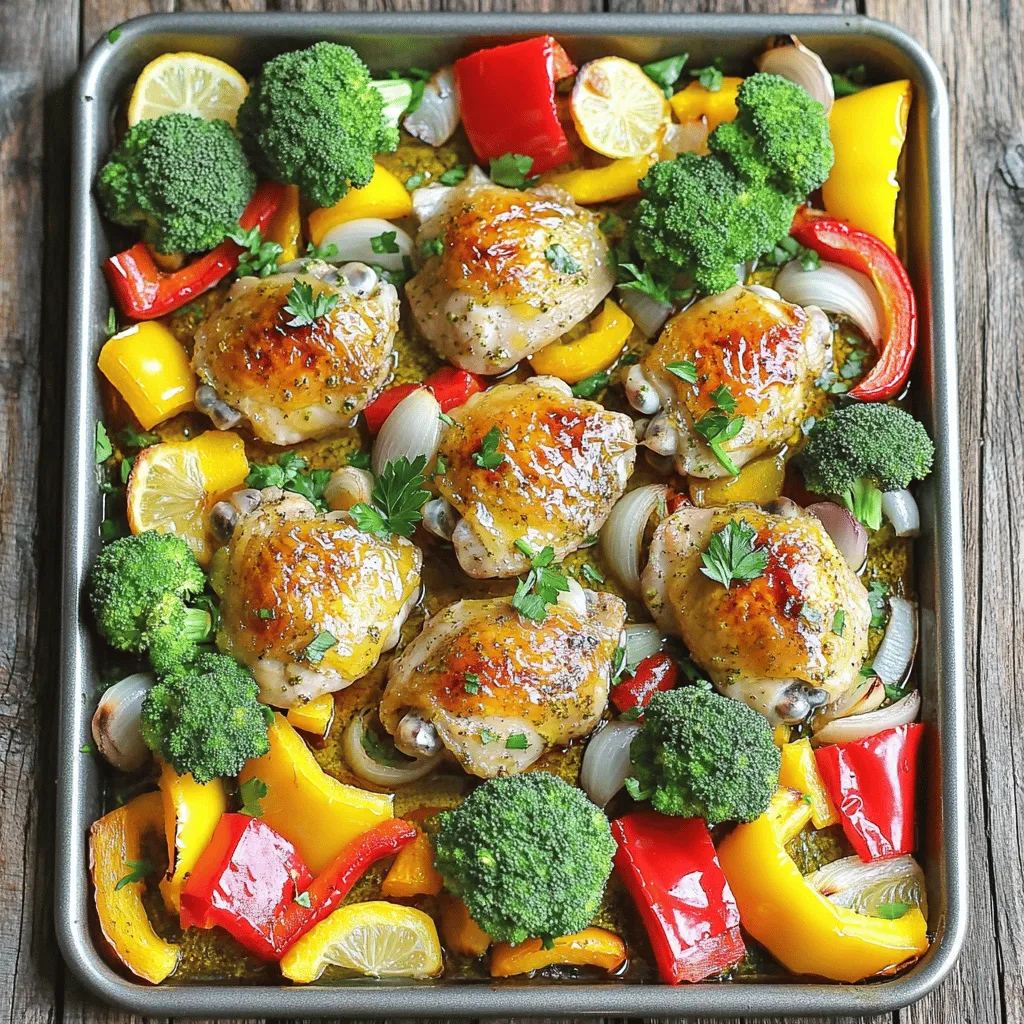
Looking for a simple yet delicious meal? My Sheet Pan Chicken and Veggies recipe delivers everything you need! It combines juicy chicken thighs with colorful, roasted vegetables, all cooked on one pan. This easy dish is perfect for busy weeknights. Plus, you’ll enjoy bursts of flavor from fresh herbs and zesty lemon. Let’s get cooking and turn dinnertime into a breeze!
Ingredients
Required Ingredients List
– 4 boneless, skinless chicken thighs
– 2 tablespoons extra-virgin olive oil (plus more for drizzling)
– Zest and juice of 1 large lemon
– 1 tablespoon honey
– 2 cloves garlic, finely minced
– 1 teaspoon smoked paprika
– 1 teaspoon dried oregano
– Salt and freshly ground black pepper to taste
– 1 red bell pepper, sliced into thin strips
– 1 yellow bell pepper, sliced into thin strips
– 1 medium red onion, cut into hearty wedges
– 1 cup fresh broccoli florets
– Fresh parsley for garnish
This dish uses simple, fresh ingredients that create vibrant flavors. Each part plays a role. The chicken brings protein, while the veggies add color and crunch. Lemon zest gives a bright taste, and honey adds a touch of sweetness. Garlic and spices round out the flavor profile.
When you gather these ingredients, think about freshness. Choose ripe veggies and good-quality chicken. This choice makes a real difference in taste. Keep your kitchen stocked with these staples. They will help you whip up this meal anytime.Cooking should be fun, and with these ingredients, you can create something special!
Step-by-Step Instructions
Preheat the Oven
Start by preheating your oven to 425°F (220°C). This temperature helps the chicken and veggies roast well. A hot oven gives a nice crisp to both the meat and the vegetables.
Preparing the Marinade
In a small bowl, mix together the olive oil, lemon zest, lemon juice, honey, minced garlic, smoked paprika, dried oregano, salt, and pepper. Whisk until smooth. This marinade adds great flavor.
Marinating the Chicken
Place the chicken thighs into a large bowl or resealable bag. Pour the marinade over the chicken, ensuring it is well coated. Let it sit for at least 20 minutes. This time allows the flavors to soak in, making the chicken more tasty.
Preparing the Vegetables
While the chicken marinates, prepare the veggies. Cut the red and yellow bell peppers into thin strips. Slice the onion into wedges and break the broccoli into florets. Toss the veggies in a bowl with olive oil, salt, and pepper. This adds flavor and helps them roast nicely.
Arranging on the Sheet Pan
Take a large sheet pan and place the marinated chicken thighs in the center. Surround them with the prepared vegetables. Make sure to space everything out well. This helps them cook evenly. If you want, drizzle a bit more olive oil over the veggies.
Roasting to Perfection
Put the sheet pan in your preheated oven. Roast for 25-30 minutes. Check that the chicken reaches an internal temperature of 165°F (75°C). The veggies should be tender and slightly caramelized. This ensures you have a perfect meal ready to enjoy.
Tips & Tricks
Enhancing Flavor
To make your sheet pan chicken and veggies shine, add more herbs and spices. Consider these options:
– Thyme: Earthy and fragrant; great with chicken.
– Rosemary: Adds a piney flavor. Use fresh for the best taste.
– Cumin: Gives a warm, nutty flavor to your dish.
– Chili flakes: For mild heat and warmth.
– Basil: Fresh or dried, it’s sweet and fragrant.
Mix and match these herbs to find your favorite blend. Fresh herbs can boost the taste when added just before serving.
Optimal Cooking Times
Cooking times can vary based on your oven type. Here are some tips to keep in mind:
– Conventional oven: Stick to 25-30 minutes at 425°F (220°C).
– Convection oven: Lower the temp to 400°F (200°C) and check at 20-25 minutes.
– Gas ovens: These may cook faster, so monitor closely.
Always use a meat thermometer. The chicken should reach 165°F (75°C) for safe eating.
Serving Suggestions
Pair your delicious sheet pan meal with simple sides or drinks. Here are some ideas:
– Grains: Serve with rice or quinoa for a hearty meal.
– Salad: A crisp green salad balances the richness of the chicken.
– Beverages: Try a light white wine or sparkling water with lemon.
These pairings elevate your meal while keeping it fresh and bright. Enjoy your colorful feast!
Variations
Substituting Chicken
You can swap chicken thighs for chicken breasts or legs. Chicken breasts cook faster, so be careful not to dry them out. Legs have more flavor and fat, making them juicy. Both options work well with the marinade. Just adjust cooking time as needed.
Changing Up the Veggies
Feel free to change the veggies based on what’s in season. Try carrots, zucchini, or asparagus for fresh tastes. You can mix and match for fun colors and textures. Using seasonal veggies adds flavor and nutrition to your meal.
Spice Level Adjustments
Want more heat? Add red pepper flakes or cayenne pepper to the marinade. If you like milder flavors, skip the heat and focus on herbs. Try fresh thyme or rosemary for extra depth. Each adjustment gives your dish a new twist.
Storage Info
Storing Leftovers
Store your leftovers in airtight containers. Glass or plastic containers work great. Make sure they are cool before sealing. This helps keep them fresh. Place them in the fridge within two hours. They stay good for about three to four days.
Reheating Tips
To reheat, use the oven or microwave. If using the oven, set it to 350°F (175°C). Heat for about 10 to 15 minutes until warm. If using the microwave, cover the dish to keep moisture. Heat in short bursts, checking often to avoid overcooking.
Freezing Suggestions
You can freeze leftovers for later meals. Use freezer-safe containers or bags. Keep the dish in portions for easy meals. Label with the date and type. They last for about three months in the freezer. Thaw them in the fridge overnight before reheating.
FAQs
What is Sheet Pan Chicken and Veggies?
Sheet pan chicken and veggies is a simple meal made on one pan. It includes chicken and a mix of vegetables, all roasted together. This easy method makes cleanup a breeze. You can enjoy a tasty and healthy dinner with little effort.
How to make the chicken juicy?
To keep your chicken juicy, start with thighs instead of breasts. Thighs have more fat, which helps keep them moist. Marinate the chicken for at least 20 minutes. This adds flavor and moisture. Cook at the right temperature, 425°F (220°C), to get a nice sear. Always check that the internal temperature reaches 165°F (75°C). Let the chicken rest after cooking. This keeps the juices inside.
Can I prepare this recipe ahead of time?
Yes, you can prep this dish ahead. Marinate the chicken a few hours before or even the night before. Cut up the veggies in advance too. Store them in the fridge until you are ready to cook. This saves time on busy days and makes dinner stress-free.
What vegetables pair well with chicken?
Many vegetables go great with chicken. Some popular choices include:
– Bell peppers
– Onions
– Broccoli
– Carrots
– Zucchini
These veggies roast well and add color and flavor. They also cook at similar rates, so everything can roast together nicely.
Is this recipe suitable for meal prep?
Absolutely! Sheet pan chicken and veggies are perfect for meal prep. You can make several servings at once. Store leftovers in airtight containers. This meal reheats well and stays tasty. It’s a great way to eat healthy throughout the week.
This blog post covered the essentials for a tasty sheet pan chicken and veggies dish. We discussed ingredients, preparation steps, and tips for cooking success. With simple steps, you can create a meal that is nutritious and full of flavor. Remember, you can easily adjust the recipe to fit your taste. Enjoy experimenting with different veggies and spices. Follow the tips for storage and reheating to keep your meals fresh. This dish is perfect for busy days or meal prep. Get cooking and savor every bite!


