Savory Pumpkin Risotto Creamy and Comforting Recipe

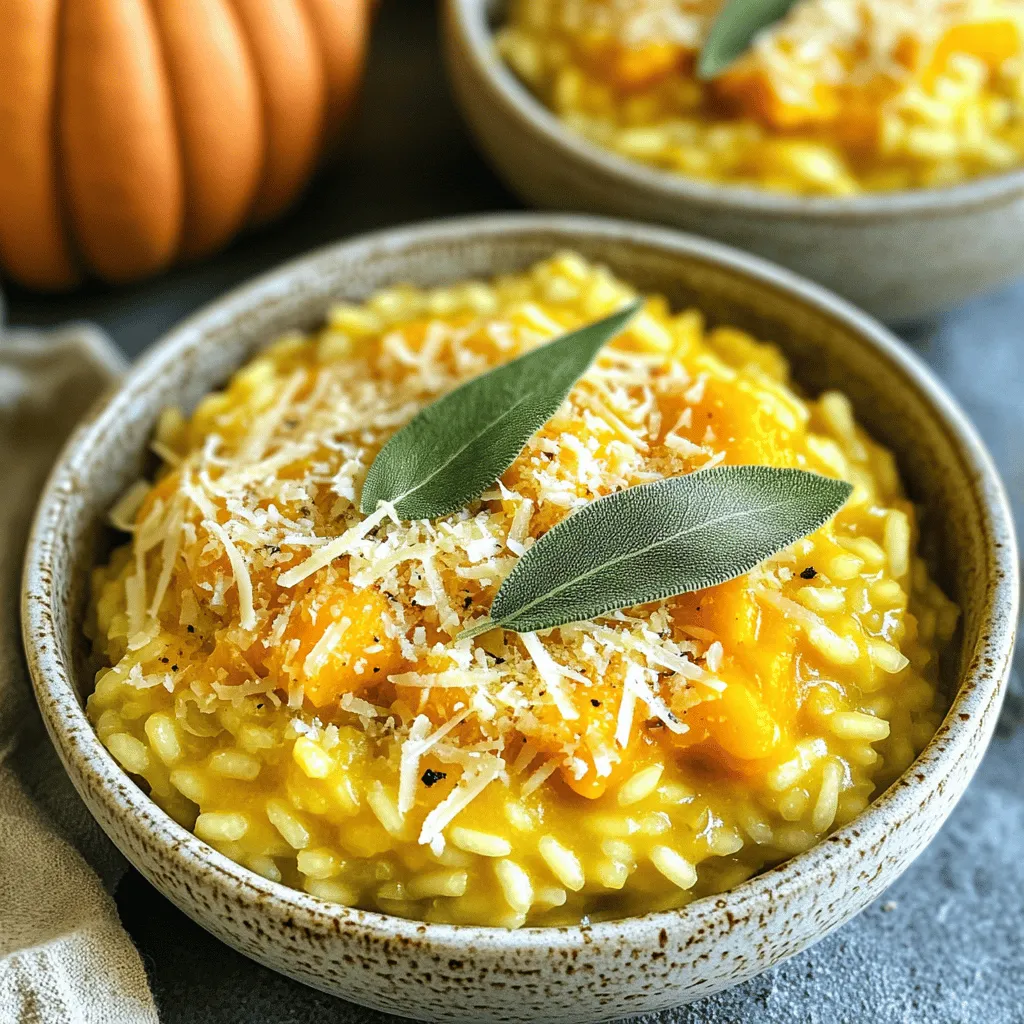
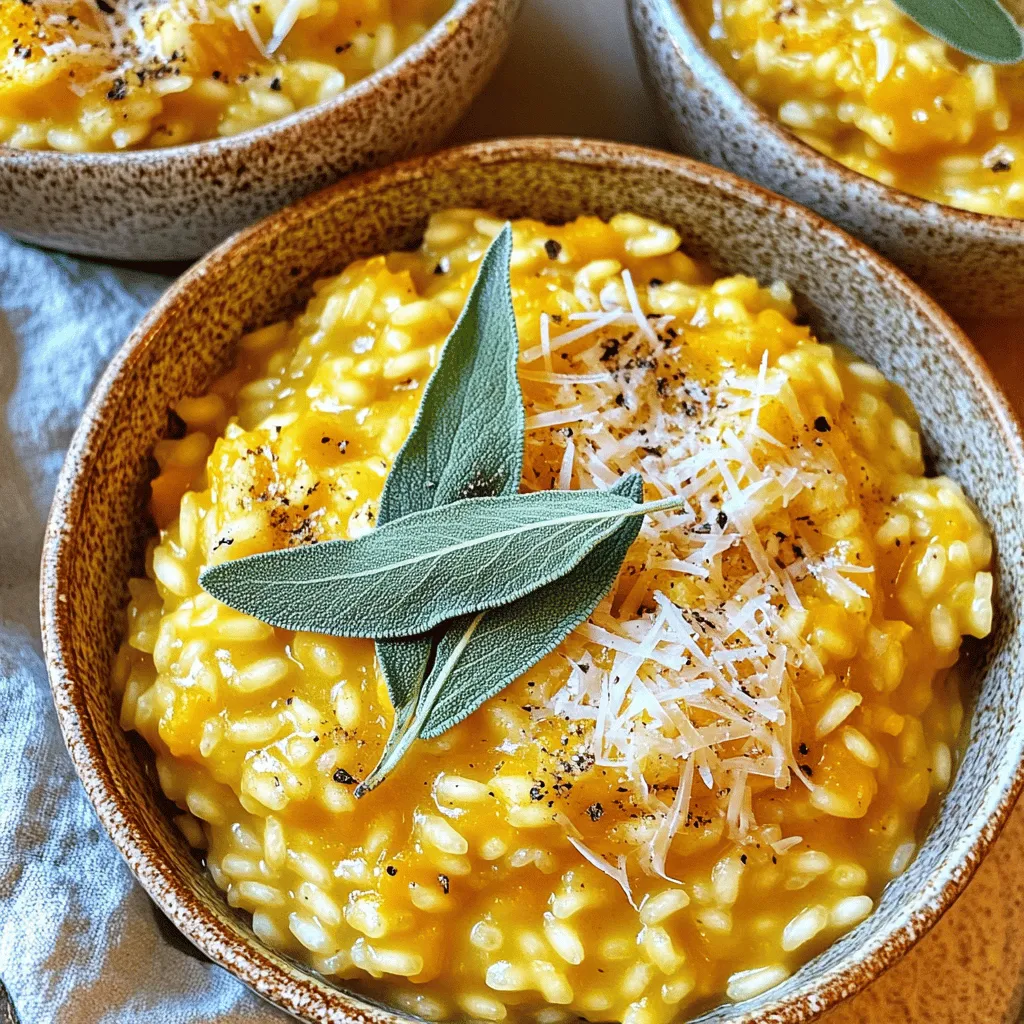
Cozy up to fall flavors with my savory pumpkin risotto! This creamy dish is perfect for chilly nights and packed with warmth. I’ll guide you through simple steps to make it rich and satisfying. Whether you want to impress guests or treat yourself, this recipe has you covered. Let’s dive into the tasty world of risotto and make your kitchen the heart of comfort!
Ingredients
Essential Ingredients
– 1 cup Arborio rice
– 2 cups pumpkin puree (homemade or canned)
– 4 cups vegetable broth
– 1 medium onion, finely chopped
– 2 cloves garlic, minced
– 1/2 teaspoon ground nutmeg
– 1/2 teaspoon ground cinnamon
– 1 cup freshly grated Parmesan cheese
– 2 tablespoons olive oil
– Salt and freshly ground black pepper to taste
– Fresh sage leaves for garnish
The main base of our risotto is Arborio rice. This rice has a high starch content. It makes the risotto creamy. Pumpkin puree adds a rich flavor and a beautiful color. The vegetable broth acts as the cooking liquid, adding depth to every bite. Onion and garlic provide great aromatics. Nutmeg and cinnamon give warmth to the dish. Parmesan cheese adds a nutty flavor and creaminess. Olive oil helps with cooking the aromatics and adds richness.
Optional Ingredients
– White wine
– Crumbled feta cheese
– Chopped nuts (like walnuts or pecans)
– Extra herbs (like thyme or rosemary)
You can add white wine for a touch of acidity. It enhances the flavor profile. Crumbled feta cheese gives a salty contrast to the sweet pumpkin. Chopped nuts add texture and a nice crunch. Extra herbs can elevate the taste and freshness of the risotto.
Nutritional Information
One serving of savory pumpkin risotto has about:
– Calories: 350
– Protein: 12g
– Carbohydrates: 50g
– Fat: 12g
– Fiber: 4g
This dish is rich in carbs, making it a perfect comfort food. The protein content helps keep you full. Pumpkin offers a good source of fiber and vitamins. This meal is balanced, satisfying, and great for sharing.
Step-by-Step Instructions
Preparation of Broth
Start by warming the vegetable broth. Use a medium saucepan over medium heat. Keep the broth warm during cooking. This helps the rice cook evenly and stay creamy.
Sautéing the Aromatics
In a large skillet, heat 2 tablespoons of olive oil. Add 1 medium onion, finely chopped, and 2 cloves of minced garlic. Sauté for about 5 minutes. Stir often to prevent burning. The onion should become soft and clear.
Cooking the Risotto
Next, add 1 cup of Arborio rice to the skillet. Stir to coat the grains in the oil. Toast the rice for about 2 minutes. It will look slightly clear. Carefully pour in a ladle of warm broth. Stir constantly until the broth is almost gone. Repeat this until the rice is creamy and cooked al dente, which takes around 18-20 minutes.
Now, stir in 2 cups of pumpkin puree, 1/2 teaspoon of ground nutmeg, and 1/2 teaspoon of ground cinnamon. Cook for an extra 2-3 minutes. This will blend the flavors nicely. Finally, remove the skillet from the heat and fold in 1 cup of freshly grated Parmesan cheese. Taste and add salt and black pepper as needed. Let it rest for a minute for the flavors to settle.Enjoy this cozy dish!
Tips & Tricks
Achieving Creamy Consistency
To get that creamy look, you must use Arborio rice. This rice has more starch, which helps create the desired texture. Cook slowly and add broth bit by bit. Stir often for the best result. Avoid rushing. If the risotto looks too thick, add a little more broth. This keeps it smooth and creamy.
Best Practices for Seasoning
Seasoning is key to a great risotto. Start with salt and black pepper. Add ground nutmeg and cinnamon for warmth. Taste your dish as you cook. Adjust the flavors to your liking. Fresh herbs, like sage, also add bright notes. Always remember, simple seasonings can make a big difference.
Time-Saving Cooking Methods
Want to save time? Use a pressure cooker for faster cooking. You can also prepare the broth ahead of time. Keep it warm to save steps. Another tip is to make a larger batch. Leftovers are great for quick meals later in the week. This way, you enjoy risotto without the wait.

Variations
Adding Protein Options
You can easily add protein to your pumpkin risotto. Cooked chicken or turkey pairs well. Simply shred the meat and stir it in at the end. If you prefer seafood, shrimp or scallops add a nice touch. For a simple twist, try adding cooked sausage or bacon. These options not only enhance flavor but also make the dish heartier.
Vegan Substitutions
To make this risotto vegan, swap the Parmesan cheese with a vegan alternative. Nutritional yeast can give a cheesy flavor. Use vegetable broth, as stated in the recipe. For creaminess, add a splash of coconut milk or cashew cream. These changes keep the dish rich and satisfying without dairy.
Seasonal Ingredient Swaps
Switching ingredients with the seasons can make your risotto exciting. In fall, add roasted butternut squash or sweet potatoes. In spring, fresh peas or asparagus brighten the dish. You can also toss in sautéed mushrooms for an earthy flavor. These swaps keep the dish fresh and fun while celebrating seasonal produce.
Storage Info
How to Store Leftovers
To store leftovers, let the risotto cool first. Place it in an airtight container. Make sure to keep it in the fridge. It will stay fresh for about three days. If you want to enjoy it later, freezing is a good option.
Reheating Instructions
When you’re ready to eat, reheat the risotto gently. You can use a saucepan or microwave. If using a pan, add a splash of broth or water. This helps bring back the creamy texture. Heat slowly, stirring often, until hot. If microwaving, cover the dish to keep moisture in. Heat in short bursts, stirring in between, until warm.
Freezing Risotto
Freezing risotto is simple but has some tricks. Let it cool completely before freezing. Portion it into containers or freezer bags. Remove as much air as you can. This prevents freezer burn. It can last up to three months in the freezer. When you’re ready to eat, thaw it in the fridge overnight before reheating. This way, it keeps its flavor and texture well.
FAQs
How long does it take to make savory pumpkin risotto?
It takes about 30 minutes to make savory pumpkin risotto. You need 10 minutes for prep and 20 minutes for cooking. Timing is key, as you want the rice to absorb the broth slowly. This helps create a creamy texture. The risotto should be stirred often during cooking. This ensures even cooking and prevents sticking.
Can I use brown rice instead of Arborio rice?
I don’t recommend using brown rice for this recipe. Arborio rice is best for risotto. It has a high starch content, which gives risotto its creamy texture. Brown rice takes longer to cook and won’t yield the same results. If you want to try brown rice, be ready for a different dish. The flavor and texture will change.
What can I serve with pumpkin risotto?
You can serve savory pumpkin risotto with several tasty sides. Here are a few ideas:
– Grilled chicken or turkey for added protein
– Roasted vegetables for a colorful plate
– A fresh green salad for a light touch
– Crusty bread to soak up the risotto
These pairings will enhance your meal and add variety. Enjoy your cooking adventure with this savory dish!
This post explored how to make a perfect risotto. We discussed essential and optional ingredients, along with their nutritional info. I provided clear steps for preparing the broth, sautéing aromatics, and cooking the risotto. You learned tips for creaminess, seasoning, and time-saving methods. We covered variations for protein and vegan options, plus storage tips for leftovers.
Remember, risotto is fun to make and easy to adapt. Enjoy creating your own unique version!


![- 1 pound boneless, skinless chicken breasts - 6 cups low-sodium chicken broth - 1 medium onion, finely chopped - 2 cloves garlic, minced - 2 medium carrots, diced - 2 stalks celery, diced - 1 cup orzo pasta - 3 large eggs - 1/2 cup freshly squeezed lemon juice (about 2-3 lemons) This soup starts with tender chicken. I prefer boneless, skinless chicken breasts. They cook fast and stay juicy. Next, low-sodium chicken broth gives the soup its rich base. Fresh veggies add flavor and nutrition. Onion, garlic, carrots, and celery create a perfect mix. I chop them finely for even cooking. Orzo pasta makes the soup filling. It cooks well in the broth, soaking up all the flavors. To achieve that creamy texture, I use eggs and lemon juice. The eggs blend with the broth, creating a silky finish. Fresh lemon juice brightens the soup, making every bite refreshing. - 1 teaspoon dried oregano - 1 teaspoon sea salt - 1/2 teaspoon freshly ground black pepper - 2 tablespoons extra-virgin olive oil Seasoning is key in this recipe. Dried oregano adds a hint of earthiness. Sea salt and black pepper enhance the natural flavors. I always choose extra-virgin olive oil for sautéing. It has a wonderful taste and is healthy too. - Fresh parsley, finely chopped - Lemon wedges for serving Garnishes make a dish special. Fresh parsley adds color and freshness. I sprinkle it on top before serving. Lemon wedges are great for those who want extra zing. They brighten the dish and add a punch of flavor. For the full recipe, check out the Mediterranean Lemon Chicken Orzo Soup! It’s a perfect guide to make this comforting dish. Start by chopping the vegetables. You will need to dice the onion, carrots, and celery. Next, shred the cooked chicken. This can be done easily with two forks. For the egg mixture, whisk together the eggs and lemon juice in a medium bowl. Make sure they blend well. In a large pot, heat two tablespoons of olive oil over medium heat. Once hot, add the chopped onion, diced carrots, and celery. Sauté these vegetables for about 5 to 7 minutes. They should become tender and fragrant. Now, stir in two minced garlic cloves. Cook for one more minute. You want the garlic to smell wonderful, but not brown. Add the chicken breasts into the pot. Pour in six cups of low-sodium chicken broth. Increase the heat slightly and bring it to a gentle simmer. Let the chicken cook for 15 to 20 minutes. Once fully cooked, carefully remove the chicken from the pot and set it aside to cool. When cool, shred the chicken into bite-sized pieces. Return to the pot and add one cup of orzo pasta. Let the soup simmer for 8 to 10 minutes, stirring to prevent sticking. In your mixing bowl, you have the whisked eggs with lemon juice. Now, temper the eggs by slowly adding a ladleful of hot broth from the pot. Whisk constantly to prevent the eggs from cooking too quickly. Gradually mix the egg mixture back into the soup. This will give your soup a creamy texture. Now it’s time to adjust the seasoning. Taste the soup and add sea salt and black pepper as needed. Finally, garnish your soup with fresh parsley before serving. This adds a nice color and fresh flavor. Enjoy your comforting bowl of Greek lemon chicken soup! For the full recipe, see the detailed instructions above. - Choosing the right type of chicken: I recommend using boneless, skinless chicken breasts. This cut cooks quickly and stays tender in the soup. It also absorbs the rich flavors of the broth well. - Adjusting salt levels for broth versus soup: Start with low-sodium chicken broth. Taste as you cook, and add salt as needed. This way, you control the saltiness without overwhelming the dish. - Techniques for tempering eggs properly: To prevent egg curdling, whisk the eggs and lemon juice in a bowl. Slowly add hot broth while whisking. This warms the eggs without cooking them. - Continuous whisking for a smooth texture: Keep whisking as you add the broth. This ensures a creamy, smooth texture in your soup. It’s key for that authentic Greek flavor. - Suggestions for family dinners or special occasions: Greek Lemon Chicken Soup is perfect for family dinners. Serve it on cozy nights or special occasions like holidays. It brings warmth and comfort to the table. - Pairing with sides for a complete meal: I love pairing this soup with a fresh Greek salad or crusty bread. These sides complement the soup and make a full meal. Enjoy your cooking adventure with this classic dish! Check out the [Full Recipe] for step-by-step details on making this delightful soup. {{image_4}} If you can't find orzo, don't worry! You can use other small pasta shapes, like ditalini or acini di pepe. Both work great in this soup. For those who need gluten-free options, try rice or quinoa. These grains add texture and flavor while keeping the dish gluten-free. You can make your soup even better by adding greens. Spinach or kale works well. Simply toss them in during the last few minutes of cooking. This adds color and nutrients. You can also enhance the flavor by using herbs. Fresh dill or basil adds a lovely aroma and taste. Try adding a handful of either herb for a bright twist. If you want a meatless version, you can replace the chicken with plant-based proteins. Tofu or chickpeas are good choices. They soak up the soup's flavors nicely. Use vegetable broth instead of chicken broth to keep the taste rich and savory. This way, everyone can enjoy a bowl of this comforting soup! For the full recipe, check out the Mediterranean Lemon Chicken Orzo Soup . To keep your Greek Lemon Chicken Soup fresh, let it cool first. Pour it into airtight containers. Make sure to store it in the fridge. It should stay good for about 3 to 4 days. Always label your containers with the date. This helps you track how long it’s been there. When reheating, do it gently. You can use the stove or microwave. If using the stove, heat it on low heat. Stir often to prevent sticking. If it seems thick, add a splash of broth or water. This keeps the soup nice and smooth. To freeze Greek Lemon Chicken Soup, let it cool completely. Pour it into freezer-safe bags or containers. Remove as much air as possible. It can last up to 3 months in the freezer. When you’re ready to eat, thaw it in the fridge overnight. Reheat gently to enjoy the same great flavor. Greek Lemon Chicken Soup, also known as Avgolemono, is a classic dish. It features tender chicken, bright lemon, and creamy eggs. This soup warms the heart and soul, especially during cold months. It is a staple in Greek homes and often appears at family gatherings. The mix of flavors showcases the essence of Greek cooking. To achieve a creamy texture, temper the eggs. Whisk eggs and lemon juice together in a bowl. Gradually add hot broth while whisking. This method prevents the eggs from scrambling. Slowly stir the egg mixture back into the soup. This creates a smooth and velvety finish. Avoid boiling the soup after adding the egg to keep it creamy. Yes, you can make this soup ahead of time. Prepare the soup but skip adding the egg mixture until serving. Store the soup in an airtight container in the fridge for up to three days. When ready to serve, reheat gently and add the egg mixture. This keeps the soup fresh and creamy. This soup pairs well with a simple Greek salad. You can also serve it with warm pita bread or crusty bread. For a lighter meal, consider grilled vegetables on the side. These options enhance the flavors and create a lovely dining experience. In this post, I shared how to make Greek Lemon Chicken Soup. You learned about the key ingredients, like chicken, orzo, and the egg-lemon mixture that gives the soup its creamy texture. I provided steps for preparation, cooking, and tips for keeping the soup delicious and authentic. Don't hesitate to mix it up with different ingredients or share it with others. Enjoy this comforting dish anytime!](https://goldendishy.com/wp-content/uploads/2025/06/4ca94f54-e42c-42a8-b75c-f7048ee8bbd9-768x768.webp)


. First, preheat your oven to 400°F (200°C). This step is key for even roasting. Gather your ingredients. You should have baby carrots, honey, olive oil, garlic, thyme, and lemon juice ready. In a large bowl, combine the honey, olive oil, minced garlic, and thyme. Add a good pinch of salt and pepper. Next, squeeze in the lemon juice. Whisk the mixture well until it is smooth. This glaze will give your carrots a sweet and savory flavor. Now, it's time to coat the carrots. Add them to your bowl with the glaze. Toss them gently until they are well coated. Line a baking sheet with parchment paper for easy cleanup. Spread the carrots out in a single layer, avoiding crowding. Place the baking sheet in the preheated oven. Roast the carrots for 25-30 minutes. Halfway through, toss the carrots again for even cooking. They should become tender and caramelized. Once done, let them cool for a few minutes. If you like, drizzle some extra glaze over the top for added flavor. Finally, garnish with fresh parsley before serving. This adds a pop of color and freshness. If you want the full recipe, check it out [Full Recipe]. To ensure your carrots roast perfectly, choose fresh carrots. Baby carrots work well, but regular ones are great too. If using regular carrots, slice them into sticks for even cooking. Spread the carrots out in a single layer on the baking sheet. This step keeps them from steaming and helps them caramelize nicely. Toss them halfway through cooking for even browning. For a great glaze, mix the honey, olive oil, garlic, and thyme well. The oil helps the honey coat the carrots. If your glaze feels too thick, add a splash of water or lemon juice. This can help thin it out and ensure it coats the carrots evenly. Remember, a smooth glaze means more flavor in every bite! To make your dish pop, use a nice platter. Once the carrots are roasted, transfer them carefully. Drizzle with extra honey for shine. Sprinkle fresh parsley or thyme over the top for color. This simple touch makes your dish look gourmet. Enjoy serving them at your next meal! For the full recipe, check out the details above. {{image_4}} You can easily change this dish by adding other vegetables. Try sweet potatoes or parsnips. They roast well and add new flavors. Just cut them to a similar size as the carrots. This helps them cook evenly. If you want to switch up the sweet taste, use maple syrup or agave. Both give a nice flavor and work well with the garlic. You can use the same amount as honey. Just mix it well with the other ingredients. Adding spices can boost the taste of your honey garlic roasted carrots. You might try a pinch of cumin or chili powder for warmth. Fresh herbs like rosemary or dill can also add a bright note. Experiment with what you love! Each change can make this dish new and exciting. You can find the full recipe to guide you through these variations. To store leftover honey garlic roasted carrots, first let them cool down. Use an airtight container to keep them fresh. If you have a lot, divide them into smaller portions. Place the container in the fridge. They will stay good for about 3 to 5 days. Keeping them sealed helps avoid drying out. When you're ready to enjoy the leftovers, preheat your oven to 350°F (175°C). Spread the carrots on a baking sheet. You can drizzle a little olive oil for extra moisture. Heat them for about 10 to 15 minutes, or until they feel warm. You can also use a microwave if you're in a hurry. Just cover them with a damp paper towel and heat in 30-second bursts. If you want to keep the carrots longer, freezing is a great option. First, let the carrots cool completely. Spread them in a single layer on a baking sheet. Freeze them for about 1 hour. This step prevents them from sticking together. After that, transfer the carrots to freezer bags. Remove as much air as possible before sealing. They can last for up to 3 months in the freezer. To eat, thaw them in the fridge overnight before reheating. For more details, check the Full Recipe. Yes, you can use frozen carrots. However, fresh carrots will taste better. Frozen carrots may lose some crunch. If you use them, roast them longer to ensure they cook fully. Just remember to thaw them before roasting for the best results. Honey garlic roasted carrots pair well with many dishes. You can serve them with grilled chicken, beef, or fish. They also taste great with rice or quinoa. Try them with a fresh salad for a balanced meal. Their sweet and savory flavor adds depth to any plate. You can make this dish ahead of time. Prepare the honey garlic glaze and coat the carrots. Store them in the fridge for up to 24 hours. When ready to serve, just roast them in the oven. This saves time and still gives you that amazing flavor. For the full recipe, check out the complete instructions above. We explored the key ingredients and steps to make honey garlic roasted carrots. You learned how to mix the glaze, roast the carrots, and personalize the dish. We also discussed useful tips for perfect roasting and presentation. Lastly, we covered variations and storage tips to keep your dish fresh. Use this guide to make a tasty meal. Enjoy these carrots with your loved ones for a delightful experience.](https://goldendishy.com/wp-content/uploads/2025/06/04a56f10-aefe-4807-b100-2b1e29675843-768x768.webp)
![For this tasty dish, you need the following main ingredients: - 1 block (15 oz) firm tofu, pressed and cut into 1-inch cubes - ½ cup soy sauce (or tamari for a gluten-free option) - ¼ cup pure maple syrup - 2 tablespoons rice vinegar - 2 tablespoons sesame oil - 3 cloves garlic, finely minced - 1 tablespoon freshly grated ginger - 2 tablespoons cornstarch - 1 tablespoon sesame seeds (for garnish) - 3 green onions, thinly sliced (for garnish) These ingredients create a savory sauce that brings the tofu to life. Firm tofu works best because it absorbs flavors well and holds its shape during baking. The soy sauce adds saltiness, while maple syrup gives a hint of sweetness. Garlic and ginger provide warmth and depth to the dish. You can add a few optional ingredients to boost the flavor even more: - 1 tablespoon sriracha or chili paste for heat - 1 tablespoon mirin for extra sweetness - 1 teaspoon sesame oil for richer flavor These options allow you to customize the dish to your taste. If you like a little heat, sriracha will spice things up. Mirin adds a sweet and tangy note that pairs well with the other flavors. If you have dietary restrictions, here are some great substitutes: - Use tempeh instead of tofu for more protein and a firmer texture - Coconut aminos can replace soy sauce for a soy-free option - Use agave syrup instead of maple syrup for a different sweetness These substitutes keep the dish delicious while catering to different diets. Tempeh offers a nutty flavor and is packed with protein. Coconut aminos give a similar taste without soy. Agave syrup is a simple way to adjust sweetness levels. For more details, check the Full Recipe. First, you need to prepare the tofu. Start with one block of firm tofu. Press it between two plates to remove excess water. This step is key for better texture. After pressing, cut the tofu into 1-inch cubes. This size helps it cook evenly. Next, let’s make the teriyaki sauce. In a medium bowl, mix together the following ingredients: - ½ cup soy sauce (or tamari) - ¼ cup pure maple syrup - 2 tablespoons rice vinegar - 2 tablespoons sesame oil - 3 cloves garlic, finely minced - 1 tablespoon freshly grated ginger Whisk these ingredients until smooth. This sauce adds rich flavor to the tofu. Now, it’s time to bake the tofu. Preheat your oven to 400°F (200°C). Line a baking sheet with parchment paper. This prevents sticking. Place the cubed tofu in a bowl and sprinkle with 2 tablespoons of cornstarch. Gently toss until each piece is coated. Spread the tofu on the baking sheet in a single layer. Drizzle half of the teriyaki sauce over the tofu. Bake for 25-30 minutes. Halfway through, turn the tofu cubes for even cooking. After baking, pour the remaining teriyaki sauce over the tofu. Toss gently to coat. Return the tofu to the oven for another 5-10 minutes. This step caramelizes the sauce, making it sticky and flavorful. Once baked, remove the tofu from the oven. Finish by sprinkling sesame seeds and sliced green onions on top. This adds color and crunch. Enjoy your tasty baked teriyaki tofu! For the complete recipe, check out the Full Recipe. To get crispy tofu, press it well. Remove as much moisture as you can. After cutting it, coat each cube in cornstarch. This step is key for that crunch. Bake at 400°F for 25-30 minutes. Flip the tofu halfway through for even cooking. The golden brown color means it is ready. Use fresh garlic and ginger for the best taste. These ingredients boost the teriyaki sauce’s flavor. Let your tofu soak in the sauce for a bit. This helps it absorb all those yummy flavors. Drizzle some sauce just before the end of baking. It adds a sticky glaze that is hard to resist. Don’t skip pressing the tofu. It will turn out soggy if you do. Avoid using too much sauce too soon. This can make your tofu mushy instead of crispy. Make sure to coat each piece evenly with cornstarch. If you don’t, some cubes may not get crispy. For the best results, follow the [Full Recipe]. {{image_4}} You can make your baked teriyaki tofu even more colorful and tasty by adding vegetables. Carrots, bell peppers, and broccoli work well. Just chop them into bite-sized pieces. Toss them with the tofu before baking. This step adds nutrients and makes the dish pop with color. If you want to switch up the protein, try using tempeh or seitan instead of tofu. Both options absorb flavors well and have great textures. Tempeh is nutty and has a firm bite. Seitan mimics meat and is very chewy. These choices keep the meal exciting and cater to different tastes. To keep this dish gluten-free, use tamari instead of soy sauce. Tamari is a great choice and tastes the same. For a nut-free option, skip the sesame oil and use olive oil instead. This way, you can enjoy the dish while sticking to your dietary needs. For the full recipe, check the earlier section. To keep your baked teriyaki tofu fresh, store it in an airtight container. Let the tofu cool down first. It can last in the fridge for up to four days. If you notice any moisture, use a paper towel to absorb it before sealing the container. This helps keep the tofu from getting soggy. When you are ready to enjoy leftovers, the best way to reheat the tofu is in the oven. Preheat your oven to 350°F (175°C). Spread the tofu on a baking sheet and cover it with foil. Heat for about 10-15 minutes. This method helps restore some crispiness. You can also microwave it for quicker results. Just remember to cover it with a damp paper towel to keep it moist. Yes, you can freeze baked teriyaki tofu! Start by letting it cool completely. Place the tofu in a freezer bag, removing as much air as possible. It can stay frozen for up to three months. When you’re ready to eat, thaw it in the fridge overnight. Then, reheat as mentioned above. Enjoy your flavorful tofu anytime! Tofu is done when it turns golden brown and crispy. You should bake it for 25 to 30 minutes. Halfway through, turn the tofu cubes for even cooking. It should feel firm to the touch and have a nice texture. Once you see a beautiful caramel color, it's ready to enjoy! Yes, you can! Try soy sauce with honey or maple syrup. A sweet chili sauce works well too. For a spicy kick, use sriracha mixed with soy. Each sauce will give a new flavor twist to your baked tofu. Feel free to explore and find what you love! Baked teriyaki tofu pairs well with steamed rice or quinoa. You can also serve it with stir-fried vegetables for a colorful plate. A fresh salad adds crunch and balance. For a complete meal, add some pickled veggies on the side. This dish is versatile and fits many sides! In this guide, we explored how to make baked teriyaki tofu. We discussed key ingredients, step-by-step prep, and tips for crispiness. You learned about tasty variations and storage tips. Always remember, cooking is fun and easy. With the right ingredients and methods, you can make delicious meals. Enjoy your kitchen journey with baked teriyaki tofu. Happy cooking!](https://goldendishy.com/wp-content/uploads/2025/07/16dcdce2-c600-4865-9aa6-5e182bb228ee-768x768.webp)