Savory Chicken Broccoli Rice Casserole Easy Recipe
![- 2 cups cooked rice (white or brown) - 1 pound boneless, skinless chicken breasts, diced - 2 cups broccoli florets (fresh or frozen) - 1 can (10.5 oz) cream of mushroom soup (or any creamy soup of your choice) - 1 cup shredded cheddar cheese, divided - 1/2 cup milk - 1 teaspoon garlic powder - 1/2 teaspoon onion powder - 1 teaspoon dried thyme - Salt and pepper to taste - 1/2 cup breadcrumbs (optional, for topping) - 2 tablespoons olive oil I love using fresh ingredients when I make this casserole. The chicken gives it protein. Broccoli adds a nice crunch and color. You can use frozen broccoli if fresh isn’t available. It works just as well! I recommend using cream of mushroom soup for a rich flavor. You can swap it with any creamy soup you enjoy. The cheddar cheese is key for that melty goodness on top. Split the cheese; half goes in the mix, and half stays for the topping. For seasoning, garlic powder and dried thyme bring out the best taste. Adjust salt and pepper to fit your palate. If you want a crunchy top, add breadcrumbs for texture. Drizzle olive oil to keep it all moist and flavorful. This combination makes a cozy, tasty meal. You’ll love how easy it is to prepare. Check the [Full Recipe] for all the steps to make this dish shine! First, preheat your oven to 350°F (175°C). This step is key. A hot oven helps your casserole cook evenly. While it heats, prepare your baking dish. Grease a 9x13-inch dish with olive oil or cooking spray. This prevents sticking and makes for easy cleanup. Next, we cook the chicken. In a large skillet, heat 2 tablespoons of olive oil over medium heat. Once the oil is hot, add the diced chicken. Season the chicken with 1 teaspoon of garlic powder, 1/2 teaspoon of onion powder, 1 teaspoon of dried thyme, and salt and pepper to taste. Sauté it for about 5-7 minutes. Stir the chicken often to ensure even cooking. You want it to be fully cooked and lightly browned. In a large mixing bowl, combine your cooked rice, steamed broccoli florets, a can of cream of mushroom soup, and 1/2 cup of milk. Add half of your shredded cheddar cheese too. Mix these ingredients well until the mixture looks creamy. This step is important. A well-mixed casserole ensures every bite is full of flavor. Once your chicken is cooked, add it to the rice and broccoli mixture. Stir gently to combine everything evenly. Now, it’s time to bake. Spread the chicken and rice mixture in your greased baking dish. Sprinkle the remaining cheddar cheese over the top. If you want a crunchy topping, add 1/2 cup of breadcrumbs. Cover the dish tightly with aluminum foil. This keeps moisture in while baking. Place it in the preheated oven and bake for 25 minutes. After that, carefully remove the foil. Bake for an additional 10-15 minutes. You want the top to be golden brown and the cheese to be bubbling. When it's done, let the casserole rest for about 5 minutes. This helps the layers set before you serve. To make your chicken tender and moist, start with good-quality chicken. Sauté the diced chicken in olive oil over medium heat. Season it well with garlic powder, onion powder, thyme, salt, and pepper. Cook until it is no longer pink. This usually takes about 5-7 minutes. Stir it often for even cooking. For casserole success, preheat your oven to 350°F (175°C) before baking. Cover the dish with foil for the first part of baking. This keeps the dish moist. Remove the foil for the last 10-15 minutes to brown the cheese and breadcrumbs. For an appealing look, garnish your casserole with fresh parsley or chives. This adds a bright color and fresh flavor. You can also use individual ramekins for serving. This makes it easy to serve and adds a cozy touch to your table. Store leftovers in an airtight container in the fridge. They will last up to 3-4 days. If you want to freeze the casserole, wrap it tightly in foil or plastic wrap. It can last up to 3 months in the freezer. When reheating, you have two options: the microwave or the oven. For the microwave, heat in short bursts to avoid drying it out. Stir occasionally to heat evenly. For oven reheating, cover with foil and bake at 350°F (175°C) for about 20 minutes, or until heated through. {{image_4}} For a gluten-free option, swap the cream of mushroom soup with a gluten-free brand. You can also use gluten-free breadcrumbs or skip them altogether. For a low-fat version, cut back on cheese and milk. Use low-fat milk and just half the cheese. This keeps the dish tasty while reducing calories. You can change the flavor by adding different veggies. Carrots and bell peppers work great. They add color and crunch too! If you want a cheese twist, try mozzarella or pepper jack for a spicy kick. Each cheese brings its own unique taste, making each casserole a new experience. Using leftover rotisserie chicken is a smart time-saver. Just shred it and mix it in. For rice, consider quinoa or cauliflower rice for a low-carb option. Cauliflower rice is light and absorbs flavors well. It’s a great way to sneak in more veggies into your meal. Feel free to get creative. This dish is versatile, and you can tailor it to your taste! Chicken Broccoli Rice Casserole shines on its own, but you can enhance your meal with sides. Here are some tasty options: - Garlic Bread: Crisp and buttery, it pairs well with the creamy casserole. - Steamed Vegetables: Lightly steamed carrots or green beans add color and crunch. - Simple Salad: A fresh garden salad with lettuce, tomatoes, and cucumbers balances the rich flavors. For a quick salad, mix leafy greens with olive oil and lemon juice. This adds a refreshing touch to your meal. To complete your dinner, consider drinks that match the flavors of the casserole: - White Wine: A chilled Chardonnay or Sauvignon Blanc complements the dish well. - Sparkling Water: For a non-alcoholic option, sparkling water with lemon is refreshing. For kids, serve some apple juice or lemonade. These drinks are fun and pair nicely with the casserole's flavors. How long does it take to cook chicken in the casserole? It takes about 5 to 7 minutes to cook the chicken in the skillet. You want it cooked through and lightly browned. This step is key for flavor. Once you add the chicken to the casserole, it will bake for about 35 minutes. This helps all the flavors blend well. Can I prepare this dish ahead and refrigerate it? Yes, you can prepare the casserole ahead of time. Just mix all the ingredients as usual. Then, cover it and place it in the fridge. It’s best to bake it within 24 hours for best taste. What can I use instead of cream of mushroom soup? If you don’t have cream of mushroom soup, you can use cream of chicken soup. You can also make a homemade creamy base using sour cream or Greek yogurt mixed with milk. This keeps the dish rich and smooth. How do I store leftovers? To store leftovers, let the casserole cool first. Then, place it in an airtight container. It will stay fresh in the fridge for up to 3 days. Make sure to reheat only the portion you plan to eat. Can I freeze Chicken Broccoli Rice Casserole for future meals? Yes, you can freeze the casserole. Just cover it tightly with plastic wrap or foil. It will last in the freezer for up to 2 months. When ready to eat, thaw it in the fridge overnight before baking. For more details, check out the [Full Recipe]. It’s a great way to ensure you have all the steps at hand! In this article, we explored the key ingredients for Chicken Broccoli Rice Casserole and shared easy steps to make it. You learned about cooking tips, variations, and serving suggestions to enhance your meal. Remember, this dish is not only tasty but also nutritious. Try different ingredients to suit your taste or dietary needs. Enjoy creating this delicious casserole and share it with your family. You’ll love how simple and fun it is to prepare!](https://goldendishy.com/wp-content/uploads/2025/07/8f73cfa4-d8c9-44a2-908a-c2367089e61b.webp)
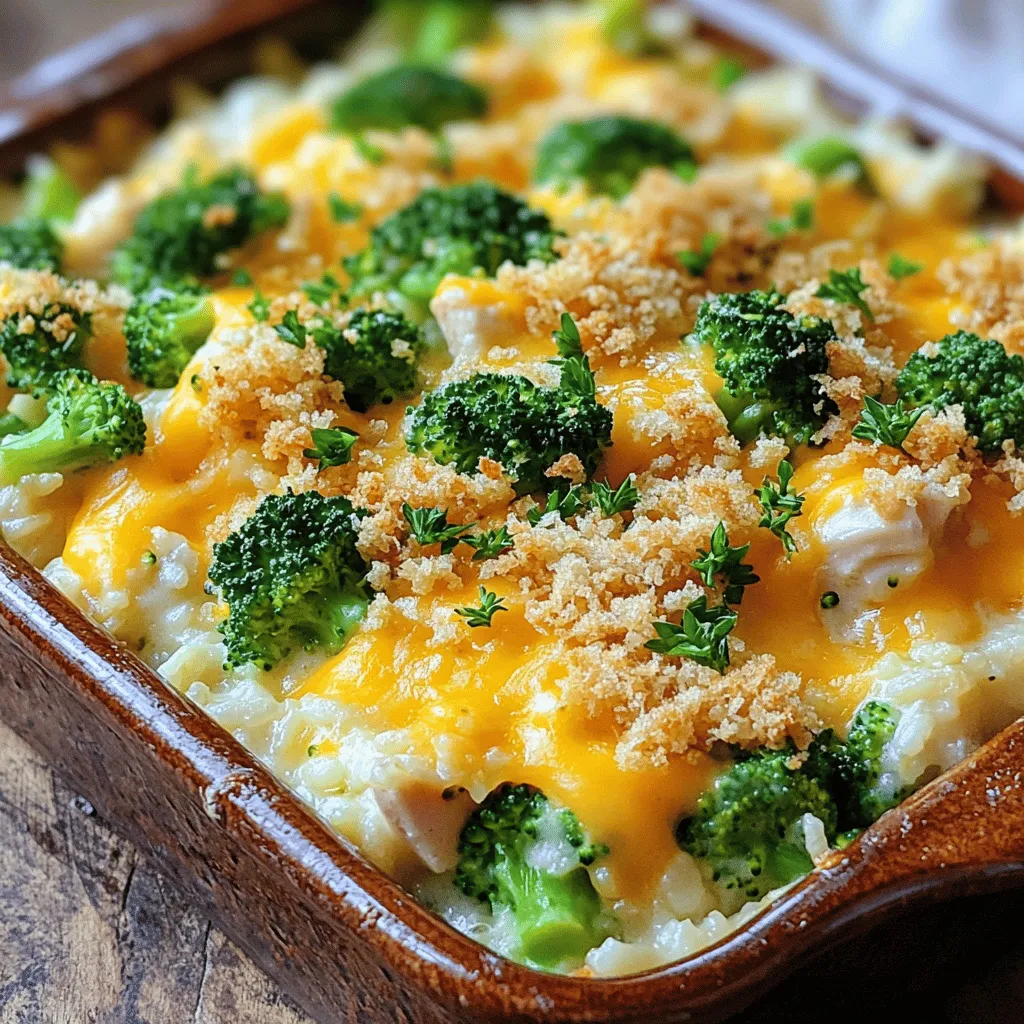
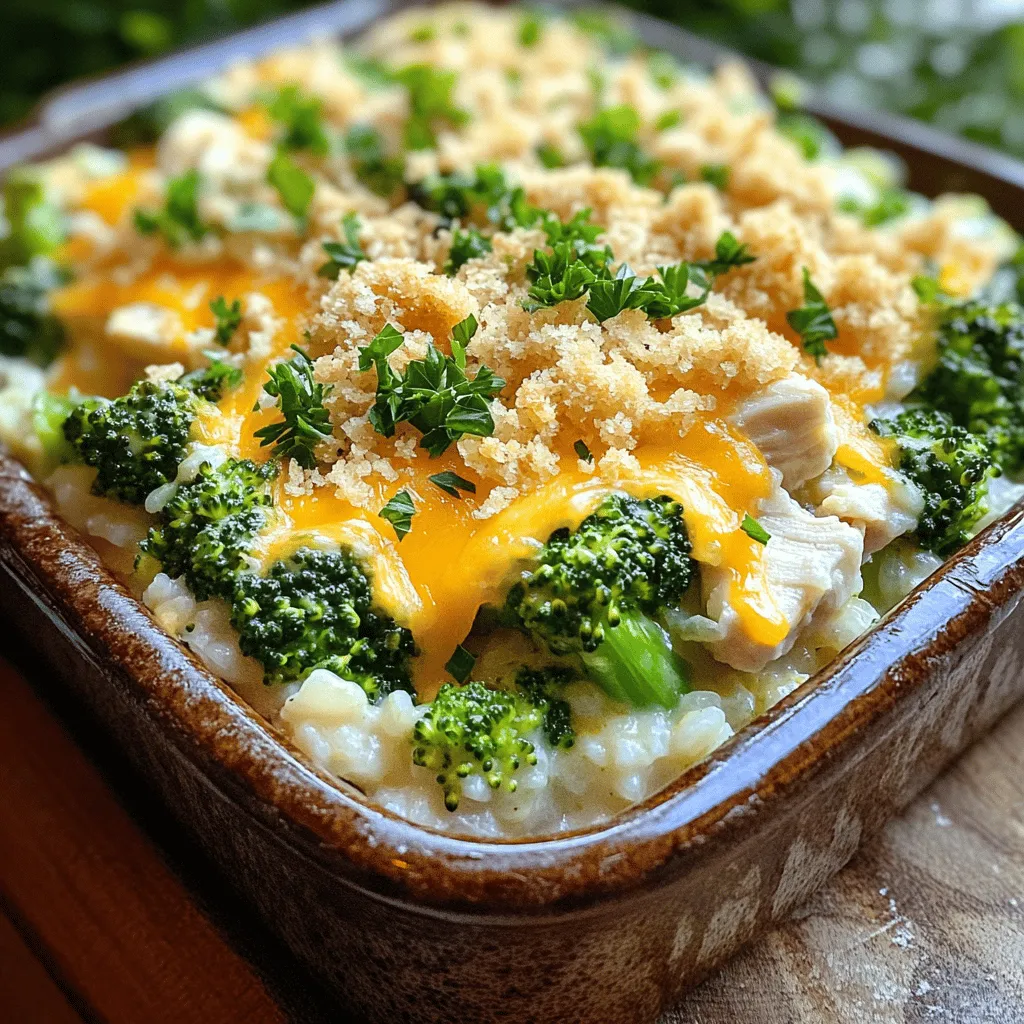
Looking for a tasty and easy meal? Try my Savory Chicken Broccoli Rice Casserole! This comforting dish is packed with flavor and nutrition. It combines tender chicken, fresh broccoli, creamy soup, and fluffy rice, topped with cheese. Perfect for busy nights, you can whip it up in no time. Join me as I share simple steps and tips to make this family-friendly recipe a hit at your dinner table!
Ingredients
Complete Ingredient List for Chicken Broccoli Rice Casserole
– 2 cups cooked rice (white or brown)
– 1 pound boneless, skinless chicken breasts, diced
– 2 cups broccoli florets (fresh or frozen)
– 1 can (10.5 oz) cream of mushroom soup (or any creamy soup of your choice)
– 1 cup shredded cheddar cheese, divided
– 1/2 cup milk
– 1 teaspoon garlic powder
– 1/2 teaspoon onion powder
– 1 teaspoon dried thyme
– Salt and pepper to taste
– 1/2 cup breadcrumbs (optional, for topping)
– 2 tablespoons olive oil
I love using fresh ingredients when I make this casserole. The chicken gives it protein. Broccoli adds a nice crunch and color. You can use frozen broccoli if fresh isn’t available. It works just as well!
I recommend using cream of mushroom soup for a rich flavor. You can swap it with any creamy soup you enjoy. The cheddar cheese is key for that melty goodness on top. Split the cheese; half goes in the mix, and half stays for the topping.
For seasoning, garlic powder and dried thyme bring out the best taste. Adjust salt and pepper to fit your palate. If you want a crunchy top, add breadcrumbs for texture. Drizzle olive oil to keep it all moist and flavorful.
This combination makes a cozy, tasty meal. You’ll love how easy it is to prepare.
Step-by-Step Instructions
Preparation Steps Overview
First, preheat your oven to 350°F (175°C). This step is key. A hot oven helps your casserole cook evenly. While it heats, prepare your baking dish. Grease a 9×13-inch dish with olive oil or cooking spray. This prevents sticking and makes for easy cleanup.
Cooking Chicken
Next, we cook the chicken. In a large skillet, heat 2 tablespoons of olive oil over medium heat. Once the oil is hot, add the diced chicken. Season the chicken with 1 teaspoon of garlic powder, 1/2 teaspoon of onion powder, 1 teaspoon of dried thyme, and salt and pepper to taste. Sauté it for about 5-7 minutes. Stir the chicken often to ensure even cooking. You want it to be fully cooked and lightly browned.
Combining Ingredients
In a large mixing bowl, combine your cooked rice, steamed broccoli florets, a can of cream of mushroom soup, and 1/2 cup of milk. Add half of your shredded cheddar cheese too. Mix these ingredients well until the mixture looks creamy. This step is important. A well-mixed casserole ensures every bite is full of flavor. Once your chicken is cooked, add it to the rice and broccoli mixture. Stir gently to combine everything evenly.
Baking Process
Now, it’s time to bake. Spread the chicken and rice mixture in your greased baking dish. Sprinkle the remaining cheddar cheese over the top. If you want a crunchy topping, add 1/2 cup of breadcrumbs. Cover the dish tightly with aluminum foil. This keeps moisture in while baking. Place it in the preheated oven and bake for 25 minutes. After that, carefully remove the foil. Bake for an additional 10-15 minutes. You want the top to be golden brown and the cheese to be bubbling. When it’s done, let the casserole rest for about 5 minutes. This helps the layers set before you serve.
Tips & Tricks
Cooking and Baking Tips
To make your chicken tender and moist, start with good-quality chicken. Sauté the diced chicken in olive oil over medium heat. Season it well with garlic powder, onion powder, thyme, salt, and pepper. Cook until it is no longer pink. This usually takes about 5-7 minutes. Stir it often for even cooking.
For casserole success, preheat your oven to 350°F (175°C) before baking. Cover the dish with foil for the first part of baking. This keeps the dish moist. Remove the foil for the last 10-15 minutes to brown the cheese and breadcrumbs.
Presentation Tips
For an appealing look, garnish your casserole with fresh parsley or chives. This adds a bright color and fresh flavor. You can also use individual ramekins for serving. This makes it easy to serve and adds a cozy touch to your table.
Storage and Reheating Tips
Store leftovers in an airtight container in the fridge. They will last up to 3-4 days. If you want to freeze the casserole, wrap it tightly in foil or plastic wrap. It can last up to 3 months in the freezer.
When reheating, you have two options: the microwave or the oven. For the microwave, heat in short bursts to avoid drying it out. Stir occasionally to heat evenly. For oven reheating, cover with foil and bake at 350°F (175°C) for about 20 minutes, or until heated through.

Variations
Dietary Modifications
For a gluten-free option, swap the cream of mushroom soup with a gluten-free brand. You can also use gluten-free breadcrumbs or skip them altogether. For a low-fat version, cut back on cheese and milk. Use low-fat milk and just half the cheese. This keeps the dish tasty while reducing calories.
Flavor Variants
You can change the flavor by adding different veggies. Carrots and bell peppers work great. They add color and crunch too! If you want a cheese twist, try mozzarella or pepper jack for a spicy kick. Each cheese brings its own unique taste, making each casserole a new experience.
Ingredient Swaps
Using leftover rotisserie chicken is a smart time-saver. Just shred it and mix it in. For rice, consider quinoa or cauliflower rice for a low-carb option. Cauliflower rice is light and absorbs flavors well. It’s a great way to sneak in more veggies into your meal.
Feel free to get creative. This dish is versatile, and you can tailor it to your taste!
Serving Suggestions
Ideal Side Dishes
Chicken Broccoli Rice Casserole shines on its own, but you can enhance your meal with sides. Here are some tasty options:
– Garlic Bread: Crisp and buttery, it pairs well with the creamy casserole.
– Steamed Vegetables: Lightly steamed carrots or green beans add color and crunch.
– Simple Salad: A fresh garden salad with lettuce, tomatoes, and cucumbers balances the rich flavors.
For a quick salad, mix leafy greens with olive oil and lemon juice. This adds a refreshing touch to your meal.
Pairing Suggestions
To complete your dinner, consider drinks that match the flavors of the casserole:
– White Wine: A chilled Chardonnay or Sauvignon Blanc complements the dish well.
– Sparkling Water: For a non-alcoholic option, sparkling water with lemon is refreshing.
For kids, serve some apple juice or lemonade. These drinks are fun and pair nicely with the casserole’s flavors.
FAQs
Common Questions About Chicken Broccoli Rice Casserole
How long does it take to cook chicken in the casserole?
It takes about 5 to 7 minutes to cook the chicken in the skillet. You want it cooked through and lightly browned. This step is key for flavor. Once you add the chicken to the casserole, it will bake for about 35 minutes. This helps all the flavors blend well.
Can I prepare this dish ahead and refrigerate it?
Yes, you can prepare the casserole ahead of time. Just mix all the ingredients as usual. Then, cover it and place it in the fridge. It’s best to bake it within 24 hours for best taste.
Substitution Queries
What can I use instead of cream of mushroom soup?
If you don’t have cream of mushroom soup, you can use cream of chicken soup. You can also make a homemade creamy base using sour cream or Greek yogurt mixed with milk. This keeps the dish rich and smooth.
Serving and Storage FAQs
How do I store leftovers?
To store leftovers, let the casserole cool first. Then, place it in an airtight container. It will stay fresh in the fridge for up to 3 days. Make sure to reheat only the portion you plan to eat.
Can I freeze Chicken Broccoli Rice Casserole for future meals?
Yes, you can freeze the casserole. Just cover it tightly with plastic wrap or foil. It will last in the freezer for up to 2 months. When ready to eat, thaw it in the fridge overnight before baking.It’s a great way to ensure you have all the steps at hand!
In this article, we explored the key ingredients for Chicken Broccoli Rice Casserole and shared easy steps to make it. You learned about cooking tips, variations, and serving suggestions to enhance your meal. Remember, this dish is not only tasty but also nutritious. Try different ingredients to suit your taste or dietary needs. Enjoy creating this delicious casserole and share it with your family. You’ll love how simple and fun it is to prepare!
![- 2 cups cooked rice (white or brown) - 1 pound boneless, skinless chicken breasts, diced - 2 cups broccoli florets (fresh or frozen) - 1 can (10.5 oz) cream of mushroom soup (or any creamy soup of your choice) - 1 cup shredded cheddar cheese, divided - 1/2 cup milk - 1 teaspoon garlic powder - 1/2 teaspoon onion powder - 1 teaspoon dried thyme - Salt and pepper to taste - 1/2 cup breadcrumbs (optional, for topping) - 2 tablespoons olive oil I love using fresh ingredients when I make this casserole. The chicken gives it protein. Broccoli adds a nice crunch and color. You can use frozen broccoli if fresh isn’t available. It works just as well! I recommend using cream of mushroom soup for a rich flavor. You can swap it with any creamy soup you enjoy. The cheddar cheese is key for that melty goodness on top. Split the cheese; half goes in the mix, and half stays for the topping. For seasoning, garlic powder and dried thyme bring out the best taste. Adjust salt and pepper to fit your palate. If you want a crunchy top, add breadcrumbs for texture. Drizzle olive oil to keep it all moist and flavorful. This combination makes a cozy, tasty meal. You’ll love how easy it is to prepare. Check the [Full Recipe] for all the steps to make this dish shine! First, preheat your oven to 350°F (175°C). This step is key. A hot oven helps your casserole cook evenly. While it heats, prepare your baking dish. Grease a 9x13-inch dish with olive oil or cooking spray. This prevents sticking and makes for easy cleanup. Next, we cook the chicken. In a large skillet, heat 2 tablespoons of olive oil over medium heat. Once the oil is hot, add the diced chicken. Season the chicken with 1 teaspoon of garlic powder, 1/2 teaspoon of onion powder, 1 teaspoon of dried thyme, and salt and pepper to taste. Sauté it for about 5-7 minutes. Stir the chicken often to ensure even cooking. You want it to be fully cooked and lightly browned. In a large mixing bowl, combine your cooked rice, steamed broccoli florets, a can of cream of mushroom soup, and 1/2 cup of milk. Add half of your shredded cheddar cheese too. Mix these ingredients well until the mixture looks creamy. This step is important. A well-mixed casserole ensures every bite is full of flavor. Once your chicken is cooked, add it to the rice and broccoli mixture. Stir gently to combine everything evenly. Now, it’s time to bake. Spread the chicken and rice mixture in your greased baking dish. Sprinkle the remaining cheddar cheese over the top. If you want a crunchy topping, add 1/2 cup of breadcrumbs. Cover the dish tightly with aluminum foil. This keeps moisture in while baking. Place it in the preheated oven and bake for 25 minutes. After that, carefully remove the foil. Bake for an additional 10-15 minutes. You want the top to be golden brown and the cheese to be bubbling. When it's done, let the casserole rest for about 5 minutes. This helps the layers set before you serve. To make your chicken tender and moist, start with good-quality chicken. Sauté the diced chicken in olive oil over medium heat. Season it well with garlic powder, onion powder, thyme, salt, and pepper. Cook until it is no longer pink. This usually takes about 5-7 minutes. Stir it often for even cooking. For casserole success, preheat your oven to 350°F (175°C) before baking. Cover the dish with foil for the first part of baking. This keeps the dish moist. Remove the foil for the last 10-15 minutes to brown the cheese and breadcrumbs. For an appealing look, garnish your casserole with fresh parsley or chives. This adds a bright color and fresh flavor. You can also use individual ramekins for serving. This makes it easy to serve and adds a cozy touch to your table. Store leftovers in an airtight container in the fridge. They will last up to 3-4 days. If you want to freeze the casserole, wrap it tightly in foil or plastic wrap. It can last up to 3 months in the freezer. When reheating, you have two options: the microwave or the oven. For the microwave, heat in short bursts to avoid drying it out. Stir occasionally to heat evenly. For oven reheating, cover with foil and bake at 350°F (175°C) for about 20 minutes, or until heated through. {{image_4}} For a gluten-free option, swap the cream of mushroom soup with a gluten-free brand. You can also use gluten-free breadcrumbs or skip them altogether. For a low-fat version, cut back on cheese and milk. Use low-fat milk and just half the cheese. This keeps the dish tasty while reducing calories. You can change the flavor by adding different veggies. Carrots and bell peppers work great. They add color and crunch too! If you want a cheese twist, try mozzarella or pepper jack for a spicy kick. Each cheese brings its own unique taste, making each casserole a new experience. Using leftover rotisserie chicken is a smart time-saver. Just shred it and mix it in. For rice, consider quinoa or cauliflower rice for a low-carb option. Cauliflower rice is light and absorbs flavors well. It’s a great way to sneak in more veggies into your meal. Feel free to get creative. This dish is versatile, and you can tailor it to your taste! Chicken Broccoli Rice Casserole shines on its own, but you can enhance your meal with sides. Here are some tasty options: - Garlic Bread: Crisp and buttery, it pairs well with the creamy casserole. - Steamed Vegetables: Lightly steamed carrots or green beans add color and crunch. - Simple Salad: A fresh garden salad with lettuce, tomatoes, and cucumbers balances the rich flavors. For a quick salad, mix leafy greens with olive oil and lemon juice. This adds a refreshing touch to your meal. To complete your dinner, consider drinks that match the flavors of the casserole: - White Wine: A chilled Chardonnay or Sauvignon Blanc complements the dish well. - Sparkling Water: For a non-alcoholic option, sparkling water with lemon is refreshing. For kids, serve some apple juice or lemonade. These drinks are fun and pair nicely with the casserole's flavors. How long does it take to cook chicken in the casserole? It takes about 5 to 7 minutes to cook the chicken in the skillet. You want it cooked through and lightly browned. This step is key for flavor. Once you add the chicken to the casserole, it will bake for about 35 minutes. This helps all the flavors blend well. Can I prepare this dish ahead and refrigerate it? Yes, you can prepare the casserole ahead of time. Just mix all the ingredients as usual. Then, cover it and place it in the fridge. It’s best to bake it within 24 hours for best taste. What can I use instead of cream of mushroom soup? If you don’t have cream of mushroom soup, you can use cream of chicken soup. You can also make a homemade creamy base using sour cream or Greek yogurt mixed with milk. This keeps the dish rich and smooth. How do I store leftovers? To store leftovers, let the casserole cool first. Then, place it in an airtight container. It will stay fresh in the fridge for up to 3 days. Make sure to reheat only the portion you plan to eat. Can I freeze Chicken Broccoli Rice Casserole for future meals? Yes, you can freeze the casserole. Just cover it tightly with plastic wrap or foil. It will last in the freezer for up to 2 months. When ready to eat, thaw it in the fridge overnight before baking. For more details, check out the [Full Recipe]. It’s a great way to ensure you have all the steps at hand! In this article, we explored the key ingredients for Chicken Broccoli Rice Casserole and shared easy steps to make it. You learned about cooking tips, variations, and serving suggestions to enhance your meal. Remember, this dish is not only tasty but also nutritious. Try different ingredients to suit your taste or dietary needs. Enjoy creating this delicious casserole and share it with your family. You’ll love how simple and fun it is to prepare!](https://goldendishy.com/wp-content/uploads/2025/07/8f73cfa4-d8c9-44a2-908a-c2367089e61b-300x300.webp)


![- 4 large bell peppers (any vibrant color) - 1 cup quinoa, thoroughly rinsed and drained - 2 cups vegetable broth - 1 can (15 oz) black beans, well rinsed and drained - 1 cup corn (fresh, frozen, or canned, drained) - 1 cup cherry tomatoes, halved - 1 teaspoon ground cumin - 1 teaspoon smoked paprika - 1 teaspoon garlic powder - Salt and freshly cracked black pepper to taste - 1 tablespoon extra virgin olive oil - ½ cup shredded cheddar cheese (optional but recommended) - Fresh cilantro or parsley, finely chopped for garnish - Additional vegetables (e.g., zucchini, mushrooms) - Spices and herbs (e.g., oregano, chili powder) When making stuffed bell pepper boats, you have many options. I love using colorful bell peppers. They add a fun look to your dish. Choose ones that are firm and bright. For the filling, I use quinoa. It’s not only healthy but also tasty. Rinse it well before cooking. The vegetable broth adds flavor and makes it rich. Black beans are another great choice. They are filling and packed with protein. Rinse them well too, to get rid of extra salt. Corn brings sweetness to the dish. You can use fresh, frozen, or canned corn. Cherry tomatoes add a nice juicy burst. Spices like cumin and paprika give depth. Garlic powder adds that warm flavor we all love. Don’t forget to season with salt and pepper to make it pop. Finally, I drizzle olive oil on the filling. It helps everything blend together. If you love cheese, add some cheddar on top for creaminess. Feel free to customize your stuffed peppers with optional add-ins. You can mix in other veggies like zucchini or mushrooms. Extra spices can make a big impact too. This recipe is flexible. You can adjust it to fit your taste. Explore and have fun with your stuffed bell pepper boats! For the complete guide, check out the Full Recipe I have shared. - Preheat the oven to 375°F (190°C). - Prepare the bell peppers by cutting off their tops. Carefully remove the seeds and membranes. Make sure they sit upright in a baking dish. - Combine 1 cup of quinoa and 2 cups of vegetable broth in a saucepan. - Bring this mix to a boil, then reduce the heat to low. Cover the pot and let it simmer. Cook for about 15 minutes or until the quinoa is fluffy and the broth has absorbed. - In a large mixing bowl, combine the cooked quinoa with one can of black beans, one cup of corn, and spices. - Add 1 teaspoon of ground cumin, 1 teaspoon of smoked paprika, and 1 teaspoon of garlic powder. Season with salt and black pepper. - Drizzle 1 tablespoon of olive oil over the mixture. Stir until everything is well blended. - Carefully spoon the filling into each prepared bell pepper. Press it down gently to pack it in. - If you like, top each stuffed pepper with ½ cup of shredded cheddar cheese for added flavor. - Pour a little water into the bottom of the baking dish. Cover the dish with aluminum foil. This helps keep the peppers moist. - Bake the stuffed peppers in the preheated oven for 25-30 minutes. Check for doneness; they should be fork-tender. Enjoy your delicious Stuffed Bell Pepper Boats with vibrant colors and flavors! For the full recipe, please refer back to the recipe section. To start, cutting bell peppers right matters. Slice off the tops using a sharp knife. Be careful not to cut too deep. Next, remove the seeds and white membranes inside. A small spoon works great for this. Rinse the peppers under cold water to clean them. For even cooking, place your stuffed peppers tightly in the baking dish. This helps them cook at the same rate. Mixing flavors is key, too. Use spices like cumin and smoked paprika to boost taste. You can taste the filling before you stuff the peppers. Adjust the salt and pepper as needed. Serving your stuffed bell pepper boats can be fun. Use a colorful platter to catch the eye. Arrange the peppers upright, showing off their filling. You can add a wedge of lime on the side for a fresh touch. A sprinkle of chopped cilantro or parsley adds color and flavor. You can prepare stuffed peppers ahead of time. Stuff them and cover with foil. Store them in the fridge for up to a day. This makes meal prep easy for busy nights. For sides, consider a fresh salad or crusty bread. You can also pair them with rice or quinoa for a filling meal. These peppers are great for family dinners or potlucks. For the full recipe, check out Stuffed Bell Pepper Boats. {{image_4}} You can easily make this dish vegetarian. Substituting quinoa with rice or couscous works well. Rice gives a nice texture, while couscous cooks faster. Both options taste great in these stuffed bell pepper boats. Adding different vegetables also boosts flavor and nutrition. Try diced zucchini, mushrooms, or spinach. These veggies add color and crunch. You can mix and match to fit your taste. Want to add meat? Ground turkey or beef makes a hearty filling. Just cook the meat before adding it to the quinoa mixture. This step ensures the meat is safe to eat. When adding meat, adjust the spices. You might want to use more cumin or paprika. This adjustment gives the dish a richer taste. Cheese can take your stuffed peppers to the next level. Mozzarella or feta are great choices. Mozzarella melts beautifully, while feta adds a tangy twist. For even more flavor, add layers of salsa or sauce. It keeps the filling moist and adds a kick. You can also drizzle some sauce on top before baking. This extra step makes the dish even more delicious. Check out the [Full Recipe] for all the details! To keep your stuffed bell pepper boats fresh, store them in an airtight container. This helps lock in moisture and flavor. You can keep them in the fridge for about 3 to 4 days. If you want to save them for later, allow them to cool completely before storing. You can freeze stuffed peppers both before and after baking. If you freeze them before cooking, wrap them tightly in plastic wrap and then in aluminum foil. This keeps out air and prevents freezer burn. If you choose to freeze them after baking, let them cool first. Then, place them in a freezer-safe container. They will stay good for up to 3 months. To reheat your stuffed peppers, the oven works best. Preheat it to 350°F (175°C). Place the peppers in a baking dish and cover with foil. Bake for about 20 to 25 minutes until heated through. You can also use a microwave if you're in a hurry. Just place one pepper on a plate and heat for 2 to 3 minutes. This method may make them a bit softer, but they'll still taste great! To make stuffed bell peppers in advance, prepare the filling first. Cook the quinoa and mix it with your beans, corn, and spices. Once mixed, stuff each bell pepper with the filling. You can store them in the fridge for up to two days before baking. Cover them tightly to keep them fresh. When ready to bake, just pop them into the oven. This saves you time and effort on busy nights. Yes, you can use other types of peppers! Try using poblano, Anaheim, or even jalapeño peppers. Each type adds a unique flavor and spice level. Poblano peppers are mild and have a rich taste. They also hold a good amount of filling. If you like a bit of heat, jalapeños are a great choice. Just remember to adjust the cooking time if your peppers are smaller. Stuffed bell pepper boats pair well with many side dishes. Some great options include a fresh green salad, roasted vegetables, or rice. You can also serve them with a side of guacamole or salsa for added flavor. If you want something warm, consider serving bread or cornbread. These sides complement the flavors and make for a complete meal. To adjust the spice level, you can add or reduce spices. For less heat, skip the cumin and paprika. If you want more flavor, add some chili powder or crushed red pepper. You can also mix in diced jalapeños or hot sauce. Start with a little and taste as you go. This way, you can find the perfect balance for your taste. Yes, this dish can be gluten-free! The main ingredients, like quinoa and beans, are naturally gluten-free. Just be sure to check that your vegetable broth is gluten-free as well. If you add other ingredients, like sauces or spices, check their labels. This way, you can enjoy a safe and tasty meal. Stuffed bell peppers are simple and fun to make. We covered the key ingredients and steps to prepare them. You learned how to customize flavors and presentation. Remember, you can use different spices, grains, or veggies. These peppers can please everyone, regardless of diet. Enjoy your meal prep and share these tasty, healthy treats with friends and family. Happy cooking!](https://goldendishy.com/wp-content/uploads/2025/07/06b7afd9-4005-4ab6-8aaa-ba374b5d3167-768x768.webp)

