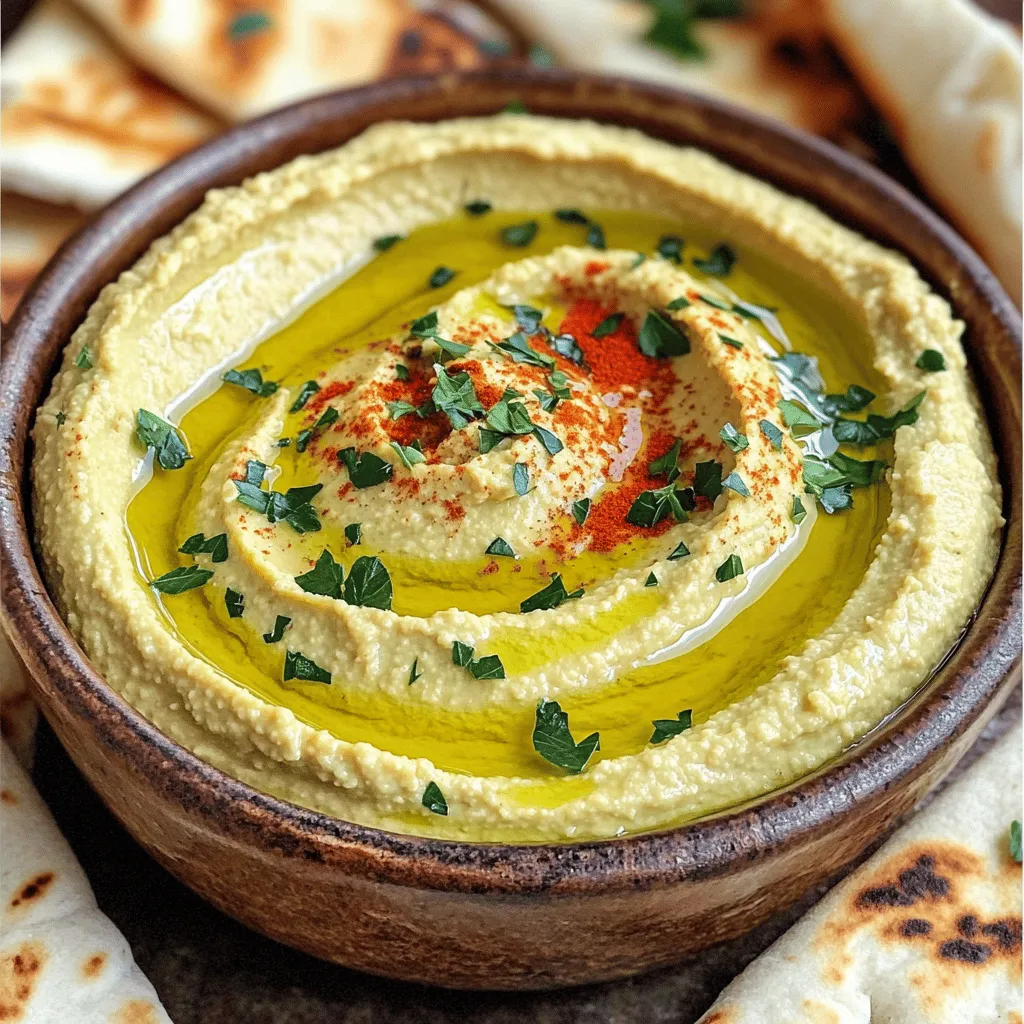
Are you ready to elevate your snack game? This Roasted Garlic Hummus is creamy, flavorful, and a perfect dip for any occasion. I’ll walk you through easy steps to create the best hummus you’ve ever tasted. You’ll discover how to roast garlic perfectly and blend those tasty ingredients into a smooth delight. Let’s dive in and make your next gathering a hit with this delicious homemade dip!
Ingredients
Main Ingredients for Roasted Garlic Hummus
To make the best roasted garlic hummus, gather these key ingredients:
– 1 can (15 oz) chickpeas, thoroughly drained and rinsed
– 1/4 cup creamy tahini
– 1/4 cup high-quality olive oil, plus extra for drizzling
– 4 cloves of roasted garlic
– 2 tablespoons freshly squeezed lemon juice
– 1/2 teaspoon ground cumin
– Sea salt, to taste
– Water, as needed for desired consistency
– Sweet paprika and finely chopped fresh parsley for garnish
These ingredients create a rich and creamy dip that bursts with flavor. The roasted garlic adds a sweet, mellow taste that enhances the overall profile of the hummus.
Optional Ingredients for Variation
You can customize your hummus with these optional ingredients:
– Spices like smoked paprika or cayenne for heat
– Fresh herbs such as basil or cilantro for added freshness
– A splash of balsamic vinegar for depth
– Roasted red peppers for a sweet and smoky twist
These additions can help you explore new flavors and keep your hummus exciting.
Nutritional Information of Key Ingredients
Here’s a quick look at the health benefits of the main ingredients:
– Chickpeas: High in protein and fiber, they help keep you full.
– Tahini: Made from sesame seeds, it provides healthy fats and calcium.
– Olive oil: A heart-healthy fat that can lower bad cholesterol levels.
– Garlic: Known for its immune-boosting properties and flavor.
– Lemon juice: Adds vitamin C and brightens the flavor.
This hummus is not just tasty; it’s also packed with nutrients. You can enjoy it guilt-free as a snack or appetizer.
Step-by-Step Instructions
How to Roast Garlic
To roast garlic, first, preheat your oven to 400°F (200°C). Take your garlic cloves and wrap them in aluminum foil. Drizzle a little olive oil over the cloves before sealing the packet. Place the foil packet in the oven and roast for about 30-35 minutes. The garlic should turn soft and golden brown. After roasting, let it cool for a few minutes before you touch it. This step brings out the sweet, rich flavor of the garlic.
Blending the Ingredients
In a food processor, add the following ingredients:
– 1 can (15 oz) chickpeas, thoroughly drained and rinsed
– 1/4 cup creamy tahini
– 1/4 cup high-quality olive oil, plus extra for drizzling
– 4 cloves of roasted garlic
– 2 tablespoons freshly squeezed lemon juice
– 1/2 teaspoon ground cumin
– Sea salt, to taste
Blend these ingredients until they become silky smooth. You may need to stop and scrape down the sides to ensure even mixing. This step creates a rich and creamy base for your hummus.
Adjusting Consistency and Seasoning
If your hummus is too thick, add water a little at a time. Start with one tablespoon and blend again until you reach your preferred creamy texture. Taste your hummus and adjust the seasoning. You might want more sea salt, lemon juice, or roasted garlic to suit your taste.Enjoy making this delicious dip!
Tips & Tricks
Best Practices for Creamy Hummus
To make your hummus extra creamy, use dry chickpeas. Soak them overnight and cook until soft. This gives a smoother texture. If you use canned chickpeas, rinse them well. It helps remove some of the canning liquid, which can make hummus taste tinny. Always blend your mixture well. Stop and scrape the sides of the bowl as needed. This step ensures every bit gets mixed in.
How to Roast Garlic Perfectly
Roasting garlic is easy and adds great flavor. Start by preheating your oven to 400°F (200°C). Wrap the garlic cloves in aluminum foil. Drizzle a little olive oil on top. Seal the foil tightly and bake for about 30-35 minutes. The cloves should be soft and golden brown. Let them cool before you handle them. You can use the roasted garlic in your hummus or on bread for a tasty treat.
Serving Suggestions and Pairings
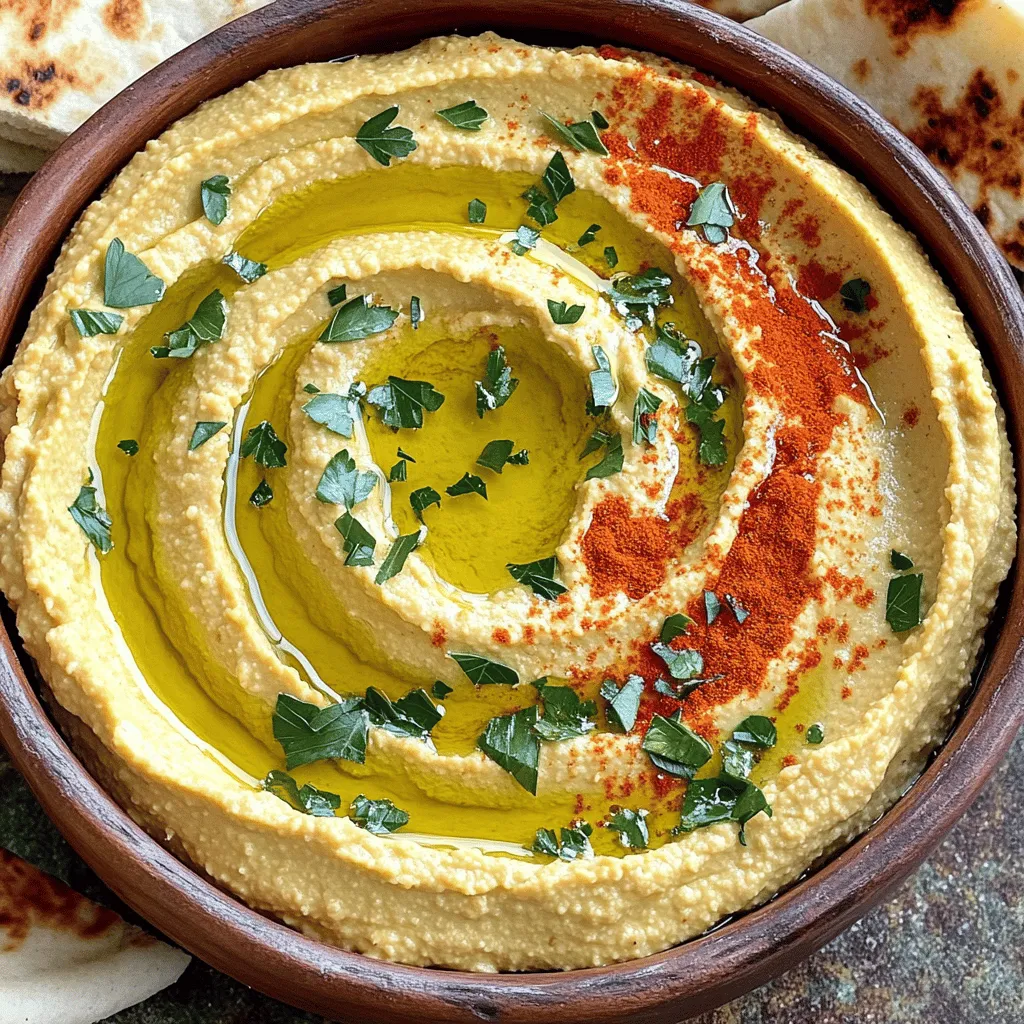
Roasted garlic hummus is very versatile. You can serve it with fresh veggie sticks like carrots, cucumbers, and bell peppers. Pita bread, toasted or soft, makes a great dipper too. For a fun twist, try pairing it with warm pita chips. Add a sprinkle of sweet paprika and fresh parsley on top for color. This makes your dish look beautiful and tasty.
Variations
Adding Additional Flavors (Spices and Herbs)
You can boost the taste of your roasted garlic hummus with spices and herbs. Try adding paprika for a smoky kick or chili powder for heat. Fresh herbs like cilantro or basil can add a bright touch. A pinch of za’atar brings an earthy flavor, while a dash of black pepper enhances the taste. Mix and match to find your favorite combination!
Alternative Base Ingredients (Beans and Peas)
Though chickpeas are classic, other beans and peas work well too. White beans like cannellini add creaminess and a mild taste. Black beans give a rich color and unique flavor. You can even use peas for a sweet twist. Each option brings its own character, so experiment to discover what you love!
Creative Serving Ideas (Dips and Spreads)
Roasted garlic hummus shines as a dip, but it can do much more. Spread it on sandwiches or wraps for a flavorful layer. Use it as a base for veggie pizzas or flatbreads. Pair it with crackers or pita chips for a fun snack. You can even dollop it on salads for added creaminess. The options are endless!
Storage Info
How to Store Leftover Hummus
To keep your roasted garlic hummus fresh, place it in an airtight container. Make sure to press a piece of plastic wrap against the hummus before sealing. This helps to keep the air out and maintain its creamy texture. Store it in the fridge for up to one week. Always use a clean spoon when scooping out hummus. This avoids introducing bacteria that can spoil your dip.
Freezing Roasted Garlic Hummus
You can freeze roasted garlic hummus for longer storage. Use a freezer-safe container or a resealable bag. Leave some space at the top, as the hummus may expand when frozen. It can last for about three months in the freezer. To use, thaw it overnight in the fridge before serving. Stir well after thawing to restore its smooth consistency.
Shelf Life of Homemade Hummus
Homemade hummus can last for about a week when stored correctly in the fridge. If you notice any off smells or changes in color, it’s best to discard it. Always trust your senses. Freshness is key for the best flavor. If you made a big batch, consider freezing a portion for later use.
FAQs
How to Make Roasted Garlic Hummus Vegan?
You can easily make roasted garlic hummus vegan. The main ingredients are already plant-based. Just use chickpeas, roasted garlic, olive oil, lemon juice, and seasoning. Ensure your tahini is vegan too. Most brands are, but it’s good to check the label.
What Can I Use Instead of Tahini?
If you don’t have tahini, don’t worry! You can use sunflower seed butter or almond butter. These will change the flavor a bit, but they still taste great. You can also skip it entirely. Just add a bit more olive oil for creaminess.
How Do I Know if My Hummus is Too Thick or Too Thin?
Check the texture while blending. If the hummus feels hard to mix, it’s too thick. Add water, one tablespoon at a time, until it smooths out. If it’s runny, add more chickpeas or tahini to thicken it. Always taste as you go!
Roasted garlic hummus is simple to make and enjoy. You learned about key ingredients, how to roast garlic, and tips for creamy texture. Variations add excitement to the dish, while proper storage keeps it fresh. This tasty dip fits many diets and pairs well with many foods. Now, it’s time to get creative in the kitchen. Make your version and share it with friends. You’ll love the flavor and fun it brings! Enjoy your hummus journey!


