Pumpkin Spice Cinnamon Roll Pancakes Tasty and Easy

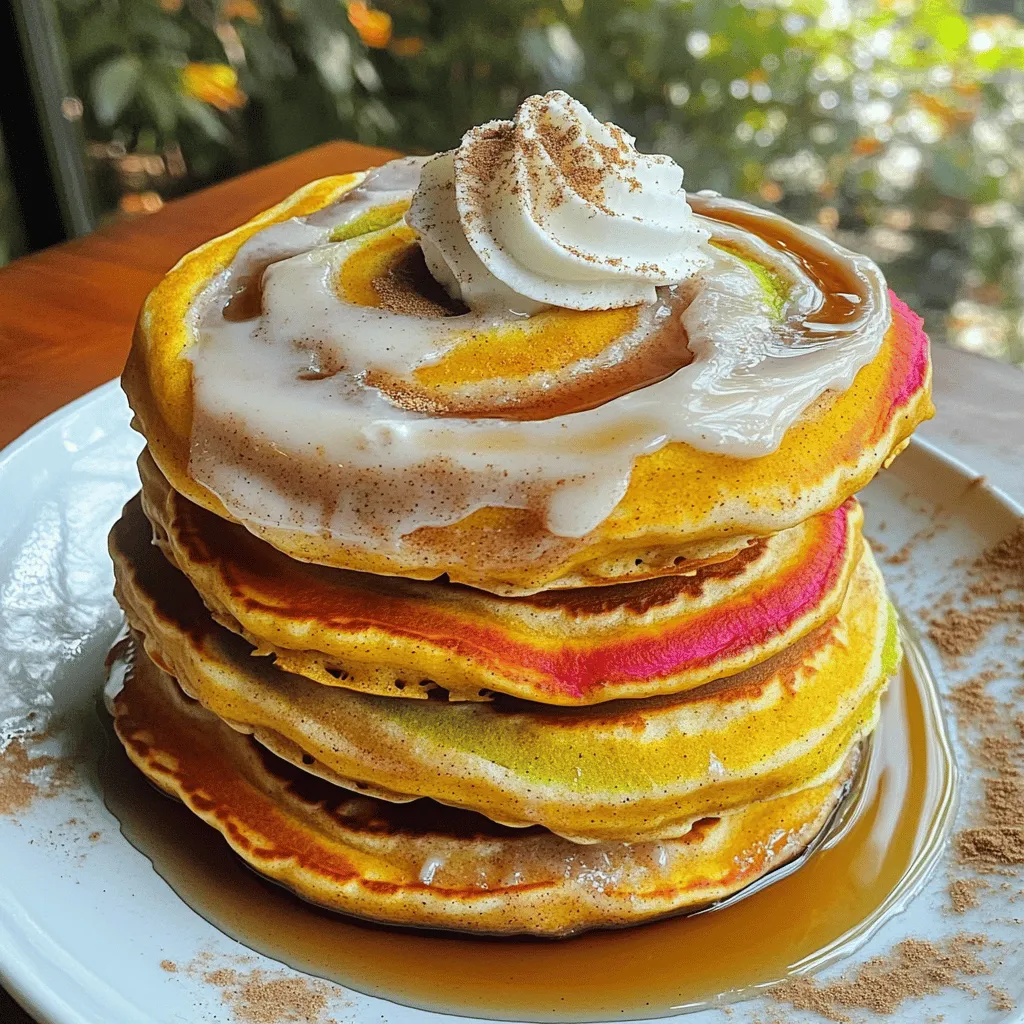
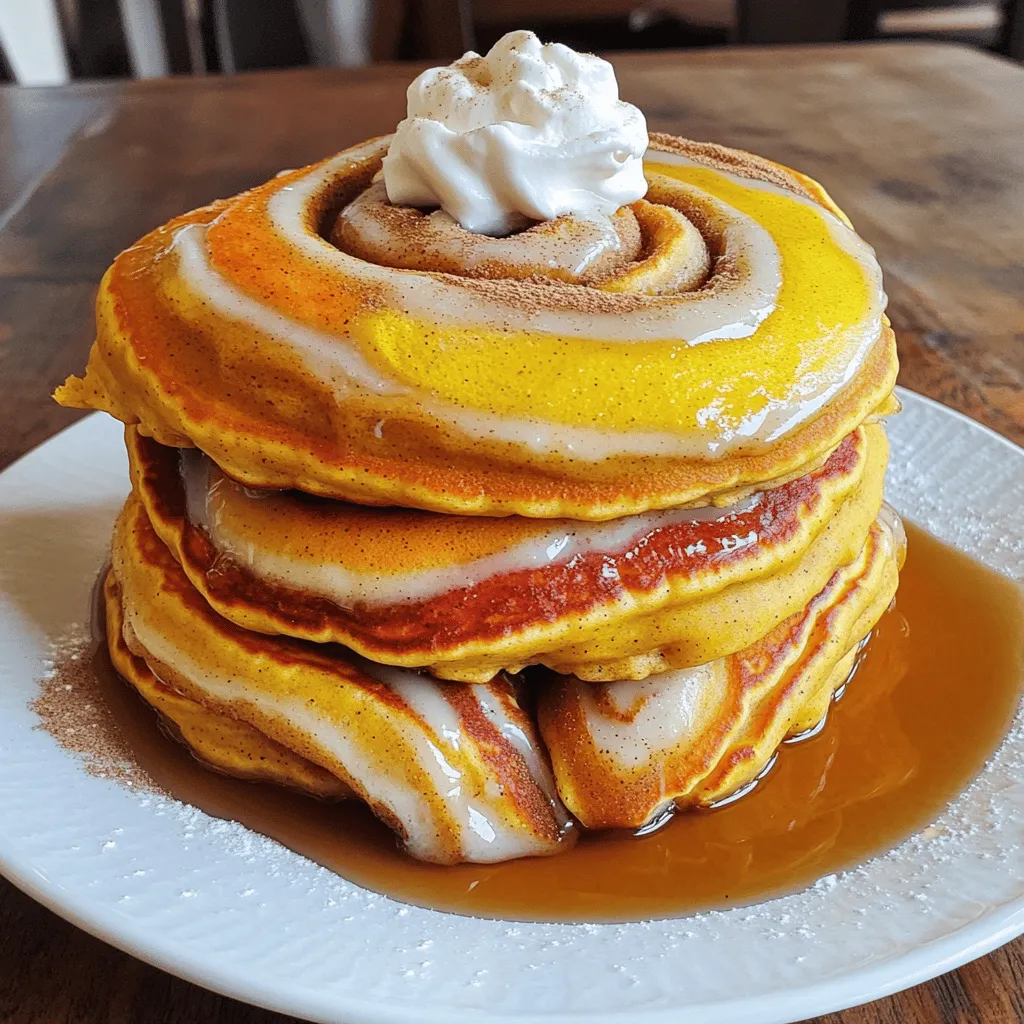
Get ready to indulge in the cozy flavors of fall with my Pumpkin Spice Cinnamon Roll Pancakes! These fluffy pancakes combine the warm spice of pumpkin with a sweet cinnamon swirl, topped with a rich cream cheese glaze. They’re not just tasty; they’re easy to make! Join me as I guide you through each simple step, tips, and fun variations to enjoy this delicious treat any time of year.
Ingredients
Main Ingredients for Pumpkin Spice Cinnamon Roll Pancakes
To make these tasty pancakes, you need the following items:
– 1 cup all-purpose flour
– 2 tablespoons brown sugar
– 1 teaspoon baking powder
– 1 teaspoon baking soda
– 1 teaspoon ground cinnamon
– 1/2 teaspoon ground nutmeg
– 1/2 teaspoon ground ginger
– 1/4 teaspoon salt
– 1/2 cup canned pumpkin puree
– 1 cup buttermilk (or 1 cup milk with a splash of vinegar)
– 1 large egg
– 2 tablespoons melted butter
These ingredients make a rich, spiced batter that bursts with flavor. The pumpkin puree gives the pancakes a soft texture and a lovely color. The spices bring warmth and depth, perfect for cozy mornings.
Cinnamon Swirl Ingredients
To make the delightful cinnamon swirl, gather these ingredients:
– 2 tablespoons softened butter
– 1/4 cup brown sugar
– 1 tablespoon ground cinnamon
This swirl adds a sweet, gooey touch. It creates that classic cinnamon roll flavor. When you drizzle it on the pancake batter, it makes a beautiful pattern.
Cream Cheese Glaze Ingredients
For the creamy glaze, you will need:
– 4 oz cream cheese, softened
– 1/2 cup powdered sugar
– 2 tablespoons milk
– 1/2 teaspoon vanilla extract
This glaze brings everything together. It adds a sweet, tangy finish that complements the warm spices perfectly. You can adjust the glaze’s thickness with more or less milk.Enjoy making these delicious pancakes!
Step-by-Step Instructions
Preparing the Pancake Batter
To start, gather your ingredients. You need flour, brown sugar, baking powder, baking soda, cinnamon, nutmeg, ginger, salt, pumpkin puree, buttermilk, an egg, and melted butter. In a large bowl, mix the flour, brown sugar, baking powder, baking soda, cinnamon, nutmeg, ginger, and salt. Whisk them well to combine. In another bowl, blend the pumpkin puree, buttermilk, egg, and melted butter until smooth. Now, slowly add the wet mix to the dry mix. Stir gently, leaving a few lumps. This keeps the pancakes fluffy.
Making the Cinnamon Swirl
For the cinnamon swirl, you need butter, brown sugar, and cinnamon. Take a small bowl and mix softened butter, brown sugar, and cinnamon until it forms a smooth paste. This will create that delicious, sweet spiral in your pancakes. Set it aside for later.
Cooking the Pancakes
Next, heat a non-stick skillet or griddle over medium heat. Lightly grease it with butter or cooking spray. Pour about 1/4 cup of pancake batter onto the hot surface. Quickly drizzle about one teaspoon of the cinnamon swirl on top. Use a toothpick or knife to swirl the mixture into the batter. Cook until you see bubbles and the edges look set, about 2-3 minutes. Flip the pancake and cook for another 2-3 minutes until golden brown. Repeat with the rest of the batter.
Tips & Tricks
Best Practices for Fluffy Pancakes
To make your pancakes fluffy, use fresh baking powder and baking soda. These ingredients help the batter rise. Mix the wet and dry ingredients separately first. Combine them gently to avoid overmixing. Lumps in the batter are okay; they help keep the pancakes soft.
Achieving the Perfect Cinnamon Swirl
For a great cinnamon swirl, mix softened butter with brown sugar and cinnamon. The mixture should be smooth but thick. Drizzle this swirl onto the pancake batter right after pouring it onto the skillet. Use a toothpick to gently swirl the mixture in. This creates beautiful patterns.
Ideas for Serving and Presentation
Presentation is key for these pancakes. Stack them high on a plate for a stunning look. Drizzle the cream cheese glaze generously on top. A sprinkle of cinnamon adds a nice touch. Serve with maple syrup and whipped cream on the side for extra flavor. Enjoy the warm, cozy vibe these pancakes bring!

Variations
Gluten-Free Pumpkin Spice Cinnamon Roll Pancakes
You can easily make these pancakes gluten-free. Just swap the all-purpose flour with a gluten-free blend. Many brands fit well in this recipe. Make sure your baking powder is also gluten-free. This way, everyone can enjoy these tasty treats without worry.
Vegan Adaptations
To make these pancakes vegan, use plant-based milk instead of buttermilk. You can use almond, soy, or oat milk. Replace the large egg with a flax egg. Mix one tablespoon of flaxseed meal with three tablespoons of water. Let it sit for five minutes to thicken. Lastly, swap butter for coconut oil or a vegan butter.
Creative Add-ins and Toppings
Feel free to get creative! Add chocolate chips to the batter for a sweet twist. Nuts like pecans or walnuts can add a nice crunch. You can also mix in dried fruits like cranberries for a burst of flavor. For toppings, try fresh fruit, whipped cream, or even a sprinkle of nuts for extra texture. Don’t forget to drizzle with maple syrup for a classic touch.
Storage Information
How to Store Leftover Pancakes
To store leftover pancakes, let them cool first. Place them in an airtight container. You can stack them, but use parchment paper between layers. This keeps them from sticking together. Store pancakes in the fridge for up to three days.
Reheating Tips
When you’re ready to enjoy those pancakes again, you have options! The quickest way is to use the microwave. Place pancakes on a plate and cover them with a damp paper towel. Heat for about 20-30 seconds. If you want them crisp, use the toaster or an oven. Preheat your oven to 350°F (175°C). Heat pancakes for about 5-10 minutes until warm.
Freezing Instructions
Freezing pancakes is easy and a great way to save them! First, let the pancakes cool completely. Then, place parchment paper between each pancake and stack them. Wrap the stack in plastic wrap or foil, then place it in a freezer bag. Press out as much air as possible before sealing. You can freeze them for up to three months. When you’re ready to eat, just thaw them in the fridge overnight or heat them straight from the freezer. Enjoy your tasty Pumpkin Spice Cinnamon Roll Pancakes anytime!
FAQs
Can I use fresh pumpkin instead of canned?
Yes, you can use fresh pumpkin. Just cook and mash it first. Fresh pumpkin can give a brighter flavor. Make sure to remove excess moisture. This keeps your pancakes fluffy.
How can I make the glaze thicker?
To thicken the glaze, add more powdered sugar. Start with a tablespoon at a time. Mix well after each addition. You can also use less milk if you want a thicker texture.
What other spices can I add to the pancakes?
You can add spices like allspice or cloves. These spices add warmth and depth. A pinch of cardamom can also enhance the flavor profile. Experiment to find your perfect blend.
Can I prepare the batter in advance?
Yes, you can prepare the batter ahead of time. Store it in the fridge for up to 24 hours. Just give it a gentle stir before cooking. This saves time on busy mornings.
These pumpkin spice cinnamon roll pancakes bring joy to breakfast. We covered key ingredients, including the rich cream cheese glaze. You learned step-by-step how to create fluffy pancakes with a perfect swirl. I shared tips to make them even better and fun variations to try.
In conclusion, enjoy making these tasty pancakes. They’re a warm treat for any day. With some simple swaps, you can personalize your pancakes, too. Happy cooking!


![To make these healthy pumpkin muffins, you will need: - 1 cup canned pumpkin puree - 1/2 cup Greek yogurt - 1/3 cup honey or maple syrup - 1/4 cup coconut oil, melted - 2 large eggs - 1 teaspoon vanilla extract - 1 1/2 cups whole wheat flour - 1 teaspoon baking powder - 1/2 teaspoon baking soda - 1 teaspoon ground cinnamon - 1/2 teaspoon ground nutmeg - 1/4 teaspoon ground ginger - 1/4 teaspoon salt - 1/2 cup chopped walnuts or pecans (optional) - 1/2 cup dark chocolate chips (optional) These ingredients come together to create a moist and flavorful muffin. Pumpkin adds natural sweetness and moisture, while Greek yogurt gives it a light texture. Whole wheat flour boosts fiber content, making these muffins a healthier choice. You can easily swap some ingredients for healthier options: - Instead of whole wheat flour, try almond flour for a gluten-free version. - Use unsweetened applesauce in place of honey or maple syrup to cut sugar. - Replace coconut oil with unsweetened mashed banana for a lower-fat option. - Use flax eggs instead of regular eggs for a vegan version. These substitutions help enhance the health benefits without losing flavor. Each swap keeps the muffins light and tasty. To make these muffins even more special, consider adding in: - 1/2 cup chopped nuts for a crunchy texture. - 1/2 cup dark chocolate chips for a sweet surprise. - Dried fruit like cranberries or raisins for added sweetness. - A sprinkle of pumpkin seeds on top for a nutty taste. These add-ins can enhance the flavor and make your muffins unique. Feel free to get creative and mix in your favorite ingredients. You can find the complete details in the Full Recipe for Healthy Pumpkin Muffins. Start by preheating your oven to 350°F (175°C). This helps the muffins bake evenly. Line your muffin tin with paper liners or lightly spray it with non-stick spray. In a large bowl, mix together the pumpkin puree, Greek yogurt, honey (or maple syrup), melted coconut oil, eggs, and vanilla extract. Stir until smooth and creamy. Make sure every ingredient is well blended. In another bowl, sift the whole wheat flour, baking powder, baking soda, ground cinnamon, nutmeg, ginger, and salt. This step helps distribute the leavening agents and spices evenly. Now, slowly add the dry ingredients to the wet mixture. Stir gently just until blended. Avoid overmixing. This keeps the muffins light and fluffy. If you want, fold in the chopped walnuts or pecans and dark chocolate chips for extra flavor. Pour the batter into the muffin cups. Fill each cup about two-thirds full to allow the muffins to rise. Place the muffin tin in the preheated oven. Bake for 18-20 minutes. To check if the muffins are done, insert a toothpick into the center of one muffin. If it comes out clean, they are ready. Let the muffins cool in the tin for about 5 minutes. Then, transfer them to a wire rack to cool completely. Enjoy your healthy pumpkin muffins! For the complete recipe, check [Full Recipe]. To get the best muffin texture, mix your wet and dry ingredients gently. Overmixing can cause dense muffins. I recommend folding the dry mix into the wet mix until you see no flour pockets. This method keeps your muffins light and fluffy. Also, use room-temperature ingredients. They blend better and help the muffins rise. Store your muffins in an airtight container. This keeps them moist and fresh. If you plan to eat them in a few days, place a slice of bread in the container. The bread helps absorb excess moisture, which keeps muffins from getting soggy. For added freshness, keep them in the fridge. Freezing muffins is a great way to save them for later. Allow them to cool completely, then wrap each muffin in plastic wrap. Place them in a freezer bag, squeezing out as much air as possible. They stay fresh for up to three months. When you're ready to eat one, thaw it at room temperature or warm it in the microwave. Enjoy your delicious pumpkin muffins anytime! For the full recipe, check out the detailed guide above. {{image_4}} You can easily make these muffins gluten-free. Use 1 ½ cups of gluten-free flour blend. Look for blends that include xanthan gum for the best results. Mix the dry ingredients just like in the original recipe. The muffins still taste great and stay moist! To make vegan pumpkin muffins, swap the eggs for flax eggs. Mix 1 tablespoon of ground flaxseed with 2.5 tablespoons of water for each egg. Let it sit for about 5 minutes to thicken. Replace Greek yogurt with a plant-based yogurt. Use maple syrup instead of honey for sweetness. The muffins will be just as tasty without any animal products! You can cut back on sugar or use sugar-free options. Replace honey or maple syrup with a sugar substitute, like erythritol or stevia. You can also reduce the amount of sweetener by a third. This keeps your muffins light without losing flavor. Feel free to add more spices for extra taste! For the full recipe, check out Pumpkin Spice Delight Muffins 🥮. To keep your pumpkin muffins fresh, store them in an airtight container. This helps prevent them from drying out. You can also place a slice of bread inside the container. The bread will help keep the muffins moist. If you want to keep them for longer, consider freezing them. Wrap each muffin tightly in plastic wrap, then place them in a freezer bag. This keeps them safe from freezer burn. When kept at room temperature, these muffins stay fresh for about 2-3 days. If you place them in the fridge, they can last up to a week. For longer storage, freeze them. In the freezer, they can last for about 2-3 months. Just make sure to label the bag with the date, so you remember when you made them. To enjoy your leftover muffins, you can reheat them in the microwave. Heat them for about 10-15 seconds. This warms them up nicely without drying them out. If you prefer a crispier texture, pop them in the oven at 350°F (175°C) for about 5-7 minutes. This will make the tops nice and crunchy. If you want to add a little extra flavor, spread a bit of butter or cream cheese on top before reheating. Enjoy these delicious treats again! Yes, you can use fresh pumpkin. Start by roasting a pumpkin until it’s soft. Scoop out the flesh and mash it until smooth. This fresh pumpkin gives a vibrant taste and rich texture. Just remember, you need about the same amount as the canned puree. Pumpkin muffins are healthy for many reasons. First, pumpkin is full of vitamins, especially vitamin A. It also has fiber, which helps your digestion. Using whole wheat flour adds more nutrients and fiber than white flour. Greek yogurt keeps the muffins moist while adding protein and cutting down on fat. Honey or maple syrup provides natural sweetness without refined sugar. To lower the fat in these muffins, you can replace coconut oil with unsweetened applesauce. Applesauce keeps the muffins moist while cutting fat. You can also use egg whites instead of whole eggs. This change reduces fat while still providing structure. Another tip is to skip the nuts or chocolate chips, or use less. These simple swaps can help you enjoy delicious muffins with less fat. For the complete recipe, check out the Full Recipe. Healthy pumpkin muffins are easy to make and enjoy. We covered key ingredients, like whole grains and spices. You can swap ingredients for healthier choices, too. I shared steps for mixing the batter and baking. Tips for perfect texture and storage help keep them fresh. Variations like gluten-free and vegan options make these muffins fit everyone's diet. In the end, these muffins are tasty and good for you. Enjoy making them in your kitchen!](https://goldendishy.com/wp-content/uploads/2025/07/7aede86b-29cc-40d2-aae7-1e9b0f50f077-768x768.webp)
![- 1 cup cherries, pitted and chopped - 1 cup unsweetened applesauce - 1/2 cup peanut butter or almond butter - 1/2 cup honey or maple syrup - 1 teaspoon vanilla extract - 2 cups rolled oats - 1/2 cup chocolate protein powder - 1 teaspoon baking powder - 1/2 teaspoon baking soda - 1/4 teaspoon salt - 1/3 cup dark chocolate chips To make the best Cherry Chocolate Protein Muffins, you need fresh ingredients. Start with cherries. Choose ripe cherries for a sweet taste. Pitting and chopping them helps mix them into the batter easily. Next, use unsweetened applesauce. It adds moisture and replaces some fat. This keeps the muffins light and fluffy. If you prefer a nutty flavor, choose between peanut butter or almond butter. Both work well. For sweetness, you can pick honey or maple syrup. Each adds a unique flavor. Don’t forget the vanilla extract. It enhances the overall taste. Now, let’s talk about the dry ingredients. Rolled oats add texture and fiber. They also help bind the muffins. The chocolate protein powder is key for a protein boost. It makes these muffins a healthy snack. Add baking powder and baking soda for lift. This ensures your muffins rise well. Lastly, sprinkle in some salt to balance the sweetness. The dark chocolate chips are the fun part. They melt in the oven and create pockets of gooey chocolate. This makes every bite a treat! For the full recipe, check out the instructions in the next section. Enjoy every step of making these delicious muffins! 1. First, preheat your oven to 350°F (175°C). This step is key to baking muffins evenly. 2. Prepare your muffin tin by lining it with paper liners. You can also lightly grease each cup to help prevent sticking. 3. In a large mixing bowl, combine the unsweetened applesauce, your choice of nut butter, honey, and vanilla extract. Mix well with a whisk or spatula until smooth. 4. Now, it’s time to fold in the chopped cherries. Gently stir them into the wet mixture. Make sure they spread evenly throughout the batter. 5. In another bowl, whisk together the rolled oats, chocolate protein powder, baking powder, baking soda, and salt. This mix will give your muffins a nice rise. 6. Gradually add the dry mix to the wet mixture. Fold them together gently, being careful not to overmix. Overmixing can make your muffins tough. 7. Next, fold in the dark chocolate chips. Ensure they are well-distributed, so you get a chocolate burst in every bite. 8. Use a spoon or an ice cream scoop to pour the batter into the muffin tin. Fill each cup about 2/3 full to allow room for rising. 9. Bake the muffins in your preheated oven for 18-20 minutes. Check for doneness by inserting a toothpick into the center. If it comes out clean, they are ready! 10. Once baked, remove the muffins and let them cool in the tin for 5 minutes. Then, transfer them to a wire rack to cool completely. This step helps keep the texture light and fluffy. For the full recipe, check out the details above. Enjoy your delicious Cherry Chocolate Protein Muffins! To make the best Cherry Chocolate Protein Muffins, avoid overmixing the batter. Overmixing can lead to tough muffins. Mix just until the dry and wet ingredients combine. This keeps your muffins light and fluffy. Measuring ingredients accurately is also key. Use dry measuring cups for solids like oats and protein powder. For liquids, use a liquid measuring cup. This ensures you add the right amounts for great results. I love serving these muffins warm. They taste best right out of the oven. A light dusting of powdered sugar or a drizzle of melted dark chocolate adds a special touch. You can also pair them with Greek yogurt for extra protein and creaminess. For a balanced meal, enjoy these muffins with a side of fruit. Slices of banana or a handful of berries can brighten your plate and add freshness. These muffins are packed with health benefits. Protein powder offers a great source of protein. It helps build and repair muscles. This makes them perfect for post-workout snacks. Cherries are rich in antioxidants. They help fight inflammation and support heart health. Oats provide fiber, which is good for digestion. They also keep you feeling full longer, making these muffins a smart choice for any time of day. For the complete recipe, check out the [Full Recipe]. {{image_4}} You can make Cherry Chocolate Protein Muffins gluten-free by using certified gluten-free oats. Almond flour also works well here. For a vegan option, replace honey with maple syrup. Use a vegan protein powder to keep it plant-based. This way, everyone can enjoy these tasty muffins, no matter their diet. - Gluten-free: Use gluten-free oats and almond flour. - Vegan: Swap honey for maple syrup and use vegan protein powder. Spicing up your muffins can add a fun twist. Try adding 1 teaspoon of cinnamon or nutmeg to the mix. This small change can bring warmth and depth to the flavor. You might also want to mix in nuts or seeds. Chopped walnuts or sunflower seeds can add crunch and nutrition to your muffins. - Spices: Add 1 teaspoon of cinnamon or nutmeg. - Nuts or seeds: Incorporate chopped walnuts or sunflower seeds. You can customize these muffins with fruits that are in season. In summer, try adding blueberries or peaches. In fall, diced apples or pumpkin puree would be delightful. Different types of chocolate can also change the taste. Dark chocolate, milk chocolate, or even white chocolate can make the muffins exciting and unique. - Seasonal fruits: Use blueberries in summer or apples in fall. - Chocolate types: Experiment with dark, milk, or white chocolate. To keep your Cherry Chocolate Protein Muffins fresh, follow these simple steps: - Allow the muffins to cool completely before storage. - Use an airtight container to maintain moisture. - Place parchment paper between layers to avoid sticking. I find that glass containers work best because they help keep the muffins soft and fresh. Freezing muffins is a great way to enjoy them later. Here’s how to do it: - Allow the muffins to cool fully. - Wrap each muffin in plastic wrap or aluminum foil, then place them in a freezer bag. - Label the bag with the date for easy tracking. When you’re ready to eat, thaw the muffins by leaving them out at room temperature. For quicker results, pop them in the microwave for about 20 seconds. This method keeps them moist and tasty. Cherry Chocolate Protein Muffins can last: - At room temperature: 3 to 4 days in an airtight container. - In the fridge: 1 week if stored properly. This means you can enjoy these muffins without worry for several days! Remember to check for freshness before eating. Enjoy your delicious snacks! Can I make these muffins ahead of time? Yes, you can make these muffins ahead of time. They store well for a few days. Just make sure to keep them in an airtight container. You can also freeze them for longer storage. What can I use instead of protein powder? If you don't have protein powder, you can use ground oats or almond flour. This will change the texture a bit but keeps the muffins tasty. You might need to adjust the liquid in the recipe. How can I reduce sugar in the recipe? To cut down on sugar, use less honey or maple syrup. You can also swap in a sugar substitute like stevia. This will help keep the sweetness but lower the sugar content. Is it possible to use fresh cherries instead of frozen? Yes, fresh cherries work great too! Just chop them up and remove the pits. Fresh cherries can add a nice burst of flavor. They may make the muffins a bit moister, so keep an eye on baking time. What is the protein content per muffin? Each muffin has about 7 grams of protein. This comes mainly from the protein powder and nut butter. It makes a healthy snack or breakfast option. Are these muffins suitable for kids? Absolutely! These muffins are great for kids. They are tasty and packed with nutrients. Plus, the chocolate bits make them fun to eat. In this article, we explored how to make delicious Cherry Chocolate Protein Muffins. We covered ingredients, step-by-step instructions, and tips for perfecting the recipe. You learned how to store these muffins and adapt them for different diets. These muffins are not just tasty; they offer health benefits too. Experiment with flavors and enjoy them as snacks or meals. Now, grab your ingredients and start baking your own batch today!](https://goldendishy.com/wp-content/uploads/2025/07/bcf12119-4bc4-4824-810e-f617231ac2e7-768x768.webp)