Pickle Ranch Chicken Pizza Flavorful Easy Dinner Option

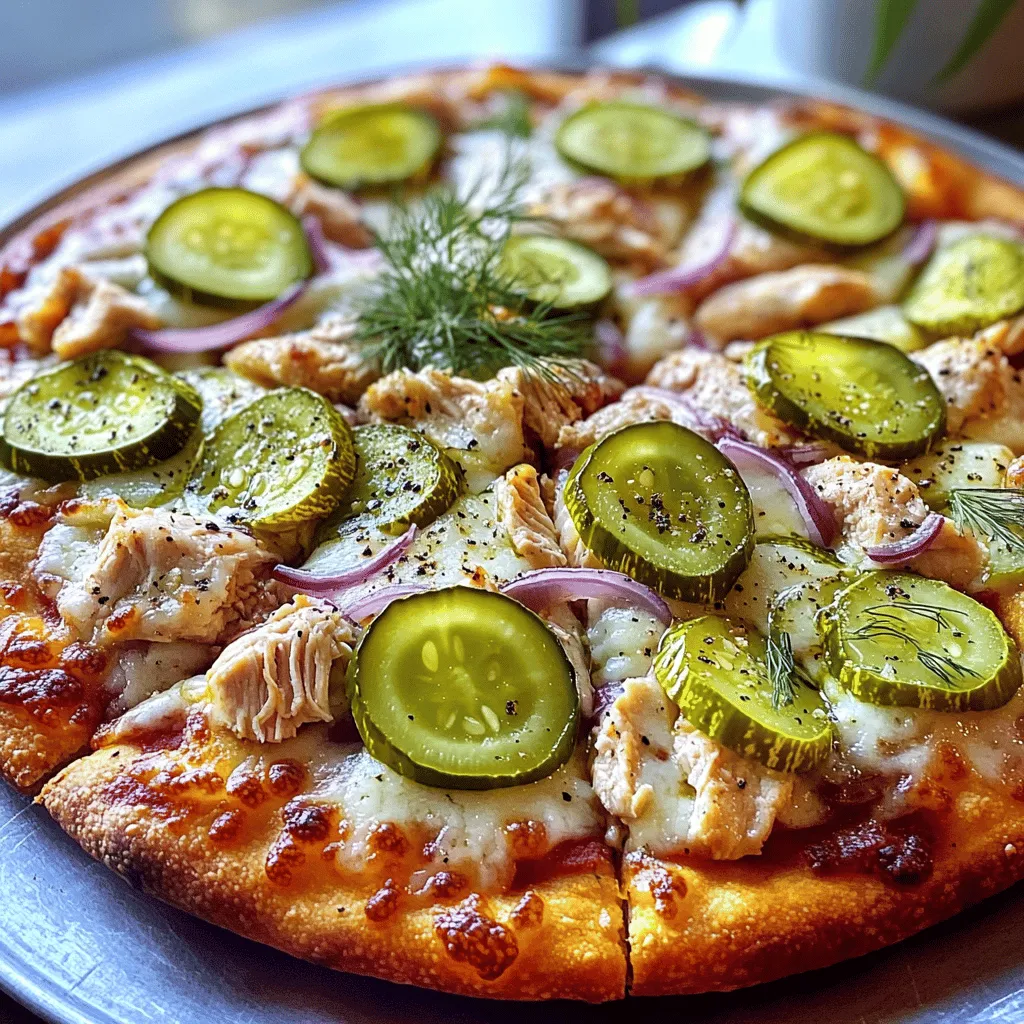
Looking for a quick and fun dinner idea? Let me introduce you to Pickle Ranch Chicken Pizza! This dish combines tender chicken, creamy ranch, and tangy pickles all on a crispy crust. It takes only a few ingredients and a short cook time, making it perfect for busy nights. Plus, kids love it! Dive into my easy, step-by-step recipe and impress your family with this unique pizza!
Ingredients
To create a delicious Pickle Ranch Chicken Pizza, gather these simple ingredients:
– 1 pre-made pizza dough
– 1 cup cooked chicken, shredded
– 1/2 cup ranch dressing
– 1 cup shredded mozzarella cheese
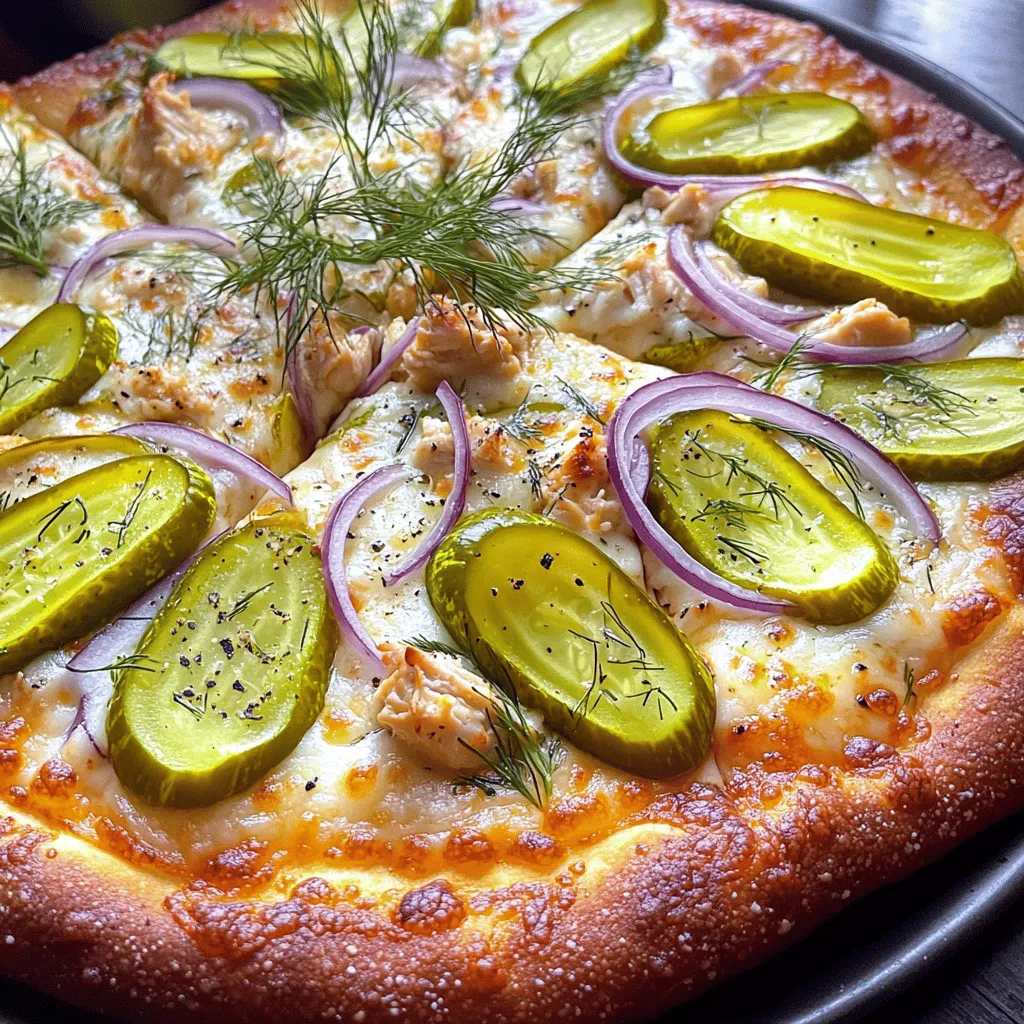
– 1 cup dill pickles, sliced
– 1/2 red onion, thinly sliced
– 1/4 teaspoon garlic powder
– 1/4 teaspoon black pepper
– Fresh dill, for garnish (optional)
These ingredients blend together to create a unique flavor. The ranch dressing adds creaminess, while the dill pickles bring tang and crunch. The mozzarella cheese melts beautifully, creating a comforting layer. Each bite bursts with flavor, making this pizza a favorite at any table.Enjoy making this easy dish!
Step-by-Step Instructions
Prepping the Pizza Dough
– Preheat your oven to 475°F (245°C) or follow your package instructions.
Making the Chicken Mixture
– In a bowl, mix shredded chicken with ranch dressing, garlic powder, and black pepper. Stir it well.
Assembling the Pizza
– Spread the chicken mixture on the dough. Layer it with mozzarella cheese. Top with dill pickles and red onions.
Baking the Pizza
– Bake for 12-15 minutes until the crust is golden brown and the cheese bubbles. Keep an eye on it to avoid burning.This pizza is fun to make and even better to eat!
Tips & Tricks
Perfecting the Crust
For a great crust, aim for a thickness of about 1/4 inch. This strikes a nice balance between crispy edges and a soft center. Roll the dough evenly to avoid any thick spots. If you want extra crunch, bake it for a few minutes before adding toppings. This helps the base set and keeps it from getting soggy.
Flavor Enhancements
To elevate your Pickle Ranch Chicken Pizza, think about adding spices. A pinch of smoked paprika or cayenne can add warmth. You can also try different cheeses. Blend mozzarella with cheddar for a tasty twist. Experiment with feta for a sharp flavor or gouda for a rich, creamy touch.
Serving Suggestions
Serve your pizza on a wooden cutting board for a rustic look. Add extra dill pickles on the side for crunch. A small bowl of ranch dressing makes a fun dip. You can also slice fresh herbs like parsley or chives to sprinkle on top. This adds color and freshness to each slice. Enjoy your masterpiece with friends or family for a fun dinner night!

Variations
Different Dough Options
You can switch up the pizza dough for fun flavors and textures. Here are some options:
– Cauliflower crust: This is a great low-carb choice. It adds a nice crunch and veggie goodness.
– Gluten-free dough: Perfect for those with gluten allergies. Look for pre-made options in stores.
– Whole wheat dough: This gives you a hearty base. It also packs in extra fiber.
Feel free to get creative with your dough choice! Each option gives a new taste to your pizza.
Alternative Toppings
Adding different toppings can make your pizza unique. Here are some ideas to try:
– Bacon: Crispy bacon bits add a savory twist. They bring extra flavor and crunch.
– Different vegetables: Think bell peppers, mushrooms, or even jalapeños. They add color and freshness.
– Cheese types: Swap mozzarella for cheddar or gouda. Each cheese has a distinct flavor that can change your pizza.
Mix and match these toppings to suit your taste!
Customizing Ranch Dressing
Ranch dressing is the star of this pizza. You can easily make it your own:
– Add herbs: Fresh herbs like chives or parsley can brighten the flavor.
– Spice it up: Add a pinch of cayenne or hot sauce for a kick.
– Creamy twists: Mix in sour cream or Greek yogurt for a thicker texture.
Experiment with these ranch dressing ideas to add a personal touch to your pizza.
Storage Info
How to Store Leftovers
To keep your Pickle Ranch Chicken Pizza fresh, store it in the fridge. Place the leftovers in an airtight container. If you don’t have one, wrap the pizza tightly in plastic wrap or aluminum foil. This method helps prevent the pizza from drying out. It can last for about three days in the fridge. For the best taste, enjoy it within the first two days.
Reheating Suggestions
When it’s time to reheat, avoid the microwave if possible. Microwaving can make the crust soggy. Instead, use an oven or a skillet. Preheat your oven to 350°F (175°C). Place the pizza on a baking sheet for about 10-12 minutes. This method keeps the crust crispy and the cheese melty. If using a skillet, heat it over medium. Place the pizza in the skillet, cover it, and heat for about 5-7 minutes.
Freezing for Later
If you want to save your pizza for later, freezing is a great option. First, let the pizza cool completely. Then, wrap it tightly in plastic wrap. After that, place it in a freezer-safe bag or container. Make sure to squeeze out any air to avoid freezer burn. It can be frozen for up to three months. When you’re ready to enjoy it, thaw the pizza in the fridge overnight. Then, reheat it in the oven for the best results.
FAQs
What is Pickle Ranch Chicken Pizza?
Pickle Ranch Chicken Pizza is a fun and tasty meal. It blends chicken, ranch dressing, and dill pickles on pizza. The ranch dressing adds a creamy texture. The pickles give a crunchy, tangy flavor. This dish is unique and exciting. You will love the mix of savory and tangy tastes.
Can I make my own ranch dressing?
Yes, you can make ranch dressing at home. Here’s a simple recipe:
– 1 cup buttermilk
– 1/2 cup mayonnaise
– 1 teaspoon garlic powder
– 1 teaspoon onion powder
– 1 teaspoon dried dill
– Salt and pepper to taste
Mix all the ingredients in a bowl. Adjust the salt and pepper as needed. Use this dressing on your pizza for a fresh taste.
What can I serve with this pizza?
Pickle Ranch Chicken Pizza pairs well with many sides. Here are some ideas:
– A fresh garden salad
– Crunchy carrot sticks
– Celery with ranch dip
– Sweet potato fries
These sides add color and flavor to your meal.
Is this recipe suitable for meal prep?
Yes, this recipe is great for meal prep. You can prepare the chicken mixture ahead of time. Store it in the fridge for up to three days. The pizza dough can also be prepped. Roll it out and keep it in the fridge. When you’re ready, just assemble and bake. This makes dinner quick and easy.
This blog post shared a simple recipe for Pickle Ranch Chicken Pizza. You learned about the key ingredients, how to prep and bake the pizza, and tips to make it even better. I also covered variations and how to store leftovers. Remember, cooking should be fun and creative. Use your favorite toppings and enjoy the process. This pizza is not just tasty; it’s easy to customize. Try it out and impress your friends with a unique dish!


![- 1 pound (450g) potato gnocchi - 2 cups marinara sauce - 1 cup ricotta cheese - 1 cup shredded mozzarella cheese - 1/2 cup grated Parmesan cheese - 1 cup baby spinach, roughly chopped - 1/2 cup cherry tomatoes, halved - 1 tablespoon olive oil - 1 teaspoon garlic powder - Salt and pepper to taste - Fresh basil leaves for garnish Cooking gnocchi is simple. You only need a few key ingredients to make this dish shine. Start with potato gnocchi. It gives a soft, fluffy texture. Marinara sauce adds a rich flavor. Ricotta cheese adds creaminess. Mozzarella and Parmesan bring that cheesy goodness. Don’t forget the fresh spinach. It adds color and nutrition. Cherry tomatoes offer a juicy burst in each bite. Olive oil helps everything meld together. Garlic powder adds depth. Finally, you can season with salt and pepper to your liking. - Alternative cheeses for different flavors: You can swap ricotta for cottage cheese. Use provolone or gouda instead of mozzarella for a twist. - Gluten-free gnocchi options: Look for gnocchi made with rice or corn flour. They work just as well! - Seasonal vegetables to replace spinach or tomatoes: Try bell peppers or zucchini in place of spinach. Fresh asparagus or roasted squash can replace tomatoes too. These substitutions keep the dish fresh and exciting. You can adjust based on what you have or what is in season. Check out the Full Recipe for more details on how to create this loaded baked gnocchi dish! - Preheat the oven to 400°F (200°C). - In a large pot, bring salted water to a boil. - Carefully add the potato gnocchi to the boiling water. - Cook until the gnocchi float, about 2-3 minutes. - Use a slotted spoon to transfer them to a colander. - In a big mixing bowl, combine the drained gnocchi with marinara sauce. - Add ricotta cheese, chopped baby spinach, and garlic powder. - Season with a pinch of salt and pepper. - Gently fold the mixture so all gnocchi get coated. - Take a baking dish and grease it with olive oil. - Transfer the gnocchi mixture to the dish, spreading it evenly. - Top the mix with mozzarella and Parmesan cheese. - Scatter halved cherry tomatoes over the cheese layer. - Drizzle olive oil on top for a nice glaze. - Bake in the preheated oven for 20-25 minutes. - Look for bubbly and golden cheese. - Once baked, remove the dish and let it cool. - Garnish with fresh basil leaves before serving. This loaded baked gnocchi dish is a savory delight that brings comfort and joy. For the full recipe, check out the detailed instructions. Enjoy your cooking! To get that perfect gooey cheese texture, use a mix of cheeses. I like ricotta for creaminess and mozzarella for stretch. Bake the dish until the cheese bubbles and starts to brown. Keep an eye on it to avoid burning. For an even golden-brown top, spread the cheese evenly. A light drizzle of olive oil helps too. You can customize this dish for different diets. For a vegan version, swap the cheese with plant-based options. Low-carb eaters can use cauliflower gnocchi instead of potato gnocchi. Try adding different seasonings. Red pepper flakes add heat, while Italian herbs bring freshness. You can also toss in cooked meats for more flavor. Serve the loaded gnocchi in colorful bowls for a nice look. This helps show off the melted cheese and bright tomatoes. Garnish with fresh basil leaves for a pop of color. A sprinkle of cracked black pepper can add an extra touch. For an elegant finish, drizzle a bit of olive oil on top. For the full recipe, check out the [Full Recipe]. {{image_4}} You can change up the flavor by using different sauces. Pesto sauce gives a fresh taste. It pairs well with the gnocchi's soft texture. Spinach-based sauces add a nice green color and taste. They also boost the nutrition. You can also try a cream or Alfredo sauce. This makes the dish rich and creamy. Each sauce brings its own twist to the meal. Adding proteins makes your loaded baked gnocchi heartier. You can use chicken for a classic touch. Sliced sausage adds a nice zing. If you want a plant-based option, mushrooms work great. They soak up flavors and add depth. Tofu is another good choice for a vegetarian boost. These proteins will fill you up and keep the dish exciting. Want to spice things up? You can add heat with red pepper flakes or jalapeños. They give the dish a nice kick. If you prefer smoky flavors, try smoked paprika or bacon bits. These flavors create a unique twist. You might even consider adding a sweet element, like caramelized onions. This balances the savory notes and adds depth. Each of these enhancements can make your dish special. To keep your loaded baked gnocchi fresh, let it cool. Then, place it in an airtight container. This helps prevent moisture loss. You can also use a glass dish with a lid. Make sure to store it in the fridge. This way, it stays safe to eat for later. When reheating, use the oven for the best results. Preheat it to 350°F (175°C). Place the gnocchi in an oven-safe dish, cover it with foil, and heat for about 15-20 minutes. You can also use a microwave, but it may not keep the texture. If you want to freeze it, do so before baking. Wrap it tightly in plastic wrap, then in foil. It can last up to three months in the freezer. In the fridge, loaded baked gnocchi lasts about three to four days. Check for any changes in smell or color to spot spoilage. If you see mold or it smells off, it’s best to throw it away. Enjoy your delicious meal, and don’t hesitate to check out the Full Recipe for more on this tasty dish! Baked gnocchi is done when the cheese is bubbly and golden. It should smell amazing too! Check the edges for a nice brown color. The dish usually takes 20-25 minutes in the oven. Yes, you can make Loaded Baked Gnocchi ahead! Prepare it and store it in the fridge. Just cover it well. When ready to eat, bake it straight from the fridge. You may need to add a few extra minutes to the cooking time. Great side dishes include a simple green salad or garlic bread. You can also serve roasted veggies for a healthy touch. Pairing with a light soup can make it a cozy meal too. Absolutely! Frozen gnocchi works well for this recipe. Just cook it according to the package instructions. Then, follow the steps in the Full Recipe to make it tasty. Yes, Loaded Baked Gnocchi is perfect for meal prep! You can portion it out for easy lunches or dinners. Just store it in airtight containers in the fridge. Enjoy it throughout the week! Loaded Baked Gnocchi is a fun dish you can easily make. You learned about the great ingredients, simple steps to prepare, and ways to customize it. Remember to enjoy experimenting with flavors and textures. You can adapt it to fit your taste. Whether you're storing leftovers or reheating, you can keep it fresh. This dish not only warms your belly but also sparks creativity in your kitchen. Dive in and enjoy making this delicious meal!](https://goldendishy.com/wp-content/uploads/2025/06/a4704798-2aa5-49c0-949b-2886f6a00168-768x768.webp)


