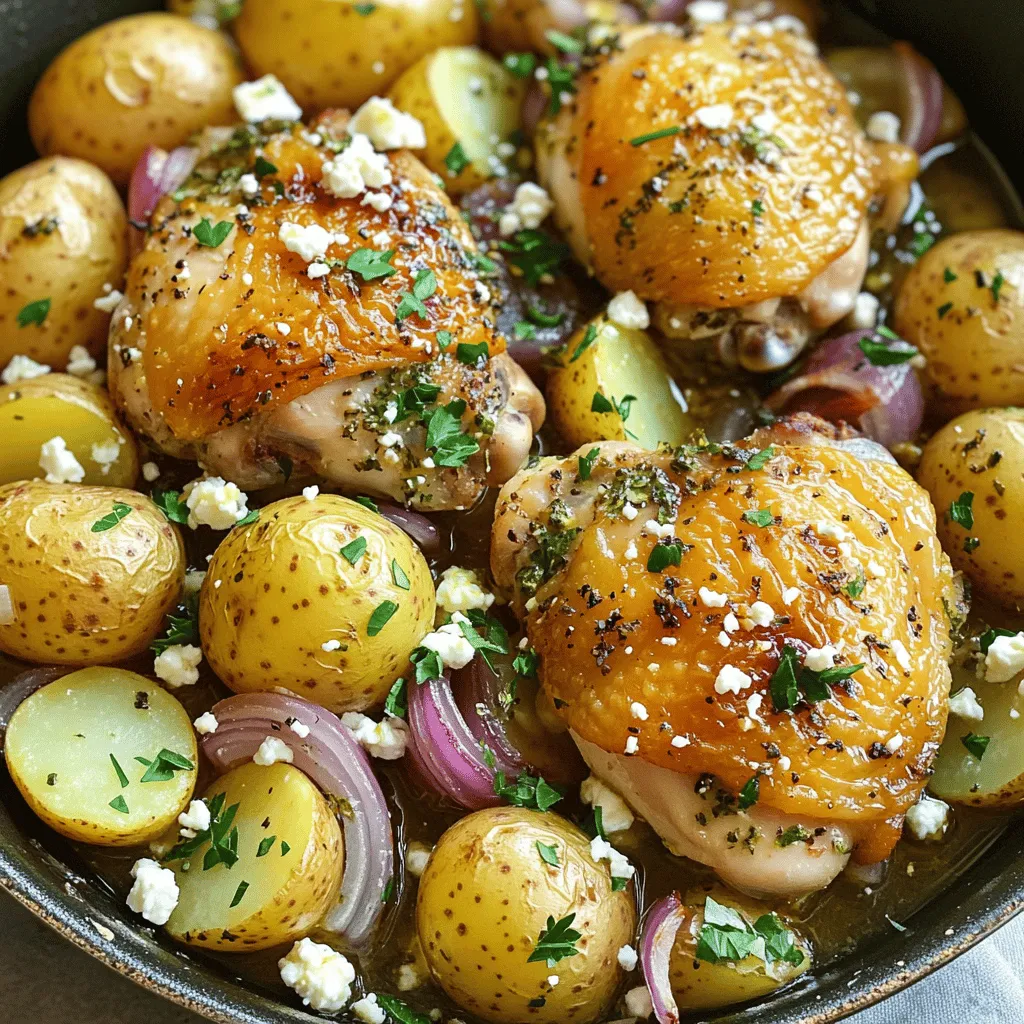
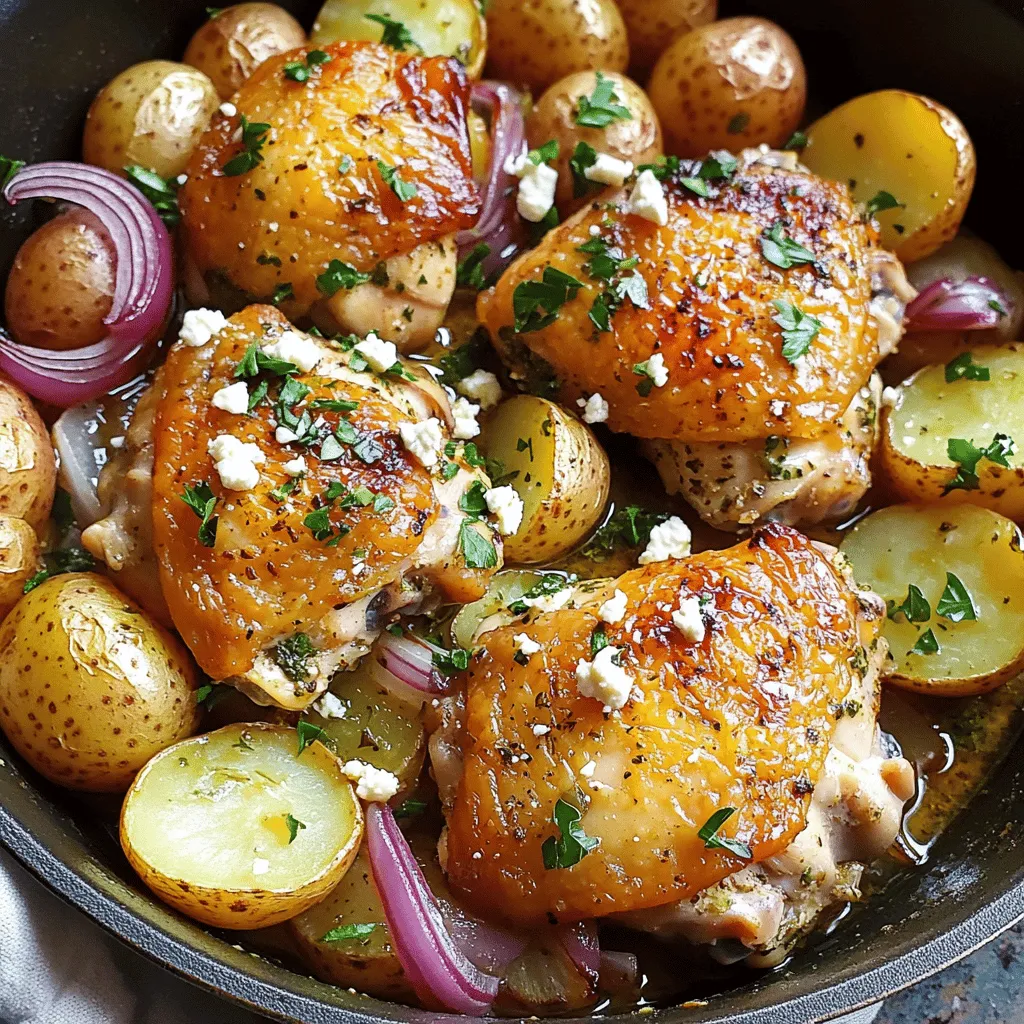
If you crave bold flavors and easy cooking, you’ll love this One-Pan Greek Chicken and Potatoes recipe. With fresh herbs and savory spices, this dish is simple yet satisfying. I’ll guide you through the must-have ingredients, helpful tips, and how to get that perfect crispy skin. Get ready to dive into flavors that dance on your palate and a cooking process that brings joy to your kitchen!
Ingredients
List of Ingredients
To make One-Pan Greek Chicken and Potatoes, you need:
– 4 bone-in, skin-on chicken thighs
– 1 lb baby potatoes, halved
– 1 red onion, quartered
– 4 cloves garlic, minced
– 2 teaspoons dried oregano
– 1 teaspoon dried thyme
– Zest and juice of 1 lemon
– 1/4 cup extra-virgin olive oil
– Salt and freshly ground black pepper to taste
– Fresh parsley, chopped for garnish
– Feta cheese, crumbled for topping (optional)
Each of these ingredients plays a vital role. The chicken gives a rich, savory taste. Baby potatoes add a nice, creamy texture. The red onion brings sweetness, while garlic gives depth. Fresh herbs like oregano and thyme add that classic Greek taste. Using fresh ingredients really boosts the flavors.
Optional Ingredients
While feta cheese is optional, it can take your dish to the next level. The salty, creamy cheese pairs well with the chicken and potatoes. You can also switch up the herbs. Try adding rosemary or basil for a different twist. A sprinkle of red pepper flakes can add a nice kick too.
Nutritional Information
This dish is both hearty and satisfying. One serving has about:
– Calories: 450
– Fats: 25g
– Proteins: 30g
– Carbs: 30g
To make it healthier, use skinless chicken thighs or reduce the olive oil. If you want to indulge, add more feta or serve with crusty bread. Enjoy the balance of flavors while keeping an eye on nutrition!
Step-by-Step Instructions
Preparation Steps
First, let’s prep our chicken and veggies. You need to start by gathering all your ingredients. This step makes cooking smooth and easy.
1. Preheat your oven to 425°F (220°C). This helps get everything ready for roasting.
2. In a small bowl, mix the olive oil, lemon juice, lemon zest, minced garlic, oregano, thyme, salt, and pepper. Whisk this until it’s all combined. This mixture is our marinade.
3. In a large bowl, add the halved baby potatoes and quartered red onion. Drizzle half of the marinade over them. Toss gently to coat well.
4. In another bowl, place the chicken thighs. Pour the rest of the marinade on top. Make sure every piece of chicken gets coated. This step adds great flavor. Marinating helps the chicken absorb all those tasty spices.
Cooking Instructions
Now, let’s cook our dish!
1. Heat a large oven-safe skillet over medium-high heat. When it’s hot, arrange the marinated potatoes and onions at the bottom.
2. Place the marinated chicken thighs skin side up on top. This allows the skin to get crispy while cooking.
3. Transfer the skillet to your preheated oven. Bake for 40-45 minutes. The chicken should be golden brown and cooked through. The potatoes should be tender when you poke them with a fork.
To ensure even cooking, check the chicken and potatoes halfway through. If one side seems to cook faster, you can rotate the skillet.
Broiling for Extra Crispiness
Want that perfect crispy chicken skin? Broiling is the trick!
1. After baking, switch your oven to broil for the last 3-5 minutes. Keep a close eye on it. Chicken can burn quickly under the broiler.
2. Watch for that golden color to develop. This extra step adds a delightful crunch to your meal.
By following these steps, you’ll create a dish full of flavor and joy.Enjoy every bite!
Tips & Tricks
Cooking Tips for Success
To make sure your chicken is juicy, use bone-in, skin-on thighs. This keeps the meat moist. Pat the chicken dry before marinating. It helps the flavors stick better. For tender potatoes, cut them in halves. This allows them to soak up the marinade well. Mix the marinade in a bowl before adding it to the chicken and veggies. This way, every bite bursts with flavor.
Serving Suggestions
Serve your Greek chicken and potatoes with a fresh salad. A simple cucumber and tomato salad pairs nicely. You can also add a side of crusty bread. This helps soak up the tasty juices. For a beautiful look, serve directly from the skillet. Add lemon wedges around the edge. A sprinkle of parsley gives it a pop of color. If you like, top with crumbled feta cheese for extra flavor.
Common Mistakes to Avoid
One common mistake is not marinating long enough. Marinate the chicken for at least 30 minutes. This allows the flavors to penetrate. Also, avoid overcrowding the pan. If the chicken and potatoes are too close, they won’t roast properly. If your chicken is undercooked, check the temperature. It should reach 165°F (75°C) in the thickest part. For vegetables, they should be fork-tender. If they are hard, give them more time in the oven.
Variations
Ingredient Substitutions
You can switch up the main ingredients in this dish. Instead of chicken, try using fish like salmon or cod. These options cook quickly and soak up the flavors well. For potatoes, consider sweet potatoes for a sweeter taste and more nutrients.
You can also change the herbs in the recipe. Try using Italian seasoning for a new twist. Fresh herbs like basil or rosemary can bring a bright taste.
Regional Variations
This dish can adapt to local flavors. For a Greek twist, add Kalamata olives or artichokes. They add a nice saltiness and depth. You can also use local veggies, like zucchini or bell peppers, for a fresh touch.
You might experiment with spices too. A sprinkle of sumac can give a citrusy flavor. This adds to the Mediterranean vibe.
Dietary Options
If you want a gluten-free version, this recipe is already a great choice! All the ingredients are naturally gluten-free. Just ensure your seasonings are also gluten-free.
For a dairy-free meal, skip the feta cheese topping. You can add avocado for creaminess instead.
If you’re looking for a vegan option, replace chicken with chickpeas or tofu. Marinate them just like the chicken. This makes for a hearty, plant-based meal that still packs flavor.
Storage Info
Leftovers
Store your leftovers in an airtight container. Place them in the fridge right after the meal. The chicken and potatoes stay tasty for up to three days. The flavors will blend well and create a delicious bite.
Reheating Instructions
For the best taste, use the oven or a skillet to reheat. Preheat your oven to 350°F (175°C). Place the chicken and potatoes in a baking dish, cover with foil to keep moisture in, and heat for about 20 minutes. If you use a microwave, heat in short bursts, checking every minute. This helps keep the chicken juicy.
Freezing Tips
You can freeze this dish for later. Cool it completely before packing it into a freezer-safe container. Make sure to label the container with the date. It can last up to three months in the freezer. To thaw, move it to the fridge overnight. When ready, reheat in the oven or skillet to restore its crispy texture. Enjoy the flavors of One-Pan Greek Chicken and Potatoes even after a few weeks!
FAQs
What is the best way to marinate chicken?
To marinate chicken well, use a simple mix of olive oil, acid, and spices. I recommend marinating chicken thighs for at least 30 minutes. For deeper flavor, let it sit in the fridge for up to 24 hours. Make sure to coat the chicken evenly. This allows the flavors to soak in and keeps the meat juicy. Don’t forget to cover it to avoid any mess.
Can I make this dish in advance?
Yes, you can make this dish in advance. Prep the chicken and veggies the day before. Store them in the fridge with the marinade. When you are ready to cook, just pop it in the oven. This method keeps flavors strong and saves time. Just be sure to let it sit at room temp for 15 minutes before cooking.
What can I substitute for baby potatoes?
If you can’t find baby potatoes, try using regular potatoes or sweet potatoes. You can also use carrots or turnips for a tasty twist. Just cut them into similar sizes for even cooking. This keeps the dish hearty and full of flavor.
How do I know when the chicken is fully cooked?
The best way to check chicken doneness is by using a meat thermometer. The safe internal temperature is 165°F (74°C). You can also check visually. The juices should run clear, and the meat should not look pink. If you cut into the chicken and it is juicy, you are good to go!
What are some good side dishes to serve with this recipe?
This dish pairs great with fresh salads or grain sides. A simple Greek salad with cucumbers, tomatoes, and feta works well. You can also serve it with quinoa or rice for a filling meal. These sides add freshness and balance to the rich flavors of the chicken and potatoes.
In summary, we’ve covered key ingredients for a tasty dish, including the power of fresh flavors. We explored preparation and cooking steps, stressing marinating and ensuring even cooking. I shared helpful tips for success and common mistakes to avoid. Plus, we looked at tasty variations and how to store leftovers properly. Keep experimenting with ingredients and techniques. Cooking is an art, so enjoy the process! You’ll find that small changes can make a big difference in your meals.


