No Bake Oreo Cheesecake Simple and Delicious Recipe

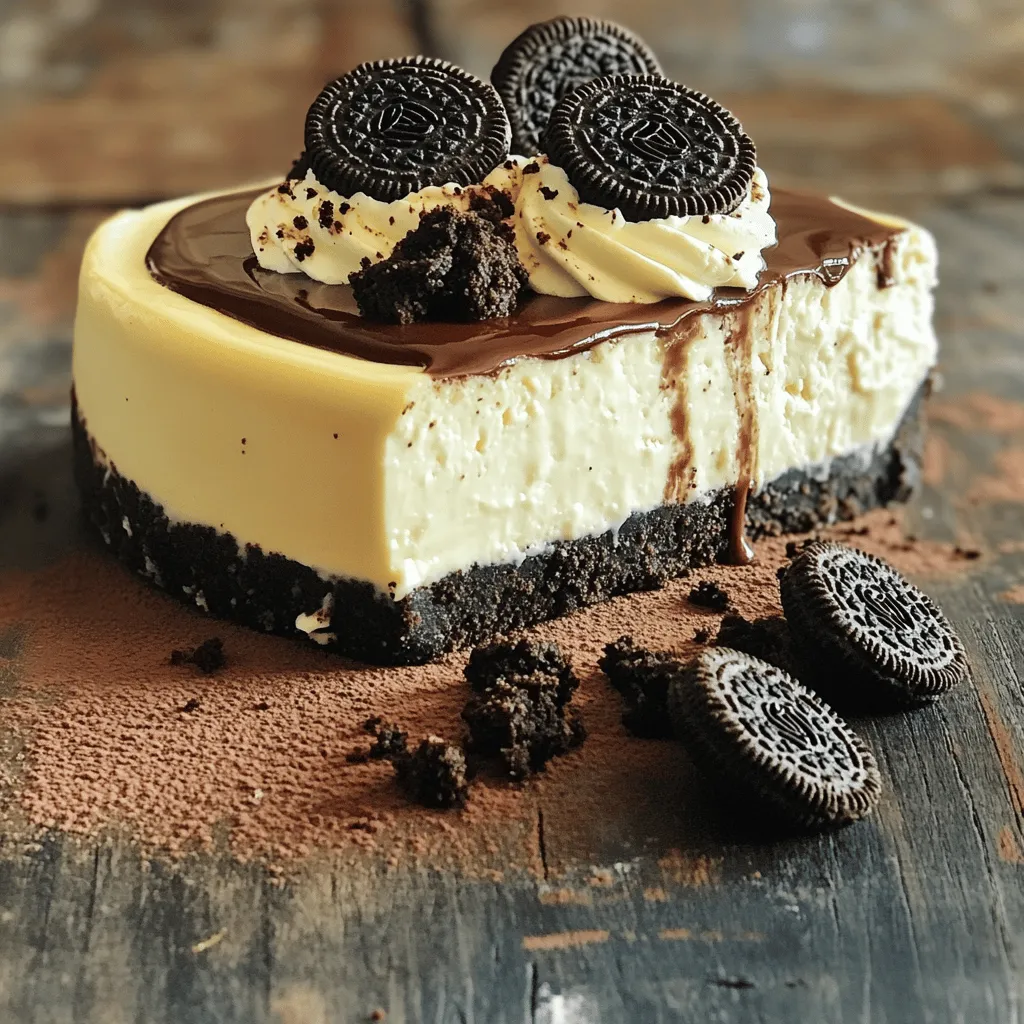
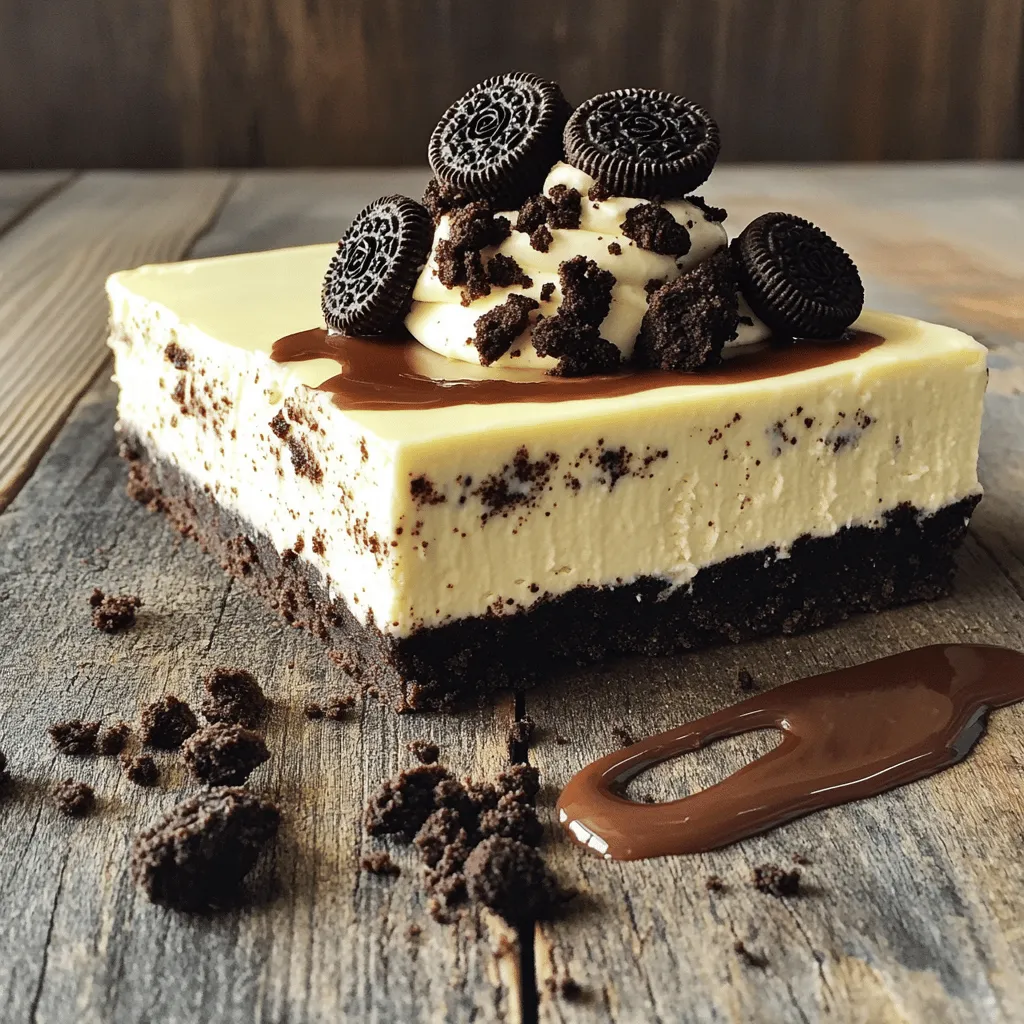
Craving a sweet dessert that’s easy to make? You’ll love this No Bake Oreo Cheesecake! This simple recipe uses rich cream cheese and crumbly Oreos to create a treat you won’t forget. Perfect for parties or a family dinner, it’s a delight anyone can whip up without turning on the oven. Stick around to learn how to make this simple and delicious cheesecake that’s sure to impress!
Ingredients
List of Ingredients
– 24 Oreo cookies, finely crushed
– 1/2 cup unsalted butter, melted
– 2 cups cream cheese, softened to room temperature
– 1 cup powdered sugar, sifted
– 1 teaspoon vanilla extract
– 1 cup heavy whipping cream, chilled
– 10 Oreo cookies, roughly chopped for incorporation
– 4 whole Oreo cookies, for topping
Important Ingredient Notes
– Quality of Oreo cookies: Using fresh Oreo cookies is key. Old or stale cookies can affect taste and texture. Always choose the best quality for a great cheesecake.
– Alternatives for cream cheese: If you want a lighter option, use Greek yogurt instead of cream cheese. It gives a nice tang. For a dairy-free choice, try cashew cream.
– Substitutes for heavy whipping cream: You can use coconut cream for a non-dairy version. It adds a subtle flavor and works well in desserts. If you prefer a lower fat option, use half and half, but the texture may be less rich.
These ingredients all come together to create a simple and delicious No Bake Oreo Cheesecake.
Step-by-Step Instructions
Preparing the Oreo Crust
1. Combine Oreo crumbs and melted butter. In a medium bowl, take 24 finely crushed Oreo cookies. Pour in 1/2 cup of melted unsalted butter. Mix until the crumbs are fully coated.
2. Press the crust into the springform pan. Transfer this mixture into a 9-inch springform pan. Use your hands or a spatula to press it down firmly. Make sure it is compact and even across the bottom.
3. Prep the crust in the freezer. Place the pan in the freezer for about 10 minutes. This will help the crust set while you make the filling.
Making the Cheesecake Filling
1. Beat the cream cheese until smooth. In a large bowl, add 2 cups of softened cream cheese. Use an electric mixer on medium speed. Beat until it is creamy and smooth, with no lumps.
2. Add powdered sugar and vanilla extract. Gradually mix in 1 cup of sifted powdered sugar and 1 teaspoon of vanilla extract. Combine until the mixture is silky and well blended.
3. Whip the heavy cream to stiff peaks. In another bowl, pour in 1 cup of chilled heavy whipping cream. Whip it using a hand mixer until stiff peaks form. This means the cream should hold its shape well.
Assembling the Cheesecake
1. Fold the whipped cream and Oreos into the filling. Carefully add the whipped cream to the cream cheese mixture. Use a spatula to fold gently. Then, add 10 roughly chopped Oreos and fold until evenly mixed.
2. Pour and smooth the filling on the crust. Take the cheesecake filling and pour it over the prepared Oreo crust. Smooth the top with the spatula for an even finish.
3. Cover and refrigerate the cheesecake. Cover the springform pan with plastic wrap. Place it in the fridge for at least 4 hours. This allows the cheesecake to set properly.
Tips & Tricks
Ensuring the Perfect Texture
To get a creamy cheesecake, start with room temperature ingredients. Cold cream cheese makes it hard to mix well. Let it sit out for about 30 minutes. This helps the cream cheese blend smoothly without lumps. When you whip the cream, it should reach stiff peaks. This means it holds its shape and adds fluffiness.
When you mix the whipped cream into the cream cheese, fold gently. Use a spatula to lift and turn the mixture. This keeps the air in the whipped cream, making your cheesecake light and fluffy. Avoid stirring too hard, as it can deflate the mixture.
Presentation Tips
A stunning cheesecake deserves great presentation! First, consider garnishing with crushed Oreos on top. You can also add a drizzle of chocolate sauce for extra flair. Fresh fruit like berries can add a splash of color. For an elegant touch, place a sprig of mint on each slice. This will impress your guests and make the dessert pop on the table.
Serve the cheesecake on pretty plates. You can cut it into neat slices or use a cake server for individual servings. A beautiful presentation makes your dessert feel extra special.
Common Mistakes to Avoid
One mistake to watch out for is overmixing the cream cheese. This can make your cheesecake too dense. Mix just until smooth and creamy. Another mistake is not letting the cheesecake set long enough. It needs at least four hours in the fridge. If you cut it too soon, the slices may fall apart. Patience is key for a perfect cheesecake.
By following these tips, you will create a delicious No Bake Oreo Cheesecake that looks as great as it tastes.

Variations
Flavored Cheesecake Options
You can have fun with flavors in your cheesecake. Try adding chocolate or peanut butter to the filling. For chocolate, mix in melted chocolate or cocoa powder. For peanut butter, fold in creamy peanut butter for a nutty twist. Both options add rich taste and make the cheesecake even more special.
You can also swap Oreos for other cookie varieties. Try using chocolate wafer cookies or even graham crackers. Each cookie brings its own flavor and style. Experiment to find your favorite mix!
Mini Cheesecakes
Turning this recipe into mini cheesecakes is easy! Use a muffin tin with liners for perfect portions. Adjust the crust and filling to fit the smaller size. Bake them for about 10 to 15 minutes at 350°F if you choose to bake; otherwise, chill them like the full cheesecake.
Serving ideas for mini cheesecakes can be fun too. Add fresh fruit or drizzle with chocolate sauce on top. They make great desserts for parties or gatherings.
Vegan Alternatives
If you want a dairy-free option, there are great substitutes. Use vegan cream cheese and dairy-free cookies. Many brands offer tasty options that work well in this recipe. You can also use coconut cream instead of heavy whipping cream for a lighter texture.
These vegan alternatives maintain the taste and texture of a classic cheesecake. Enjoy your sweet treat without the dairy!
Storage Info
Proper Storage Techniques
To store the cheesecake in the fridge, cover it with plastic wrap or foil. This keeps the cheesecake fresh and prevents it from picking up other smells. Place it on a flat shelf to avoid any damage.
If you want to freeze the cheesecake, wrap it tightly in plastic wrap. Then, place it in an airtight container. This will help keep it safe from freezer burn. You can store it in the freezer for up to three months.
Shelf Life
The cheesecake lasts about five days in the fridge. After that, it may start to lose its flavor and texture. Look for signs that the cheesecake has gone bad. If you see mold or if it smells sour, it’s time to toss it out.
Reheating and Serving after Freezing
To thaw the cheesecake, move it from the freezer to the fridge. Let it sit overnight for the best results. If you need to thaw it faster, you can leave it at room temperature for about two hours.
After thawing, you may notice a change in texture. To restore it, gently whip a bit of heavy cream and fold it into the cheesecake. This will help bring back its creamy texture. Enjoy your cheesecake as a delicious treat!
FAQs
How long does it take to make No Bake Oreo Cheesecake?
Making this cheesecake takes about 20 minutes of prep time. You will also need to chill it for at least 4 hours. In total, you’re looking at about 4 hours and 20 minutes. This gives the cheesecake time to set and become firm.
Can I use different cookies for the crust?
Yes, you can use other cookies for the crust. Graham crackers work well, giving a nice flavor. You can also try chocolate wafer cookies for a richer taste. Just crush them finely and mix with melted butter, like you do with Oreos.
Is it necessary to use heavy whipping cream?
Heavy whipping cream is key for a fluffy texture. It helps the cheesecake become light and airy. If you don’t have it, you can use whipped topping as a substitute. This will change the taste a bit, but it will still be good.
What if my cheesecake doesn’t set?
If your cheesecake doesn’t set, check a few things. First, make sure you used enough heavy cream. Also, ensure you chilled it long enough. If it’s still soft, try putting it back in the fridge for a few more hours. Sometimes, a little more time is all it needs.
This blog post walks you through making a tasty No Bake Oreo Cheesecake. I covered ingredients, step-by-step instructions, and tips for perfecting your cheesecake. You learned how to ensure a great texture and avoid common mistakes. With variations and storage tips, you can tailor your cheesecake to your needs. Now, try this recipe and wow your friends! Remember, with practice, you’ll create a delicious dessert every time. Enjoy your cheesecake adventure!


![- 1 ripe avocado, peeled and pitted - 1/2 cup unsweetened cocoa powder - 1/2 cup maple syrup or honey - 1/4 cup almond butter or peanut butter - 1/2 cup whole wheat flour - 1/2 teaspoon baking soda - 1/4 teaspoon salt - 1 teaspoon pure vanilla extract - 1/2 cup dark chocolate chips The key ingredient here is the avocado. Why choose avocado for brownies? It adds creaminess and healthy fats. This makes the brownies moist without extra oil. Next, we have cocoa powder. It gives the brownies a rich chocolate taste. The maple syrup or honey acts as a natural sweetener. I prefer maple syrup for its unique flavor. Almond butter or peanut butter brings a nutty taste. Whole wheat flour adds fiber, making these brownies healthier. Baking soda helps the brownies rise. Salt enhances all the flavors. Finally, dark chocolate chips are a must for that gooey chocolate burst. Using avocado offers many perks. It is rich in vitamins and healthy fats. These fats can help lower bad cholesterol. The fiber in avocado also aids digestion. Cocoa powder is full of antioxidants. It can improve heart health while making brownies delicious. Maple syrup is a lower glycemic option. It can provide a steady energy boost without a sugar crash. Switching to whole wheat flour adds more nutrients. It has more fiber than white flour. This helps keep you full longer. If you need gluten-free options, use almond flour instead of whole wheat. It works well and keeps the taste rich. For a vegan-friendly version, replace honey with maple syrup. Use a nut butter that fits your diet. You can also find dairy-free chocolate chips easily. These easy swaps ensure everyone can enjoy these healthy chocolate avocado brownies! - Preheat your oven to 350°F (175°C). - Line an 8x8 inch baking pan with parchment paper. Leave some paper hanging over the edges. This helps with easy removal later. - Take your ripe avocado and mash it in a bowl. You want it smooth and creamy. You can also use a food processor for this step. - In the same bowl, add maple syrup (or honey), almond butter, and vanilla extract. Mix until everything is blended well. - In a different bowl, whisk together cocoa powder, whole wheat flour, baking soda, and salt. Make sure these dry ingredients are mixed well. - Gradually add the dry mix to the wet mix. Stir gently until just combined. It’s okay to have a few lumps; this helps keep the brownies soft. - Fold in dark chocolate chips so they are evenly spread in the batter. - Pour the batter into your prepared pan. Use a spatula to smooth it out evenly. - Place the pan in your oven. Bake for 20-25 minutes. - To check if they are done, insert a toothpick into the center. It should come out with a few moist crumbs but not wet batter. - Once baked, let the brownies cool in the pan on a wire rack for 15 minutes. Use the parchment paper to lift them out. Let them cool further before cutting into squares. Enjoy making these Healthy Chocolate Avocado Brownies with the [Full Recipe]. To make your brownies just right, avoid overmixing. When you combine wet and dry ingredients, mix gently. A few lumps are okay. This keeps your brownies soft and fudgy. Even baking is also key. Make sure to spread the batter evenly in the pan. This helps them bake at the same time. For a lovely presentation, dust the brownies with cocoa powder or powdered sugar. You can also serve them with fresh berries. A dollop of yogurt adds creaminess and balances the rich chocolate. These simple touches make your brownies look great on any plate. You can boost the taste of your brownies easily. Try adding spices like cinnamon or a pinch of sea salt. A splash of almond or peppermint extract gives a fun twist. Using flavored chocolate chips adds another layer of taste. Think about using orange or hazelnut chips for a unique flavor profile. Check out the Full Recipe for more ideas! {{image_4}} To make these brownies gluten-free, swap whole wheat flour for almond flour or coconut flour. These options keep the texture rich and moist while avoiding gluten. Just remember to adjust the amount, as almond flour is more absorbent. For a vegan twist, replace honey with maple syrup. You can also use a plant-based nut butter, like almond or sunflower seed butter, instead of peanut butter. This keeps the flavor intact without any animal products. You can add a fresh twist to these brownies by mixing in mint extract. Use about 1 teaspoon of pure mint extract for a refreshing flavor. This makes mint chocolate avocado brownies that are perfect for any mint lover! Another fun option is to create a peanut butter swirl. Drop spoonfuls of peanut butter into the brownie batter before baking. Use a knife to swirl it around for a beautiful marbled look. This adds a delicious peanut flavor that pairs well with chocolate. If you want to change the serving size, you can easily convert the recipe. For a smaller batch, halve the ingredients. Use a smaller pan, like 6x6 inches, and keep an eye on the baking time. Smaller brownies will bake faster. You can also bake these brownies in a larger pan for thinner squares. A 9x13 inch pan works well, but adjust the baking time to about 15-20 minutes. Check for doneness with a toothpick, just like before. For the full recipe, check out the details above! To keep your brownies fresh, store them in an airtight container. This prevents air from making them dry. You can also place a slice of bread in the container. The bread helps maintain moisture. Always let brownies cool before storing. This avoids steam build-up, which can make them soggy. If you want to freeze brownies, first cut them into squares. Wrap each piece tightly in plastic wrap. Then, place them in a freezer-safe bag or container. This helps avoid freezer burn. When you're ready to eat them, just take out a piece and let it thaw at room temperature. You can also warm them in the microwave for a few seconds. Brownies last about 3-4 days at room temperature. If you see any mold, throw them away. To keep them fresh longer, refrigerate or freeze them. Refrigeration can extend their life to about a week. For best taste, enjoy them within a few days. For the full recipe, check out the provided details. Can I use ripe bananas instead of avocado? Yes, you can use ripe bananas. They add sweetness and moisture. However, the flavor changes slightly. Bananas may make the brownies taste fruitier. If you love banana, give it a try! How can I make these brownies less sweet? To reduce sweetness, cut back on the maple syrup or honey. You can also swap some sweetener for unsweetened applesauce. This keeps the texture but lowers the sugar. What is the best way to test brownies for doneness? The best way is to use a toothpick. Insert it in the center. If it comes out with a few moist crumbs, the brownies are done. If it has wet batter, bake a bit longer. Can these brownies be made without flour? Yes, you can make them without flour. Use a blend of nut flour or almond flour instead. This gives a nutty flavor and keeps the brownies moist. How many calories are in a serving? Each brownie has about 100 calories. This can change based on the ingredients you use. For example, using less sweetener or different nut butter may alter the calorie count. What are good dairy-free alternatives for chocolate chips? Look for dairy-free dark chocolate chips. Many brands make these with coconut or almond milk. You can also chop up a dairy-free chocolate bar for chunks. In this article, I covered a delicious brownie recipe that uses healthy ingredients. You learned about the key components, their nutritional benefits, and how to adapt the recipe for dietary needs. I shared step-by-step instructions for baking these brownies to perfection. With tips on flavor and texture, you can create the best version. Remember to store your leftovers properly to keep them fresh. Enjoy baking these brownies, knowing they are a tasty treat that can fit your diet!](https://goldendishy.com/wp-content/uploads/2025/06/19347e51-2d6e-4328-baa5-83086a8293f2-768x768.webp)


![For the baked cinnamon apple chips, you will need: - 2 large apples (Honeycrisp or Fuji are ideal for sweetness and texture) - 1 teaspoon ground cinnamon - 1 tablespoon sugar (coconut sugar serves as a healthier alternative) - A pinch of salt - Optional: 1 teaspoon lemon juice (to prevent browning of the apple slices) You can switch out the sugar for a natural sweetener like honey or agave. For a fun twist, try adding a sprinkle of nutmeg or cardamom in place of cinnamon. If you want to skip the lemon juice, you can use vinegar. Just remember, it may change the flavor a bit. I recommend using Honeycrisp or Fuji apples. They offer a great mix of sweetness and crunch. Other good choices are Granny Smith for a tart flavor or Gala for a milder taste. Each type brings its own charm to the chips, so feel free to experiment with your favorites. First, set your oven to 225°F (110°C). This low heat helps the apples dry out slowly. While the oven warms up, line two baking sheets with parchment paper. This keeps the apple chips from sticking and makes cleanup easy. Next, wash the apples under cool water. This step is key for cleanliness. Use an apple corer or a sharp knife to remove the cores. Slice the apples into thin rounds, about 1/8 inch thick. If you want to keep them fresh, sprinkle a bit of lemon juice on the slices. This will stop browning. Now, lay the apple slices on the baking sheets. Make sure they do not overlap. Overcrowding will make it hard for them to crisp up. When the apple slices bake for about 45 minutes, flip them over. This helps them cook evenly. Use a spatula and be careful not to break them. Keep an eye on the apple chips as they bake. After 1 to 1.5 hours, they should look golden and feel crisp. If they still feel soft, let them bake a little longer. Once done, take them out and let them cool on the sheets. They will get crunchier as they cool. For the complete recipe, check out the Full Recipe section! To get your apple chips nice and crispy, slice them thin. Aim for about 1/8 inch thick. The thinner the slice, the crunchier the chip. Lay the slices flat on your baking sheet without overlapping. This helps them bake evenly. Baking at a low temperature, like 225°F, lets the moisture escape slowly. Flip them halfway through baking for even crispiness. Keep an eye on the apple chips as they bake. They can go from crisp to burnt quickly. Check them every 15 minutes towards the end of baking. Look for a light golden color and a crisp texture. If they bend, they need more time. If they snap, they're done. This way, you can catch them at just the right moment. These apple chips are great on their own, but you can make them even better. Serve them in a bright bowl for a fun touch. Pair them with dips like nut butter or yogurt for a tasty snack. You can also sprinkle some extra cinnamon on top before serving for added flavor. Enjoy them as a healthy treat any time of day! {{image_4}} You can change the spice game with nutmeg or cloves. Nutmeg gives a warm, sweet taste. Cloves add a rich, spicy flavor. Try mixing cinnamon with these spices for a fun twist. A little goes a long way, so start small. Just a pinch can transform your apple chips into something special. If you want to switch things up, use different sweeteners. Honey adds a nice floral note. Agave syrup is a great vegan choice. Coconut sugar offers a brown sugar taste. Each sweetener brings its unique flavor. Just remember to adjust the amount based on sweetness. Check the [Full Recipe] for guidance on using your chosen sweetener. Want to boost flavor? Add nuts or dried fruit. Chopped almonds or walnuts add crunch and protein. Dried cranberries or raisins can bring sweetness. Mix them into your cinnamon-sugar blend for an extra treat. You can even sprinkle them on top before baking. This way, each bite becomes a delightful surprise. To keep your baked cinnamon apple chips fresh, use an airtight container. Glass jars work well. You can also use resealable plastic bags. Just make sure to remove as much air as possible. Store them in a cool, dark place. Avoid direct sunlight or heat, which can make them soggy. When stored properly, these chips can last about one week. After that, they may lose some crunch. If you place them in the fridge, they can last longer, but the texture might change. Always check for any signs of moisture or softness before enjoying them. If your apple chips lose their crunch, don’t worry! You can easily revive them. Simply preheat your oven to 200°F (93°C). Spread the chips on a baking sheet in a single layer. Bake them for about 5 to 10 minutes. This will help bring back their crispy texture. Enjoy them fresh from the oven! Yes, you can use a dehydrator. Just slice the apples thinly. Set the dehydrator to 135°F (57°C). Dehydrate for 6 to 8 hours. Check them often. You want them crisp but not burnt. This method keeps more nutrients than baking. To stop browning, you can use lemon juice. Just sprinkle a teaspoon on the slices. This acid slows down the browning process. You can also soak the slices in a mix of water and lemon juice for a few minutes. Rinse and dry them before baking. Apple chips are a great snack! They have fiber that helps digestion. They are low in calories, making them a healthier choice. You get natural sweetness without added sugar. Plus, they contain vitamins A and C. They are good for your skin and immune system. Yes, you can freeze them! First, let them cool completely. Place them in a single layer on a baking sheet. Freeze until solid. Then, transfer to an airtight bag. They can last up to 6 months in the freezer. Just let them thaw before eating. For the full recipe, check the earlier section. In this post, we explored how to make delicious baked cinnamon apple chips. We covered ingredients, substitutions, and the best apple varieties. The step-by-step guide included tips for achieving crispiness and avoiding overbaking. You also learned variations with spices and sweeteners, along with storage information. Now you have all the tools to create your own tasty snacks. Enjoy your homemade apple chips!](https://goldendishy.com/wp-content/uploads/2025/07/917ca0c2-206f-45f2-a1a8-9893eb8662bc-768x768.webp)