Looking for a fresh, tasty meal that’s packed with flavor? My Mediterranean Quinoa Salad is just what you need! This dish combines wholesome ingredients that fill you up without weighing you down. In this article, I’ll share key ingredients, easy steps, and clever tips to make your salad shine. Plus, you’ll discover fun variations and storage tips to enjoy it longer. Let’s dive into this simple, healthy recipe!
Ingredients
Essential Ingredients for Mediterranean Quinoa Salad
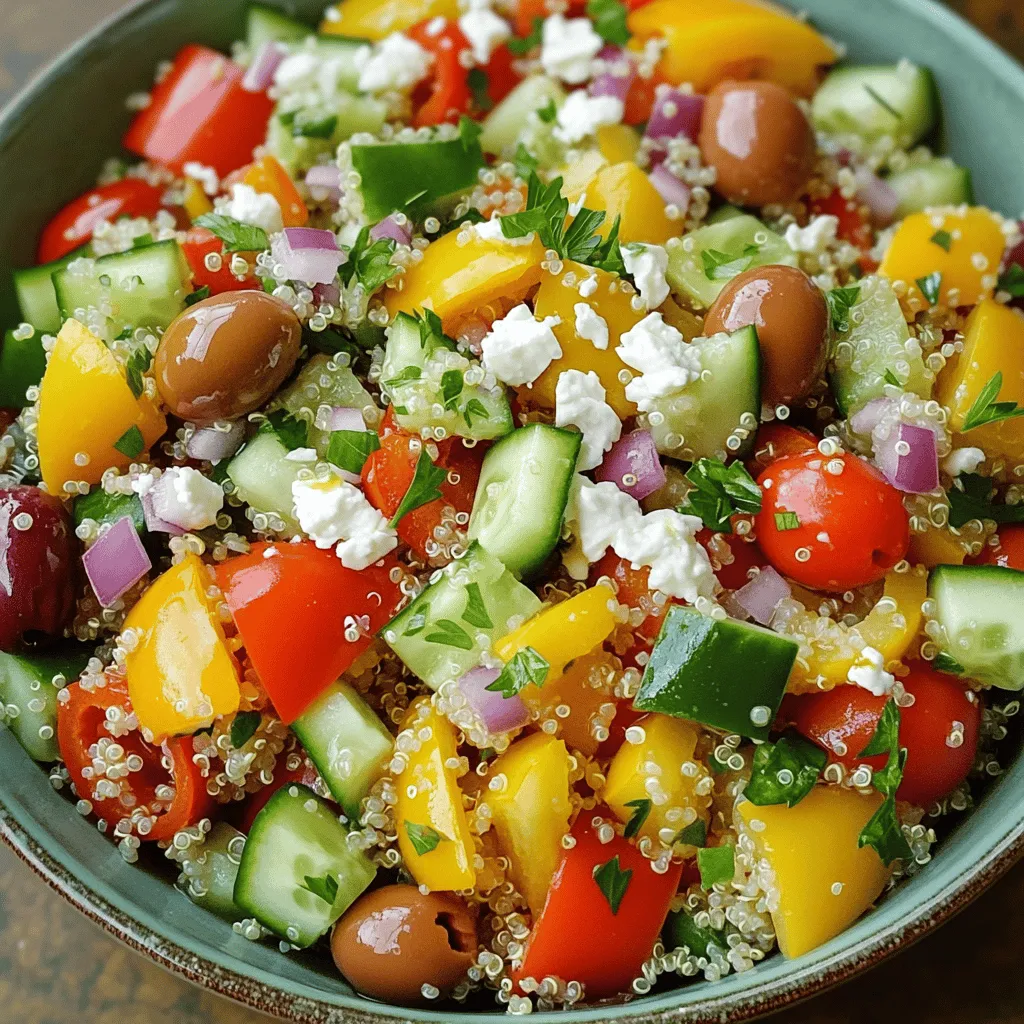
To make a fresh Mediterranean quinoa salad, gather these key ingredients:
– 1 cup quinoa, thoroughly rinsed
– 2 cups vegetable broth (preferably low-sodium)
– 1 bell pepper (either red or yellow), finely diced
– 1 medium cucumber, diced into bite-sized pieces
– 1 cup cherry tomatoes, halved
– 1/4 of a medium red onion, finely chopped
– 1/2 cup Kalamata olives, pitted and sliced
– 1/2 cup feta cheese, crumbled
– 1/4 cup fresh parsley, finely chopped
– 1/4 cup extra virgin olive oil
– 2 tablespoons freshly squeezed lemon juice
– 1 teaspoon dried oregano
– Sea salt and freshly cracked black pepper to taste
These ingredients blend well together. Each one adds a unique flavor. The quinoa forms the base, while the vegetables add crunch and color. Kalamata olives give it a salty twist, and feta cheese adds creaminess.
Optional Garnishes or Add-ins
You can customize your salad with these optional add-ins:
– Avocado for creaminess
– Grilled chicken for protein
– Chickpeas for extra fiber
– Spinach or arugula for leafy greens
– Sun-dried tomatoes for a tangy kick
These add-ins can enhance the salad’s taste and texture. Feel free to experiment with what you love!
Nutritional Information Overview
This salad is a healthy choice. It is packed with nutrients. Here’s a quick look at its benefits:
– Quinoa: High in protein and fiber
– Vegetables: Rich in vitamins and minerals
– Olive oil: A source of healthy fats
– Feta cheese: Adds calcium and flavor
One serving provides a balanced mix of protein, healthy fats, and carbs. Eating this salad can support your health while satisfying your taste buds.
Step-by-Step Instructions
Preparation of Quinoa
To start, rinse 1 cup of quinoa under cold water. This step removes the bitter coating. Next, combine the rinsed quinoa and 2 cups of vegetable broth in a medium saucepan. Bring this mixture to a rolling boil over medium-high heat. Once boiling, reduce the heat to a gentle simmer. Cover the saucepan and let it cook for about 15 minutes. The quinoa is ready when it absorbs all the liquid and becomes fluffy. After cooking, fluff it with a fork and transfer it to a large mixing bowl. Let it cool for a few minutes.
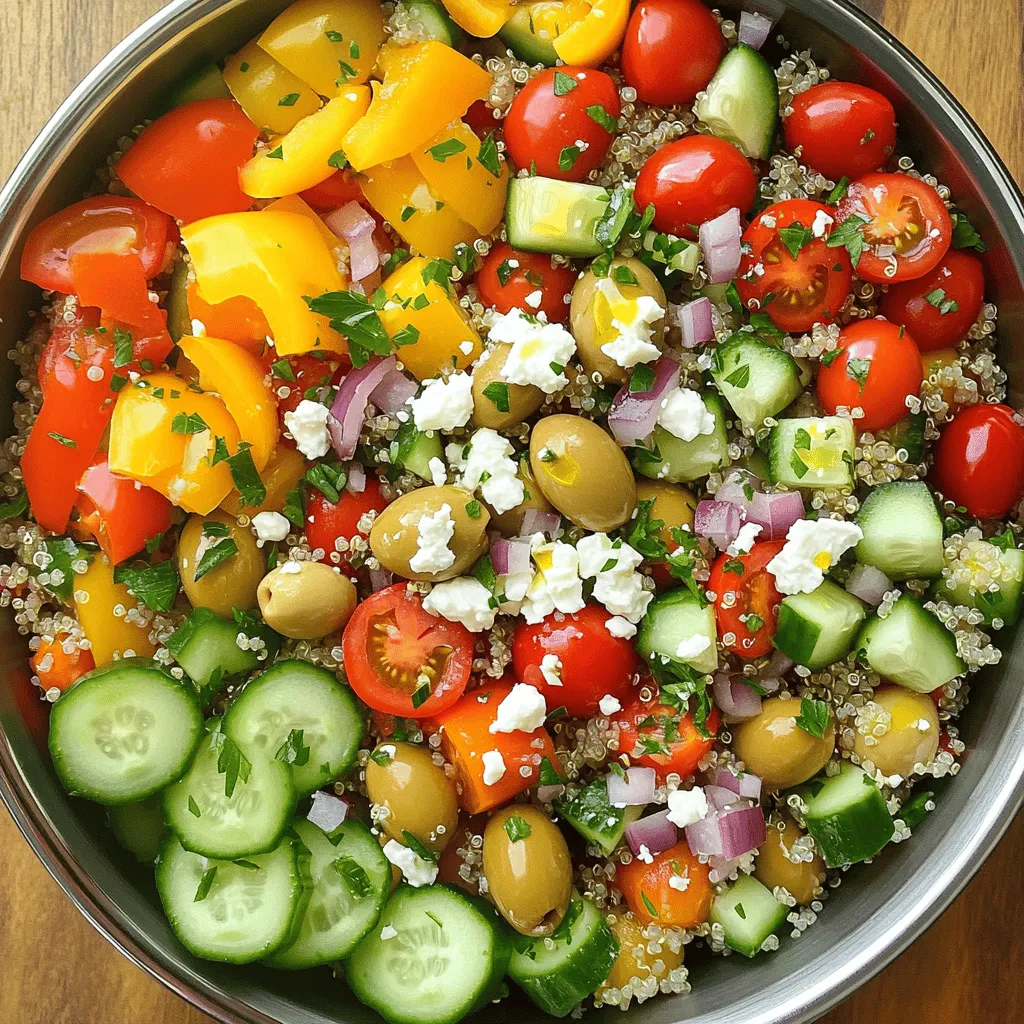
Mixing the Vegetables
While the quinoa cools, prepare the vegetables. Dice 1 bell pepper and 1 medium cucumber. Halve 1 cup of cherry tomatoes. Finely chop 1/4 of a medium red onion, and slice 1/2 cup of Kalamata olives. In the same large bowl with the quinoa, add all these diced vegetables along with 1/2 cup of crumbled feta cheese. Gently stir to mix everything together.
Making the Dressing
For the dressing, take a separate small bowl. Whisk together 1/4 cup of extra virgin olive oil, 2 tablespoons of freshly squeezed lemon juice, and 1 teaspoon of dried oregano. Add sea salt and freshly cracked black pepper to taste. Whisk until the dressing is well combined and emulsified.
Combining Everything
Pour the dressing over the quinoa and vegetable mixture. Toss everything together until the quinoa and veggies are well coated with the dressing. Finally, fold in 1/4 cup of finely chopped fresh parsley. Be careful not to break the feta or overcrowd the grains. Cover the bowl and let the salad sit at room temperature for at least 30 minutes. This time helps the flavors blend beautifully.
Tips & Tricks
How to Perfectly Cook Quinoa
To cook quinoa, rinse it well in cold water. This removes bitterness. Use a ratio of 1 part quinoa to 2 parts vegetable broth. Boil the mixture, then reduce the heat to simmer. Cover and cook for about 15 minutes. When done, fluff it gently with a fork. Let it cool before mixing it with other ingredients.
Flavor Enhancements
To boost flavors, add fresh herbs like basil or mint. You can also toss in some garlic or lemon zest for a zing. Experiment with different olives or cheese types. Each will give a unique twist. Don’t forget to season with salt and pepper to taste.
Serving Suggestions and Presentation Ideas
Serve the salad in a large bowl for sharing. For individual servings, use small plates. Garnish with lemon wedges and extra parsley for color. A drizzle of olive oil on top adds shine and flavor. You can also pair it with grilled chicken or fish for a complete meal.
Variations
Protein Additions (Chicken, Chickpeas, etc.)
You can easily boost the protein in your Mediterranean quinoa salad. Adding cooked chicken gives a hearty touch. Simply grill or roast chicken breasts, then slice them up and mix them in. If you prefer a meatless option, chickpeas work great. Use canned chickpeas for quick prep. Rinse and drain them before adding.
Alternative Dressings
While the olive oil and lemon dressing is tasty, you can try other dressings too. A balsamic vinaigrette adds a sweet tang. For a creamy twist, mix Greek yogurt with lemon juice and herbs. This will make the salad richer and even more satisfying.
Seasonal Vegetable Swaps
Swap in seasonal veggies for fresh flavor. In the spring, add sweet peas or asparagus. In summer, try zucchini or fresh corn. Autumn brings squash or roasted root vegetables. Winter is great for kale or Brussels sprouts. These swaps keep your salad exciting and varied all year round.
Storage Info
How to Store Leftovers
After enjoying your Mediterranean quinoa salad, store leftovers in the fridge. Place the salad in a bowl and cover it tightly with plastic wrap or a lid. This helps keep the salad fresh and tasty. If you want to save some for later, portion it out into meal prep containers.
Best Containers for Salad Storage
When storing your salad, use airtight containers. Glass containers work great because they don’t stain or retain odors. If you prefer plastic, choose BPA-free containers. Ensure they are deep enough to hold the salad without squishing it. If you have a dressing, keep it separate until you are ready to eat to avoid sogginess.
Shelf Life and Reheating Tips
Your Mediterranean quinoa salad will last in the fridge for about 3 to 5 days. If you notice any change in smell or color, it’s best to toss it out. Reheating is not recommended for salads with fresh veggies. Instead, enjoy the salad cold or at room temperature. If you want to warm it up, heat the quinoa-only portion in a microwave for about 30 seconds, but avoid reheating the veggies and feta.
FAQs
What is quinoa and its health benefits?
Quinoa is a tiny seed rich in protein, fiber, and vitamins. It is gluten-free and very nutritious. It helps in building muscles and keeps you full longer. Quinoa contains all nine essential amino acids, making it a complete protein. This is great for vegans and vegetarians. It also has antioxidants that help fight inflammation. Eating quinoa may support heart health and improve digestion.
Can I make this salad in advance?
Yes, you can make this salad ahead of time. It tastes even better after sitting for a few hours. Just keep it in the fridge for up to three days. The flavors meld together nicely. If you add the dressing later, it stays fresh longer. Just remember to mix it before serving to spread the flavors.
How to make Mediterranean quinoa salad vegan?
To make this salad vegan, skip the feta cheese. You can use avocado instead for creaminess. You can also add extra olives or nuts for texture. The dressing is already vegan with olive oil and lemon juice. This way, you keep it tasty without any animal products.
What to serve with Mediterranean quinoa salad?
This salad pairs well with many dishes. You can serve it with grilled chicken or fish for protein. It also goes nicely with roasted vegetables or hummus. For a lighter meal, enjoy it with pita bread. This salad is great as a side or a main dish.
The Mediterranean quinoa salad is a tasty and healthy dish. We covered key ingredients, from quinoa and fresh veggies to possible add-ins. I shared easy steps for preparing the salad and tips for cooking quinoa just right. You learned about variations and how to store leftovers properly. Remember, this salad is very flexible; you can change the protein and dressing as you like. Enjoy this dish for its flavor and nutrition. It’s simple, refreshing, and great for any meal!


