Lemon Garlic Hummus Simple and Flavorful Dip Recipe

Looking for a tasty dip that’s easy to make? This Lemon Garlic Hummus recipe is just what you need! With simple ingredients and bold flavors, it’s perfect for snacking or impressing guests. I’ll guide you step-by-step, share tips for creaminess, and even suggest great serving ideas. Get ready to enjoy a dip that brightens every occasion! Let’s dive into this delicious, zesty treat!
Ingredients
Main Ingredients for Lemon Garlic Hummus
To make this zesty dip, gather these main ingredients:
– 1 can (15 oz) chickpeas, drained and rinsed
– 3 tablespoons tahini
– 2 cloves garlic, finely minced
– 2 tablespoons extra virgin olive oil
– Juice of 1 large, fresh lemon
– 1/2 teaspoon ground cumin
– Sea salt, to taste
– 3-4 tablespoons cold water (adjust as needed)
These ingredients create a smooth and creamy base. The chickpeas add protein and fiber. Tahini gives a rich, nutty flavor. Garlic adds a punch, while lemon brings brightness. Cumin adds warmth and depth. Each ingredient plays a role in the flavor.
Optional Garnishes and Toppings
You can add extra flair with these toppings:
– Smoked paprika
– Freshly chopped parsley
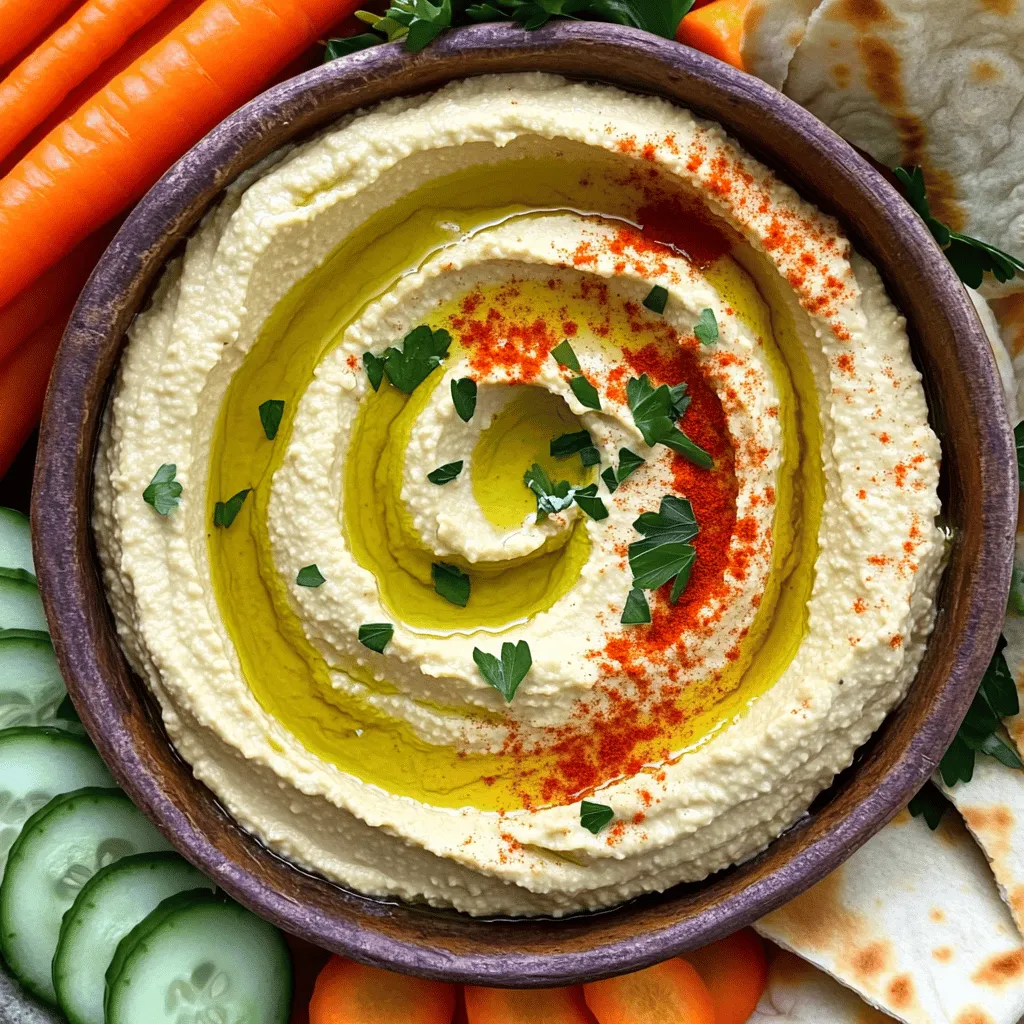
These garnishes enhance the dish’s look and taste. Smoked paprika adds a slight smokiness. Chopped parsley gives a fresh, vibrant touch. You can also drizzle olive oil on top for added richness.
Equipment Needed
To prepare this hummus, you will need:
– Food processor
– Measuring spoons
– Lemon juicer (optional)
– Serving bowl
A food processor makes blending easy and quick. Measuring spoons ensure you use the right amounts. A lemon juicer helps extract juice efficiently. Having a serving bowl ready lets you present the hummus beautifully.
Step-by-Step Instructions
Preparation of Ingredients
Start by gathering all your ingredients. You will need:
– 1 can (15 oz) chickpeas, drained and rinsed
– 3 tablespoons tahini
– 2 cloves garlic, finely minced
– 2 tablespoons extra virgin olive oil
– Juice of 1 large, fresh lemon
– 1/2 teaspoon ground cumin
– Sea salt, to taste
– 3-4 tablespoons cold water (adjust as needed)
– Smoked paprika and freshly chopped parsley for garnish
Make sure everything is ready. This helps the process go smoothly.
Blending the Hummus
Add the chickpeas, tahini, garlic, and olive oil to your food processor. Next, squeeze in the lemon juice. Be careful to catch any seeds. Add the ground cumin for extra flavor.
Secure the lid tightly. Blend for about 30 seconds. Stop and scrape down the sides to mix well. Check the texture; it should be smooth and creamy.
Final Adjustments for Flavor
Taste your hummus. Add sea salt to make it pop. Blend again to mix the salt in well. If the hummus is too thick, add cold water one tablespoon at a time. Keep blending until you reach your desired creaminess.
Do a final taste test. Adjust the lemon or garlic if needed. Transfer the hummus to a bowl. Drizzle some olive oil on top. Sprinkle smoked paprika and chopped parsley for a fresh look.
Your zesty lemon garlic hummus is now ready to enjoy!
Tips & Tricks
How to Achieve Creamy Hummus
To get a creamy hummus, start with good chickpeas. I prefer using canned chickpeas. Rinse them well to remove any canning liquid. This helps keep your dip smooth. When blending, use enough cold water. Add it slowly, one tablespoon at a time. If you want it even creamier, blend longer. Don’t rush this step.
Best Practices for Garlic Flavor
Garlic is key for flavor in this dip. Always use fresh garlic for the best taste. Mince the garlic finely to spread the flavor evenly. If you want a milder taste, try roasting the garlic first. Roasting brings out sweetness and smoothness. This way, the garlic won’t be too strong.
Serving Suggestions for Lemon Garlic Hummus
Serve your lemon garlic hummus with fun dippers. I love warm pita bread and crunchy veggies. Carrot sticks and cucumber slices add great color. You can also use crackers for a nice crunch. For a special touch, drizzle olive oil on top and sprinkle paprika. This makes your dish look beautiful and appetizing.

Variations
Adding Spices for Extra Flavor
You can spice up your lemon garlic hummus easily. Try adding a pinch of cayenne for heat. Cumin gives it a warm taste, while smoked paprika adds depth. You can also mix in fresh herbs like cilantro or dill for a fresh twist. These spices make the dip more fun and exciting.
Substituting Ingredients
If you want to switch things up, you can change some ingredients. Use white beans instead of chickpeas for a milder flavor. Swap tahini for sunflower seed butter if you have a nut allergy. You can also use lemon zest for more citrus flavor. Each change gives a new taste to the hummus.
Pairing Options for Different Diets
Lemon garlic hummus pairs well with many foods. For a vegan diet, serve it with veggies like carrots and bell peppers. If you are gluten-free, use rice crackers or corn chips. For a Mediterranean flair, try warm pita bread. This dip is versatile, making it perfect for any gathering or snack time.
Storage Info
How to Store Leftover Hummus
After you enjoy your hummus, store any leftovers in the fridge. Transfer the hummus to an airtight container. This helps keep it fresh. Make sure to cover the top with a thin layer of olive oil. This layer adds flavor and prevents drying.
Freezing Lemon Garlic Hummus
You can freeze your lemon garlic hummus for later use. Portion it into small containers. Leave some space at the top, as it will expand when frozen. You can keep it in the freezer for about three months. To thaw, place it in the fridge overnight or on the counter for a few hours. Stir well before serving.
Best Containers for Storage
Choose glass or BPA-free plastic containers for storage. Glass containers help keep flavors intact. They are also safe for both freezing and heating. If using plastic, ensure it is labeled as freezer-safe. Avoid metal containers, as they may react with the hummus.
FAQs
Can I make Lemon Garlic Hummus ahead of time?
Yes, you can make Lemon Garlic Hummus ahead of time. It tastes great after a few hours in the fridge. In fact, the flavors blend better when it sits. I often prepare it a day before a party. This way, I save time and enjoy the gathering.
What can I serve with Lemon Garlic Hummus?
You can serve Lemon Garlic Hummus with many tasty options. Here are some ideas:
– Warm pita bread
– Crisp cucumber slices
– Colorful carrot sticks
– Bell pepper strips
– Crackers or chips
Each of these pairs well with the zesty hummus. The crunch and flavor create a great mix.
How long does homemade hummus last in the fridge?
Homemade hummus lasts about five to seven days in the fridge. Make sure to store it in an airtight container. If you see any signs of spoilage, it’s best to throw it out. To keep it fresh, I often recommend placing a thin layer of olive oil on top. This helps seal in moisture and flavor. For the best taste, enjoy it within a few days!
In this post, we explored how to make Lemon Garlic Hummus. We covered the main ingredients, optional toppings, and required equipment. I shared easy steps for prepping, blending, and fine-tuning flavors. You learned tips for creamy texture and garlic intensity.
We also discussed delicious variations and storage methods. Remember, you can make hummus ahead of time and enjoy it fresh for days. Experiment with different flavors and pairings. Your hummus can be a tasty, healthy snack for everyone!


![To make Zucchini Ricotta Fritters, gather these simple ingredients: - 2 medium zucchinis, grated - 1 cup ricotta cheese - 1/2 cup all-purpose flour - 2 large eggs, beaten - 1/4 cup grated Parmesan cheese - 2 green onions, finely chopped - 1/2 teaspoon garlic powder - Salt and pepper, to taste - Olive oil, for frying - Fresh basil or parsley, for garnish These ingredients work together to create crispy, tasty fritters that everyone will love. The fresh zucchini adds moisture and flavor, while the ricotta cheese gives a creamy texture. Using grated Parmesan cheese enhances the savory taste of the fritters. Make sure to squeeze out as much moisture from the zucchini as you can. This step is key to ensure your fritters do not get soggy. You can use a clean kitchen towel for this. Want to dive deeper into making these fritters? Check out the Full Recipe for all the steps! Start by grating the zucchinis. You can use a box grater or a food processor. After grating, place the zucchini in a clean kitchen towel. Gather the towel around the zucchini and twist it. This will help squeeze out the extra moisture. Removing moisture is key. It keeps the fritters from becoming soggy. In a large bowl, combine the drained zucchini, ricotta cheese, flour, and beaten eggs. Add grated Parmesan, chopped green onions, garlic powder, salt, and pepper. Use a sturdy spoon to mix everything. The batter should be slightly chunky, not too smooth. This texture helps the fritters hold their shape when cooking. Heat a non-stick skillet over medium heat and add a few tablespoons of olive oil. Let the oil heat until it shimmers. Once hot, drop spoonfuls of batter into the skillet. Gently flatten each fritter with a spoon. Cook them for about 3-4 minutes on each side. They should turn golden brown and crispy. Don't overcrowd the skillet. If needed, cook in batches. After cooking, place the fritters on a plate lined with paper towels. This will absorb any excess oil. Serve warm with chopped basil or parsley for a fresh touch. To make your fritters crispy, start by removing moisture. Zucchini has a lot of water. When you grate it, you must squeeze it in a towel. This helps the fritters stay firm. Next, heat your oil until it shimmers. A hot skillet cooks the fritters quickly and keeps them crispy. If the oil is not hot enough, they can soak up too much oil and become soggy. Herbs and spices can elevate your fritters. I love adding fresh basil or parsley for brightness. You can also try a pinch of red pepper flakes for heat. For dips, a tangy yogurt sauce pairs well. You can also serve them with a tasty marinara. These additions make each bite even better. Avoid overcrowding your skillet. Too many fritters at once can lower the heat. This can lead to uneven cooking. Instead, cook them in small batches. Keep the cooked fritters warm by placing them on a plate in a low oven. This way, they stay warm and crisp until you serve them. {{image_4}} You can change the taste of your fritters easily. Try adding different cheeses like feta or mozzarella. You can also mix in finely chopped veggies such as bell peppers or spinach. Fresh herbs like dill or thyme add a nice touch too. These small changes can create a whole new snack experience. If you need a gluten-free version, use almond flour or coconut flour instead of all-purpose flour. Both options work well and will keep your fritters light and crispy. Just be sure to adjust the amount used, as these flours can absorb moisture differently. For a vegan twist, replace the ricotta with a plant-based cheese. Flaxseed meal can work well as an egg substitute. Just mix one tablespoon of flaxseed with three tablespoons of water and let it sit for a few minutes. If you want low-carb fritters, swap the flour for grated cauliflower. This keeps the fritters tasty while cutting down on carbs. For the full recipe, check out the [Full Recipe]. To keep your zucchini ricotta fritters fresh, you should refrigerate them. Place the leftover fritters in an airtight container. This helps prevent them from drying out. Make sure to layer them with paper towels to absorb extra moisture. You can store them for up to three days in the fridge. If you want to save some for later, freezing is a great option. First, let the fritters cool completely. Then, place them in a single layer on a baking sheet. Freeze them for about one hour. This step helps them keep their shape. After they are frozen, transfer them to a freezer bag. Label the bag with the date. They can stay good for up to two months. When you’re ready to eat your frozen fritters, reheat them in the oven. Preheat the oven to 375°F (190°C). Place the fritters on a baking sheet and bake for about 15-20 minutes. This method will help them regain their crispy texture. Enjoy your tasty snack! For the full recipe, check out the detailed instructions above. Yes, you can bake them! Place the fritters on a baking sheet lined with parchment paper. Brush them lightly with olive oil. Bake at 400°F for about 20-25 minutes. Flip them halfway through to get both sides crispy. To reheat, use an oven or an air fryer. Preheat the oven to 350°F. Place the fritters on a baking sheet and bake for about 10 minutes. This will keep them crispy. You can make the batter ahead of time! Store it in the fridge for up to 24 hours. Just remember to mix it again before cooking. The moisture from the zucchini can settle. Fritters are done when they are golden brown and crispy on both sides. You can also gently press them. If they feel firm and do not sink, they are ready. Yes, they are great for meal prep! You can cook them and store in the fridge for up to 3 days. They make a tasty snack or meal addition. For more details, check the Full Recipe. Zucchini ricotta fritters are a simple and tasty snack. You can enjoy them any time of the day. Here’s how to make them: - 2 medium zucchinis, grated - 1 cup ricotta cheese - 1/2 cup all-purpose flour - 2 large eggs, beaten - 1/4 cup grated Parmesan cheese - 2 green onions, finely chopped - 1/2 teaspoon garlic powder - Salt and pepper, to taste - Olive oil, for frying - Fresh basil or parsley, for garnish To start, I recommend grating the zucchinis. Use a box grater or food processor to make it quick. After grating, take a clean kitchen towel. Place the zucchini in the middle and twist the towel. This helps squeeze out extra moisture. It’s important to do this step to keep your fritters crispy. Next, grab a large mixing bowl. Add the drained zucchini, ricotta cheese, flour, beaten eggs, Parmesan, green onions, garlic powder, and some salt and pepper. Mix everything well with a spatula. The batter should feel a bit chunky. Now, heat a non-stick skillet over medium heat. Drizzle in some olive oil to coat the bottom. Let the oil heat until it looks shiny. This ensures a nice fry for your fritters. Once the oil is hot, drop spoonfuls of the batter into the skillet. Use the back of a spoon to flatten each fritter a bit. This helps them cook evenly. Fry for about 3-4 minutes on each side. You want them golden brown and crispy. Don’t overcrowd the skillet; work in batches if needed. When done, transfer the fritters to a plate lined with paper towels. This will soak up any extra oil. Serve them warm, topped with fresh basil or parsley. These toppings add a lovely touch to your dish. For the full recipe, check out the detailed instructions above. Enjoy making these tasty treats! In this blog post, we covered how to make Zucchini Ricotta Fritters from start to finish. We shared a list of simple ingredients and provided step-by-step cooking instructions. You learned tips to ensure crispiness and explored tasty variations. Storing and reheating tips were also discussed to help keep your fritters fresh. Overall, these fritters are easy to make and delicious. They offer a healthy twist for any meal. Enjoy experimenting with different flavors and variations!](https://goldendishy.com/wp-content/uploads/2025/06/35e9f5a9-d1bf-47b3-b252-98dbfdd31548-768x768.webp)
![- 1 bunch of fresh asparagus, trimmed (about 16-20 spears) - 1 cup freshly grated Parmesan cheese - 1/2 cup panko breadcrumbs - 3 cloves garlic, finely minced - 1 teaspoon garlic powder - 1/2 teaspoon fine sea salt - 1/4 teaspoon freshly ground black pepper - 2 large eggs, lightly beaten - 2 tablespoons extra virgin olive oil - 1 tablespoon fresh parsley, finely chopped For the best flavor, choose fresh asparagus that is bright green with firm stalks. Look for Parmesan cheese that you grate yourself. Pre-grated cheese often lacks the rich taste you want. When selecting panko breadcrumbs, ensure they are light and airy for that perfect crunch. It’s important to use fresh garlic for the best taste. Always measure your ingredients accurately for consistent results. Each serving of Garlic Parmesan Asparagus Fries offers a tasty balance of nutrients. These fries are low in calories and high in vitamins A and C. They provide healthy fats from olive oil and protein from eggs and cheese. One serving typically contains around 200 calories, 10g of protein, and 15g of fat. This makes them a healthier alternative to regular fries. Enjoy them guilt-free as a snack or side dish! To make Garlic Parmesan Asparagus Fries, start by gathering your ingredients. You will need fresh asparagus, Parmesan cheese, panko breadcrumbs, garlic, eggs, and olive oil. Next, preheat your oven to 425°F (220°C) and line a baking sheet with parchment paper for easy cleanup. In a shallow bowl, mix the panko breadcrumbs, grated Parmesan cheese, minced garlic, garlic powder, sea salt, and black pepper. Stir well to combine all the flavors. In another bowl, beat the eggs until they are smooth and a bit frothy. Now, take each asparagus spear and dip it in the egg mixture. Make sure to coat it well, but let any extra egg drip off. Then, roll the asparagus in the breadcrumb mix, pressing gently to ensure an even coat. Place the coated spears on your prepared baking sheet in a single layer. Drizzle the olive oil over the asparagus. This helps them get that nice crispy texture as they bake. Place the baking sheet in your oven. Bake the asparagus fries for about 15 to 20 minutes. Keep checking until they are fork-tender and the coating is a beautiful golden brown. Once done, take the baking sheet out of the oven. Let the fries cool for a few minutes. This step is important as it helps them crisp up even more. For a lovely presentation, serve your Garlic Parmesan Asparagus Fries on a long platter. Add a small bowl of marinara sauce or garlic aioli for dipping. This adds a tasty twist that everyone will love. Finally, sprinkle some fresh parsley on top for a touch of color and flavor. For the full recipe and more details, check out the [Full Recipe]. To get your Garlic Parmesan Asparagus Fries crispy, follow a few steps. First, use fresh asparagus. The fresher, the better! Next, coat each spear well with the egg and breadcrumb mixture. This helps the coating stick. Press the breadcrumbs onto the asparagus for a nice layer. Finally, drizzle olive oil over the fries. This adds flavor and aids crispiness. I’ve seen a few common mistakes in the kitchen. One is overcrowding the baking sheet. It causes steaming, making your fries soggy. Arrange the asparagus in a single layer. Another mistake is not preheating the oven. A hot oven ensures that the fries cook evenly. Lastly, don’t skip the panko breadcrumbs. They give the perfect crunch. Garnishing adds fun to your dish. Try these ideas to elevate your fries! First, sprinkle more parsley for color. You can also add lemon zest for a fresh taste. If you like heat, sprinkle some red pepper flakes on top. For a dip, serve marinara sauce or a creamy garlic aioli. These little touches make your Garlic Parmesan Asparagus Fries stand out. For the full recipe, check out the earlier section. {{image_4}} You can easily make these fries vegan. Instead of eggs, use a flax egg. Mix one tablespoon of ground flaxseed with three tablespoons of water. Let it sit for a few minutes to thicken. This mixture works great to bind the panko and cheese. For cheese, try using a vegan Parmesan. It adds flavor without dairy. This way, everyone can enjoy these tasty fries! To make Garlic Parmesan Asparagus Fries gluten-free, swap regular breadcrumbs for gluten-free panko. You can also use crushed nuts or almond flour. Both options give a nice crunch. Just ensure all your ingredients are gluten-free. This way, you can enjoy these fries without worry. Want to spice things up? Add some cayenne pepper or chili flakes to the breadcrumb mixture. This gives your fries a nice kick. You can also mix in some dried herbs like oregano or thyme. Fresh herbs like rosemary can add an amazing flavor too. Feel free to experiment and find your favorite taste! For the full recipe, check out the detailed instructions above. You can store leftover Garlic Parmesan Asparagus Fries in the fridge. Use an airtight container. They will stay fresh for up to three days. Make sure the fries are cool before sealing the container. This helps keep them crisp. To reheat, use an oven or air fryer. Preheat the oven to 350°F (175°C). Place the fries on a baking sheet. Heat for about 10 minutes. This keeps them crispy. Avoid using the microwave, as it makes them soggy. You can freeze these fries for later use. First, let them cool completely. Then, place them in a freezer-safe bag. Remove as much air as possible. They can last for up to three months. When ready to eat, bake from frozen at 425°F (220°C) for 20-25 minutes. Enjoy the crunch just like fresh! To make Garlic Parmesan Asparagus Fries, you start by preheating your oven to 425°F (220°C). Next, line a baking sheet with parchment paper. This helps with easy cleanup. Combine panko breadcrumbs, grated Parmesan cheese, minced garlic, garlic powder, sea salt, and black pepper in a shallow bowl. Mix them well. In another bowl, beat two eggs until they look frothy. Dip each asparagus spear into the eggs, letting the excess drip off. Roll them in the breadcrumb mix, ensuring they are coated evenly. Place the spears on the baking sheet in one layer. Drizzle olive oil on top. Bake for 15-20 minutes until crispy and golden. Finally, sprinkle fresh parsley on top for a nice finish. For the full recipe, check out the detailed instructions above. Yes, you can use frozen asparagus, but it may not be as crisp. Frozen asparagus tends to have more moisture. This can lead to soggy fries. If you use frozen asparagus, thaw and drain it well before coating. Pat it dry with a paper towel to remove excess water. This step helps keep the fries crispy when baked. If you need a substitute for Parmesan cheese, try nutritional yeast for a vegan option. It has a cheesy flavor and works well in this recipe. Grated Pecorino Romano offers a similar taste, though it is saltier. If you want a milder cheese, use grated mozzarella. Just remember, the flavor may change with these swaps, but they will still be tasty! This guide covers all you need for perfect Garlic Parmesan Asparagus Fries. We explored key ingredients, measurements, and nutrition. I provided step-by-step instructions to help you bake and serve. Plus, we shared tips for crispiness, mistakes to watch for, and fun garnishing ideas. In the end, try out variations like vegan or gluten-free. Proper storage can keep your fries fresh and tasty. With these insights, you can make delicious fries every time. Enjoy experimenting and sharing these yummy treats!](https://goldendishy.com/wp-content/uploads/2025/07/ccbce488-a3dc-4dce-b527-37d827ece95a-768x768.webp)


